How To Learn To Sing, Pt. 2 – Your Voice… NOW!!

Girl breathing before singing

Stop what you’re doing.

Take a moment…

… and just BE…

… in this moment.

Right now.

Not tomorrow. Not yesterday.

Now.

Now imagine your voice… singing.

Blue stage girl singing

Singing one note… beautifully… out into “now”… and further on, into “forever”.

Can you hear it? Do you believe that it’s possible?? Do you recognize that THAT… as you?

If so, then you’re well on your way to knowing how to learn to sing. The most important part is visualizing that you really CAN.

Deleting Old Files…

First things first: If you didn’t read Part One of this series, go ahead and do that now AT THIS LINK. It lays a good foundation you don’t wanna miss.

Did you take Part One in?? Great, let’s build on that.

If you want to know how to learn to sing, your biggest first step is believing that you can.

” if you think you can’t, … you are right.”

But then, the opposite is true also – if you can muster up a little faith that what you desire is possible, you’ll not only see results, you’ll see them faster.

First, you must visualize.

Then, with continued dedication to this vision, promise will materialize…

… until it last… your dream finally will become realized.

But, you’ll never be able to do anything that you can’t picture yourself doing.

Lemme say that again: you’ll never be able to do anything that you can’t picture yourself doing.

Because of that, you can be the biggest detriment to your own progress. Or the greatest reason for your reward.

Perhaps you have “recordings” in your head; voices from the past, that are like virus files on your computer. They tell you things like:

Oh, no… You can’t do THAT!”

Sing? YOU???

Honey, it’s okay – some people just weren’t born with the gift of singing.

Prairie dog singer

No, don’t ask him to sing – he sounds like a PRAIRIE DOG!!

There will always be people to tell you what you can’t do, what you’ll never accomplish, and how you should just give it up.

Buy into their “wisdom”? It’s “game over” before you’ve even begun.

So don’t let the haters be the victors. Turn off their recordings once and for all, and start picturing yourself singing well… so well that others want to hear you.

And one day? Those same naysayers will be surprised at just how good you sound.

Yes, You Already Do… !

In THIS PREVIOUS LESSON ON SINGING, I talked briefly about how your voice already makes singing tones. It happens when you talk! Whether you use a can or not!

To clarify the issue, and give you further insights and encouragement concerning this, let me remind you of other times you are psuedo-singing:

  • Laughing
  • Shouting cheers at sports games
  • Calling for members of your family who are elsewhere in the house
  • Outcries when someone tickles or pokes you
  • Those noises you make on roller coaster rides. You know the ones. 😉

These additional examples of your own personal “music” should help convince you that you already have what it takes to sing. You make all kinds of pitched noises!! You just have to hone them into a more controlled skill set.

But how can we do that? What specific things can we employ, even on a daily basis, that will actually produce the results we’re looking for – the ability to sing pitches that others recognize as songs?

Well, I’m glad you asked! Time to WORK it, people… !

Your Pal, the Pitch App

Since most of us these days have a cell phone, I want you to go to your App Store and download an app called “Pano Tuner“. It’s by a company called Kaleloft LLC.
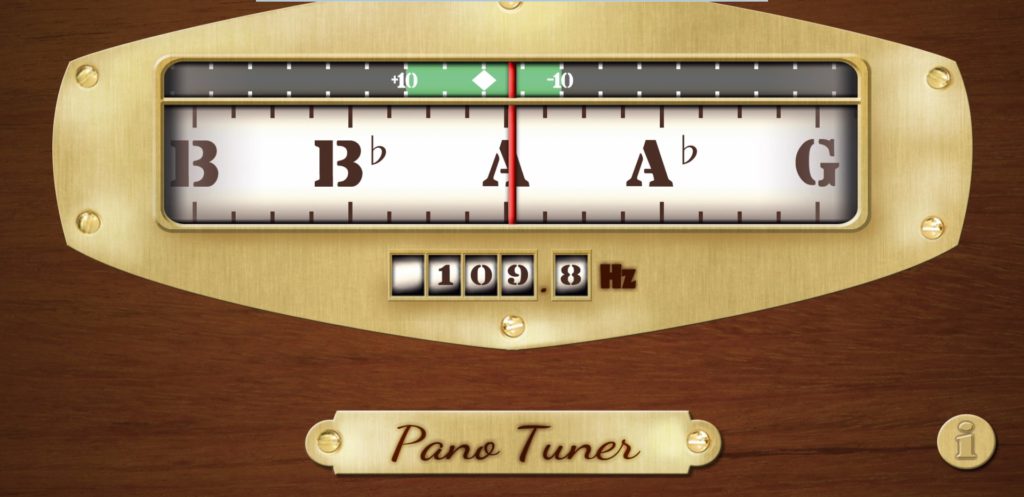
Green means you’re on pitch!

Why a piano tuner?? Because it has some graphics that will help you to learn to sing better.

Did you download it? Alright, open it up. You’ll immediately see letters at the top. These are the names of notes you can sing.

Go ahead and try to sing the word “yes”. You’ll be holding the pitch on the “ehhh” sound of ‘yes’.

As you do so, notice that there is a green, or brown, bar that slides back and forth below the letter names. Do you see it?

The bar is green when you are in the ballpark of the note. It’s brown when you are too far off of the note.

Can you guess where we’re going with this? Your goal with this app is to sing any note, try to get it to stay within that green bar.
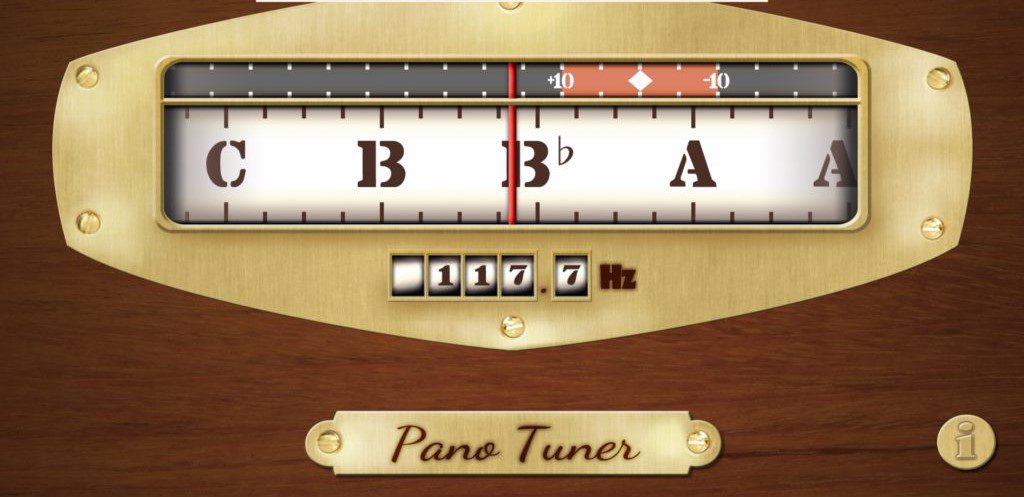
Brown means you need to raise or lower your pitch.

If the bar is brown, that means you have to raise the pitch of the note you’re singing, or lower the pitch of the note you’re singing. In other words, your voice must go higher or lower.

If you play around with this app every day, striving to keep that bar green, you could gain some real progress. Like most things, it’s all about how much you practice.

Don’t feel bad if at first you can’t keep the bar green. Remember, you’re just starting at this! Adele’s voice wasn’t built in a day, or Paul McCartney’s…or any other voice you might like and respect. They all had to practice… A LOT!

If you can eventually sing a pitch for an entire 5 seconds, keeping any pitch in the green zone… DUDE – you are SINGIN’!!

Don’t forget to celebrate your progress as you conquer new vocal territory. Come back here to Seriousgas and tell us. You better BELIEVE we’ll whoop it up with ya!!!

There’re few things more inspiring than hearing someone who thought they couldn’t sing finally producing real, recognizable music with their voice. As a private music teacher I’ve heard just that, time and again.

How ’bout you be next?! 😉

Her BFF, the Ear Trainer!
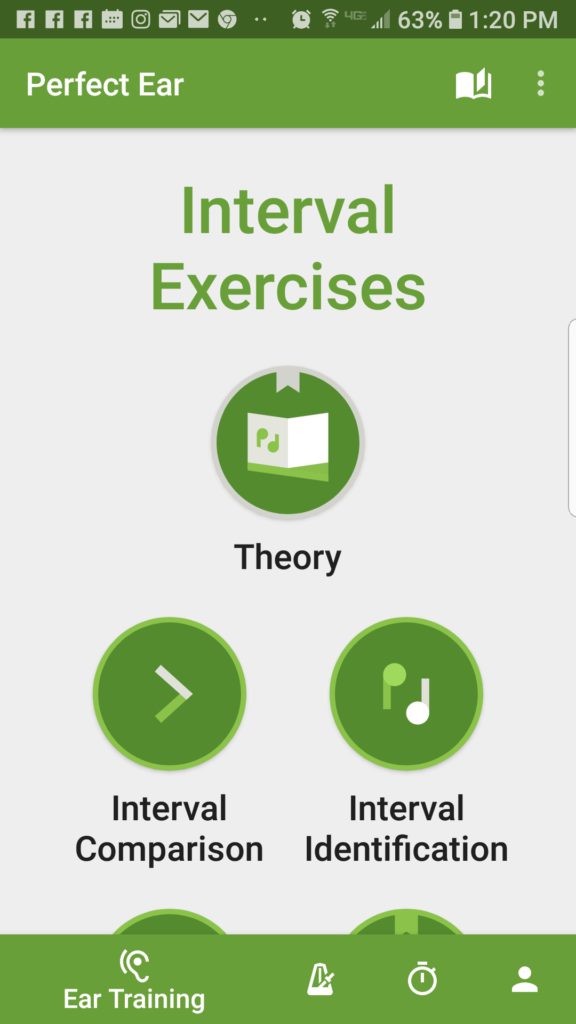
Perfect Ear app for singers

That tuner app should really accelerate your progress if you work with it. But where that hones your ability to keep a pitch, this next app will help improve your ability to change pitch.

It’s called “Perfect Ear”. Go ahead and download that app now.

Got it? Good. Open it up.

Ask you whether you want to hear a piano or guitar sound, so just choose whichever one you prefer.

I use piano sounds myself.

The first thing you should see on your screen is “interval exercises”.

You can skip the top icon called “Theory”.
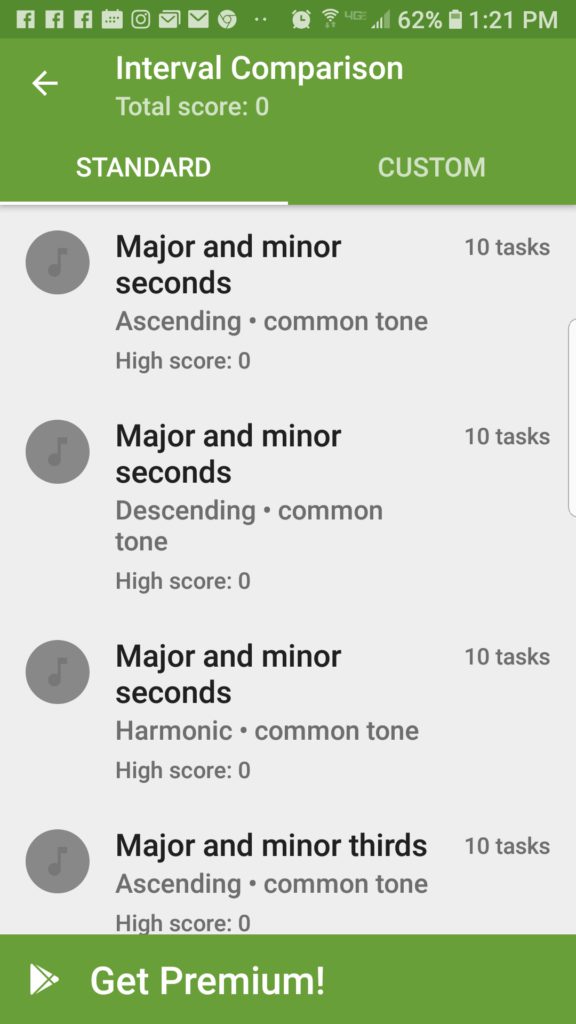
Interval comparison for singers

Instead, scroll below it and tap on the “Interval Comparison” icon.

What this exercise will do is get your brain really proficient at recognizing musical pitches.

Why do you need this? Well, if your brain can’t recognize music, do you think you’re going to be able to sing it well??

I think you know the answer.

What is an interval? It’s just the distance between notes.

Sometimes the distance can be big, like singing the first word of “Somewhere Over the Rainbow“. Or, the distance can be small, like singing the first two words of the chorus of “Don’t Stop Believing” by Journey.
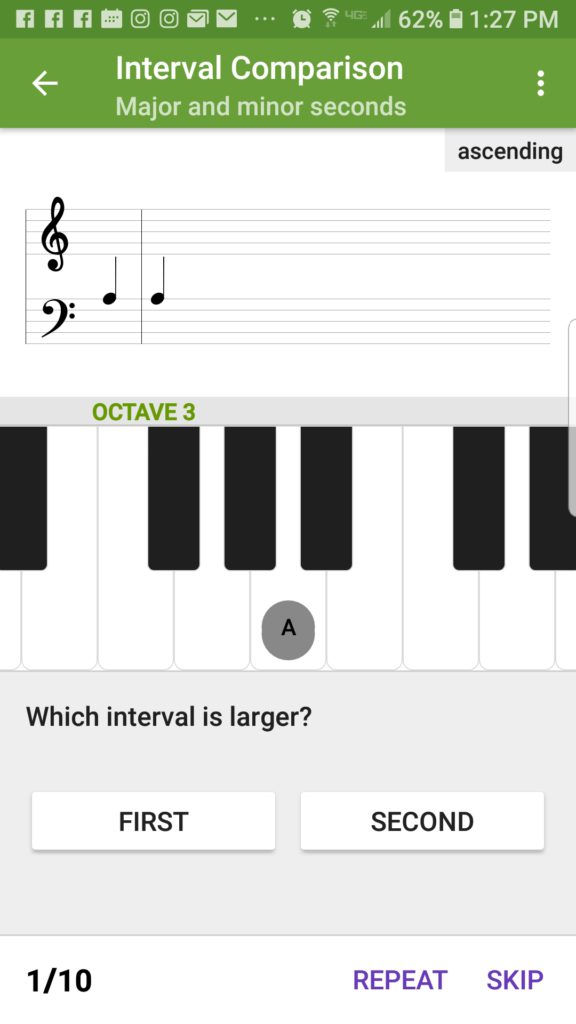
minor 2nd interval for singers

This app is a strong tool. If you use this, or one like it, you will get so much better at not only recognizing music, but being able to replicate it, which is what singing is really all about.

We have 12 different notes in our musical scale, so there’s lots of exercises here for you to go through.

Concentrate for now, though, on just the first couple. Don’t try to master all these notes to start with. Strive instead to get all correct answers on the “major and minor Second” intervals only. Then you can move on to other intervals.

What I love about these apps is that they can go with us everywhere. Most people these days can’t be away from their cell phones for even a few minutes. That can be a good thing, especially if you use it for educational purposes and to make yourself more awesome at something!

So, yeah… go do that! 😉

BE that Voice Inside You

Igor Stravinsky said, “Music is the sole domain in which man realizes the present.”

Singer charicature

These days we live in a frenetic, whirlwind-paced world, that can easily steal from us the riches that every minute provides.

Though I would say that there are other things which help us live in the moment (like meditation, which I practice and am a fan of), I believe ol’ Igor was really onto something.

As you’re learning to sing, recognize that you are also developing the skill of focus; the talent of concentration. You must have this, or at any moment your notes could fly off anywhere.

As you sing, you are deeply grounded in the “now” of your performance. It is a calm, peaceful place, from which joy, exuberance and appreciation for your listeners for your gift can stream forth.

This attitude of being very present in your singing will benefit you greatly as you go forward.

Boy meditating

And, yea, if you find it hard to concentrate… on ANYTHING, then I highly recommend meditation. It strengthens your muscles of concentration more than anything else I know of.

This, in turn, will bolster your musical ability.

Viva La present!!

Seeing is Believing

A mic in the hand is worth... ??

Because YouTube has become the leading propagator of educational and musical videos, I’m throwing one in for you today to help bring all this together.

This video by Dandapani shows us why focus and concentration is so needful if we want to accomplish anything in our lives.

Watch him through to the end of the video, and then afterwards we’ll wrap up back here:

So there you go. Did that help clarify?? Do you see what I mean about how the ability to control your thoughts and be in the moment can help you do anything, including singing?

I hope so. Practice the present, and when you sing, focus on letting your voice be heard in the “now” and not judging it, but rather just let it express your emotions, without any guilt or condemnation.

If, as Dandapani says, “Life is a manifestation of where your energy is flowing”, then we can direct our energy towards this wonderful skill of singing with laser-like intent, and go far quickly. Believe it. See it. BE it.

Also, let me return again to the obvious: If you can talk, it’s all there… all that you need to be a singer. You need no other sign to pursue this!

Like anything weak and inexperienced, your voice needs to be exercised and challenged in the right ways in order to become adaptable, flexible… versatile. But it’s easily doable.

And YOU CAN do it!

The Final Cadenza!

I hope you found this second post informative and helpful and, more than anything, I hope it helps you sing a lot better…

… maybe even for the first time!! That would be amazing.

It definitely could happen. So now I’m throwin’ it back to YOU!

Throwin it to all singers!

You’ve got to go spend the time and effort necessary to realize this musical potential within you.

Open these apps. Use these exercises. Dedicate yourself to making progress, one little step at a time… and you’ll get there.

Just don’t put a deadline on yourself. Everybody’s brain and voice is different; it might take longer for some compared to others.

Outdoor singer

None of that matters. What DOES matter is that you enjoy every second of learning, trying, exploring and uncovering your unique and inspiring voice…

That you use and appreciate NOW for all it’s worth, and be fully present in every moment of practice, listening, thinking and aspiring.

I can’t wait to hear the results you achieve!!

Now, go… make… sounds!!

Teaj

Teaj in the storm fields!

The Digitech GSP1101 – Still A Clear Winner!!

For over a thousand years (maybe even two thousand!), the practice of bloodletting has been piercing human skin all over the world.

What in Les Paul’s name does that have to do with the Digitech GSP1101 Guitar Preamp?? Stay with me…

Physicians usually used leeches for bloodletting – just plop them on the skin and let ’em suck. What could be easier?

Thankfully, we were born after the 1800s, so we know that having “too much blood” is probably not a valid reason for our ailments. So these days… all “suckers” are banished (too many years late for George Washington unfortunately)!

So I asked you then… why should we still let “sucking” happen with our guitar amps??!

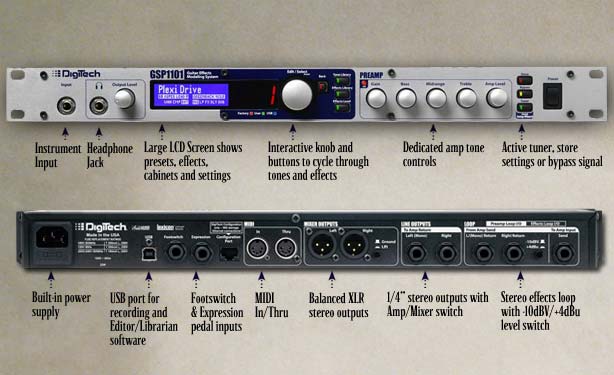
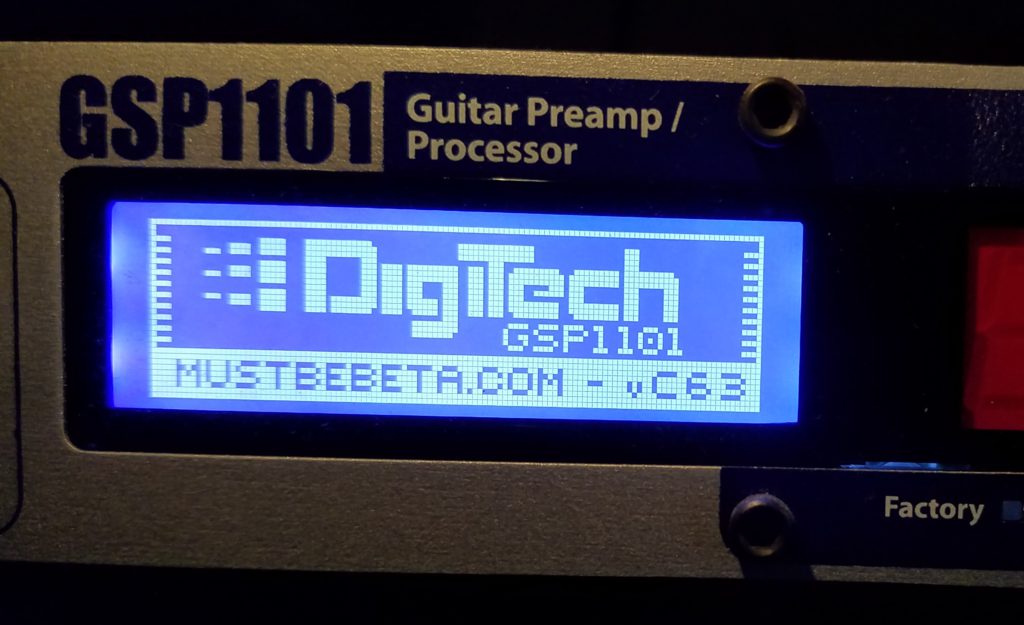
GSP1101 face

Enter the GSP1101! It was also created post-1800s, to disallow for such travesties of tone. It’s been part of my main rig for almost a decade now, and I still wouldn’t have it any other way.

Wonder why?? Ohhh, that’s easy… !!

The Sound of Not Sucking

The GSP1101 was created for guitarists with great amps, plain & simple.

For players, like myself, who already love the tones we get through our Fender, Mesa Boogie, Vox, Marshall, Hiwatt, EVH or other amps, we merely want good effects to complement them, from a unit that WON’T SUCK TONE!!

I mean, if you’ve worked for years, maybe even decades, to find just the right amp for your signature sound, you don’t want some over-indulgent, blowhard of an effects unit to cover all that richness up, right?!

Getting this kind of transparency has been available for some decades, but it was usually at a high cost.

gsp1101 FRONT AND BACK

Then one day in 2006 along comes the 1101. Retail price? $499! Real “tone preservation” and clarity in a guitar processor was unheard-of that time, for that price.

In fact, it still is.

Gsp1101 is no longer made by DigiTech, and it’s really left a gaping hole in guitar processor marketing. There’s just nothing left that’s as good at staying out of your tone’s way at a low, reasonable price point.

The Guts

The 1101 is a powerful unit from the get-go. Here’s a brief overview:

  • Intuitive user interface with dedicated amp controls and LCD display
  • 99 factory patches that don’t change
  • 99 User patches for you to manipulate, or create from scratch, your own sounds
  • Over 120 amp, cabinet, preamp and effects models including vintage stomp boxes and pickup modeling
  • Stereo effects loop
  • 40 Tone and 40 Effect Chain Libraries – 1600 exclusive DigiTech combinations
  • Global EQ
  • Balanced stereo XLR and 1/4″ outputs
  • Chromatic tuner
  • USB with audio streaming Editor/Librarian software included
  • MIDI In / Thru
  • Internal power supply
  • Front panel guitar input and headphone output
  • Footswitch and expression inputs
  • Seamless preset changes
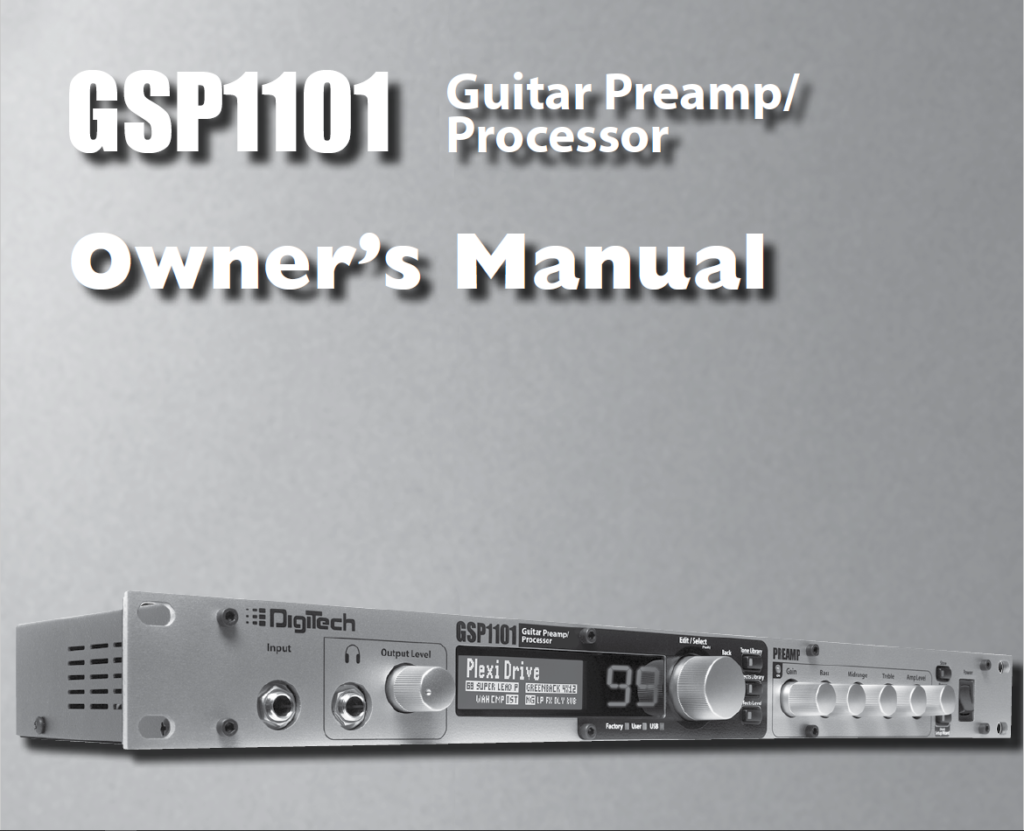
GSP1101 Manual

If that’s not enough, meaning you’re a “Super-Tweak! Super-Tweak! You’re Super-TWEAK-yyyyyy!!”, CLICK HERE to view the 1101 Manual!

The Glory!

Any mention of the 1101 to players who use it will uncork a gushing fountain of superlatives.

To see what I mean, go to any guitar forum and just type in ” gsp1101″. You’ll immediately see what I’m talking about.

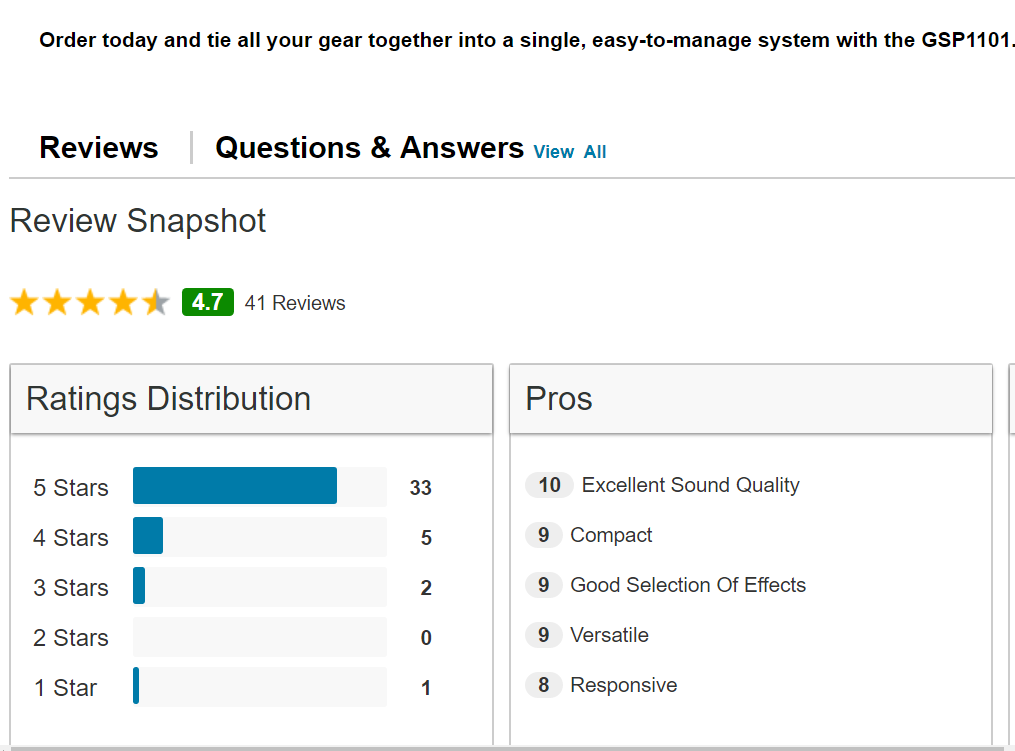
Rave reviews! 5 star ratings! Pages of owner-created patches and “Impulse Response curves” for you to upload… usually for free!

gsp1101 REVIEW STARS

DigiTech has created a real family around this piece of gear. It’s become kind of what the Yamaha ns10 speakers used to be in studios worldwide – preferred and ubiquitous!

But there’s a reason for us Avid fans, and it’s simply that DigiTech promised exactly what this unit delivers – top quality effects that never compromise your amp’s unique, throaty voice!

When I’m playing live, I never use any of the amp or cab modeling. I totally bypass all that, only using the typical effects that are needed in the pop/rock genre that I usually adhere to.

Instead, I let my amp’s tone, crunch, distortion and wailing lead gain structure fill the void with its signature EVH magnificence!

In the studio however, I often dial up plenty of emulated amps and cabs, seeking to find that perfect match of amp voice to song style and EQ.

The 1101 has never let me down on either front.

Your Effects Options!

The GSP1101 is chock-full of amplifiers, cabinets, stomp boxes, and digital effects.

Here’s the complete list of effects in the GSP1101:

  • wah
  • compressor
  • distortion
  • noise gate
  • amp model
  • cabinet model
  • parametric EQ
  • chorus/FX
  • delay
  • reverb

Now, you don’t HAVE TO use the amps & cabs & stomp box effects that are in this puppy. After all, the reason most choose this unit is that they like the sound of their own amp & cab and only want to add some effects to their golden tone.

In that case, yes, you can simply turn off its amp and cabinet simulations globally and never have to deal with ’em.

But if you want to get daring, as I do occasionally, and use a sound that is completely different from your amp, leave ’em available, ‘cuz MAN, do you have choices!

GSP1101 killer clown pic CARTOONED

Just in amps alone you get 36 different models! These emulate the famous tones that have come from amps by Vox, Fender, Marshall, Carvin, Mesa/Boogie, Matchless, Soldano…

Digitech also threw in some amp models that they designed themselves to round out your selection and give you more to choose from.

And cabinets? You can choose from 23 different cab types there, including:

  • Fender Tweeds
  • Vox AC15
  • Blackface
  • Vox AC30
  • Bassman
  • Marshalls
  • Hiwatt
  • Johnson

… and more!

Editing on the Fly

To show you how simple, easy and effective editing on the fly is with the 1101, I’ve done this short video.

Once you get familiar with how these simple menus operate, you can really fly through any changes you need to make.

Check it out:

4 Cable Setup!

The 1101 is by far better suited for using the 4-cable Method of signal flow than most other processors in its price range. The engineers had this exact option in mind when they designed it, since the market for this unit was to be, came to be, and still IS, players that want the tone of their amp to shine through.

4 cables FEATURED

If you want a real detailed understanding of the 4-cable method, and why it’s the preferred route to go if you dig your real amp’s sound, spend a couple minutes with THIS POST. You’ll have all the info you need!

Suffice it to say this method was a breeze on the 1101. I think I may have been spoiled, it’s so easy.

The Controlling Foot

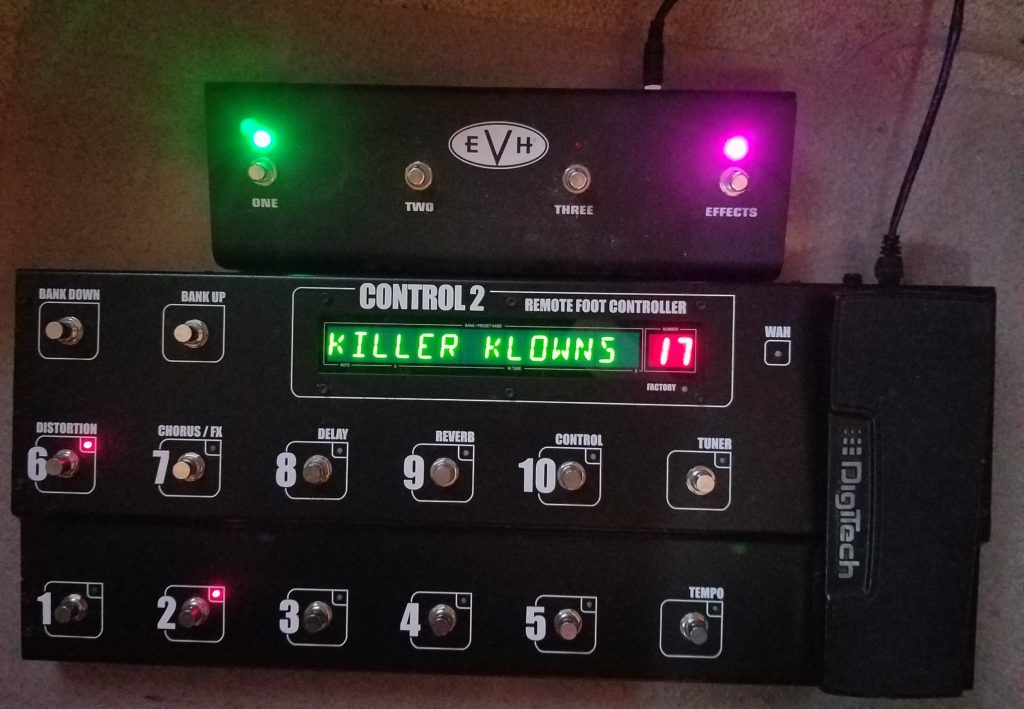
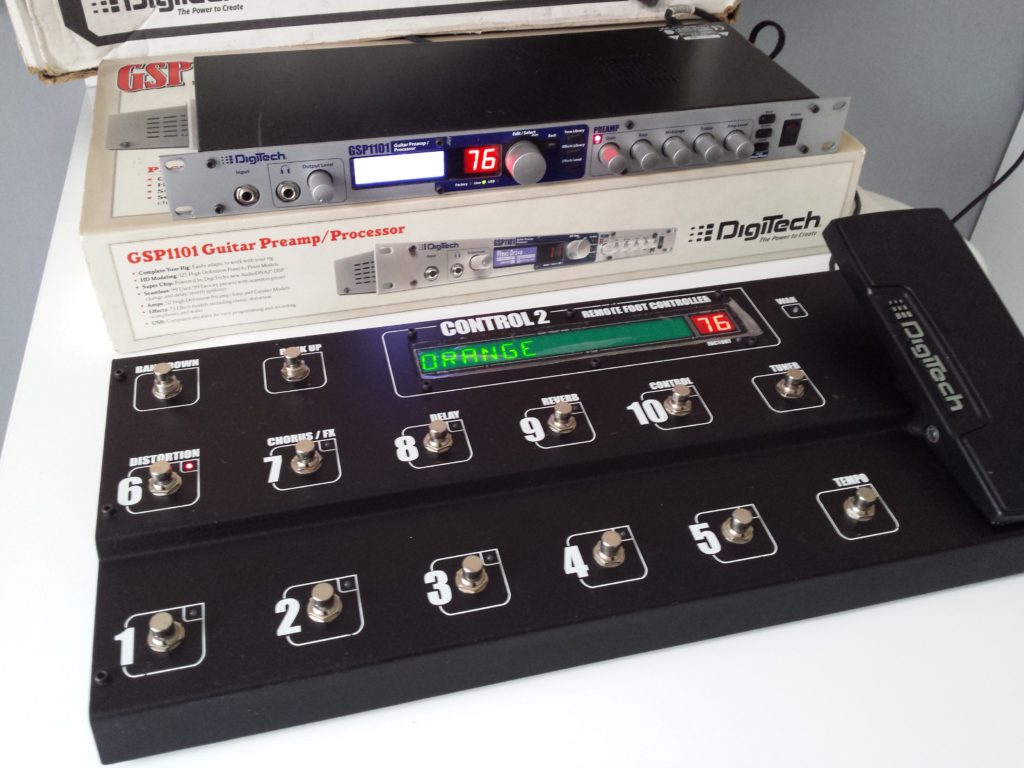
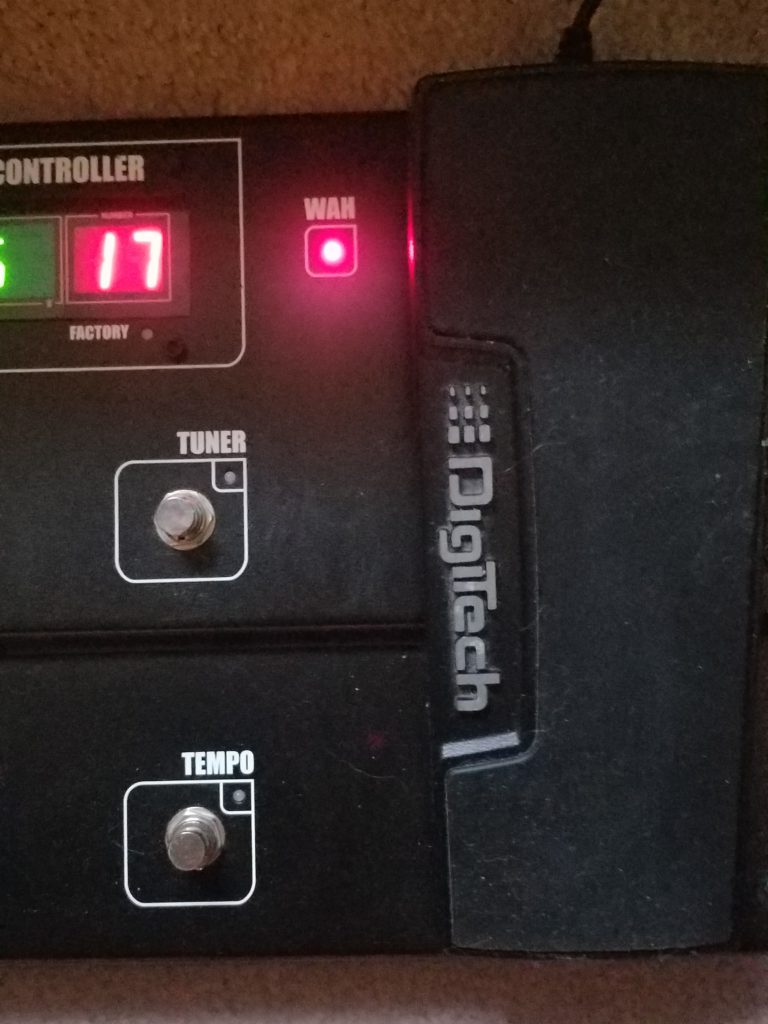
In the age of stage-encompassing guitar pedals, we would be remiss to not mention the outstanding foot controller that was designed for the GSP1101 – the “Control 2”!

GSP1101 foot controller, the Control 2

I can’t imagine playing through my 1101 without this foot controller. Yes, you could have it on stage with you and manually change the settings or patches. Yes, you could have some MIDI controller that switches it all for you once you’ve spent a lifetime programming that.

But it’s soooooo much nicer just having all the controls right at your footsie-tips!

Everything is laid out so ergonomically on the control 2. Without a manual, makes sense in an instant just looking at it.

If you have a patch all pre-programmed with four or five effects, once you start to play through it you can take any of those effects in or out at the touch of a button.

The foot pedal also works really well. You engage it by pressing down at the top of the pedal.

GSP1101 wah engaged!
Wah engaged!!

I use the pedal mainly for volume swells and wah effect, though sometimes I still throw a Hendrix Dunlop wah at the top of my signal chain if I want Jimi’s particular wah vibe.

One excellent bit of engineering is that the cable they chose to connect the 1101 to the Control 2 pedal board is a Cat5e cable. You may have seen this cable type in use for Ethernet hookups.

That’s great, because those cables have NO deterioration of signal flow over long distances. I’ve got a 30-foot cable comin’ out of my 1101, and my footswitch presses are always immediate, no waiting at all!

The Control 2 remote controller retailed for $299 when it was still in production. These days you can still find them online occasionally, but they are harder to locate than the 1101.

You’ll also find that typically people are asking a lot more money for the controller than they are for the 1101.

GSP1101 tuner
Tune it or die!

It just goes to supply and demand. Lots of people bought the 1101 without the controller, easy to program from the face plate.

Best thing to do if you want one? Program a search into eBay that will send you an email whenever a control 2 appears. I’ve managed to find a lot of great gear at outstanding prices by doing this.

Can’t hurt, right? 😉

Take it… to the Limit… One More Ti – ime!

Very few pieces of music gear are perfect, and this preamp shows that it does have limits, mostly in that it can’t do EVERYTHING.

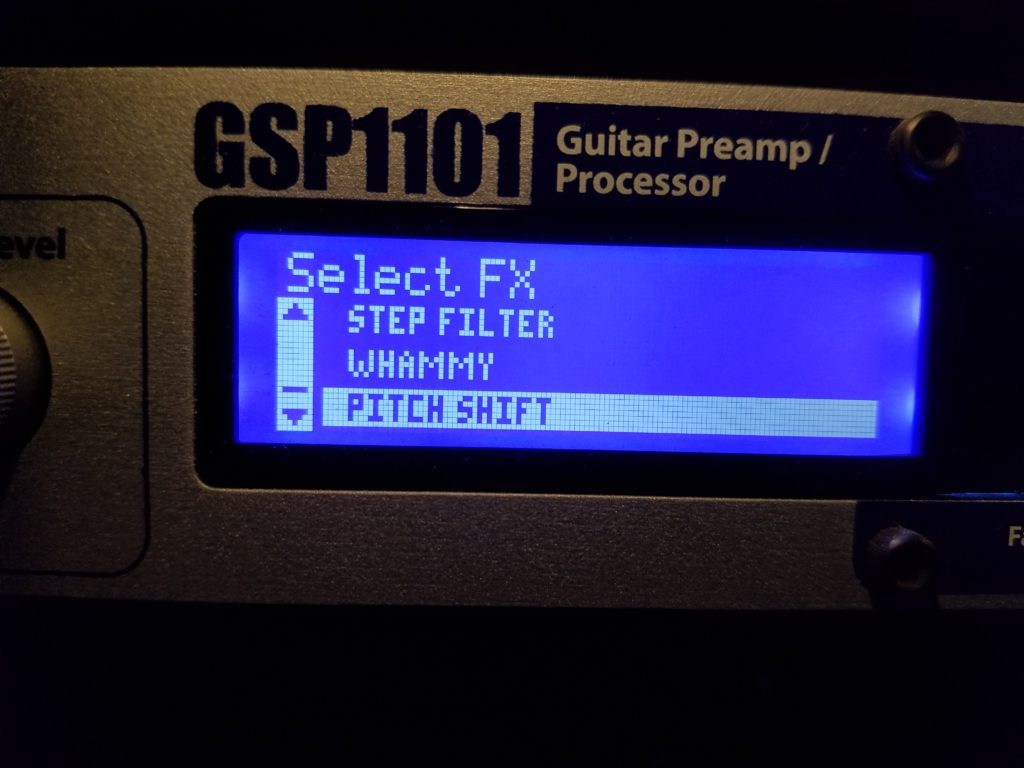
For example, if you want to use CHORUS, while at the same time using the WHAMMY or IPS effect… you’ll won’t be able to. That’s because those particular effects are within the same “block”, called “Chorus/FX”, and can’t be separated.

GSP1101 Whammy patch

Also, you cannot run multiple blocks of the same effect on this unit . Once you have a delay engaged, for example, that’s it. You can’t add another delay after it.

Finally, although most sounds coming out of the 1101 sound amazing, there are a couple amp emulations that I think sound terrible. I have found an easy work-around though. Wanna know what it is??

Just DON’T USE ‘EM!! lol

For me, these were all trivial issues ‘cuz I’ve honestly never needed ’em. I’ve played thousands of songs in disparate genres and what the GSP brings has always been more than enough. But hey, YMMV.

Bye, Bye, Mr. Software Upgrade Guy…

No more upgrades on in the pipeline (unless Digitech employees fiddle around some more and upload some on “mustbebeta.com” (which for some reason is temporarily down as of this writing).

The last, greatest upgrade – version C63 which I have, added a whole new slew of user cab Impulse Response curves that really help to shape amp emulation tones down to exacting details. It also now can accept up to TEN custom User Cabinets IRs from other guitarist programmers. Real cool.

The latest upgrade ROX!!

Most of us who’ve played through the 1101 for years think this upgrade is the reason why it’s stayed in the marketplace for so long.

You CAN, however, still upgrade and tinker with perfecting your tone for years to come, using IR sites like “Ownhammer.com”.

If you’re at all hesitant to get a piece of gear that’s no longer being made, I feel ya. It’s true that after a piece of pro audio gear goes out of production, you will no longer find much help from the manufacturer if trouble arises, unless you by luck score a new one that still has a warranty card. Then you’re set (Amazon has new ones today).

HOWEVER, there are so many 1101 fans on so many forums online that if you ever have an issue there’s probably someone there that can help you.

Repairs are another story. If you’re lucky, the company has lots of parts for repairs on a certain unit. Other times they have none. It really all depends on what they’ve kept in stock.

I had an 88-key Roland keyboard controller with weighted action keys a few years back, for example. When three crucial keys in the middle of the keyboard stopped working, I called Roland only to find out they had no parts. Zero. Zip. Nada.

Whether that’s true or not for the gsp1101, only time will tell. The good news is, after 10 years… my 1101 is still pumping out the jam with slick perfection!

So Many Sharin’ the Love…

There are SOOOO many people who think this unit is the fizzle-mo-shizzle! Just type in “GSP1101” into Google and read any of the Forums that come up there. From GearSlutz.com to Sevenstring.org, UltimateGuitar.com to theGearPage.com, you can read rave after rave about this unit.

My rigs DYNAMIC DUO!!

One favorite thing players like to mention about this unit is the ability for effects tails, like reverb washes, to continue after you switch patches. It’s called “seamless preset changes”. This wasn’t available when it came out except for LOTS o’ cash.

Hard to believe it’s taken so long for all companies to make this standard, which it is mostly these days. Who wants your effects to suddenly STOP when you change patches?? Come on, people!

A Test for Your Ears!!

Okay, let’s have a bit of fun, shall we?!!

Today I found a video that puts the GSP1101 up against two of arguably the BEST guitar rigs on the market right now – the Kemper Profiler, and the Atomic Amplifire!

These three go head-to-head, recorded at the same time, via daisychaining the signal, and the results… well, let’s see!

I’ve downloaded here the AUDIO ONLY just for you. So do this: listen to these sound excerpts with a pencil paper in hand. Each time a different set of three chords or licks plays, write down which of the three YOU thought sounded best. Let’s rock!:

Did you score ’em?? Okay, now that you’re done, go back and this time WATCH it. Write down which processors you actually chose.

Well?? What did your ears tell YOU was the winner??

Come back and tell us in the Comments! We’re dyin’ to know your final tally!!

What was mine? Well, let’s just say either I’m a creature of habit, or I have good taste. 😉

I prefer to think it’s the latter. Lol

Here was my final tally:

  1. Kemper
  2. GSP1101
  3. GSP1101
  4. Kemper
  5. GSP1101
  6. GSP1101
  7. GSP1101
  8. Amplifire
  9. Kemper
  10. Kemper
  11. GSP1101
  12. Kemper
  13. Amplifire
  14. GSP1101

That makes the final score:

  1. GSP1101 with SEVEN points
  2. Kemper with FIVE points
  3. Amplife with TWO points

Is it any wonder I haven’t changed preamps in years??! Lol

The Crunch Chord Ending

That was fun. I think I’ll make more o’ those puppies. Fun, right?!

Well, when I first wrote this article, the Digitech GSP1101 was still, after 11 years, being sold on Amazon!

I just checked today though (March of 2019) and it looks like they’ve finally depleted all their 1101 inventory. I checked all the other other pro audio retailers and found the same thing.

I spoke with DigiTech and confirmed that they stopped production on the 1101. They also said that there is no design arriving soon to take its place.

That’s a shame because DigiTech had a real corner on the market with this ” save your tone” thing.

Moment of silence please.

On second though, forget the silence!! Turn up that amp and let’s rock, ‘cuz Guitar Center still has plenty of ’em used, but in great shape!! GO GET ‘EM HERE!!!

One thing’s for sure: the gsp1101 will still be talked about for years to come. And, at least in my studio and live concerts, with my EVH 5150III,… it’ll still be HEARD!!

So are you thinking about getting a gsp1101?? Or maybe you found one for years and are a DigiTech veteran??

Whichever is the case, let us know by leaving a Comment. And don’t forget to tell us how you scored on those three preamps when you took our little survey.

For now though, keep chasin’ tone and keep dreamin’ big. ‘Cause you never know…

… with the right gear you can accomplish anything!!

Now, go… make… sounds!!

Teaj
Teaj in the storm fields!

Recording Studio Wiring – Successful Cabling Tips & Tricks!

STARS

When music is first born, it’s often sent floating off into the air, via the instrument of our choice, like stars dancing through the cosmos.

When it’s time to record that music however, every single note and noise needs to be corralled down a long & narrow line until it reaches the stage where it can shine like those stars – the mixing board!

Audio (and video) cables are like tangible umbilical cords that help funnel the musical life we create into a captured medium.

Cable Face CARTOONED
Oh, no, it’s… CABLE FACE!!!

But they’re not perfect. They are extremely sensitive to things that will splash noise onto our signal – things like EMI (electromagnetic induction), RFI ( radio frequency interference), electrostatic coupling & changes in capacitance.

Many (tho’ certainly not all!) audio cables that you buy are made to withstand these things up to a point but, as usual, their effectiveness is all over the map. Thus, it’s up to us to use informed tactics to defeat any and all audio gremlins before they steal our audio gold!


I could get reeeeeeeally technical in this post, but because there are literally hundreds of other articles & videos you can consult that cover those details ad nauseam, I’ll spare you the boring bits. Instead, as usual here on Seriousgas, we’re going to concentrate on what works and, in a succinct way, tell you why.

Let’s get our signals straight!!

Humming vs. Humming!

Feel free to write a song in which you hum a lovely melody and get us a feeling all warm and fuzzy inside. That’s a good thing.

But letting HUM creep into your signal because of proximity to electric cables?? Baaaaad. Very baaaaad!

Here’s the deal: you want to keep your electric power cables as far away from your audio cables as possible.

Why? Simply put, because they usually introduce noise into your signals.

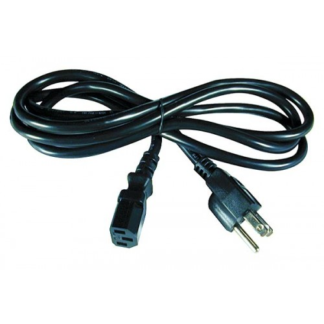
Notice the black audio cable crossing over the white electric cord at a 90 degree angle.

In my studio, I was very deliberate when hooking everything up to place all my hardware in such a way that all power cables could be tied together and kept away from any audio cables. If you want clean signals, you should do the same.

If, however, there’s no way to get around juxtaposing a power chord and an audio cable, do this: make sure they are crossing one another at a 90 degree angle.

Making them cross perpendicular to each other like this will greatly lessen the hum and noise potential. Why?

Because of the Laplace Force, which is due to yet another law, the Biot-Savart Law, which…

Sorry. I went all tweaky there for a moment. 😉

There are other cables which don’t have too many problems with this, like optical cables.

But if we want to maximize our potential for excellent audio, I say let’s use every trick in the book.

So if you see any power cables running parallel to your audio cables in the studio… Cross ’em, or move ’em!

The Right Length for the Job

Purple cables

Here’s another thing you can do to potentially increase the quality of audio pouring through your studio cables – buy cables just long enough for the job, but no longer.

Having long lengths of extra cable is especially problematic in the live sound arena. There, because you can run snakes sometimes for hundreds of feet, picking up noise becomes a real problem.

But, again, if we know that the longer the cable the more noise can be picked up, then even in the short run, why not just make sure we have the right length needed and no more?!

I’m especially picky with this when it comes to monitors. the cables coming out of my interface and then into my various studio speakers are measured exactly to length.

The reason? I want the cleanest sound possible. And besides… why pay for extra cable when you don’t need it?

Now, I know some of you out there (trolls, anyone?) think that:

  1. The length of cable won’t matter a bit, and
  2. The brand, materials & construction won’t matter at all

Sorry, but there’s just too much proof to the contrary. In fact, if you just think through it, the conclusion is unavoidable that these two things DO make a difference.

For your educational pleasure, try on Assan’s article on cable length HERE. It should at least get you considering how size matters.

As for the ongoing debate about whether materials & construction matter (I can’t believe this is even considered arguable) READ THIS.

So don’t just buy a cable of any length ‘cuz it’s on sale. Measure, know how much you need, and buy accordingly.

Electric Infinity!

If any of you have studied Electric Engineering (like my wife), you may remember that coiling power cables in a circle, or loop, creates magnetic inductance and heat generation.

In layman’s terms: it could send noise out further, louder, and hurt cables because of heat.

Figure 8 those electric cords!

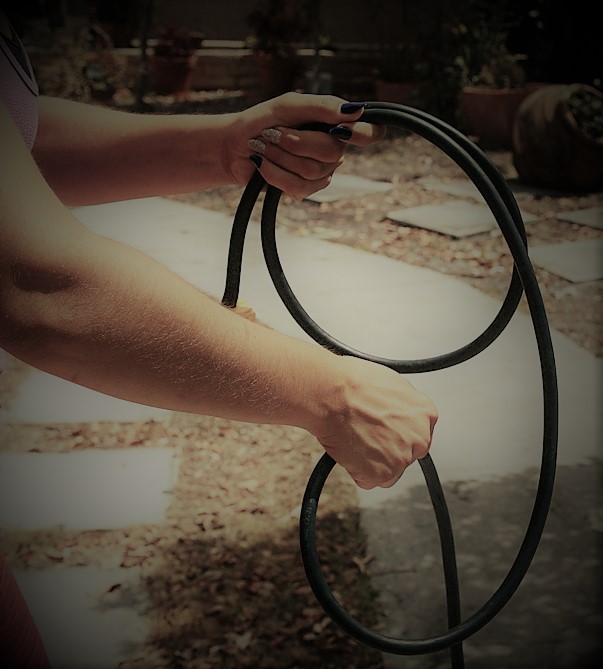
So, let’s not do that, shall we? Instead, coil any extra electric cable into a figure-eight pattern. This will reduce any magnetic inductance and help dissipate the heat better.

Not that you’re going to get much with shorter cables, mind you. But in a recording studio, we should seek to optimize every single link in the audio chain with as many complementary tweaks that we can.

As we know, it aaaaaaaall adds up, and eventually lands in our recordings!

Over/Under. Roger, Roger. What’s Our Vector, Victor?

Much of your studio wiring will be plugged in and left untouched most of the time. But there are cables that we have to use and then put away.

For these cables it’s important to gather them up correctly, ‘cuz no one wants to suddenly have to take another trip to Guitar Center just because of a dead cable.

There IS a right way to coil audio cables. It’s a method that maximizes the longevity of the cables by protecting what’s inside.

I was preparing to shoot a video to show you this, but then… I saw hundreds already uploaded showing the exact same thing.

Like almost everything else humans ever did… yea, YouTube’s got a vid’ for that! Lol

Let’s watch our pal Gil show us the technique that I learned in my first days of working professionally in L.A. Studios:

Didja get it? It might take a little practice before it becomes second nature. I know it did for me.

Suffice it to say though, this IS the way you want to gather cables. anything we can do to keep those wires inside from breaking, twisting or cracking is to our long-term benefit.

And our music’s too!

Besides I read a statistic online that said that 75% of musicians who coil cords incorrectly will inevitably pass this behavior on to their children. Awwhh! The insanity must… be… stopped!!

Why You Got to Label, Braw?!

Labeling might be very un-P.C. in the real world, but in the studio it can be a real TIME-saver.

It will save you an enormous amount of time if you label all cables that are installed and you never or rarely change.

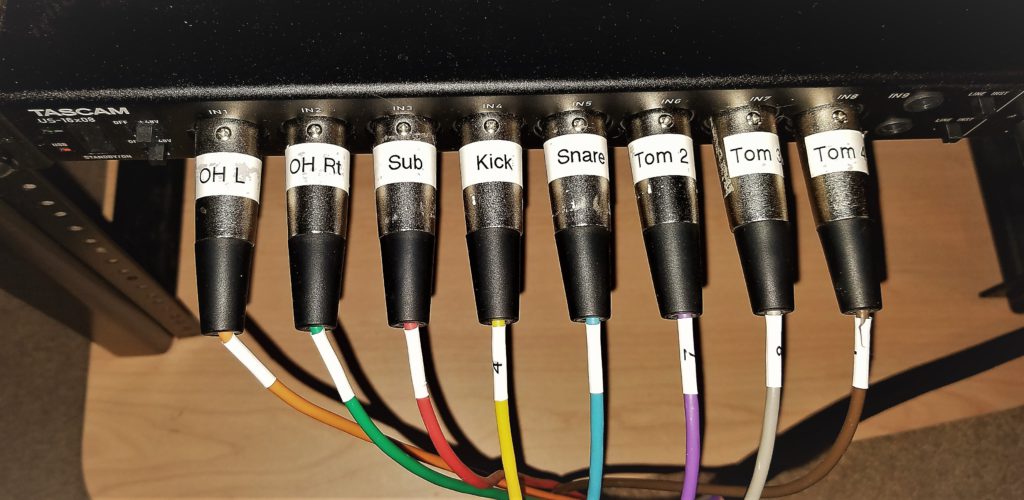
I’ll give you an example: I have a 20 foot, 8-cable snake that I use for recording live drums. A snake is a great way to organize if you need a lot of inputs ongoingly.

When I first got it, I didn’t label anything. After about the fifth time using it, each time spending at least an hour trying to figure out where each of the strands led to, I said, “Enough!”

Now I always leave my studio drums mic’ed, at the ready, with cables attached. At the ends of those cables I have different-colored tape applied that corresponds to a specific strand of the snake, and/or printed out labels with the names of each specific part of the kit it leads to.

By doing these things, I know exactly what cable my snare needs hooked up to, and don’t have to call my son up to play the drums to figure out the signal flow of our Neil Peart-inspired drum kit… which obviously could take a while!

Back of amp cables

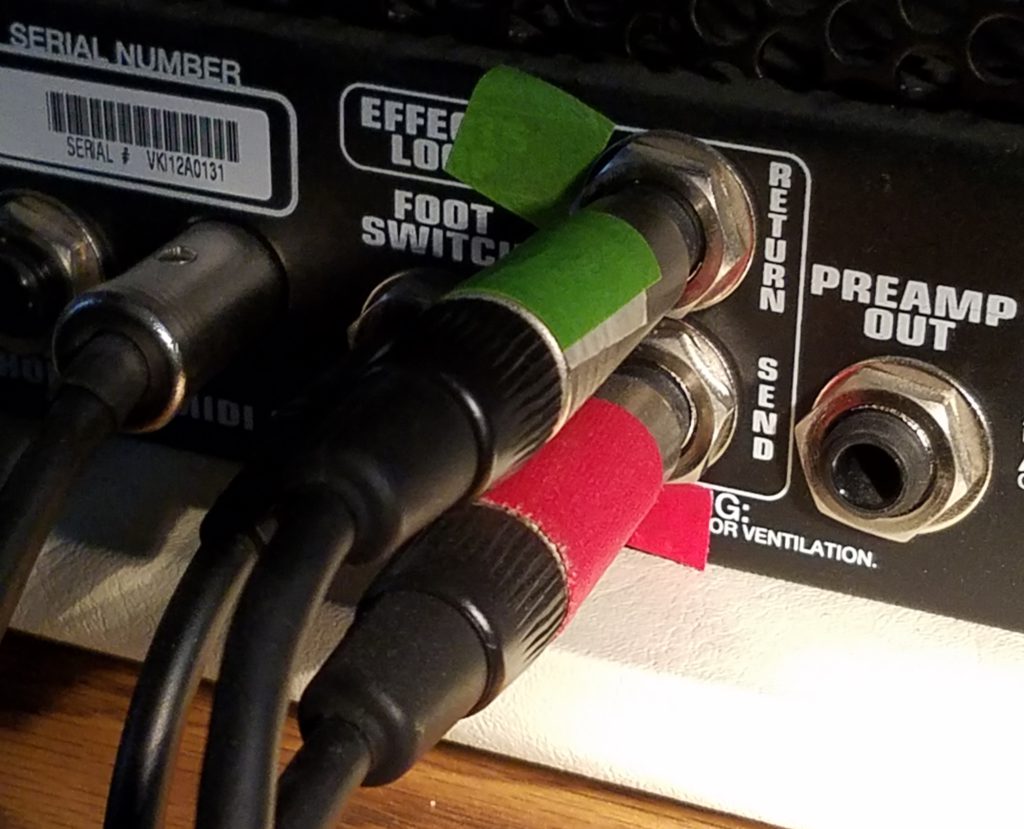
Similarly, I have color-coded my guitar amp setup. I use the four-cable method, which you can read about right here.

The cabling is a bit more involved in this method, so color-coding makes it quick and easy, not only in the studio, but for when I have to go play live.

None of this is crucial if we’re talking about cables that never gets swapped. But for those that get changed out a lot, let your rainbow signal flow shine, my friend.

You’ll thank me later. 😉

The Ring, Precioussssss… !


I’m sure most of you already know this, but for those of you who are quite new to this business of pro audio, I want you to be aware something you might miss.

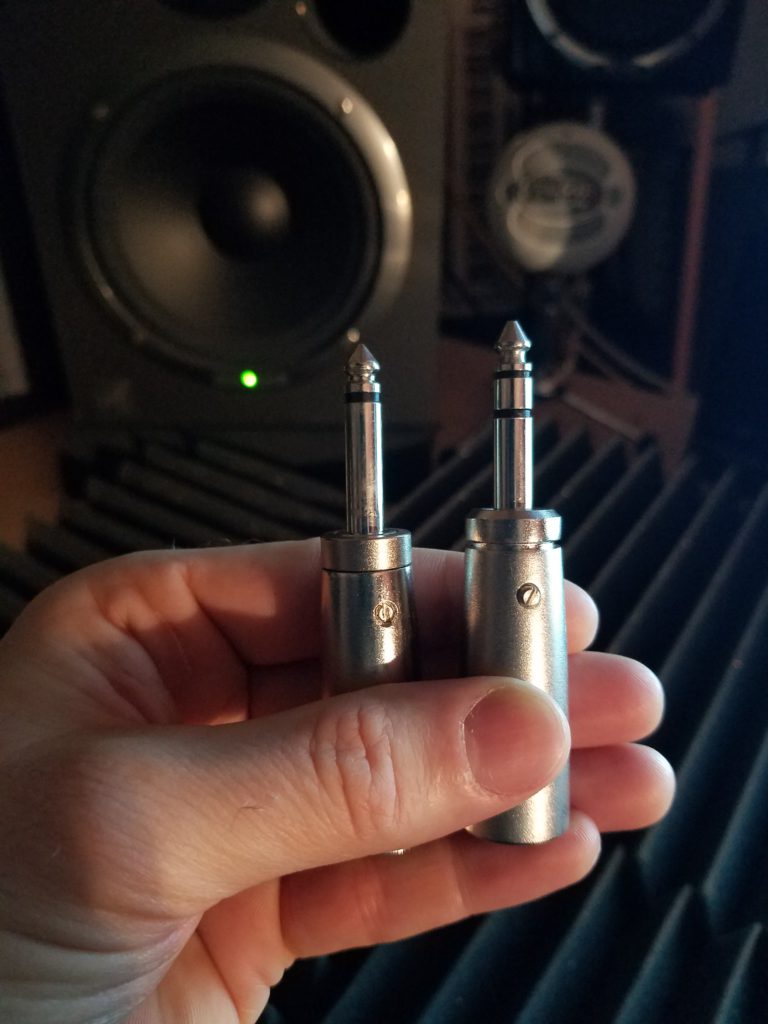
balanced vs unbalanced cables
Unbalanced left. Balanced right.

There are two kinds of quarter-inch cables:

  • Balanced
  • Unbalanced

The way you can tell them apart is by looking at the metal ends. If you see only one black line, then it’s an unbalanced cable.

If you see two black lines, it is a balanced cable.

The bit to remember? Don’t use one where you should be using the other.

For all your guitars, amps and pedals, use unbalanced cables. That’s what they were designed to use.

The connectors used for amps and this kind of thing are typically short, so you end up having no real benefit using balanced cables anyway.

Let’s listen to Colin give us a really good explanation of this… not only because he knows what he’s talking about, but because his accent is William Wallace awesome!!

Heigh-Ho! The Cord Velcro!

The last thing about I’ll say about studio cabling is that you should have your cables organized and partition according to type, even where you can’t see them.

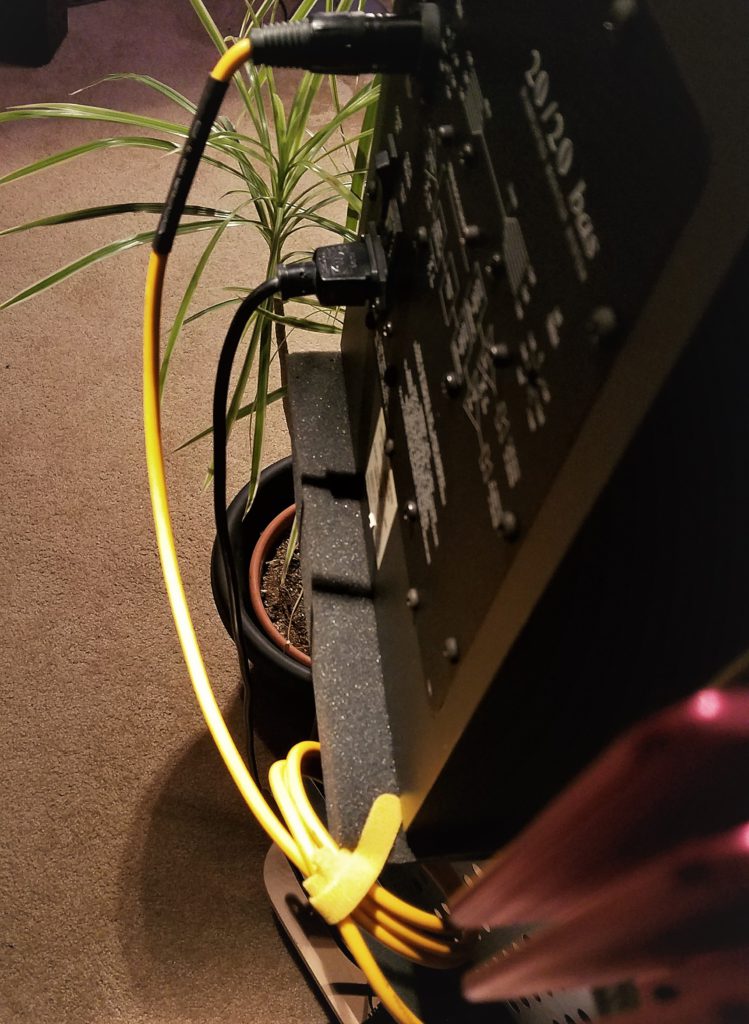
Using Velcro strips is a cheap, but very effective way to accomplish this. I bought THIS LARGE PACK of colored Velcro strips to keep my cable paths nicely harmonized.

For me personally, red Velcro equals electric cables (they’re HOT, you know?).

Yellow Velcro keeps the XLR cable from touching the electric cord.

Yellow Velcro the audio cables of my main monitors in place, and green Velcro I use for secondary speakers.

You get the point. If ever I need to go behind my monitors, behind my mix desk, I’m no longer greeted by a cobra den of black spaghetti.

Instead, there is order, clarity and neat organization that helps me make any changes or troubleshooting quickly and easily.

That isn’t that what you want for your studio? 😉

Another option for this is a cable management sleeve, like THIS ONE.

But I still prefer the Velcro strips. The biggest reason is I secure audio cables high on my desk, while running the electric cords low, near the floor. This keeps them, as we discussed earlier, in their own little worlds.

The studio – where audio segregation is a beautiful thing!

Give a Man Enough Cable, & He’ll RECORD Himself!

So with the myriad of cables we have in our audio Studios these days, it’s more important than ever to keep things organized and play by certain audio rules that can ensure a professional, exciting final product that has a noise floor as near to zero as possible.

If you need more explanations on any of these issues, or if you want to get all super-tweaky, we can do that too. Sometimes it’s fun!

But for now, take what I’ve given you and make your music the better for it! 🙂

OK – ‘WIRE’ you still here? Go… make… sounds!!

Teaj

Teaj in the storm fields!

What Is The Best Acoustic Guitar For Beginners?? – Ya Gotta Start Somewhere!

porsche
NOT my 1st car.

My very first car was not a Porsche.

Not even close!

It was an Oldsmobile “Delta 88”: Light brown, except for the lower side panels, where they’d scraped off a ton of rust, spread it with epoxy and painted it black!!  lol

But I didn’t care, ‘cuz sometimes, you’ve just gotta go with something a little cheaper to get started. Then, later, as you get more skills… and money, you can upgrade.

Which is why we’re answering this question today: what is the best acoustic guitar for beginners??

My students (and even more so their parents) ask me all the time for this exact information. In fact, one of my students is going to get a new guitar that he has “earned” this Christmas right off of the list below!

Guitar girl taking in the sky CARTOONED

If you’re buying a “first guitar”, you typically don’t want to spend a ton of money, so we’ve kept all these guitars UNDER $200!!

There’s a total of eight guitars listed below, and they’re listed from the CHEAPEST to the PRICIEST (though under $200 for a quality acoustic guitar is really a heck of great deal).

Alright, people – let’s do this!!

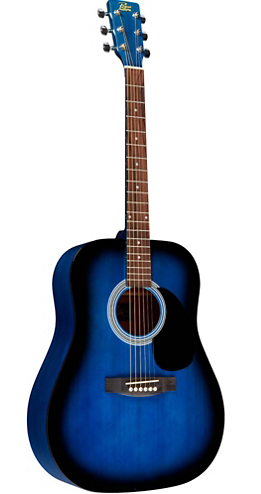
The Rogue RA-100D Dreadnought

Rogue RA-100D
Rogue RA-100D

Many times I get a new student who’s totally new to music and his or her parents want to get them an inexpensive guitar that they can use for the “testing phase”, the first couple months when a kid starts something and they’re uncertain if they’ll stick with it.

This guitar is PERFECT for that. Not only do you not have to spend much money (especially if you buy from Musician’s Friend, who obviously have the best price on it!), it’s also available in FIVE different colors so the student can feel like they chose the one that most fits them.

Add to that that there were more than FIVE HUNDRED reviews on this guitar that gave it an average rating of 4.5 stars, and you can see why this one’s on the list.

The Rogue features:

  • Genuine spruce top
  • Die-cast tuning machines
  • Nato neck
  • 25-1/2″ scale length
  • Bound rosewood fretboard
  • Martin strings
  • Case sold separately

The Rogue is probably not for the intermediate player, but a better value for someone starting out as a music student I could not find.

Some colors differ in price by a few dollars. Take a look at each color and you’ll see what I mean. Usually just a buck or two.

You never know how long Musician’s Friend will keep a sale going, so act fast if you want this obvious bargain pricing!

click map

Musician's Friend Amazon

Jasmine S34C

Jasmine S34C

Jasmine S34C

“Jasmine” started out as Takamine‘s budget line of guitars. The line is now owned by “KMC Music Company” and comes out of China, whose manufacturing quality has really blossomed into substantial improvement in the last decade or so.

You’ll see their model S25 also touted as a great value for the money. I simply went by what real people said in real reviews, and this guitar was slightly higher on the customer satisfaction averages, though the prices of the two were about the same.

Here’s a basic rundown of the S34C features:

  • Gloss Natural
  • Dreadnought body style
  • Slim neck profile
  • Laminate Spruce top
  • 25-1/2″ scale length
  • Sapele back and sides
  • Rosewood Fingerboard
  • Satin Natural finish
  • Synthetic bone nut and saddle
  • Case sold separately

For those interested in getting a little more, only Amazon is offering a guitar “bundle” with this guitar for $121.54 that includes a gig bag, picks, extra strings and a clip-on tuner!

This guitar is good for beginners to intermediates. Professionals might not be that impressed with its laminated top and hit-or-miss action from the factory, but the reviews say it all – most entry-level players are very pleased by the voice it sings with.

I also think this guitar looks really, really nice. The wood looks quality and the binding that keeps the body together appears classy. The fact that it’s a cutaway up high on the neck too would definitely make me wanna stop and give it a try.

At this price, how can ya lose?!

click map

Musician's Friend Amazon

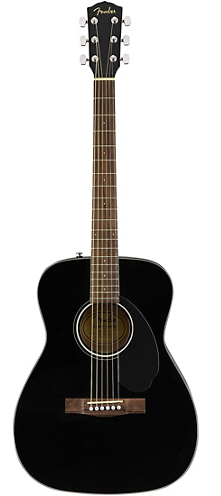
Fender CC-60S

Fender CC-60S
Fender CC-60S

Musician’s Friend is having a SALE on this item at this time of writing, putting it at only $107!! Every other store I found this on was at LEAST $80 more expensive, so I’m putting this in bold right now – THIS IS A GREAT PRICE FOR THIS GUITAR!!

Fender is one of the most well-respected names in guitar-making history, so that alone is worth the price of admission. But another incredible reason to get this guitar for your beginning student (or yourself!) is that it comes with “Fender Play” guitar lessons for three months included.

Imagine your musician getting to take lessons in your own home, via computer, for three months for free! Wow!!!

Here’s what could be winging your way:

  • Body shape: Classic Design
  • Top wood: Solid Spruce
  • Back & sides: Mahogany
  • Bracing pattern: Quartersawn Scalloped X
  • Body finish: Gloss
  • Neck shape: Easy To Play
  • Fingerboard: Rosewood
  • Neck wood: Mahogany
  • Scale length: 25.3″
  • Number of frets: 20
  • Bridge: Rosewood
  • Saddle & nut: Plastic
  • Number of strings: 6-string
  • Case: Sold separately
  • Country of origin: Spain

The Fender name speaks for itself. It’s good quality, with a limited 2-year Warranty, and added strings, picks, strap and lessons thrown in for holiday good measure make this deal a real no-brainer.

And the Musician’s Friend price??? Insane!

Who knows how long it’ll last, so if you have a budding singer/songwriter needing a good guitar… get it while it’s reduced or you’ll kick yourself later!

click map

Sam Ash Amazon Musician's Friend

Carlo Robelli G600CE

I can’t believe how much comes with this guitar for this price. It’s rare to see an acoustic with electronics in it below $150. This allows the player to plug into an amp, or a sound system, and be heard a LOT louder because of it.

Carlo Robelli G600CE

Great for someone who plays acoustic but also likes to play with other musicians. The only way an acoustic player can be heard over drums, for example, is to be amplified. With this guitar, they’re ready to go!

This guitar is also a “cutaway“, which means you can play high up on the neck because the body is cut so your hand can get up in there. That’s also usually on more expensive models.

Oh, and they’re also throwing in picks, a strap to hold it on, a gig bag to carry it in, and a tuner! Unbelievable!!!

This guitar is only available at Sam Ash, but I just had to add it to the list. For value at this price, it can’t be beat. At least not this week! ;-0

Features:

  • Acoustic-Electric Guitar
  • Dreadnought Body with a Comfortable Cutaway Design
  • Built-In Tuner with a Backlit Display for Dark Stages
  • 3-Band EQ Control for Shaping Your Tone
  • Spruce Top with Agathis Back & Sides
  • 25.5″ Scale Length
  • Blackwood Fingerboard
  • Chrome Tuners
  • Includes Padded Gig Bag, Guitar Strap, and Picks

click map

Sam Ash

The Cordoba Disney Pixar “Coco” Mini Guitar

Coco poster
My “Coco” poster to inspire students!

How cool is it and Pixar put out a film that starred… a guitar?!!
If you haven’t seen “Coco” yet, then by all means do so.

Yes, it’s an animated cartoon. Yes, it’s meant more for kids than adults. But if you’re an aspiring musician, or are buying for one, it’s still well worth seeing… and supporting.

It’s not often that a movie comes around that can single-handedly increase total sales volumes in the music instrument field. But “Coco” definitely did, with the production of this guitar.

Cordoba "CoCo" guitar
Cordoba “CoCo” guitar

Here’s a quick breakdown of the guitar:

  • Spruce top with laser-etched figuring
  • Mahogany back and sides
  • Travel Size
  • Smaller C-Shape Mahogany Neck with Shorter 22.8″ Scale Length
  • NuBone Saddle
  • Cordoba gig bag and strap included

Notice that this is a classical acoustic guitar, NOT a standard six string. The big difference? The strings on Coco’s guitar are nylon, not steel.

Nylon strings are softer and not as hard on the fingertips for little kids. The younger the child, the more they’ll appreciate nylon strings. Also the sound of this guitar, because of the nylon strings, will be softer and gentler.

To hear what I mean, listen to Tavi playing the 7/8 model in THIS VIDEO.

A full-size classical guitar will also usually have a much wider neck, but on this model that’s not the case. It’s made to be really easy for a child to play it. Is that why on some sites it’s getting all 5 STAR ratings in the reviews?! Who knows, but it’s obvious a lot of people really like this fun guitar!

Maybe it’s the laser-etched Spanish motif on this guitar that summons the love. If kids are a fan of the Coco movie… that would certainly make them go gaga!!!

But don’t think that because it’s related to Disney that they went all rinky-dink on this one. They didn’t. They used quality wood and I think, based on what I hear coming from the videos, that it sounds really good.

Included with each purchase is a gig bag and a guitar strap. All in all, a great deal for a low-priced guitar that plays in a niche all its own.

Follow these links to get your own “Disney magic”!

click map

Sam Ash Amazon Musician's Friend

Fender CD-60S Dreadnought

Fender CD60S
Fender CD60S bundle

This is another golden “Fender” guitar find that I discovered online by researching for days just for you.

Amazon is selling this guitar, which differs from the other Fender guitar above only in COLOR, at a price that is beating out the other stores by a long shot!

I don’t know how they’re doing it, but They’re a full SIXTY BUCKS cheaper than all the rest. Gotta love those holiday sales!

You really can’t go wrong getting this model. The reviews on Sam Ash AND Musician’s Friend are totally all FIVE stars, which you don’t see that often. Plus, it’s backed by Fender’s standard warranty.

Here’s what ya get:

  • Dreadnought Body style
  • Solid Spruce top with scalloped “x”-bracing, Mahogany back and sides
  • Gloss-finish Mahogany neck with 20-fret rosewood Fingerboard
  • Rosewood Bridge with compensated saddle
  • Includes picks, strap and Spare strings!

If your musician has been at this a while, he or she will truly appreciate a guitar made by a music industry legend – Fender. I would even go so far as to say that if the quality of the guitar SOUND, for the price, is most important to you or your player, this acoustic would be my #1 on today’s list.

As usual, I don’t know how long this Amazon sale price will go on, so if this is the ticket… buy it now!

click map

Sam Ash Amazon Musician's Friend

Yamaha GigMaker Pack

Yamaha Gigmaker Acoustic bundle
Gigmaker Acoustic bundle

As a music instrument company, Yamaha has always been, for decades, at the forefront of producing quality instruments at fair prices.

This instrument bundle is one of the latest to showcase their strength and their commitment to musicians around the globe to bring us well-made products at affordable prices.

This pack is obviously loaded to the gills with extras:

  • a gig bag
  • an instructional DVD
  • a guitar strap
  • a QT11 digital guitar tuner
  • Extra strings
  • Guitar picks

Here’s a look at its basic specs:

    • Laminated Spruce top
    • Meranti back, sides
    • Nato neck
    • Rosewood fingerboard
    • Die-cast chrome tuners
    • Rosewood bridge
    • Gig Bag, instructional DVD, guitar strap, tuner, strings and picks included
    • Limited lifetime warranty

    But it all starts with a really good guitar, the finely-crafted Yamaha F325. Look at those review ratings! It’s easy to recommend a product when its customer satisfaction is near the 5 star mark consistently.

    If you’re a student wanting to step up from a cheaper acoustic, or you have a child that you think has “earned” their first quality instrument, this is a great choice.

    The free lessons on the DVD don’t hurt either. Those are easily downloadable, by the way, into a computer to watch. Most kids I know these days prefer to let the computer be their portal to the world (don’t get me started on video games!!).

    All in all, a dependable value that gets you everything needed to sound good and go farther than ever in your musical pursuits!

    click map

    Sam Ash Amazon Musician's Friend

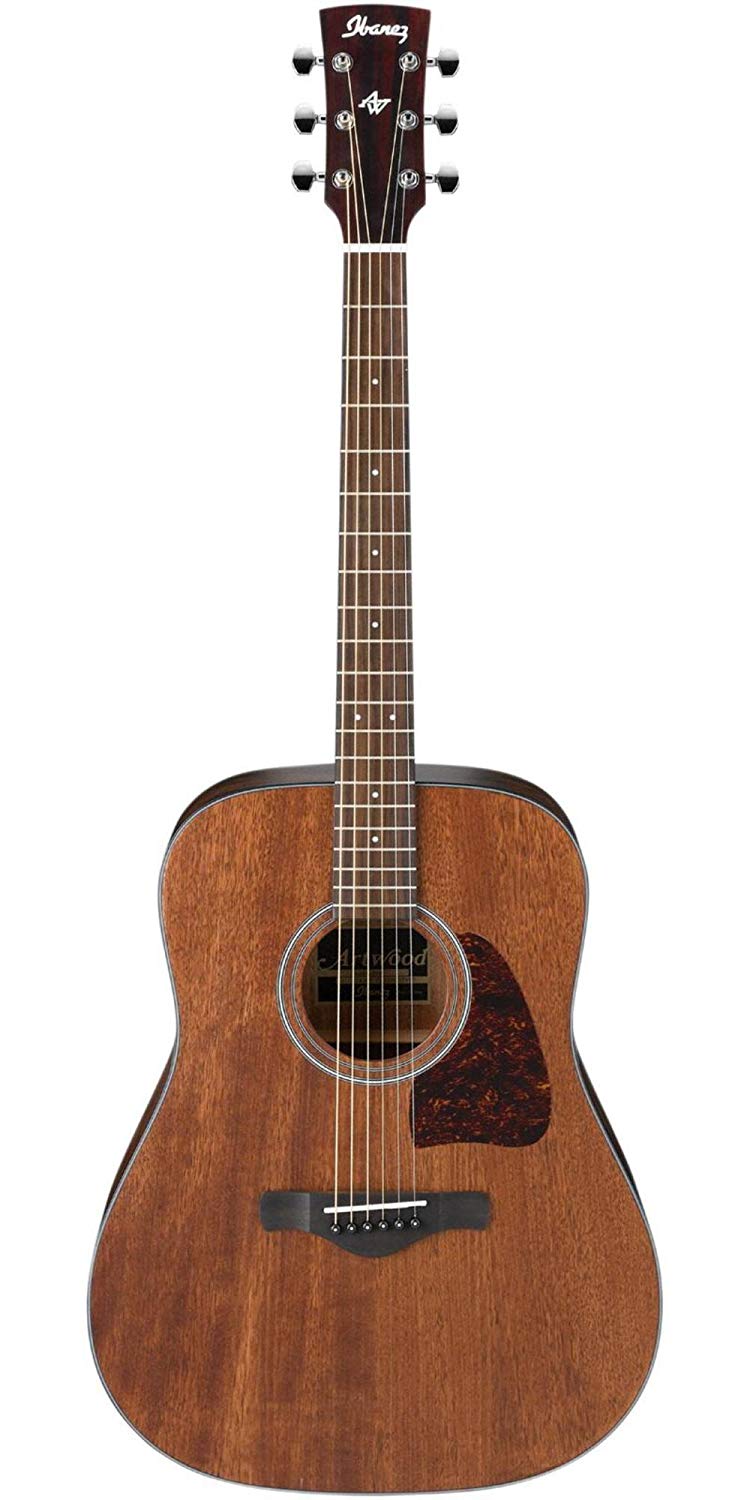
    Ibanez AW54 Artwood Acoustic

    Ibanez Artwood Acoustic
    Ibanez Artwood Acoustic

    If I were to pick one guitar that, as a seasoned pro, I might be interested in, it would be this one. The reviews by some very experienced players tell of a surprisingly above-average sound coming from this instrument.

    This guitar also had THE highest review ratings out of any other guitar I looked at. Obviously Ibanez is doing something right in this AW54!

    I have this one on the list for those who want to have the highest quality and don’t mind paying extra for it, even if it IS a “first guitar”. You know who you are.   😉

    The guitar consists of:

    • Dreadnought body
    • Solid mahogany top
    • Mahogany back & sides
    • Mahogany neck
    • Rosewood bridge and fretboard
    • Chrome die-cast tuners
    • D’Addario EXP strings
    • Open pore natural finish
    • Ibanez Advantage bridge pins
    • Case sold separately

    If you’re an intermediate to professional player and want another acoustic (like I do… ALL the TIME!), it doesn’t sound like you could go wrong with this axe, judging by the reviews and specific praise all over the Internet for it.

    I also think the open-pore natural wood finish looks really sweet.

    Here’s a video with quality audio to give you warm taste of the honey that flows from this baby:

    Okay, so… anyone else gettin’ serious G.A.S. for this instrument besides me?!! I bet I’m not alone… Lol

    I also notice that nobody is putting this one on sale. That usually means one thing…

    It sells so well as is they don’t have to.

    See you at Checkout! 😉

    click map

    Sam Ash Amazon Musician's Friend

    The Bottom Line

    holy grail of guitar toneWe musicians always want the best gear at the best price if we can help it. Today we’ve shown you eight different ways to reach that goal for acoustic guitars under $200.

    Rest assured that we spent waaaaay more time investigated these deals, and dozens of others, than you’d probably ever want to do. It’s all to help you, and ourselves, make the wisest pro audio decisions we can, as we chase after that elusive holy grail… the quest for excellent sound and tone!

    The closest I’ve come is having a guitar handmade, which you can READ ABOUT HERE. But, trust me… it was more than $200.   😮

    If you like any of the guitars you see above, use our links to snag the deal, won’t you? It helps fund our research, and doesn’t cost you a penny more!

    Thanks for stopping by Seriousgas. We hope you’ll be a regular here, and look forward to hearing your animated stories of inspiring gear and instruments. Leave us a note in the Comments. We’d love to hear about it!

    Now, go… make… sounds!!

    Teaj
    How To Play A Bass Guitar, Pt. 2 – Splash Those Colors!!

    Starry night by Van Gogh
    “Starry Night” by Van Gogh

     
    One of my favorite artists is Van Gogh. I have his painting called “Café Terrace at Night” hanging in our kitchen.

    Van Gogh is known for using vibrant colors in his creations. He would often paint an object using bright colors you would never see on the object in real life.

    That’s probably a big reason why his works are so fascinating.

    As we go into this second article on how to play a bass guitar, we will be dealing with two of the essential colors in music, without which it would be a drab world indeed. So…

    … put on your axe and let’s get started!

    Seeing is Believing

    I always like to give you a video tutorial, as well as the more detailed text, to really allow you learn as if you’re in a lesson with me. Watch this short lesson on YouTube first, then come back here to explore all the particulars and increase your understanding:

    Got the Foundation?

    If you haven’t read yet my first article on how to play a bass guitar, you might need to. A lot of the things I will reference in today’s article I explained in part one.

    Do you have the chromatic scale memorized?

    Do you know what the open strings of your bass guitar are??

    Do you know the exercises to practice that will quickly help you get around on your bass guitar neck??

    Do you know how to play a root and a 5th anywhere on the neck, and know what those mean???

    If you answered “no” to any of these questions, then go back and review my part one article RIGHT HERE.

    Don’t worry. I’ll wait.   lol

    Okay – got everything in part one mastered?? Sweet. Now let’s add some color…

    The Spinning Wheel

    Playing the root, the 5th and the octave on a bass guitar is very common and very useful. There are some songs I’ve played that stay on the root, the 5th and the octave almost exclusively.

    But if that’s all we ever play, there won’t be very much color at all in our expression. It’ll be very black and white, and after a while would get kind of boring.

    Don’t get me wrong, those notes are fine for some things, but what about all the other glorious shades that are available to us in music? shall we just ignore them??

    HECK…NO! Life’s too short to not use the whole color wheel.

    So let’s start spinning it with two of the best colors of all…

    Darkness & Light

    There are two kinds of chords that are the most basic western music:

    1. The major chord
    2. The minor chord

    It’ll make things a lot easier to remember by describing these two chords this way:

    • The major chord sounds happy.
    • The minor chord sound sad.

    This is a simplification of all the depths that are plumbed in those two chords, but it will quickly help you differentiate between the two.

    So just remember: happy and sad. Light and darkness. Sunrise and sunset. That’s major and minor.

    Now let’s tackle how to play ’em!

    Sunrise

    First, we’ll bring the sun up playing the major chord outline.

    Choose a root. Any root. I’ll choose 5th fret “A” to get us going.

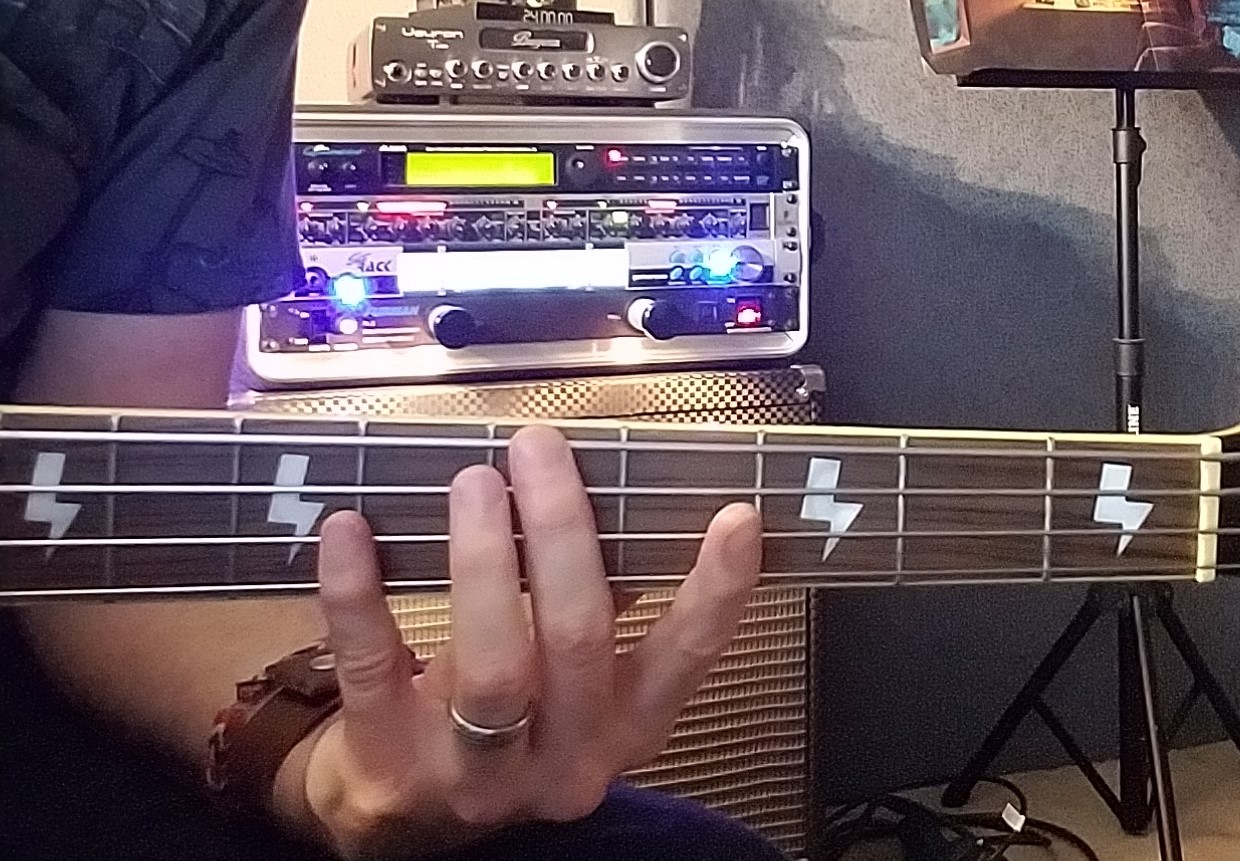
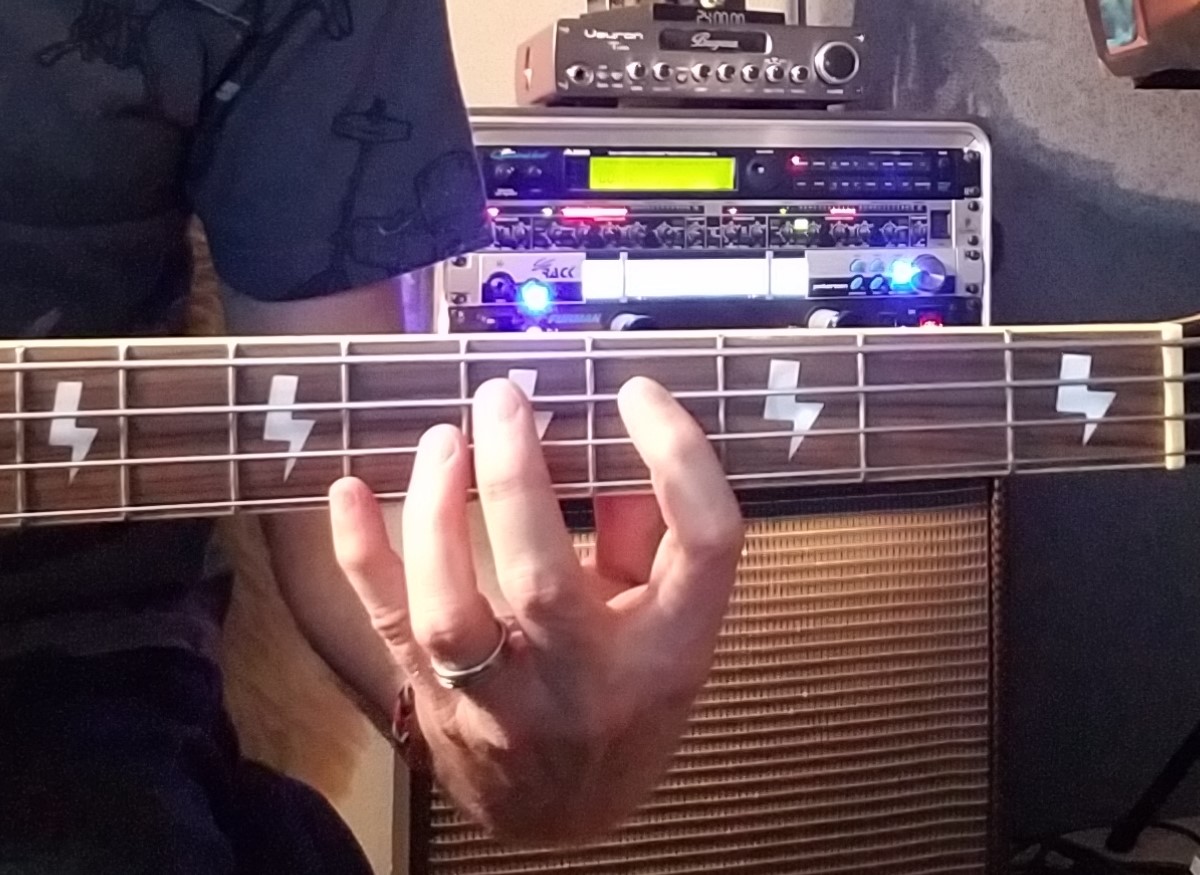
    ROOT bass fingering

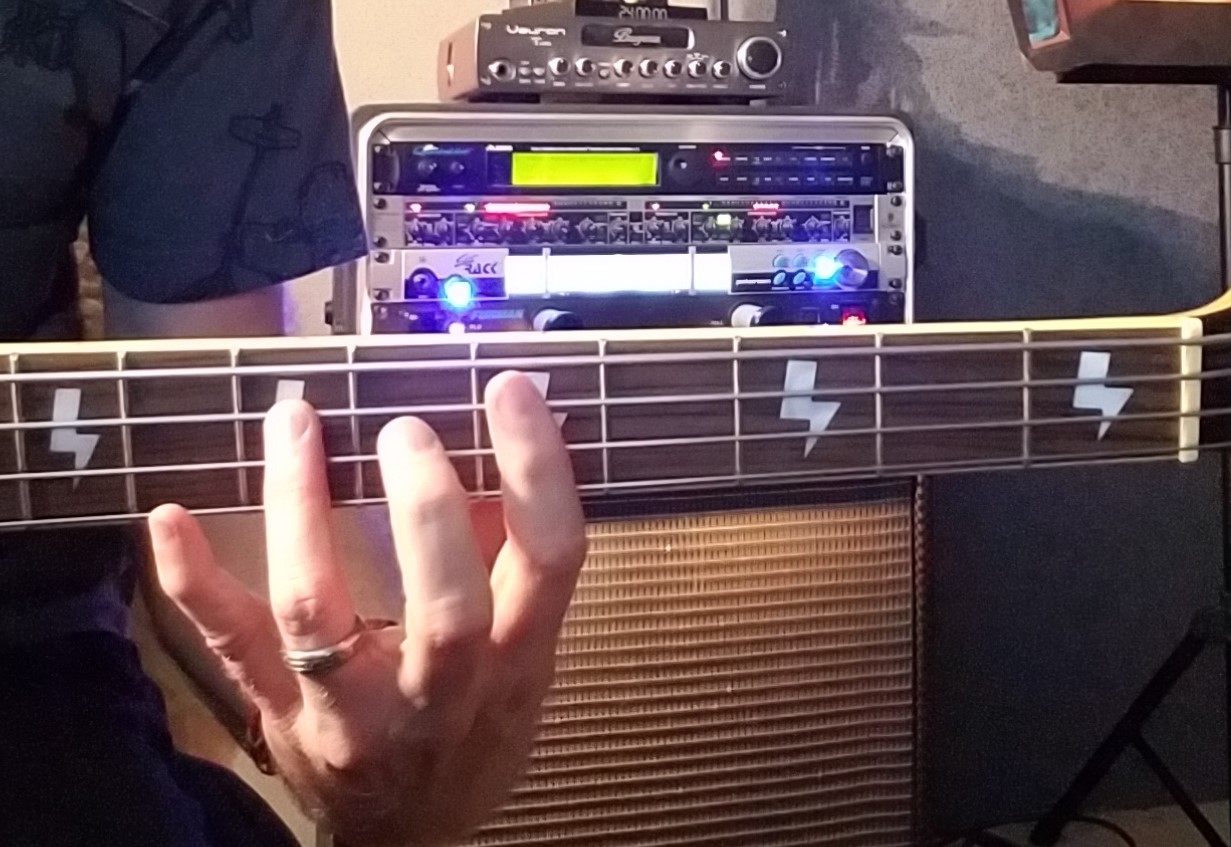
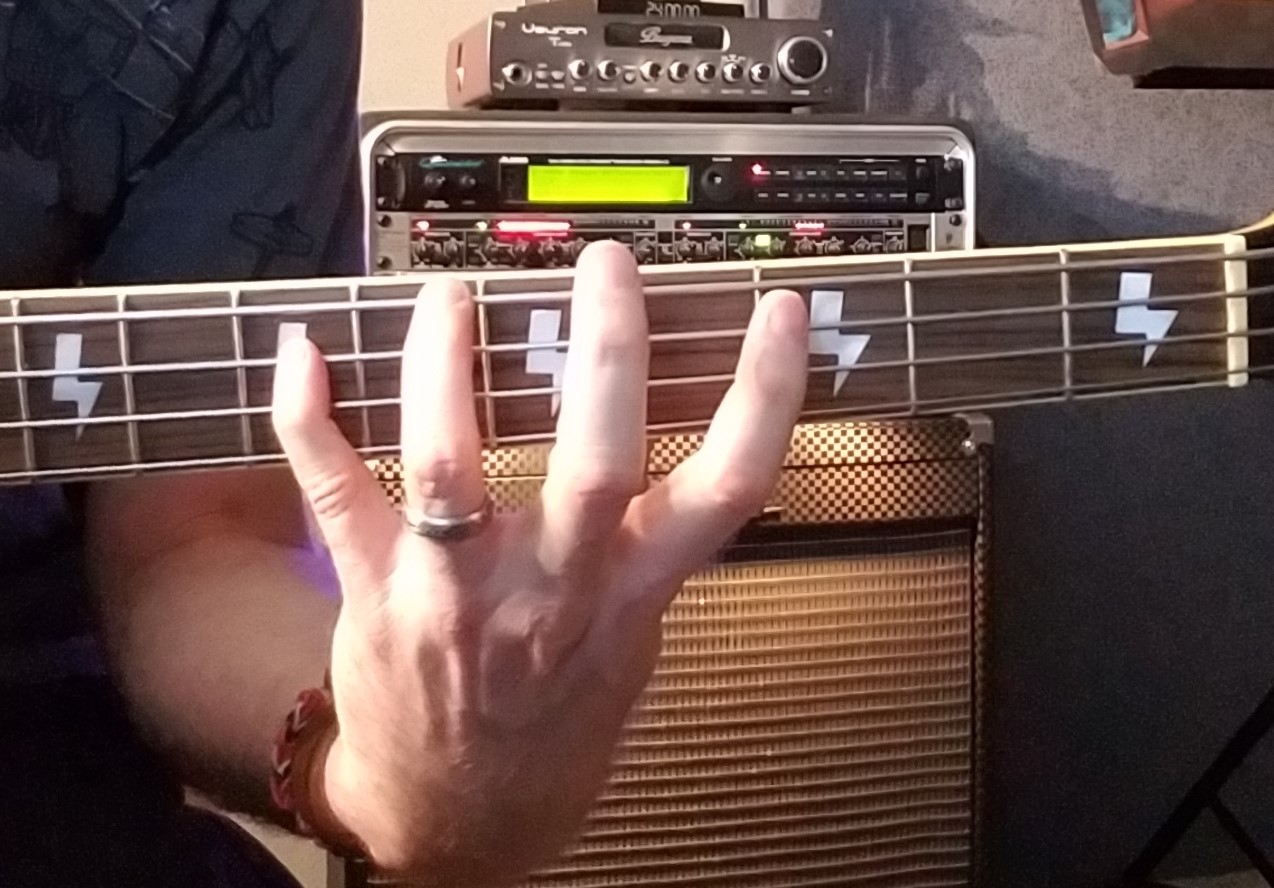
    On the bass guitar, if you go one fret over and one fret down from whatever root note you’re on, you will be playing the major third note.

    MAJOR THIRD bass fingering

    You can throw this note in whenever you’re playing a chord that is only a letter, like A, or D, or G.

    You can also use the major third note for chords designated by letters that are followed by either a flat or a sharp. Eb, for example, or C#.

    All those types of chords are major chords. That means they use the major third. Therefore, you can toss it in whenever you want.

    Do you have to play the major third when it’s a major chord?? Now, there’s no rule that says you must. But it does often helped establish the happy sound of a major chord.

    Don’t forget to let your ol’ pals the 5th & the Octave have a little fun in your jam too. Toss them in like a good strong marinating sauce. They produce a STRONG flavor!

    Alright, so let’s get to know it, shall we? Turn a metronome on, set it to 4/4, and create a Groove first using just your route 5th and octave.

    Next, try occasionally the major third in somewhere. See how that sounds. It should have a pretty uplifting quality, since our ears are trained to recognize the major chord as bright and happy.

    Got it? Cool. Now let’s meet its bummed out counterpart.

    Be forewarned though: he’s a bit of a Donald Downer. 😮

    Sunset

    The minor chord sounds darker, sadder and, frankly, depressed. If you’ve ever had your emotions moved buy a truly sorrowful song, it was probably using minor chords.

    There are two ways to play a minor chord outline. The first way is:

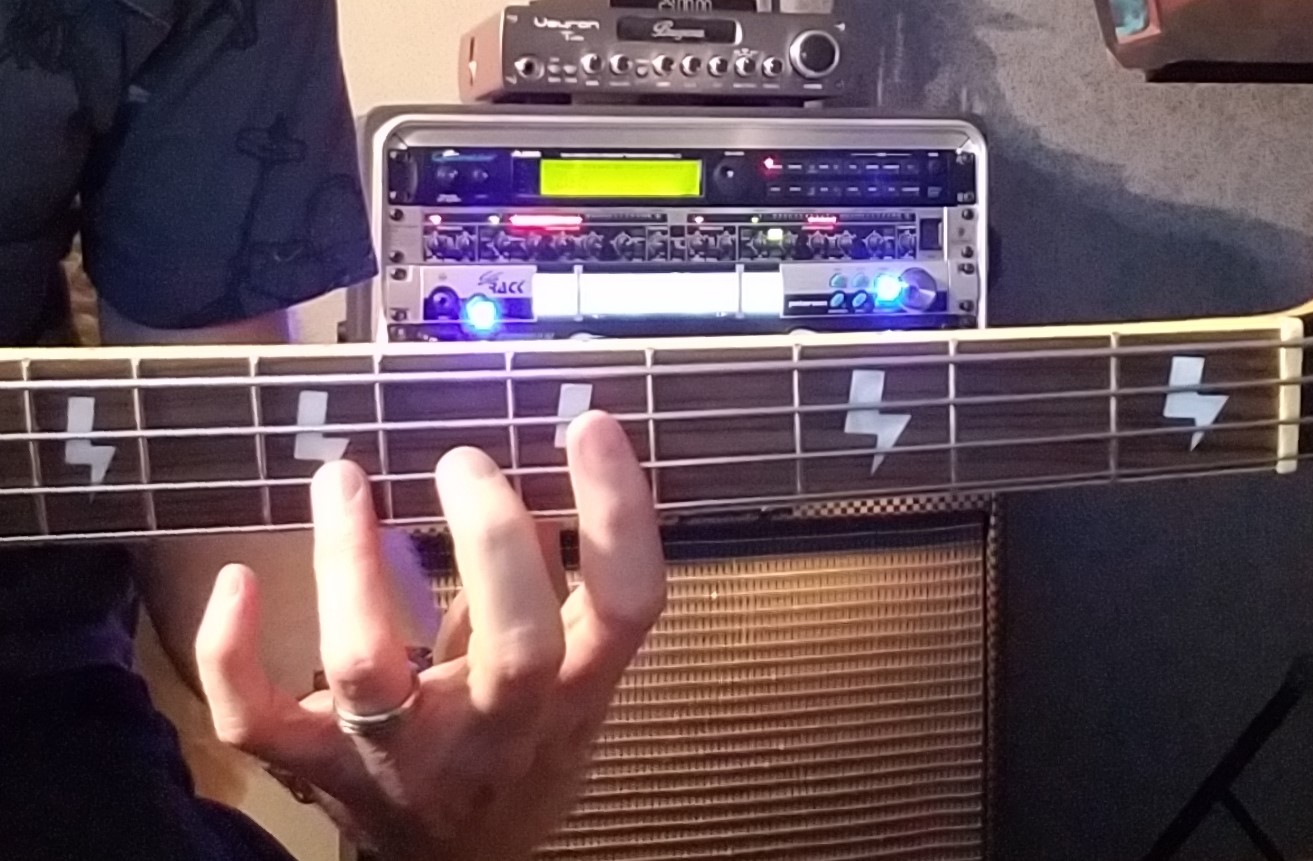
    Start on any root with your first finger, then play the minor third THREE FRETS UP on the same string.

    MINOR 3RD Up bass fingering

    You then can play the fifth and octave with your ring finger.

    The 5th from the Minor 3rd up bass fingering

    The OCTAVE from the Minor 3rd UP

    The second way to play a minor chord outline is:

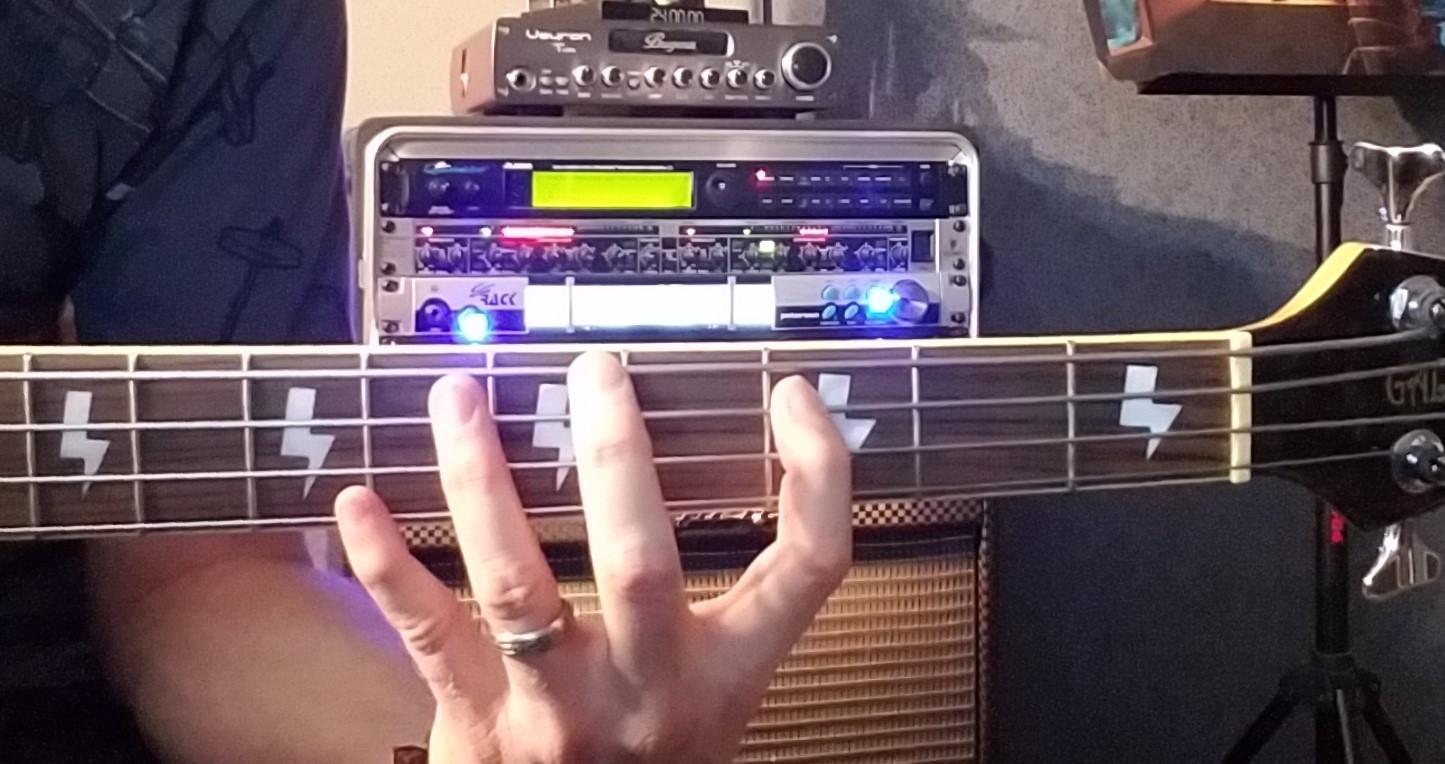
    Play any root note with your second finger. Then go to the next string UP and go two frets down. That’s your minor third note. Play that with your first finger.

    The Minor 3rd DOWN bass fingering

    To add the 5th, stretch up four frets and play it with your pinky. The octave you’ll also play with your pinky, one string up from the 5th.

    The 5th from the Minor 3rd DOWN bass fingering

    I tend to use the first method way more. Occasionally though, there will be a bass line where it makes more sense to use the second method.

    Make yourself adept at both by practicing, and you’ll know which one to use at any given moment.

    Now turn on your metronome again, and try coming up with bass lines that use a root, 5th, octave and minor third. Try incorporating both minor third fingerings.

    Are you hearing the sad, dejected quality of the minor third as you play?? This color in music can really impact us… especially if we’ve had a bad day!

    Adjusting Your Hair Trigger!

    You should be able to change between a major chord outline and the minor chord outline at the drop of a pick.

    Get that hair trigger honed by doing this with a metronome: play the major fingering for four counts; then the minor; then repeat back and forth.

    To get yourself really adept, switch your metronome to 3/4 time, and come up with grooves that utilize both chord types.

    If you do that, you’ll pretty much be ready for whatever a band might throw at you! Unless they wanna do Rush-type stuff and rock in 7/8, 9/4 and 5/8. Then you may have to practice… uh… a little more.  lol

    Making Your BIG Splash!!Whale-splashing CARTOONED with BASS

    As always, the best thing you can do to become a better player is play SONGS. Get yourself some song books. Or find your favorite songs chords using Google.

    Doing this is like “splashing in the water” of music. It’s a great way to train your ear to hear the many colors, or emotions, that music can conjure up. And it’s more fun than a blue whale breaching in the mighty Pacific!

    That’s all for today. Hope you enjoyed the video and the tutorial, and I hope you are as excited as I still am to play the bass.

    It’s a fantastic instrument!!

    Now, go… make… sounds!!

    Teaj
    Studio Soundproofing – Options That Won’t Break The Bank!

    Miles Davis
    (Photo: Oliver Nurock)

    As any good gigging player will tell you, music is about what you don’t hear, and don’t play, as much as it is what you do.

    As Miles Davis put it:

    “It’s not the notes you play, it’s the notes you don’t play.”

    When it comes to studio recording, there are two things we really don’t want to hear:

    1) Noise, and

    2) Distortions of our recorded signal

    Avoiding those sound traps are why we always should be utilizing studio soundproofing techniques and products.

    windex that audio with notes CARTOONED
    Windex that audio!!

    Sure, it’s better to have captured an amazing musical performance with a little noise than to not have it recorded at all.

    But if you’re into recorded audio at all, you know it’s about the little things: those tiny details that we stack, sound upon sound, effect and effect, until our goal is reached.

    Starting your recordings with clean, unfiltered, unmangled signal sources is perhaps the greatest detail of all in a recording studio.

    “Always record the best signal possible.” It was drilled into my head when I first started recording, and it’s still resonating there today.

    So how do we do it? Well, there’re certain things that will really “Windex the windows” of your audio. Let’s lay ’em down…

    There IS A Difference

    We should probably talk first about the distinction between “soundproofing” and “sound absorption”.

    Soundproofing” is meant to outright STOP the transference of sound from one point to another, like from your Rehearsal Room into your Control Room. In other words, it usually is talking about spillage of audio, room to room.

    Sound Absorption“, on the other hand, is designed to improve the frequency clarity within any given space, such that noise is reduced, and frequency alterations are kept to a minimum.

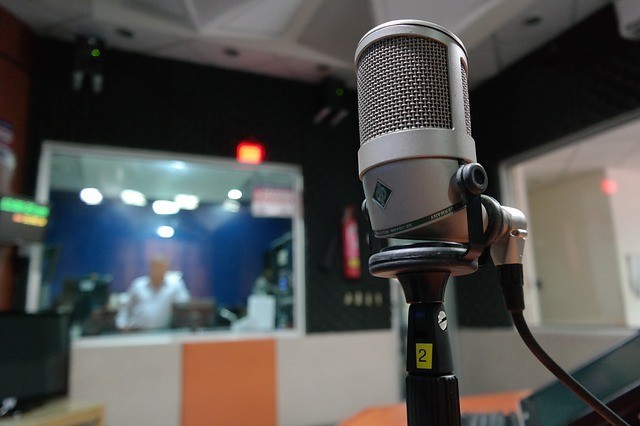
    mic & control room windows

    With these definitions in mind, it’s easy to see that true room soundproofing is an expensive business. You’d have to literally tear down ordinary house walls, floors AND ceilings, and install a whole slew of additional layers in order to truly soundproof a room.

    Those expensive professional studios you’ve seen, been in, or heard about?? They have all that stuff built-in from the ground up. It’s a lot harder for us with preexisting “normal houses” to alter the sound qualities (or lack of it) after the fact.

    Thankfully, using sound absorption principles and items are typically all we need to be able to capture good, clean audio signals and afterwards process them in a way that allows for maximum purity of the original signals, without mutations due to room construction or materials.

    I’m going to show you how to set up this maximized type of recording setup by looking at the four prominent surfaces of your studio control room:

    • Walls
    • Ceiling
    • Floor
    • Table

    Your control room is where most of the magic happens. It’s also where you must be the most careful in how you position everything. The three flat, reflective surfaces listed above can wreak havoc on your final audio products, and their power to wreck your mix should not be underestimated.

    But they are powerless… with a little preparation!!

    Look Out, Behind You… !

    Lon Chaney as the Phantom
    Even Phantoms don’t like anyone creeping up behind!

    Let’s talk about “the back wall”, or what’s behind you as you sit in your mixing seat.

    No, it’s probably not Lon Chaney as “The Phantom”. Though, if it were… that’d be pretty cool!

    But bouncing frequencies can definitely creep up on you from where your monitors have sent the sound – behind you. If you have normal smooth, flat walls back there, LOOK OUT…!! Monster Opera roque tones will be batting your head like tumbling notes from an organ recital!!

    It’s typical to see studio tables positioned near the ends of a rectangular- shaped room. this is fine, as long as you are a few feet away from the wall behind your speakers. Following the 38% rule might be to your benefit also, so CHECK HERE first to see if it jives with your room dimensions.

    I went a little unorthodox in my studio, but it’s worked like a charm. I think the reason is mostly due to one thing: cubicle dividers. They’re the blue panels you see in the pic below.

    My behind-the-chair sound absorption setup!
    My behind-the-chair sound absorption setup!

    I got ’em because one day, when in casual conversation with a fellow musician, I was told that some office partitions were being giving away for free at a local church.

    I went over, checked ’em out, and soon had seven office dividers, each 59″ by 59″, tied to the top of my Jeep Grand Cherokee.

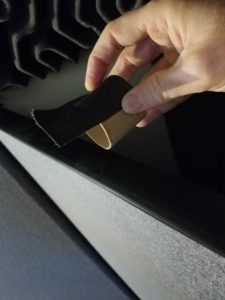
    t.p. roll & duct tape spacer
    My t.p. roll & duct tape spacer… works perfectly!!

    I, uh, definitely took the back roads that day!

    These things are perfect for studio use. They are cloth on both sides. Beneath the cloth is a thin layer of wood, there’s an air pocket between those layers. This makes for excellent sound absorption.

    On top of that, I made a 2″ spacer out of (wait for it…) a T.P. ROLL (see pic to the right) so that I also have an air pocket behind the panels to add further buffering to any signals my monitors pump out (see photo below).

    Talk about suckin’ up the noise… I can scream into that corner and it just disappears, quick as a blink!

    The good news for you is that you can almost always find sound-absorbing office dividers on Craigslist for peanuts, or sometimes Freecycle… for FREE! I checked just now saw THIS AD, for example, in my area. Check under these Search titles: “Office Dividers”; “Office Partitions”; “Cubicle Panels”, or any variation of those.

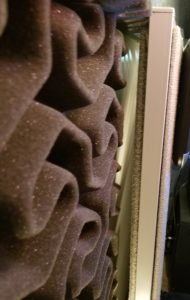
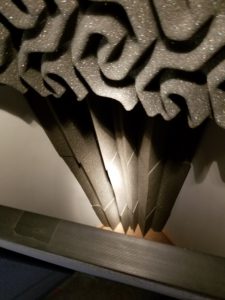
    The gap between sound panel & wall.
    The gap between panel & wall.

    Always make sure you’re getting dividers with cloth on the outside. You never want your outer layer to be a hard smooth material, ‘cuz that’s just like adding another wall for sound to bounce off of even more!

    As you can see from the picture above, I’ve placed two of my dividers on either side of the corner behind my mixing chair, and one between them, stretching across the corner and parallel to my back.

    Behind this middle partition, I have bass traps stacked three high. Then, above all that, I’ve hung more sound absorption foam.

    This has created a corner that is REEEEALLY dead, sonically-speaking. I love it, ‘cuz I can track all my lead vocals a few feet behind my mixing chair, where I can still see the computer monitor and check my signals and status at a glance.

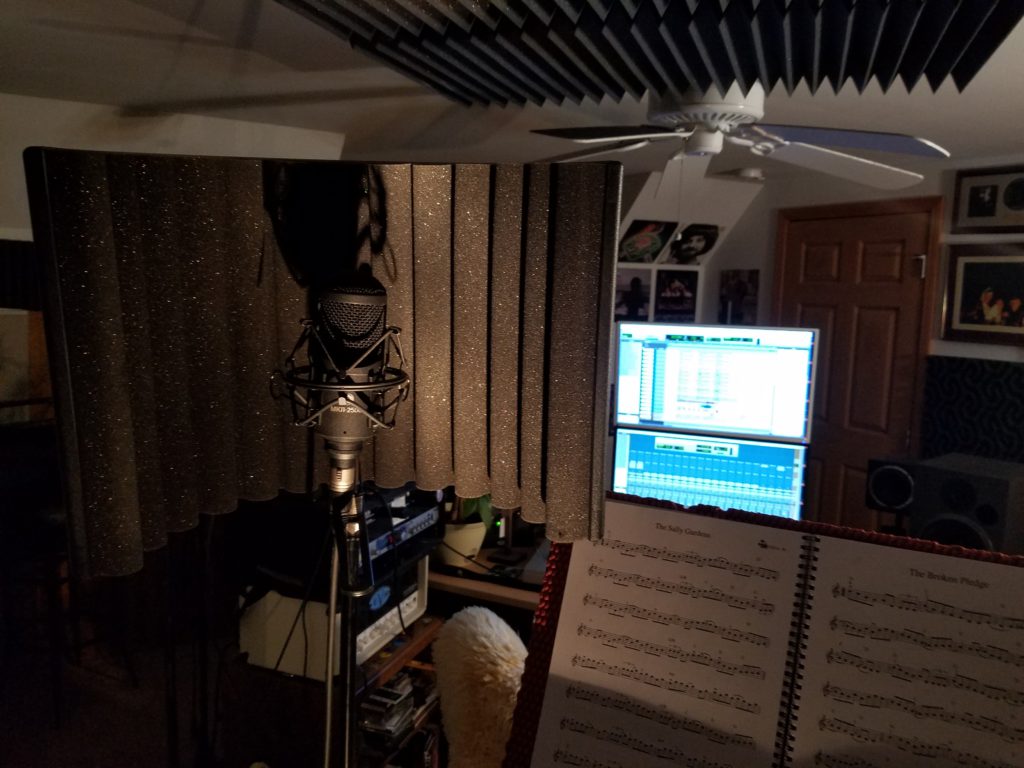
    SE Sound absorption for mics

    The only thing I had to add to do this was an SE “Reflexion Filter” (check it out HERE) for mic isolation from behind, as you see to the left.

    This dead corner is also we’re both of my monitor speakers are pointing when they pass my ears. Any reflections past that point are caught forever in, as Stephen King put it, “The Dead Zone”!!

    So don’t forget: check Craigslist, or even better yet, Freecycle, and look for those office dividers.

    Your mixes will be glad you did. 😉

    Those Pesky SIDE Effects

    You’ll want some sparse foam soundproofing coverage on the side walls of your studio.

    This is especially true if your room is a perfect square or rectangle. Too many standing waves can accumulate at too many frequencies and start Ping-Pong zinging around your ears like a Pong game on steroids!

    On the other hand, some have the misconception that they have to cover their whole studio with foam, like white on rice, in order to monitor their recordings correctly. This is not the case.

    Sound foam behind my monitor
    Strategically placed acoustic foam behind my monitors.

    Sometimes you want a bit of reflection in your recordings, not a room so dead that a zombie horde could be screaming for your brains a few bloody arm-lengths away and you wouldn’t able to hear it because of the Emo tune you’re remixing into a Trance classic.

    If you’re wanting to build and isolation booth for pristine, low-noise-floor vocals, then sure… go crazy!

    But otherwise just putting 2″ or 1.5″ foam squares in strategic places on your side and back walls will do the trick.

    I still have about half of my side walls naked, but since it doesn’t negatively affect my mix zone, it’s all good.

    Where do you put ’em on the side walls?? If you have a couple vertical layers midway on your wall, about the same height as your monitor speakers, it should be enough.

    IF your mixing table is not too close to any walls or set of walls. basically don’t allow your mixing table to have too close a proximity to any walls, and you’ll more successfully mitigate the chances of producing rogue waves that’ll blur the grand vision of your mix.

    Hey! Down In Front!

    bass traps
    Corner bass traps really make a difference!

    What do you have behind your computer monitor? What is your “front wall”, as we call it? Are you close to hard walls? Then you could be magnifying certain low frequencies that will then be overemphasized in your mix.

    Give yourself at least two feet from the back wall and, if you can afford ’em, buy a couple bass traps for both corners (two or three high would be optimal). My table is over three feet away from any wall, and I believe, based on physics, that’s why I never have a problem mixing.

    To the left you can see the three-high bass traps I have behind one of my sound diffusion panels. No big standing waves comin’ outta THAT corner!

    Also, put a few sound absorption foam panels at monitor-height, just like you did for the side walls, directly behind both of your monitors. This should nullify any sympathetic frequency boosts in the area of your mixing chair.

    No Ceiling Tennis, Please

    Frequencies don’t just bounce horizontally; they ricochet vertically and diagonally too.

    This is why, if you’re going to be tracking or mixing it all, you need to have some acoustic treatment directly above your mixing chair, on the ceiling, or your frequencies will be tennis balls being served into your head. Kinda hurts after a whole. 😉

    These bouncing high frequencies off the ceiling can blur what you hear coming out of your monitors. These are called early reflections, or First Reflections, and they must be eliminated if you want to produce a clear mix.

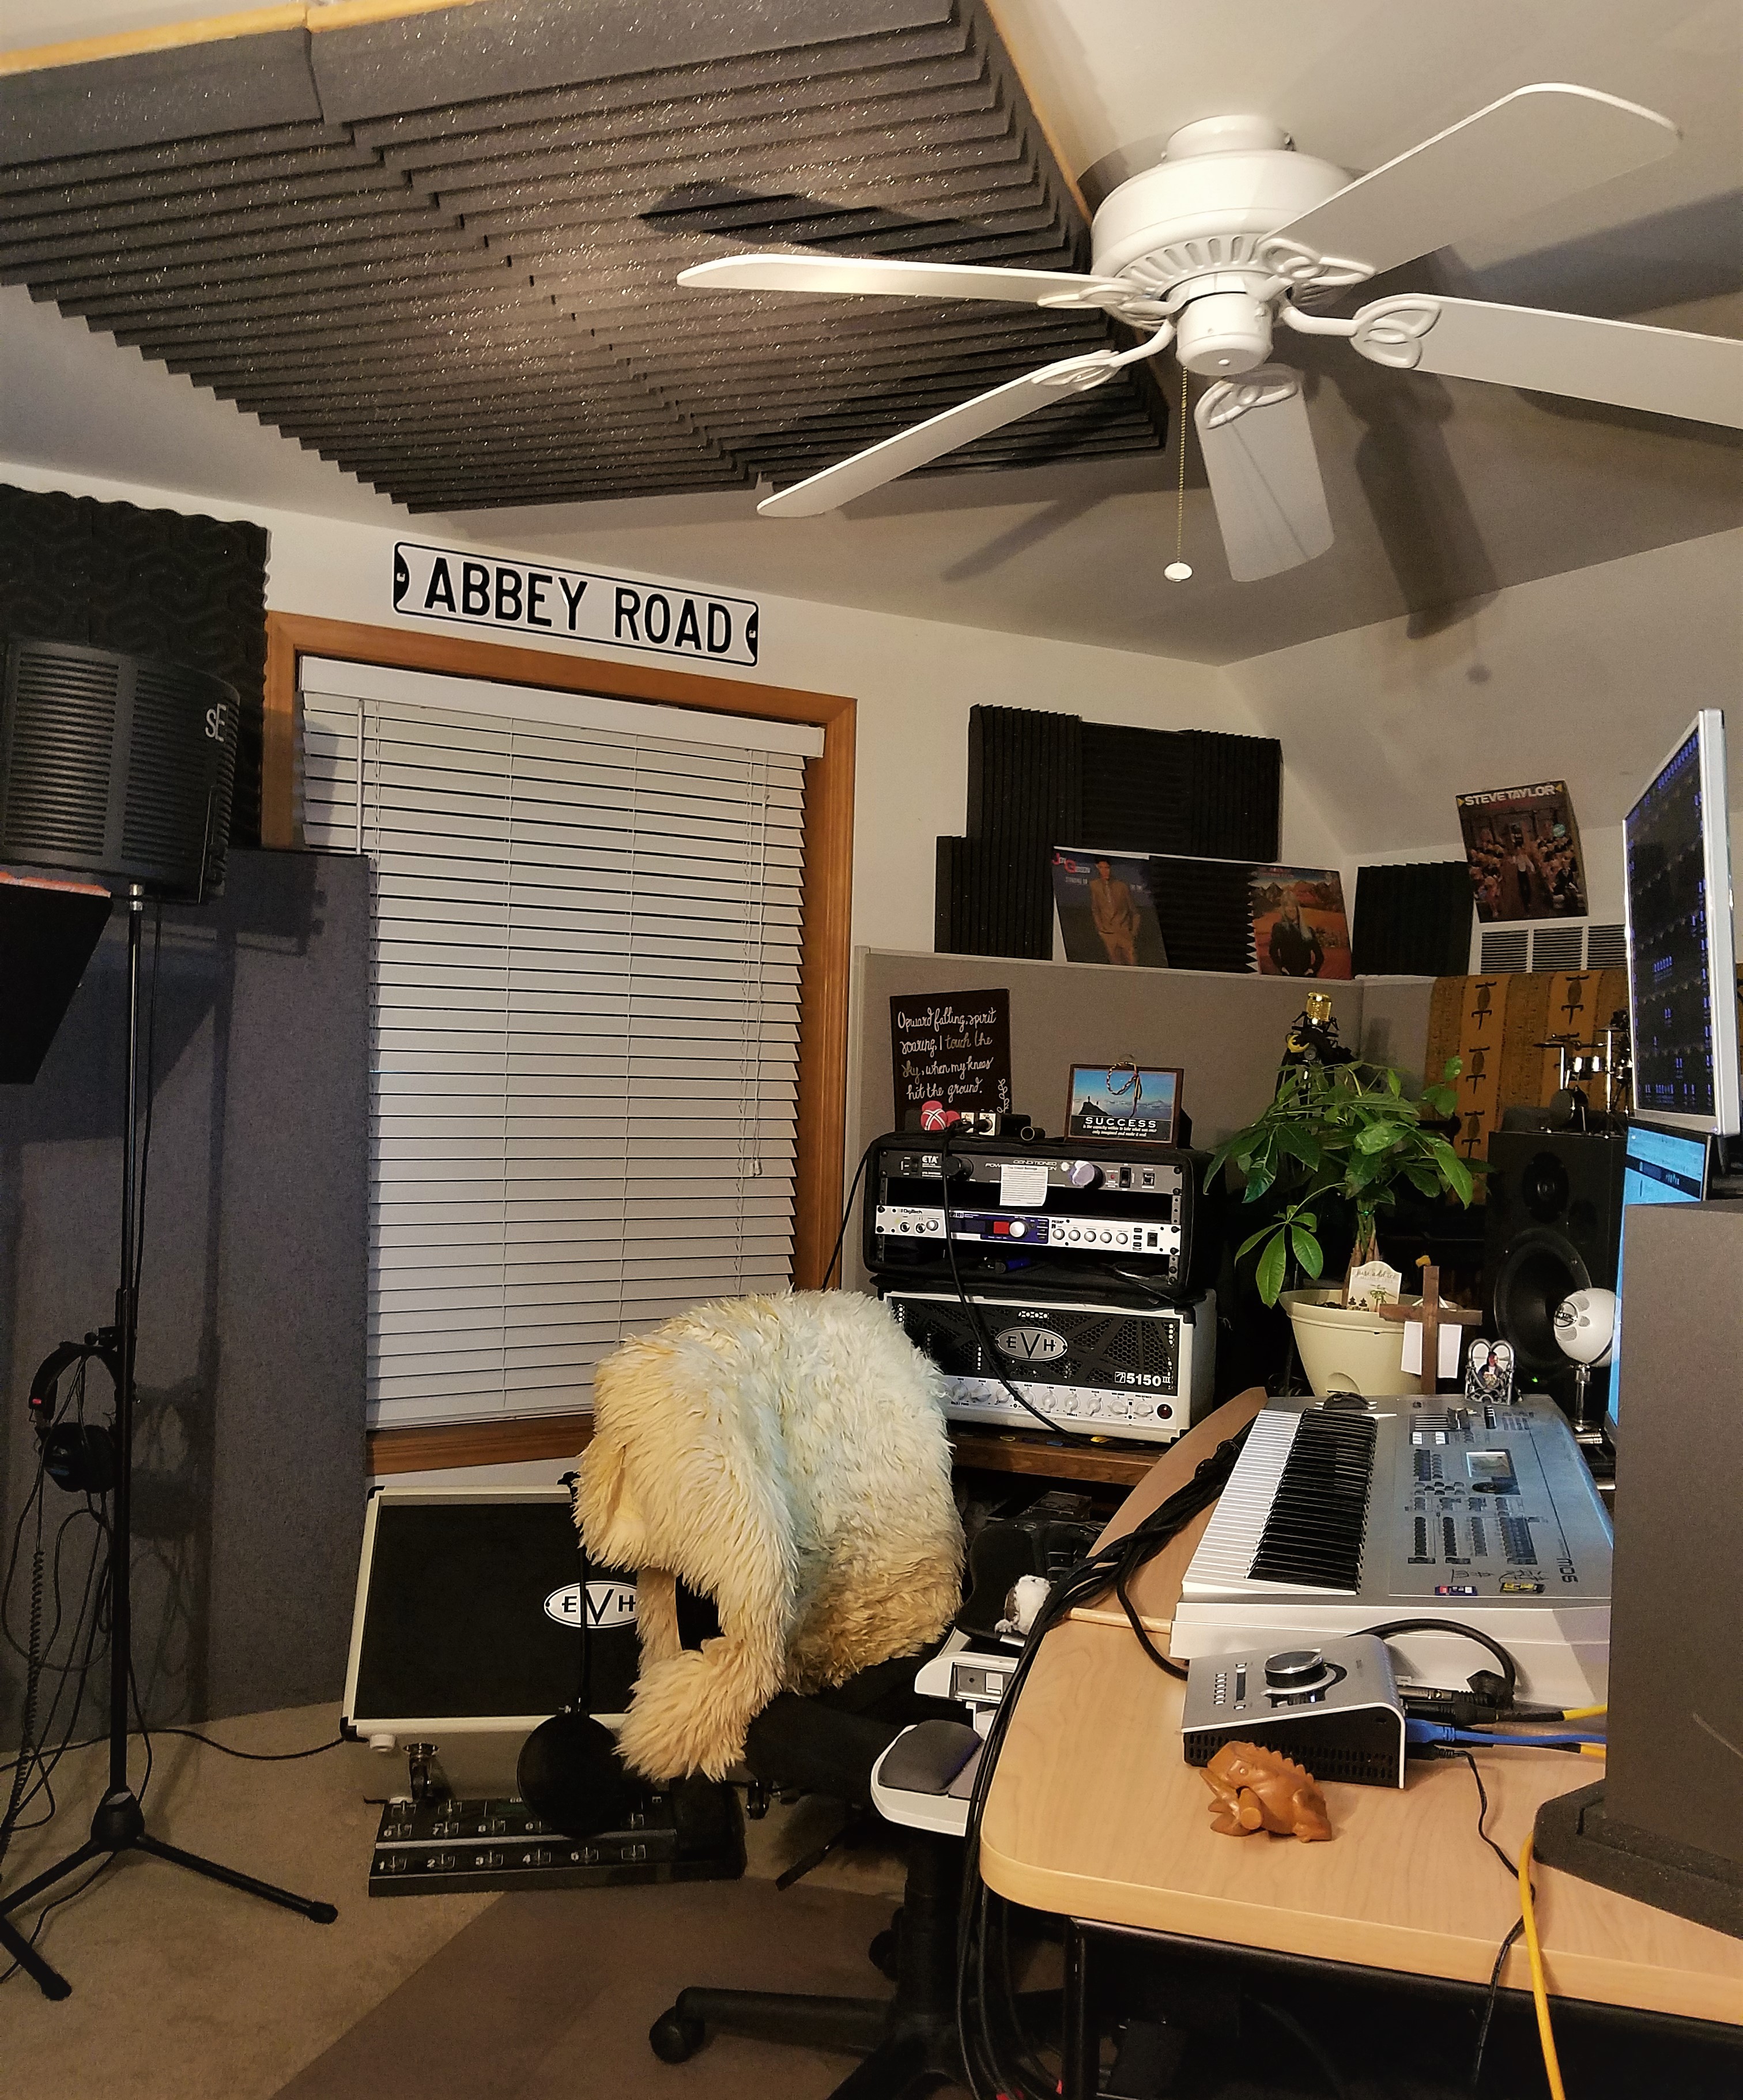
    Ceiling sound absorption
    Ceiling absorption panels right above the mixing chair!

    In the picture to the left you can see what I use.

    The simple wood frame was built from thin wooden planks 3/4 of an inch by 1 inch and 1/4. Lowe’s or Home Depot, people. They’re cheap.

    The frames are 48″ long, and 24″ wide, which accommodates the long piece of acoustic foam exactly.

    I’ve attached to the frame 24″ x 48″ 3″ inch pyramid foam. This style because it’s the most rigid, so it won’t tend to sag when it’s placed upside down.

    You could use pyramid-style acoustic foam, but it won’t keep the rigidity as well as the wedge style does. The convoluted egg crate style of foam, because of how it’s made, doesn’t come in 3″, so that’s not even an option.

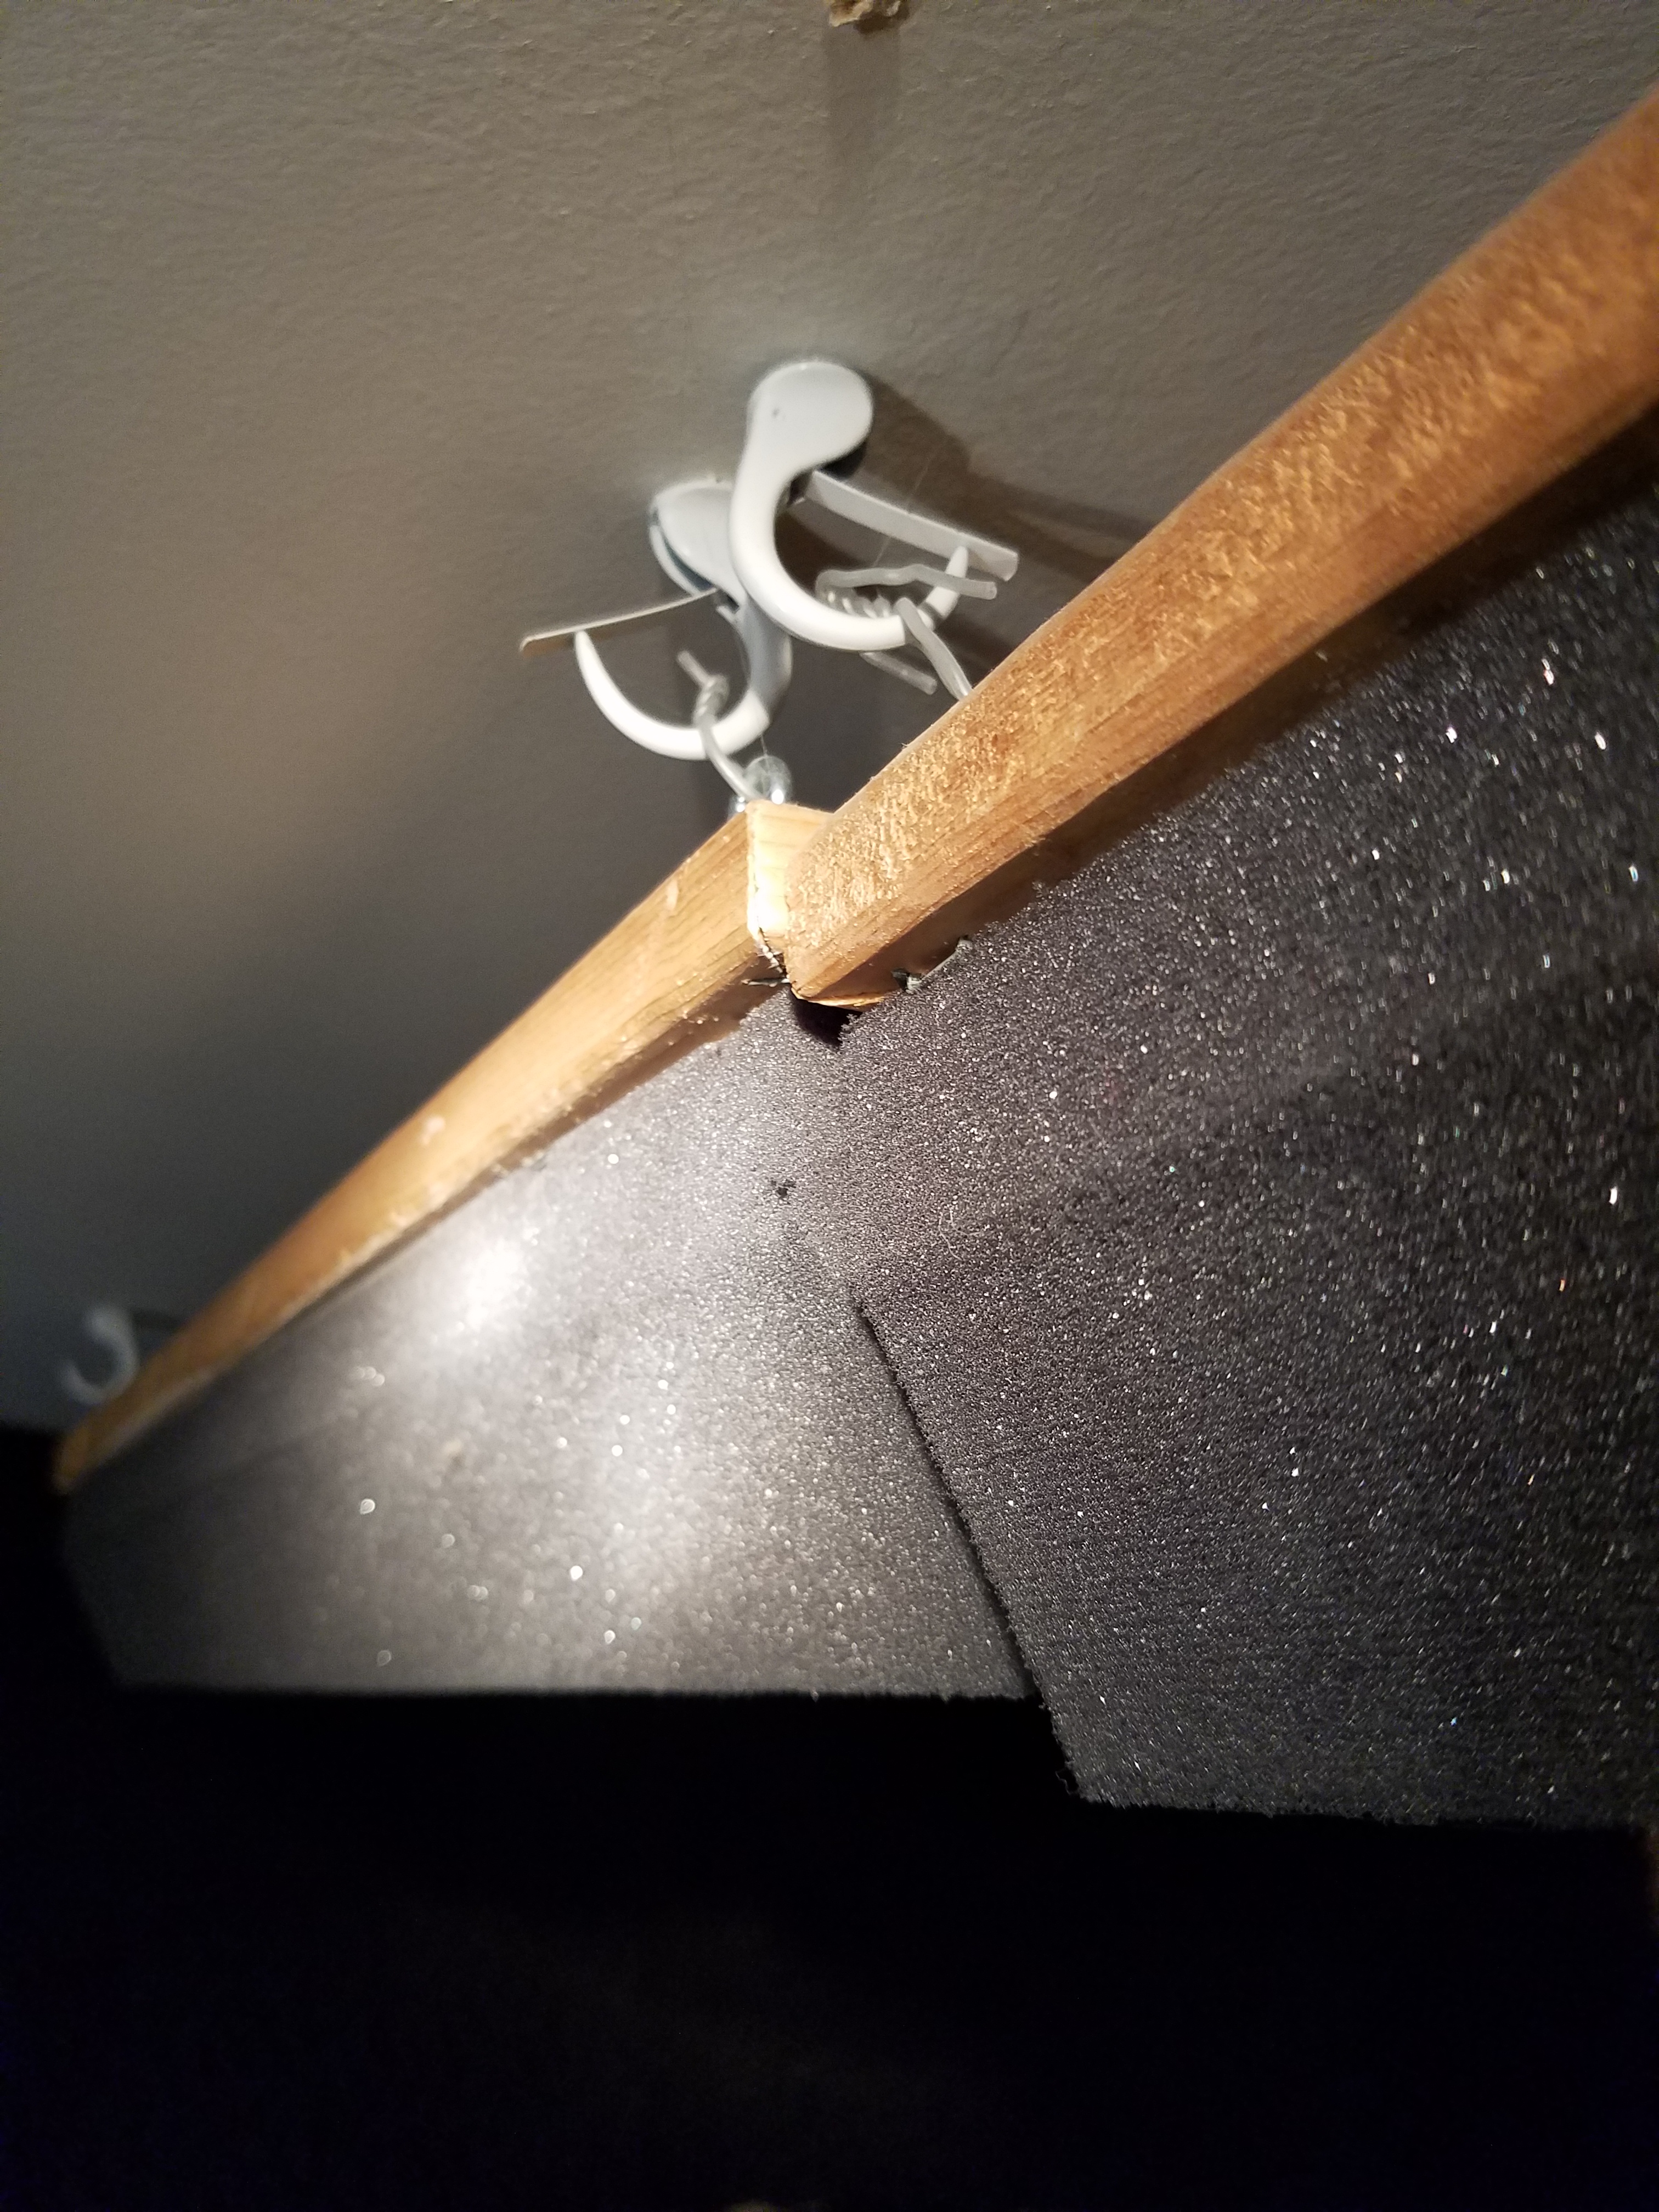
    sound foam ceiling clips
    The ceiling clips that hold it all up!

    Next, hot glue the foam to the frame and let it sit for at least a couple hours before you try to hang it. If you don’t have a hot glue gun, they’re cheap – pick one up HERE.

    Lastly, just drill four little holes in each corner to screw four metal eyelets in and you’re ready to win those first reflection frequency battles!

    As you can see in the picture below, I screwed four clip hooks into my ceiling, then used invisible hanging wire to connect them to the eyelets. Pick up that hanging wire RIGHT HERE.

    Seeing your tracks from your tube mic ROCKS!
    Seeing your tracks from your tube mic ROCKS!

    Now, as far as where you buy the foam, I guess I won the Pro Audio Lottery, because the cheapest price I can find on this foam is a company that’s right in my backyard practically: Foam ‘N’ More in Clawson, Michigan.

    I called them today and asked, just for you, the price for these. They said one wedge of those dimensions cost only 14 bucks!! That’s so much better than the prices I see online, lemme tell ya.

    Find out all the specifics on their website RIGHT HERE.  Throw ’em an email, place your order and save some big cash. Tell ’em Teaj from Seriousgas sent ya. They know me well from all the foam I’ve bought from ’em.

    The other option is to order some from UA Acoustics. Their the next cheapest option and they actually specialize in audio, unlike Foam’n’More. Their website you can peruse RIGHT HERE.

    Floored By Your Audio Prowess!

    Dog on rug
    Dog not included with studio rug!

    If you’re tracking in a home studio, there’s a good chance you have carpet on the floor. This is good. That means you don’t have to do anything else – it’ll suck up sound waveforms nicely, thank you very much.

    If, however, you have a solid wood floor, or tile, Linoleum… (basically anything besides carpet), you’ll need to find a big rug to put underneath you.

    It’ll be preferably to have one that extends a few feet forward to eliminate shoe noise, all the way to a few feet behind you to dispose of bouncing reflections from the ceiling or walls.

    The floor is the least troublesome when it comes to recording audio, but still… we want to cover all the bases. You do want the best mix on our music possible, right? You bet your sweet asymmetrical walls, you do!! Lol

    Let’s Table Those Frequencies For Now…

    One often overlooked place where frequencies like to pretend they’re on a trampoline is the table you have all your tracking & mixing gear on. It’s a solid, smooth surface, right?? Then that means you’ve got bouncing frequencies, my friend.

    Not too mention a lot of your gear sitting on the table that also has a lot of flat, smooth surfaces.

    There are two things I use to protect the hallowed ground of my mixing table:

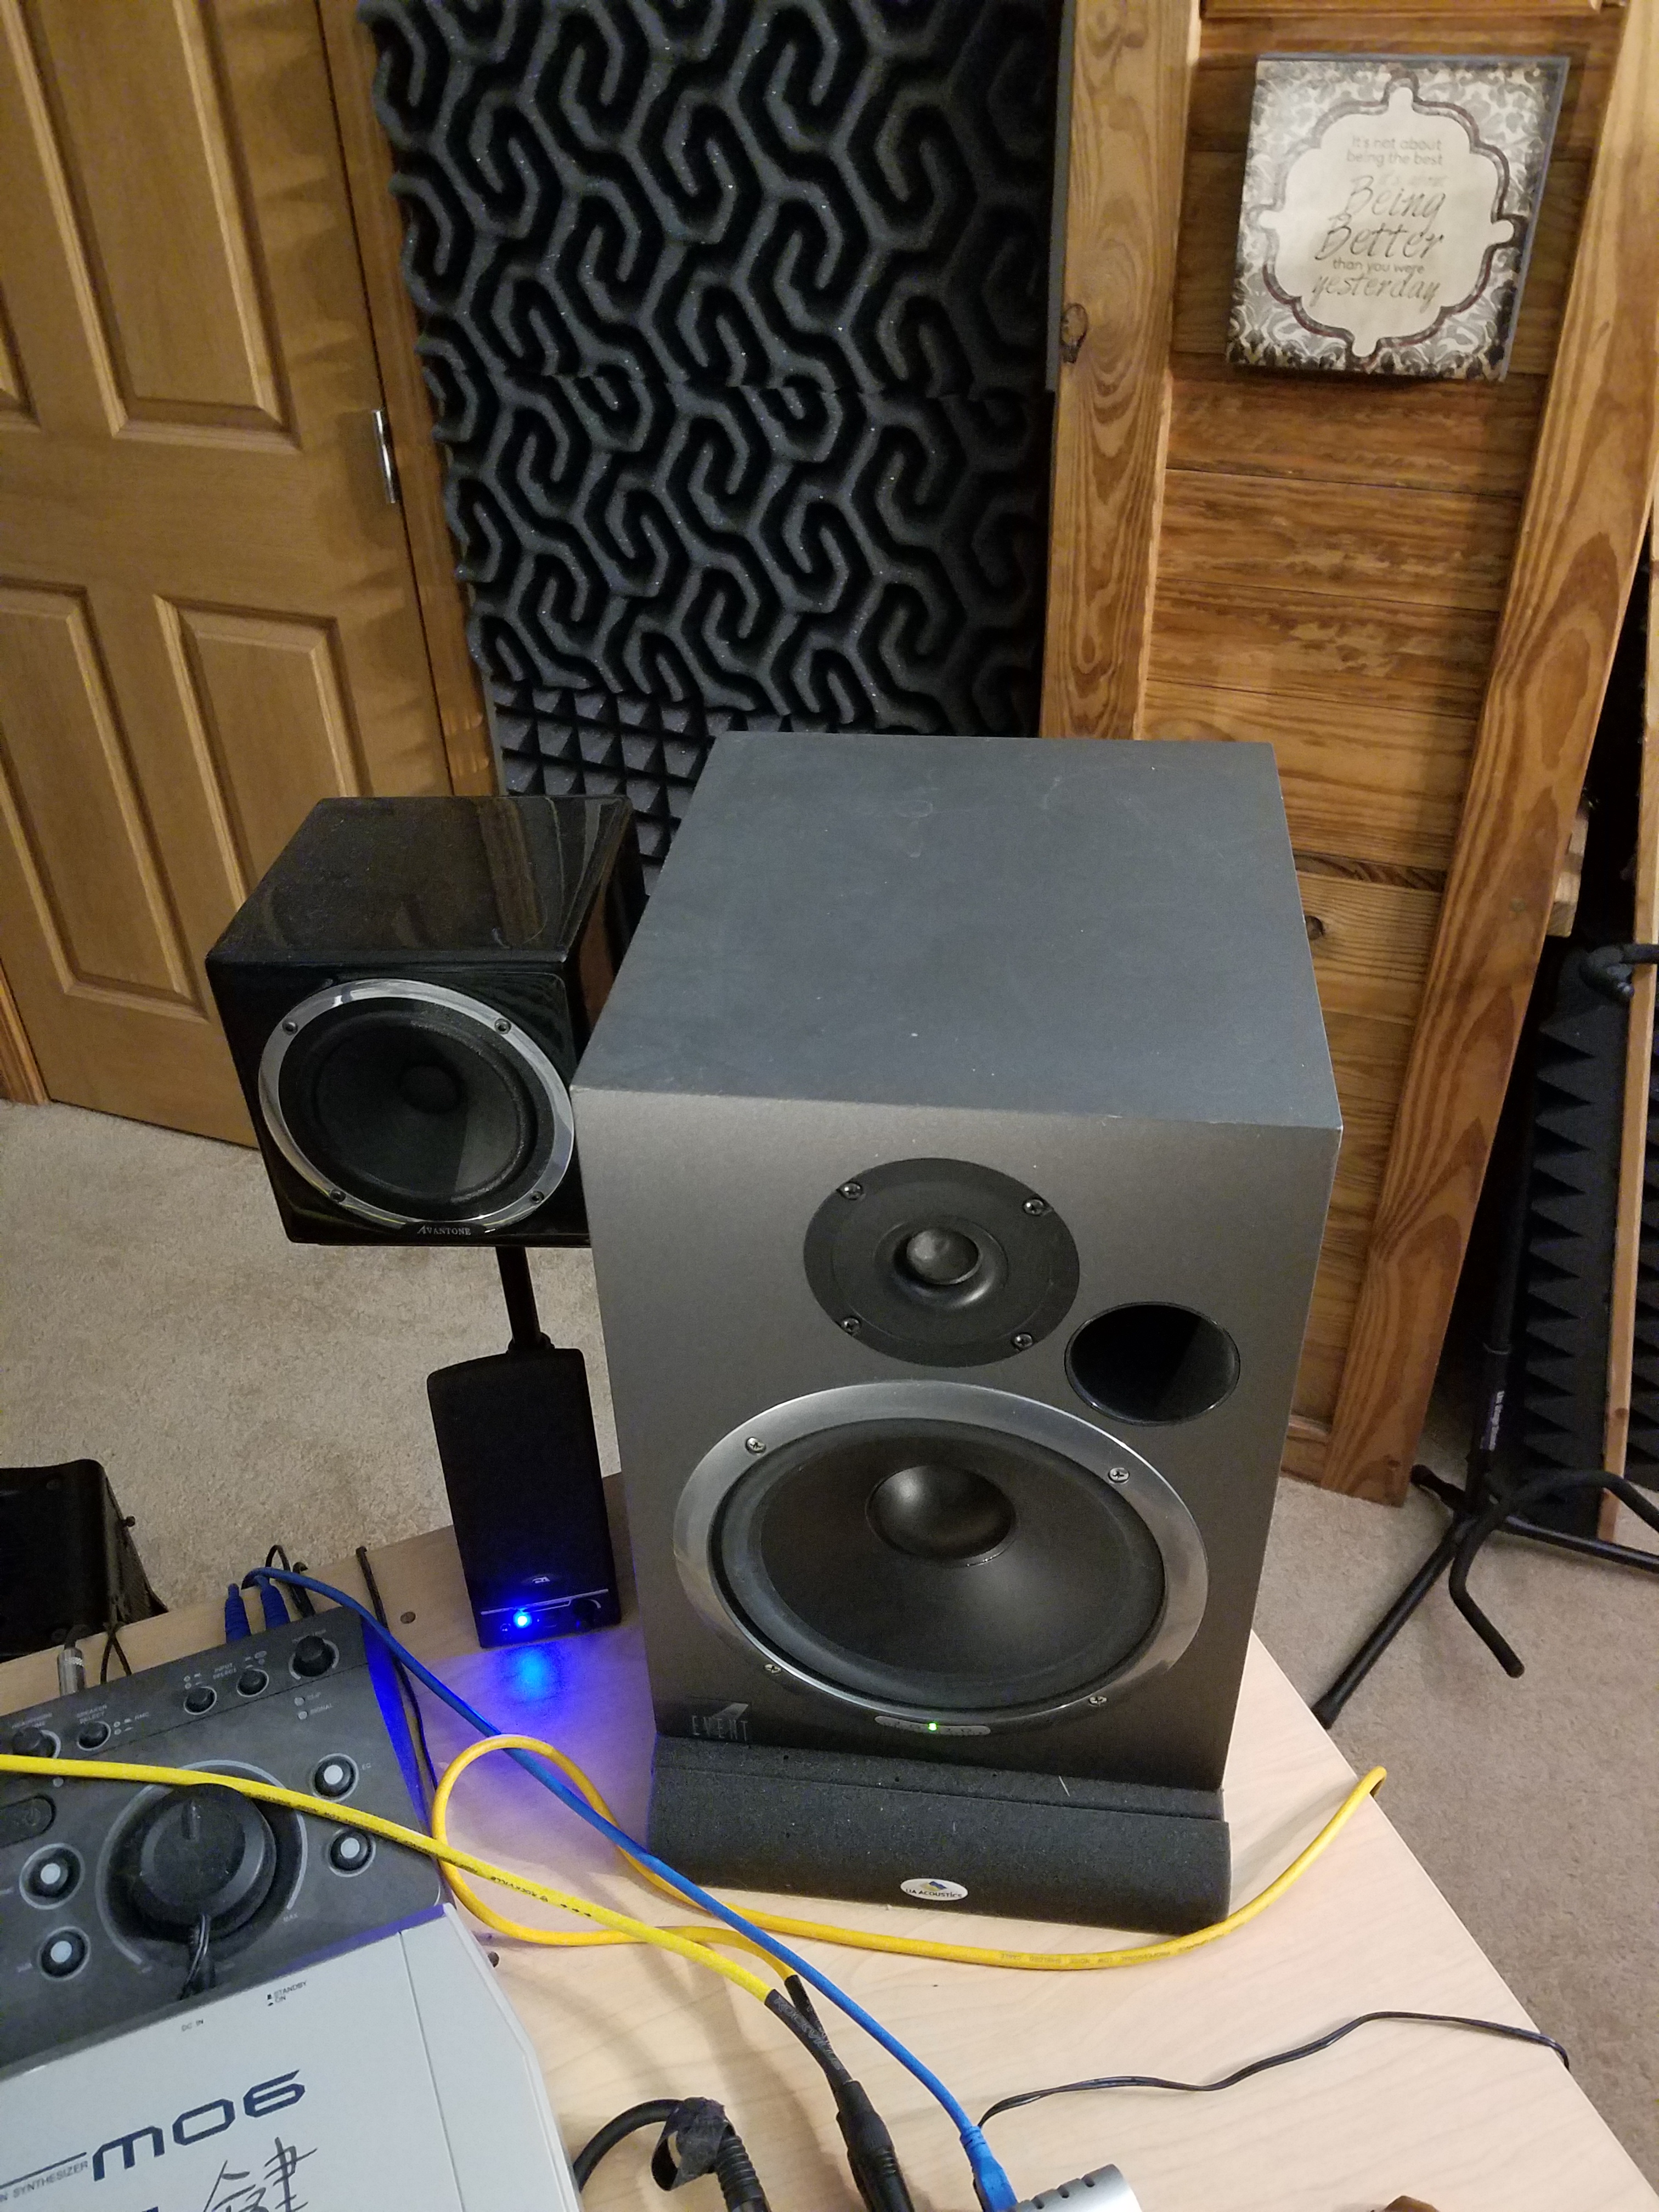
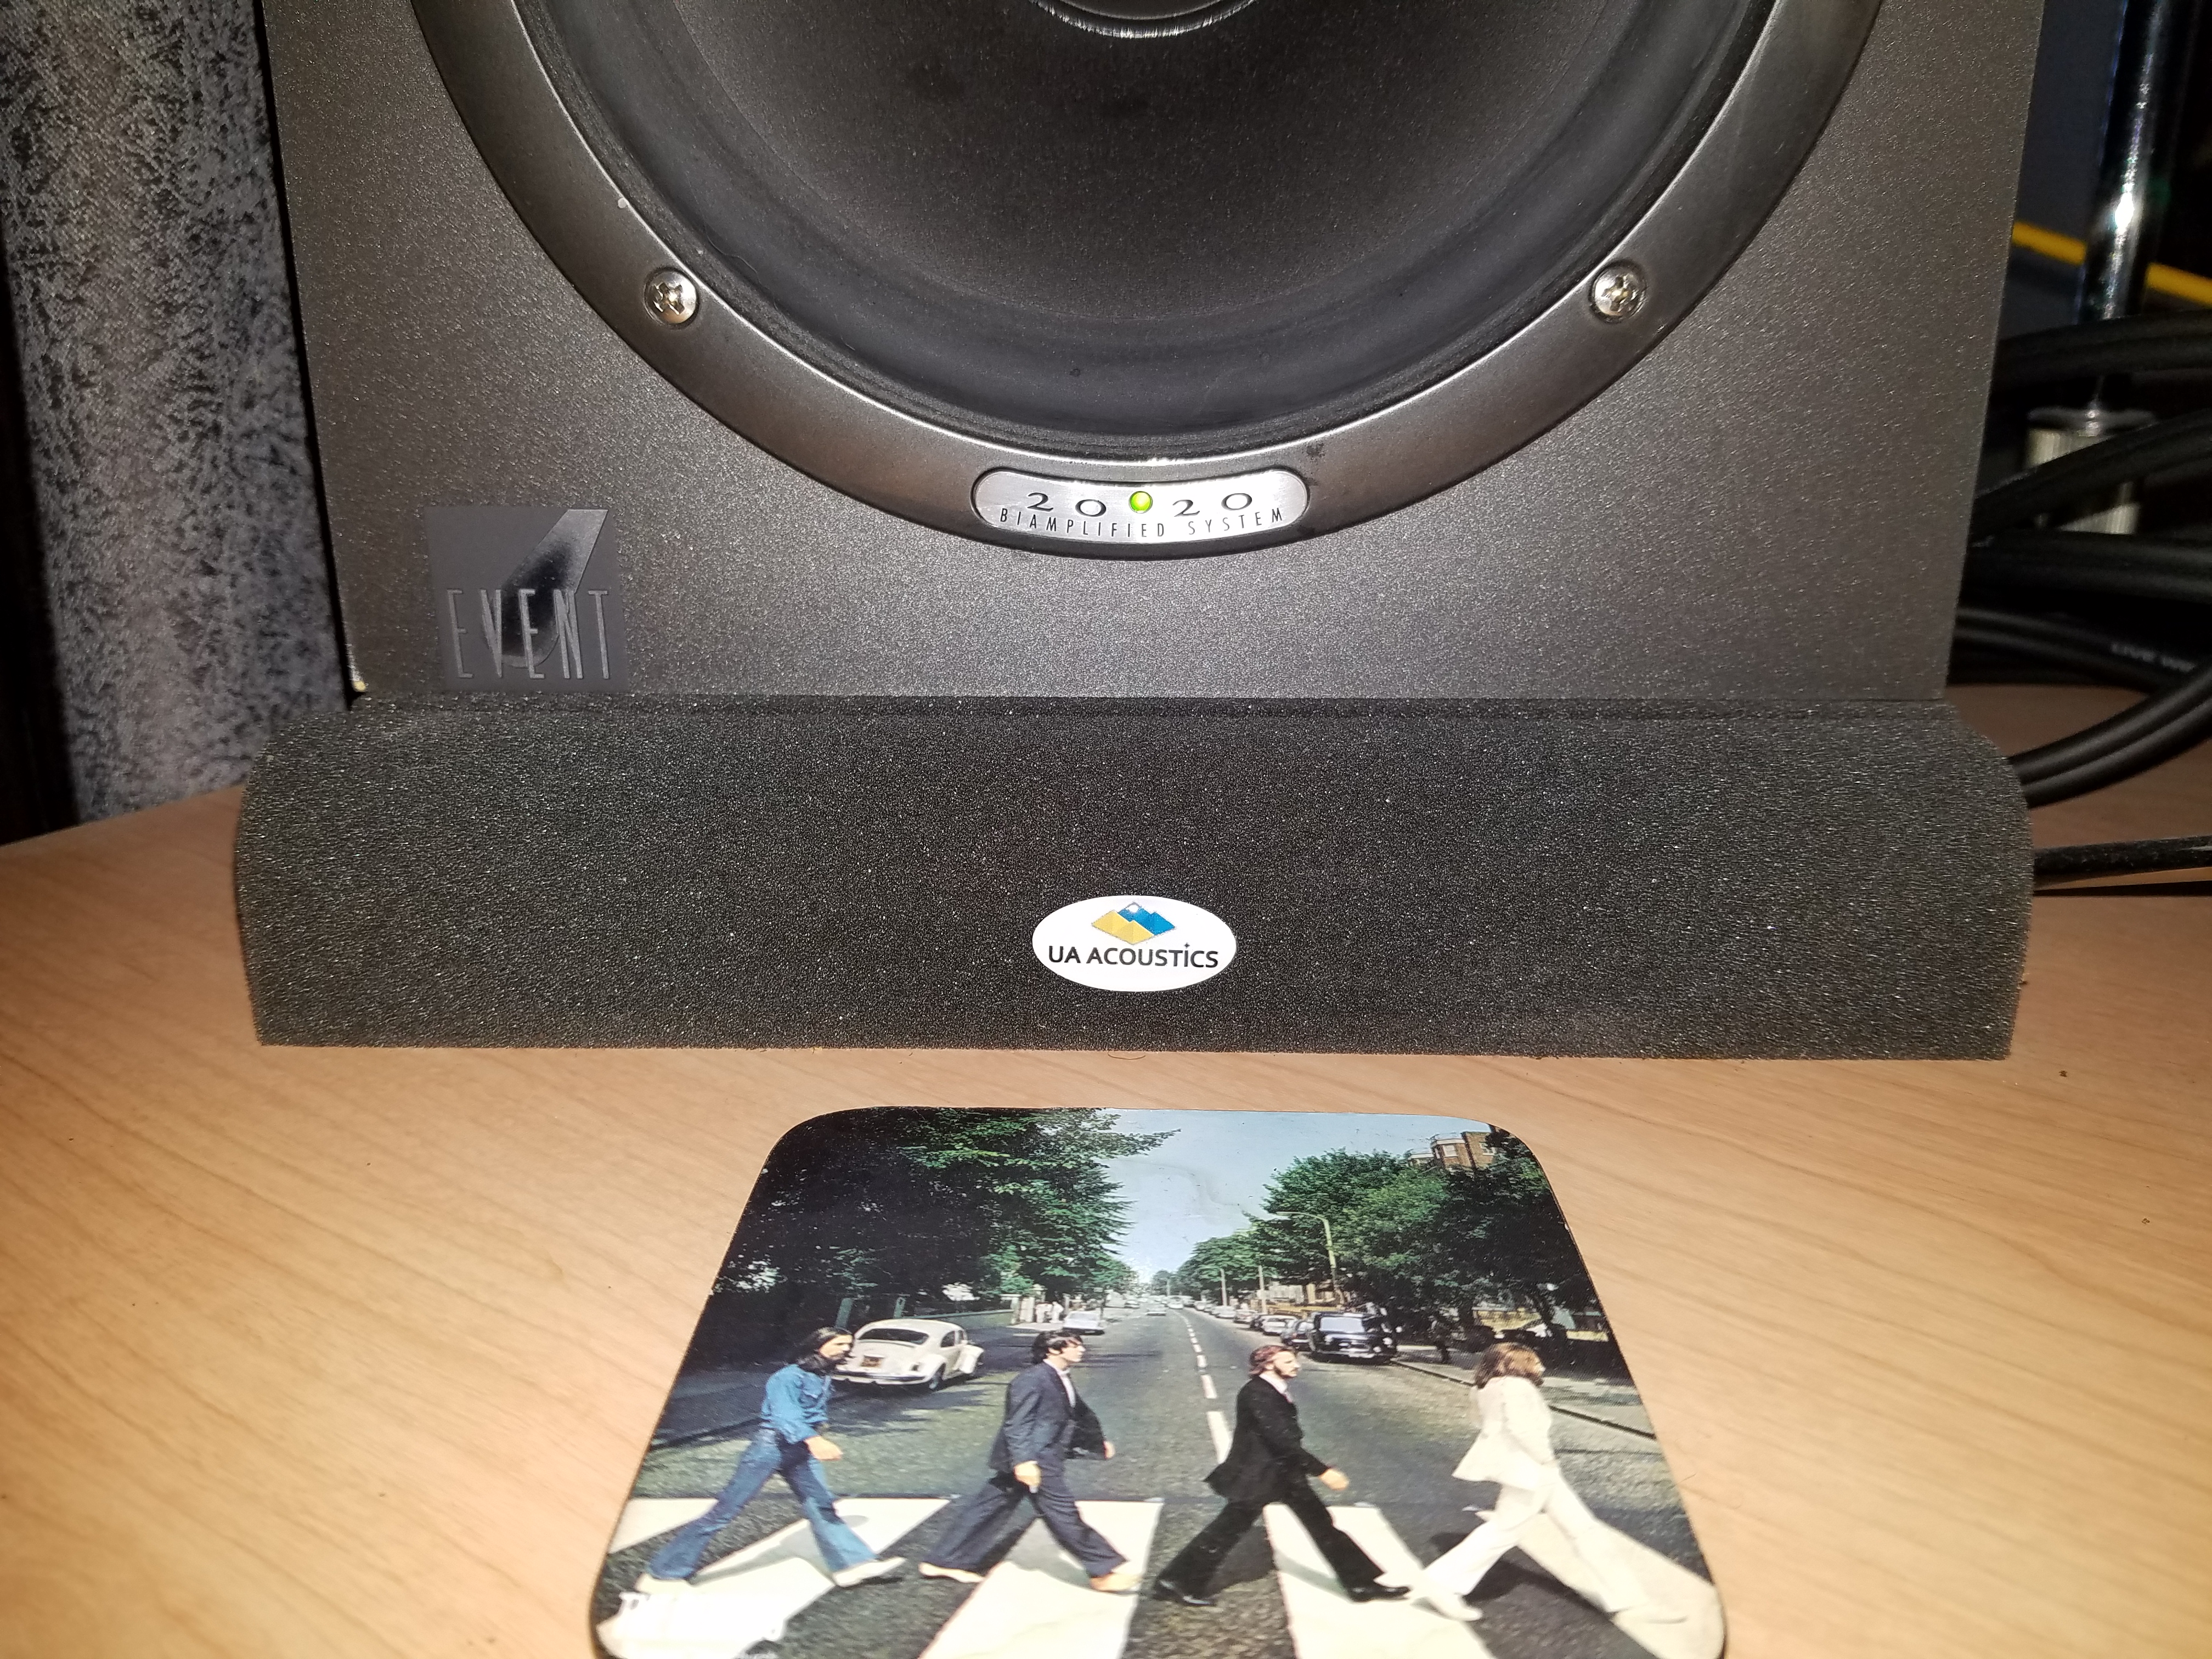
    UA speaker isolation pad
    Speaker Isolation is an important mixing ingredient!

    • Speaker Isolation Pads, and
    • Acoustic foam ON the table during mixdown

    Investing in a good set of speaker isolation pads is a wise move. Every object has a resonating frequency, and tables are no exception.

    Without iso pads, you’ll be sitting there cutting & boosting with your favorite EQ, totally oblivious to the fact that those instruments are fine – you’re just hearing EXTRA dB of them due to your table resonance!

    This, in turn, serves only to cover up certain other frequencies that you then go boost with your fader or EQ, and all the while… the mix is fine! It’s just your table messin’ with your head.

    Mixing desk with sound foam
    Mixing desk with sound isolation foam

    The bigger your table, the more pronounced these results of simple physics will be, so… do yourself a favour – isolate those speakers with pads.

    They’re inexpensive, and can help you get a great mix a lot quicker. The ones I use, which are made by UA Acoustics and do a bang-up job, you can FIND HERE.

    Lastly, if I’m sitting down to MIX at all, I actually take my keyboard off the table, and lay down a bed of acoustic foam across the table-top in front of my speakers that I’ve cut perfectly to size. This virtually eliminates all “bounce-ups” and keeps my focus where it belongs – on the ACTUAL frequencies that I recorded, not ones that are sympathetically boosted because of my table top!

    Overkill?? Not at all. Don’t we want our mixes to rival the best out there? Don’t we want to do the things that make that mixing easier, not harder?? All it takes is a little effort. Some determination. Some informed preparation…

    … and some foam.  😉

    Foam! But Not At the Mouth…SSL console in studio

    So do what it takes produce the very best results on your audio recordings – use sound absorption materials to your benefit.

    Then you too can create mixes that will play through the ages, by attenuating all that room reverberation.

    And remember, there’s always more inexpensive ways to do pretty much anything. With a little ingenuity, a little effort, a little help from your friends here at Seriousgas, you can have a bitchin’, sound-absorbin’ home studio cranking out the awesome tunes… in no time.

    Now, go… make… sounds!!

    Teaj
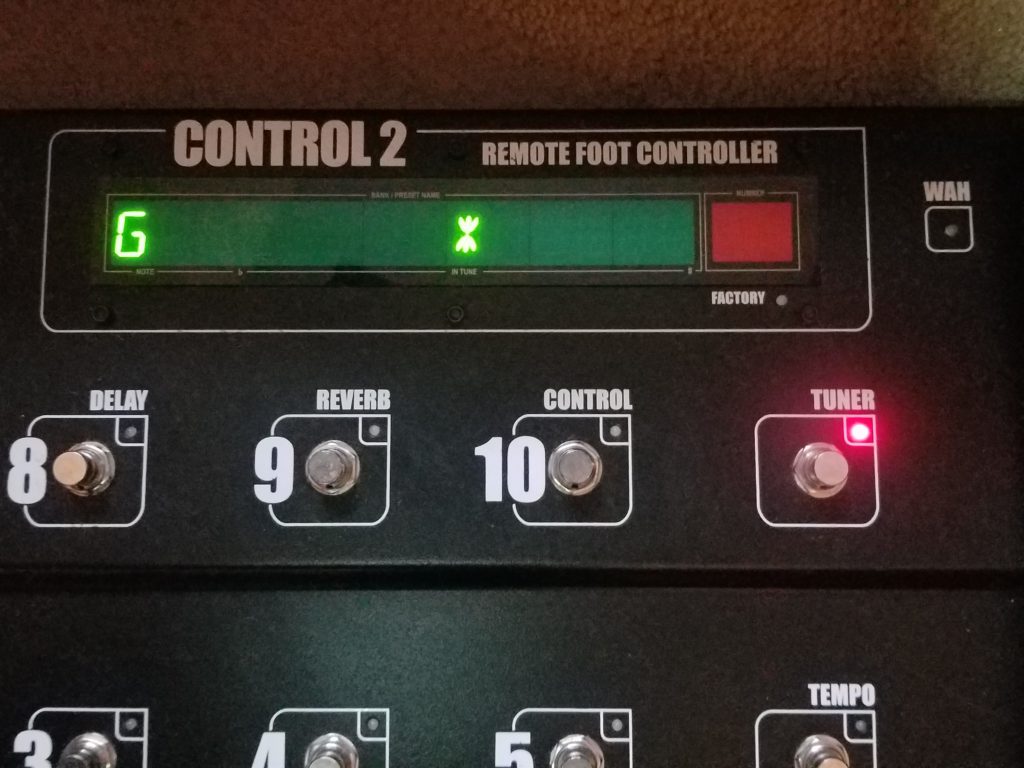
    <div>Icons made by <a href=”https://www.flaticon.com/authors/good-ware” title=”Good Ware”>Good Ware</a> from <a href=”https://www.flaticon.com/” title=”Flaticon”>www.flaticon.com</a> is licensed by <a href=”http://creativecommons.org/licenses/by/3.0/” title=”Creative Commons BY 3.0″ target=”_blank”>CC 3.0 BY</a></div>

    UAD Plug Ins – Your 7 Essential Must-Haves For The Holidays!!

    UAD logo

    Ho-ho-HO! It’s Ho-ho-Holiday SALE time!!

    At least at Universal Audio Digital, it is!

    If you’re here, there’s a good chance you already know that an Ocean Way Studio-full of UAD Plug ins are now on sale, through the end of December.

    Cool, right?! You better believe it! We serious G.A.S.-ers need all the help we can get. But maybe you’re like I was earlier this month, asking…

    “Which ones should I GET???”

    UAD plug ins
    This morning’s plug-in signal chain!

    Say no more! Say… no… MORE (nudge, nudge, wink, wink)! We’ve got ya covered. At least when it comes to plug ins, not “candid photography”.

    We’ve jumped online and heard from real musicians, just like ourselves, about what they like and what works for them.

    I HAD to do this, as I was “GEAR-ing” up for what I accomplished yesterday morning – my own plug in purchases.

    Our goal today is two-fold:

    • First, to recommend to you products that are highly esteemed in the Pro Audio marketplace, and are universally touted as the best at what they do.
    • Second, for those of you new to UAD and the plug ins game, I want to prepare you well for artistic success, such that you have all you need to finish, and release, your songs to the world, using just seven plugins.

    So let’s hit the “HOT” button, and get rockin’!!

    The Neve 1073 Preamp & EQ

    1073 plug in
    My latest UAD investment!

    The 1073 is one of the most highly-lauded and sought-after preamps in pro audio history… even to this day.

    Until today, I was using UAD’s Legacy version of this heralded preamp. It has served me well, but, well, I didn’t know what I didn’t know…

    All that changed yesterday morning when I spoke with Brandon, a tech support guy at UAD. He was quick to say that he’s not a salesperson; he’s just a Tech Support guy, but since I asked his informed opinion and he uses this stuff in his own studio, he gave me the straight-up goods.

    His strongest endorsement over all the many UAD products we discussed was for the 1073 preamp and EQ. He said that he also used the “Legacy version” at one time, but then he upgraded to this current version (the one that’s on sale right NOW), and it was the most substantial upgrade in tone and quality he’s experienced.

    He basically said there’s no comparison.

    Did I buy it??

    Does Bootsy like leopard skin??!! Lol

    Now that I have both and have engaged them side by side on guitar and vocal tracks, I can see what he means. There is a difference, and I’m glad I spent the extra. It sounds truly worth it.

    To investigate its potential for your own music, GO HERE.

    The EMT 140 Plate Reverb

    Of all the plugins I heard about months of research, this plugin was the most beloved, recommended, extolled and celebrated. I don’t think I’ve ever seen a larger consensus on any piece of pro audio gear than I have on the EMT 140.

    EMT 140 Plug-in

    Before this time, I’ve always been either a Lexicon or TC Electronics man when it comes to reverbs.

    But today, I’ve jumped onto the EMT bandwagon. So many high-end professionals ongoingly use this unit and sing its praises online… I just can’t ignore them anymore.

    Because it’s a Plate Reverb, it won’t give you room emulations. That we’ll give you in a later plugin. But it only has limitations beyond its kind. Within its genre, it’s the king in the crown!

    To see what I mean, GO HERE!

    The 1176 Compressor

    Universal Audio goes all the way back to 1958, when Bill Putnam Sr. launched the monster company that would revolutionize the recording world.

    In fact, Bill was the mastermind behind THREE pro audio companies: Universal Audio, Studio Electronics, and UREI.

    1176 Plug-in
    Three for one!!

    So many transformative products came out of those three corners of Bill’s mind, but among the greatest is certainly the 1176 compressor.

    If you’ve been recording at all seriously and haven’t heard of the 1176 compressor… well, let’s just say you need a new group of friends and colleagues!!

    Getting the UAD plug-in for the 1176 actually gets you three plugins – the Rev A, the Rev E, and the AE, each with its own sonic signature.

    Trust me when I say that this is one of the most famous pro audio units ever made, and it’s scores of big name producers this very compressor on a daily basis.

    That’s why you can’t go wrong. Sure, the 1176 is not preferred for “clarity”. It definitely brings its own color to a mix. But it’s a color that’s nearly idolized, beyond how well it actually reduces dynamics.

    To hear its triumphant sheen, CLICK HERE.

    The SPL Transient Designer

    In 2010, esteemed producer Alan Parsons released his “Art and Science of Sound Recording” DVDs. For anyone wanting a glimpse into how Alan does what he does best (which is make the best-sounding records in history), this DVD series gives you a front row seat.

    I invested in this product a few years back, to my happiness and benefit. I wouldn’t see them for anything and off and go back and re-watch them, for tips, tricks and inspiration. To investigate that bag of goodies, GO HERE!

    spl Transient Designer plugin

    It was on these DVDs that I got to witness Simon Phillips, the legendary session percussionist, playing drums for Alan. He goes into great detail about how he recorded his drums to make them sound so good.

    Without giving everything away, I’ll just say that the SPL Transient Designer was a crucial link in his signal chain.

    It’s so cool what this thing does, and what’s even cooler is there’s very few products that have this same combination of controls and tone-shaping tools.

    In a nutshell, this software lets you shape and manipulate the sustain and the attack of your signal sources. Nothing else, just the attack and sustain.

    For drums, this is an incredible, no-brainer godsend. I totally get why some of the finest engineers in the world have called it a “secret weapon” tool. The flexibility it affords you when mixing drums is unparalleled.

    Yea… I love this thing!!

    For an insider’s video, listen to it RIGHT HERE!

    Antares AutotuneAntares Autotune plug in

    Ever since Cher first “Cher”-ed her robot voice love in her song “Believe” in 1998, the world has known what Autotune is.

    Since then, this plugin has been put on everything. So much so that I believe that the common person’s perception of good pitch has improved dramatically, because almost all the vocals they hear on the radio now are so perfectly in tune.

    Do you ever listen to Oldies stations?? Have you noticed that old songs that used to not bother you at all, now have vocals that sounds so sharp or flat you can’t stand it?! I’ve definitely found that to be true.

    I won’t mention any songs by name, but man some of those 60s artists… they were WAY off!

    Antares plug in closeup
    Assign your vocal range and start trackin’!

    Suffice it to say that even if you don’t need Autotune for tracking (I always track without it), it’s still good to have for mixdown.

    Even if your voice doesn’t sound “off”, may want to apply a little Autotune just to get it to sound more like what the radio asking for, which these days… is vocal perfection.

    Of course, it goes without saying that if you DON’T sing well, you’re reeeeally gonna need it!

    Get all your T-Pain glory by GOING HERE.

    Lexicon 480L ReverbLexicon 480L plug in

    The 480L by Lexicon is my second “must have” Reverb choice.

    I remember this Lexicon device sitting to the left of our huge recording console at Bill Schnee Studios in North Hollywood, California, where are used to work.

    Back then it looked so futuristic and New World-ish. But even better, its reverbs spread… like buttuh, baby!!

    My favorite ‘verbs are still from Lexicon. What can I say? Old habits die hard.

    It’ll pretty much give you all the algorithms you’ll need to sound amazing, and swim in rich, lush ambiance that would have even Whitney or Marvin smiling and nodding.

    Do yourself a favor and go here to GET A ROOM!    lol

    The Precision Mastering Bundle

    The reason I’m including this bundle is so that you can have all that you need to complete an album, or even just a song, professionally with just the seven plugins listed here.

    Are there good reasons to buy any of the other plugins??

    precision mastering plug in

    Of COURSE! Why do you think Gear Acquisition Syndrome is so rampant across the face of our planet?? There’s ALWAYS a good reason for more gear!! 😉

    But if you’re a musician with limited resources to some degree ( most of us are), you’ll appreciate that you won’t need anything else to put something out that recognized as “well done”.

    Until this year, I’ve always sent my albums out to a mastering engineer for the important last step of album-making.

    For my next one, however, I’m giving up to do it myself, and this Precision Mastering Bundle will guide me through my first mastering journey.

    These days software is becoming more and more intuitive towards our audio needs. I even viewed this year, at Sweetwater sound “Gearfest”, “track and mastering assistant” software from iZotope that can automatically make mixing and mastering decisions for you if you’re not scared of giving those adjustments over to a ROBOT!!   Lol

    Izotope “Neutron” A.I. in action. The red histogram at the top indicates frequency “collisions”.

    When it’s software Avatar is designed to look like C-3PO, I’m in!!

    For now though, who has all you need to finish up your tunes. There’s plenty of free training on YouTube that will bring you up to speed, so don’t worry – you can do this!

    If you have the plugins, that is. 😉

    To go all Jedi and become a “Master”, CLICK HERE.

    Brave New World?!

    If you don’t already own a universal audio hardware interface, getting one this month means Santa’s gonna drop something extra special down your stocking and there will suddenly be a whole new world of endless audio carrots dangling in front of your face every day.

    Be brave, soldier. Be brave.

    UAD Twin free plug ins!

    So until December 31st, if you buy the Apollo twin Duo, or USB, you get some really cool plugins thrown in for free!:

    • The Neve 1073 preamp and EQ collection
    • The Oxide Tape Recorder
    • The Fender ’55 Tweed Deluxe amp

    fender 55 tweed plugin
    The Fender ’55 Tweed plugin

    Since I now have and use the Neve 1073 and the Fender Tweed, and can vouch that they both are the bomb, for different reasons.

    The Fender ’55 amp has an obvious retro kind of tone, so you wouldn’t use it for everything. But if you’re playing old school R&B, country, bluegrass, or if you want your chicken pickin’ or palm-muted staccato riffs to sound amazing (which is why I generally engage it), stick this character-crammed Deluxe into your signal chain.

    You’ll be grinnin’ in no time.  😉

    The Oxide Tape Recorder I haven’t bought, because I already own Slate’s “Virtual Tape Machine“, which essentially does the same processing.

    Oxide Tape plugin
    The Oxide Tape Recorder plug-in

    What I will say is that I absolutely LOVE what Slate’s plugin does to my final mixes, so if UAD’s version is even in the same ballpark (which I can’t imagine it wouldn’t be), I know you’re gonna dig it. It just simply makes everything sound… better.

    As for the Neve 1073, I’ve already told you above how awesome that plug-in is – nothin’ more to say!

    Now, you could buy the cheaper Apollo Twin “Solo”, or the cheaper-still UA “Arrow” interface, and with those you’ll get the “Legacy 1073” thrown in for free this month ’til December 31st.

    But knowing what I know from Brandon, and from other Forum posts that I’ve read online, I’d save a bit more money and get at least the “Duo” interface. Not only do you get more free plugins (3 total, or 5 for the quad!), but higher quality to boot.

    Sounds like a win-win, doesn’t it?!

    To glean a lot of info from the post I wrote specifically about the Apollo Twin interface, and get those cool plug ins, CLICK HERE.

    Or just pick your store below and hatch your hit music factory in one fell swoop!!

    click map

    Sam Ash Amazon Musician's Friend

    Unpluggin’ for Now!

    Plug ins Christmas with SANTA CARTOONEDThe last thing I’ll say is this: these seven “best plugins” are not just my opinion – I actually have the sanction of Brandon from UAD on all of these. Here’s what he said when I told him of my choices:

    “I agree! All these are good first choices. You’ve got a little bit of everything that would be needed to record, mix, and make LOUD.  🙂 “

    Now, if the man who has EVERY plug in you could possibly get from UAD, and uses them to record, says that…

    … what are we waiting for?  😉

    The sale ends December 31st, and the prices will definitely go up substantially, so don’t dilly-dally.  ‘-)

    So if you’ve been wondering which UAD products you should spend your hard-earned cash on, we hope this post has delightfully enlightened you.

    May angelic tone rise up to meet you! And may the wind at your back never be your brother after eating Taco Bell!

    Here’s to real G.A.S. – the gift that keeps on giving.   Lol

    Now go… make… (UAD) sounds!

    Teaj
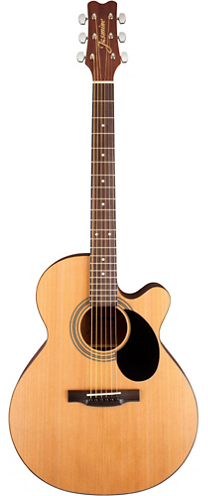
    Teaj in the storm-fields!