What Is A Partscaster? – An Axe That’s Truly… YOU!!

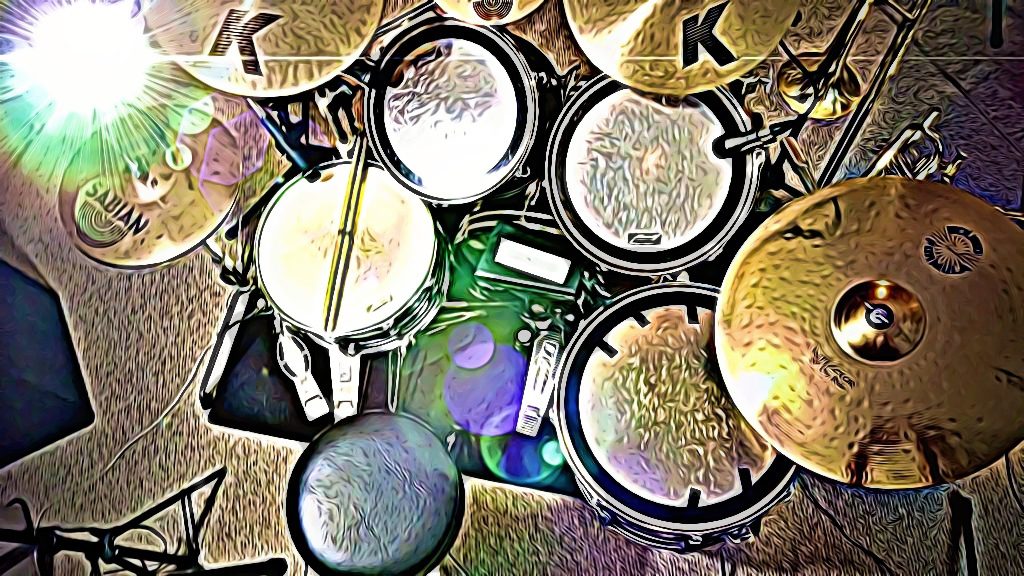
I love the Internet, don’t you?!

Not only can you find INSTANTLY information on whatever your muse is wooing you towards, you can truly, if you want, get educated on a myriad of interests, no matter how offbeat or eccentric.

Take today’s post, for example: “What is a Partscaster??” is a question I had never asked until just a couple years ago.

But after some rampant Googling, a little G.A.S.-y drooling, and ramping up the ol’ studio budget, I was led to where I am today – being the proud owner of a one-of-a-kind Strat guitar that I really dig.

If you’ve never heard the term “Partscaster” before, or you’ve stumbled upon the term but want more info on it… cool. You’re in the right place to expand your brain AND your tonal palette!

Frankenstein LIVES!!

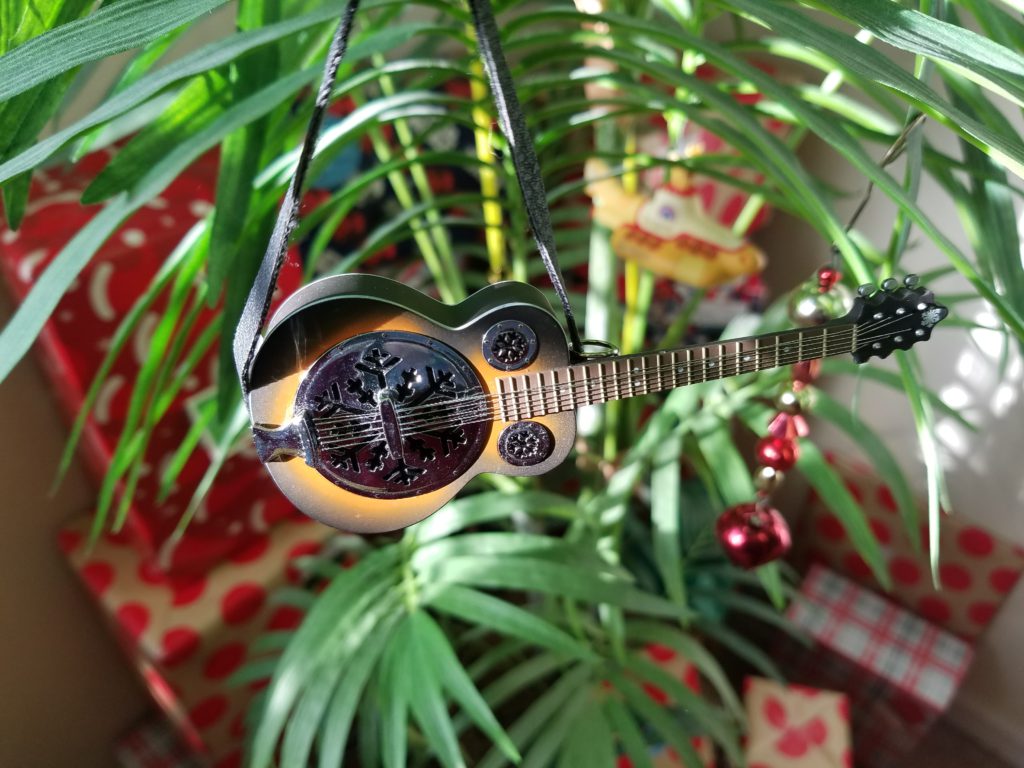
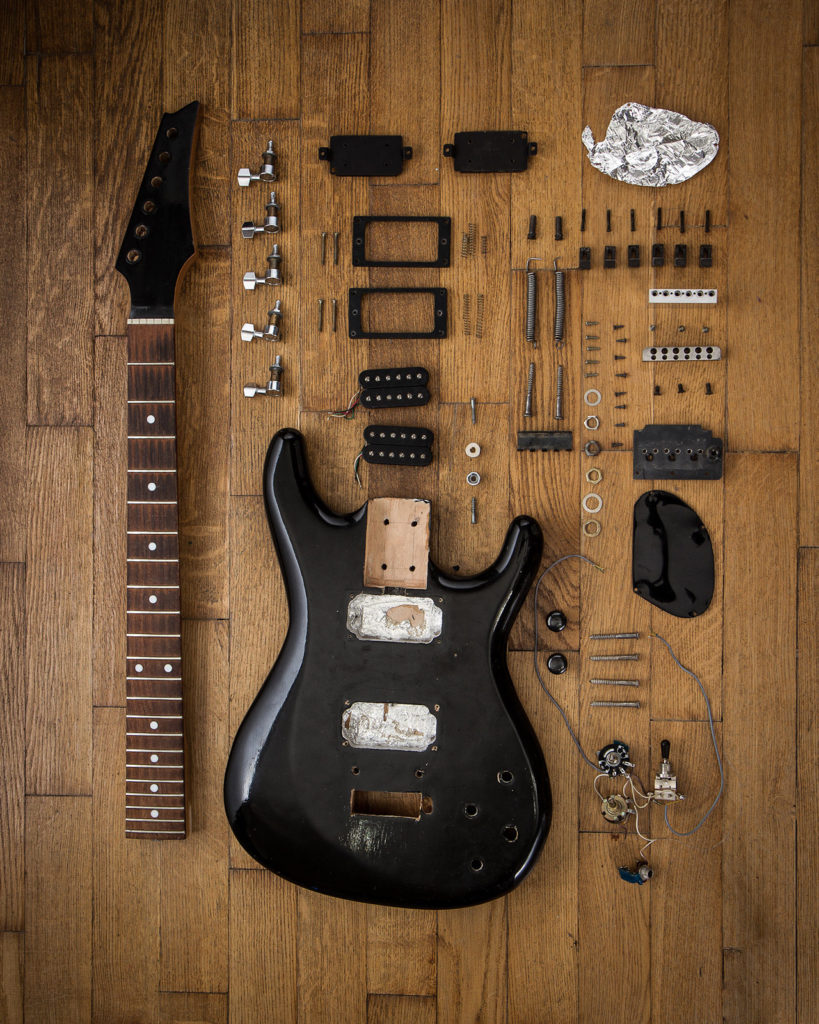
In a nutshell, a Partscaster is any guitar put together with parts, rather than one that came stock, all in one piece, from a guitar manufacturer.

The majority of players, when they want a new guitar, just go to a nearby music store and play what’s on the wall, questing for that “Holy Grail” of tone that is unique to their ears alone.

But those guitars have one sound, predetermined by the company that makes them. All models tend to sound the same. That’s what the company, and usually the consumer too, wants. It’s dependability. It’s quality control. It’s consistency.

But, if you’re like me, the sound of stock guitars is a little constricting after a while. There comes a time when you want a sound that’s unique – one that you can’t pick off the wall at Guitar Center.

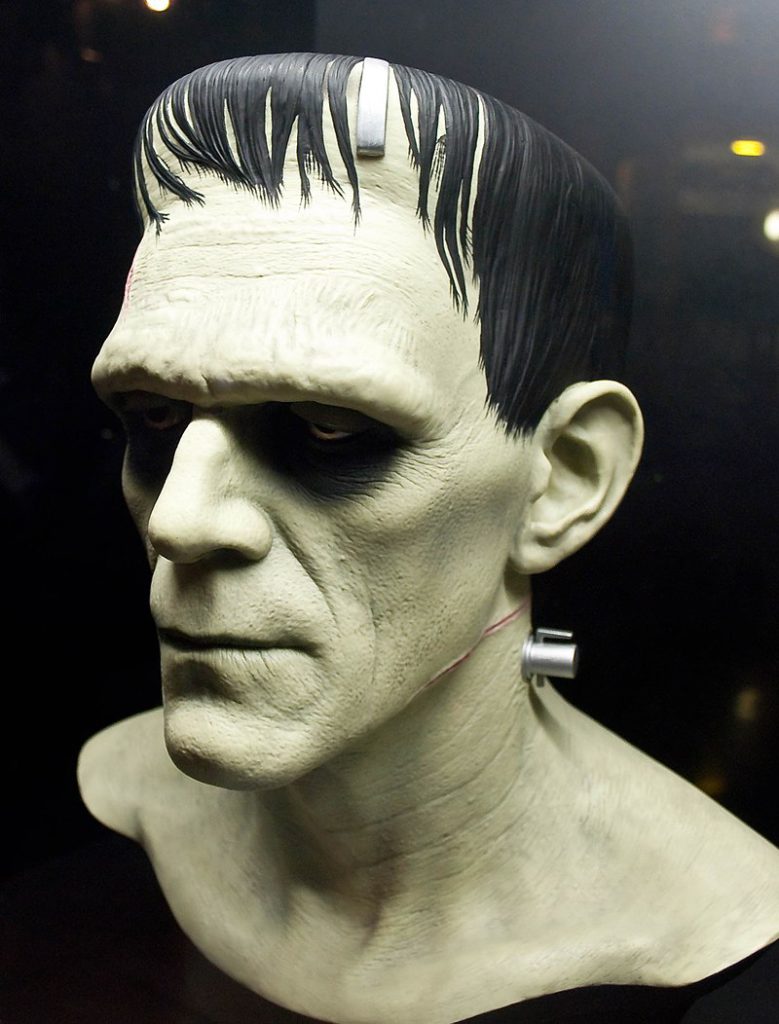
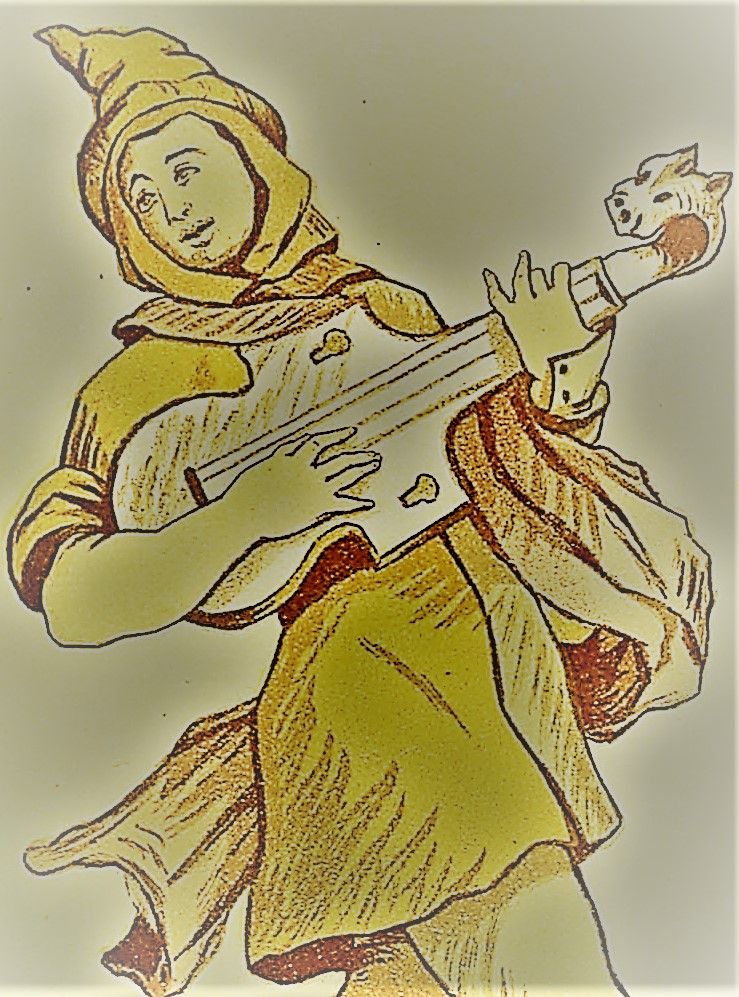
It’s like Frankenstein’s monster: a creature consisting of disparate parts, from varied corpses and lab-harvested organs.

Unforgettable, right?? A lot of Partscaster are just as striking and attention-getting.

When you want your OWN brand of electric lightning, throw the switch on a Partscaster!

“LIFE! DO YOU HEAR ME? GIVE MY CREATION… LIFE!!”

She’s Got the Look!

One of the best reasons to build your own guitar creation is that you can put together combinations of wood, electronics and hardware that, to YOU, look the best you’ve ever seen.

Heck, some build one without even caring how it sounds – they just know it’s going to be sweet eye candy for their adoring audiences everywhere they go!

Want a Telecaster that has creme binding on the front AND the back?? No problemo.

Like your Strat Alder wood body, but wish it had gold pickups instead of chrome?? A simple swap and Bob’s your uncle.

Happen to play on a Pau Ferro wood fretboard and now want all your guitars to have that kind of neck??! Let the postman deliver your dream to your door!

We all have different ideas of what a “gorgeous guitar” looks like… and that’s okay. To each our own, right?!

Crafting your own Partscaster go to be particular about every detail, such that, to you, it looks absolutely… fantastic!!

Mod vs. Caster

So what’s the difference between “mod”-ing your guitar and building a Partscaster??

Well, it kinda depends on who you ask. There are divergent opinions all over the internet.

There does seem to be a slight consensus though, and that is if you’re changing any of the WOOD elements on your guitar, then it’s becoming a Partscaster.

MOD-ing it. (photo: TT Zop Parts)

If you’re only swapping out electronics or hardware, most consider that a simple “mod“. This kind of change-up won’t alter how your guitar feels, or resonates, much at all. It’ll just affect tone.

If you alter the wood in your guitar though, especially the body, you’ll notice a BIG difference in feel, and sustain.

Nomenclature aside, what really matters is do you want to make your guitar distinctly your own or not? If so, changing it up with parts from another company might just rev up your ride, yo!

Why “-caster”??

If constructing guitars were easy, then everybody would do it. But it does rather take some skill and precision to get it right…

… if you want the intonation not to suck!

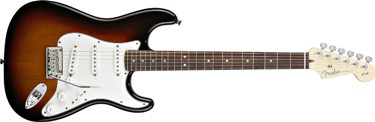
Most home-grown guitars tend to be Fender Stratocaster or Telecaster styles. Is there a reason??

The Stratocaster

Yes, and it comes down to the fact that not everybody is a carpenter or luthier! Some guitars are easier to assemble than others.

Best example? Strats and Teles. They’re the easiest guitars to change necks on since they’re bolted on. It’s much harder to swap out a “set neck” that you find on a Gibson SG or LP style guitar.

The Telecaster (photo: Matt Easonderivati)

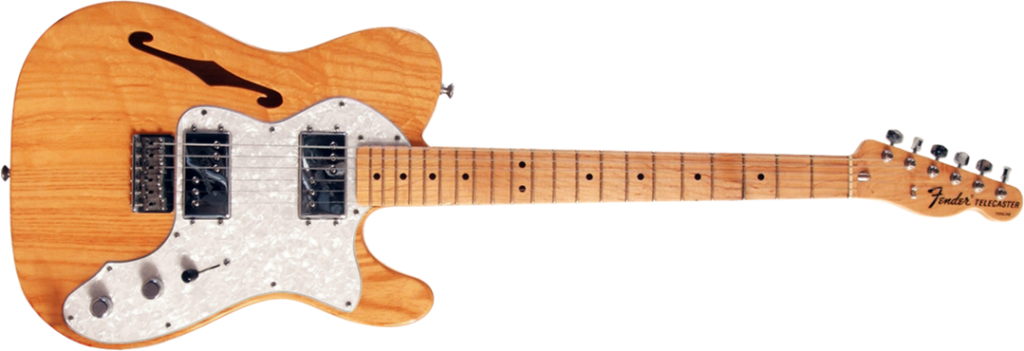
The Fender styles cut you more slack; they’re not so finicky, like some other guitars with complex engineering and fitting that demand you go to Guitar Design school just to know how to set the neck properly.

Not that there even IS something called “Guitar Design School”. But there SHOULD be. Lol

Regardless, Fender has got to love it that they get free advertising whenever somebody puts their own guitar together. We don’t think of Gibson, after all, when we hear the term “Partscaster”.

And I’ve never heard anyone yet say they want to build a “PartsPaul”. 😉

But is it CHEAPER??

Yes!!

And no!

Here’s why: because the choosing of supplies for your Partscaster is totally up to you, the budget can from “very cheap” to “vastly expensive”! It’s your call.

Want to swap out your pickups? Well then, you could buy THIS HUMBUCKER for around fifty bucks.

Or, instead, invest in THIS HUMBUCKER, which is, uh… a bit more, shall we say. 😮

Or what about guitar necks?? There’s THIS NECK, which won’t drain your funds much at all.

But there’s also THIS NECK, which most certainly will!!

So you can see, the budget for a Partscaster can be pretty much anywhere you want it to be. Choose the total based on your own budget, and order away.

If it’s your first time trying this though, you might want to keep the cost down.

Ya know… in case you screw it up ROYALLY!! Lol

Warranty?? We Don’t Need no Stinkin’ Warranty!

It might go without saying, but I do have to mention that if you put your own guitar together, there’s no warranty, no back-up plan, no service department it’s going to have your back if you botch the Construction.

The coolest thing about a Partscaster is also its greatest drawback: YOU’RE putting it together! How it turns out is totally on you, bud.

Still, if you’ve got the time and a little money… maybe you’ve even got some old guitar parts lying around that are doing absolutely nothing except gathering dust…

… then you might as well go for it! Even if you mess up, who cares?! It won’t be a big loss if you haven’t spent much.

And you’ve learned something along the way about guitar construction. It’s always good to know more about your axe, and one day, who knows… you can always try again.

Stick Your Neck Out!

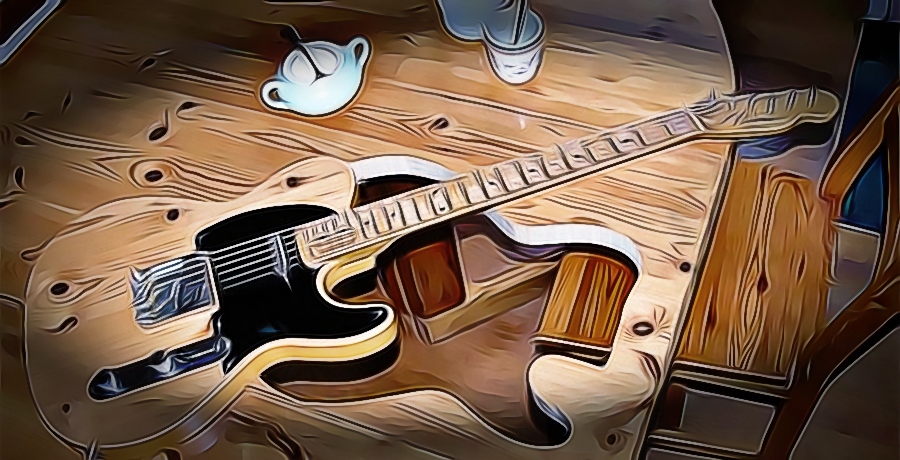
One of the simplest ways to create a Partscaster is to swap the neck out on one of your guitars.

I played a brand new Telecaster this past year, and did a review on it in THIS ARTICLE. I absolutely hated the neck. It was HUUUGE! Like a baseball bat.

baseball  bat guitar

But it sounded good. So, if I had kept that guitar (I didn’t), one thing was certain: I would have swapped the neck out on it as soon as possible.

I’m partial to Stratocaster necks, since I’ve played them for years. A friend of mine here in town, for example, has a beautiful Pau Ferro Strat neck for sale that would be just the ticket.

Pau Ferro guitar neck

If you do this though, just make sure you check the neck measurements to make sure you’re getting the right size for your guitar body. There are different styles, and they won’t all fit together.

Research first. Then pull the trigger. You’ll be a much happier shredder. 😉

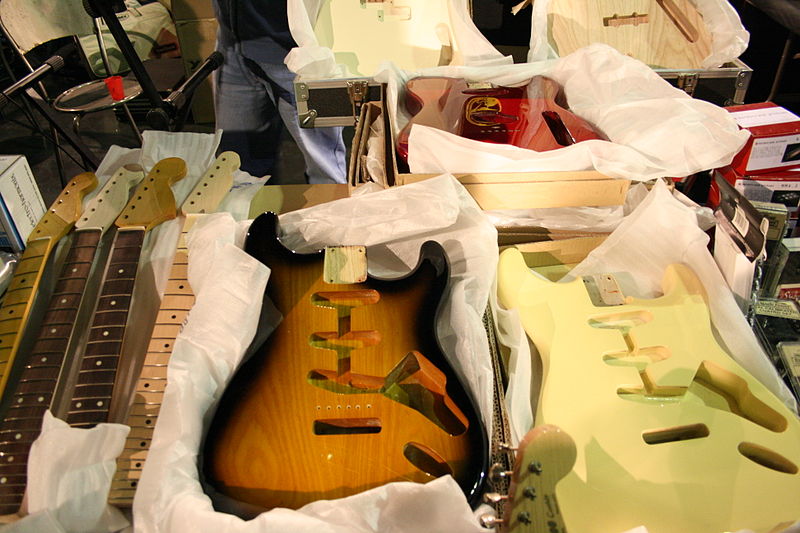
You Gotta Be KIT-in’ Me?!

If you’ve got a little time on your hands, but you still have zero carpentry skills, you might want to consider buying a guitar kit.

With this approach, you are sent all the pieces of a guitar but none are put together. Usually, none of them have been painted or glossed at all either.

So, it’ll take a lot of work on your part before that finished axe is ready to be played. But, if you’re up for the challenge, “rolling your own” can bring a lot of satisfaction. Every time you strap that “job well done” on it’ll bring quite a smile to your face.

And if you do it right… to the faces of OTHERS too. 😉

One added benefit of putting the whole shebang together is that it teaches you about guitar construction in a way no Internet post ever could. But it’s beneficial not only from the standpoint of education…

Just think how, in the future, should you ever want to add, subtract, repair or swap out anything on your axe, how much more well-informed you’ll be on how to do it?!

And if you’re well-informed, you’ll have more confidence. And with more knowledge and confidence… comes great skill!

So, chances are, your final product will not only work, it’ll be bangin’! That’s worth it’s weight in amps, right there!! 😉

The Ultimate Itch Solution

If you’re really itching to build your own guitar, and want to go the WHOLE way…

… well, you’re a lot braver than me! But it can be done; you can build a whole guitar from scratch. And from any wood you want. Dining room table?? Why not?! Just clear it with the REST of your family first. 😉

This will necessitate you having some serious carpentry skills, not to mention some serious carpentry tools!

Shaping the contours of the guitar body, for example, is a mean feat, and extremely difficult to pull off for the inexperienced hand.

Still, if that dream is rousing up inside you and you believe you have the wherewithal to accomplish it, GO for it!

Brian May’s handmade “Red Special”

Don’t think you have to do it alone either. Take a construction cue from Brian May, rockin’ axe genius for Queen: he built his legendary Red Special guitar with his Dad!

Brian was only 16 when they started the build together. It’s not hard to imagine him thinking “Gee, I could probably use a little help with this.”

Because of that, for the last four decades Brian has been able to play a completely “personalized to his own tastes” guitar which has burned its tone into our collective psyche via Queen’s soundtrack to our lives.

“Bohemian Rhapsody”, anyone?!

Probably best of all, the memory of him and his late father building it together must be precious to him. Every time he plays it he must think, “Miss you, Dad.”

That rocks. 🙂

Write on Your Head!!

One of the most fun parts of building your own guitar is applying your own custom headstock insignia to the finished product.

There are some who just slap an authentic Fender logo on the headstock when they finish a build. To me, that’s missing out on a great opportunity for personal expression, not to mention creating possible confusion in the future about whether the guitar is truly a factory Fender instrument or not.

So get creative! It’s an awesome confidence booster to get on stage and rock with a guitar that has your name on it, or your signature, or your favorite catch-phrase.

You can use your favorite font. Draw up your own personalized graphic. Heck, draw a CARTOON of yourself and slap it on the darn thing! Your brain-sky’s the limit. And your fans?? They LOVE that kind of personal touch!

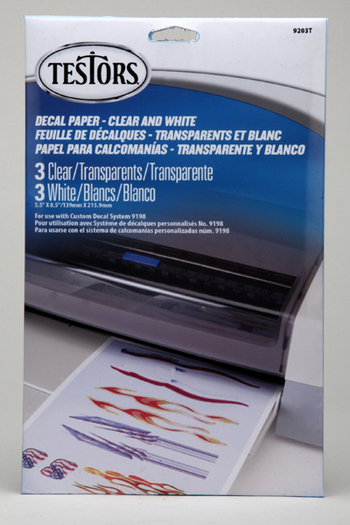
It’s pretty simple to do: just get decal paper at a hobby store, or online. Then draw something up on the decal paper, and print it out on an ink jet printer.

It’ll have to have a little finishing surface spray on top too, but you’ll learn all about what you coat guitars with when you do your build.

If you’re not a graphics kind of person, let’s make it even simpler for you: check out THIS PARTSCASTER DECAL FORUM for great type & print ideas. Or order some ready-to-go decals at THIS SITE by just telling ’em what you want your ‘stock to say!

Easy-peasy, trem’ bar squeezy!!

Parts to Play

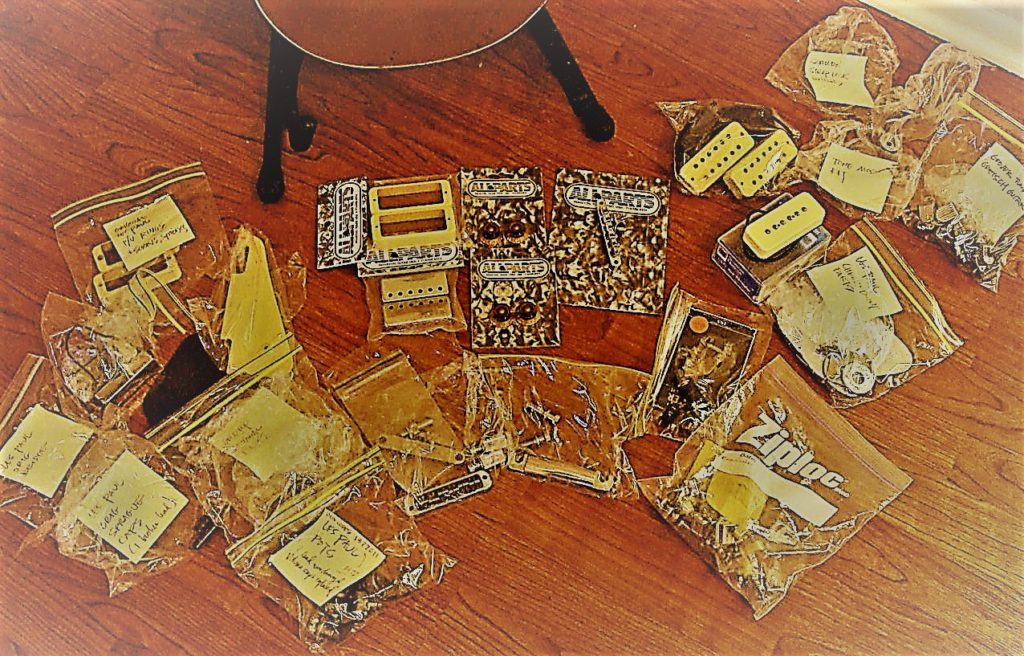
Okay, so… where do ya go to GET all this stuff you need to build your own Partscaster??

Here are the best places I’ve found for lining up all the “right stuff”. Just click the names to link to their websites. Many online reviewers who have built some cool-looking electrics give these providers a big thumbs-up, so… get exploring!!

Warmoth

BYOGuitar

StewMac

Best Guitar Parts

GuitarFetish

Rosser Guitars

AllParts

Ebay

Saga

Also, for some great pictures of players who’ve completed a Partscaster using these stores, and are showing off the results, GO HERE. It’ll give you better direction as to what body types you want to pursue if nothing else.

Parting with Your Parts

Time to get real for a moment about a sad-but-true fact concerning the guitar you will spend days, weeks… perhaps even months constructing: if you wanna sell it later, prepare yourself… you’re not gonna get much.

Resale on a Partscaster is much harder than a typical instrument. you’ve gotta know going into your great guitar adventure that you might not get back all the money you put into it. In fact, you might find yourself stuck in “Lowballers Alley” for quite some time.

Will you take 50 cents for it??

It makes sense in a way though. People are going to be quite skeptical about your luthier expertise if that’s not what you do for a living. In the back of their minds they’ll be thinking, “But what if he got something wrong??”

Why? Simple human suspicion. Their doubts aren’t that far-fetched either. There are a LOT of really poorly-made Partscasters out there!

But if you build a “self-expressin’ Strat” simply because you want to learn a lot about guitar construction, have the time & money to do it without needing recompense, and are eager to jam on an instrument that’s uniquely YOU, then the fact that you won’t get much for resale isn’t an issue, right?

It’s about the journey, not the destination. 😉

How do They Stack Up??

Our fellow shredder Darrell Braun did a GREAT stock guitar vs. Partscaster guitar shootout that I just love. Check out this video he did and then come back and tell us which one YOU thought wins the day.

To me, it was obvious…

Why I’m a Fan!

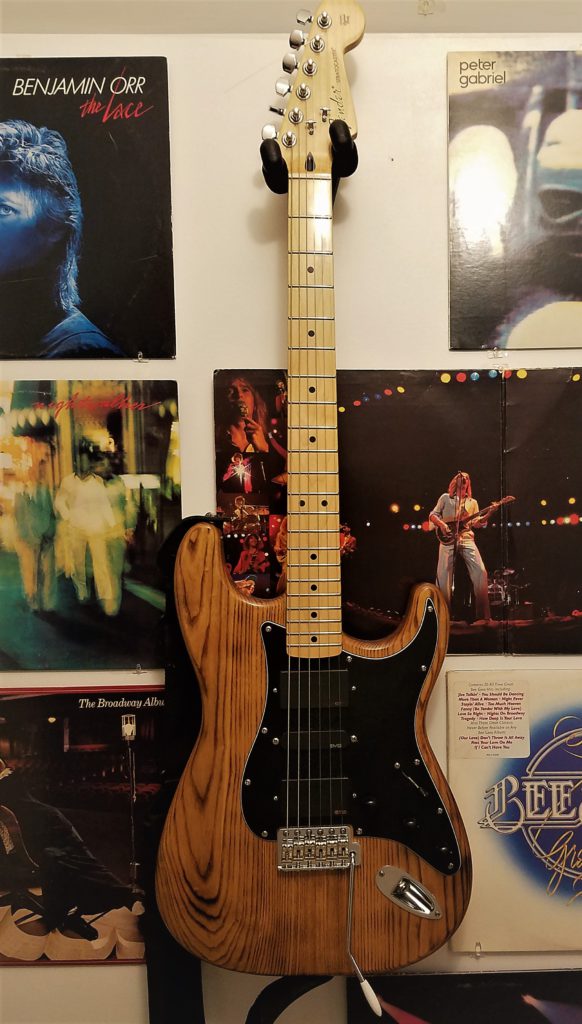
Finally, I’d like to introduce you to a wonderful Partscaster that my friend John Alexander made, and that I purchased from him. Meet… “Verbrannt“!!

This beautiful guitar has a body made of “burned Ash wood“. It’s the product of a technique where you put the wood in a fire for a short time, then finish it with Tru-oil and a bit of sanding.

The fire causes the grain to darken, bringing out a kind of “Tiger Stripe” look. Cool look, right?!

Here’s what the body looked like when John first got it new from Rosser Guitars (linked above):

The Un-burned Ash look.

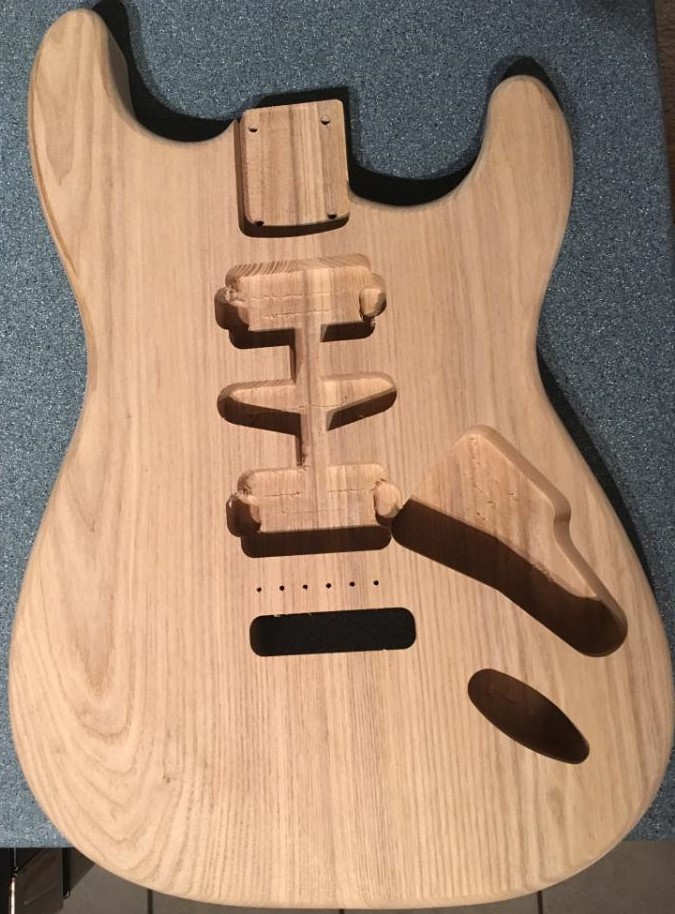
Not nearly as dramatic without the Tiger striping!

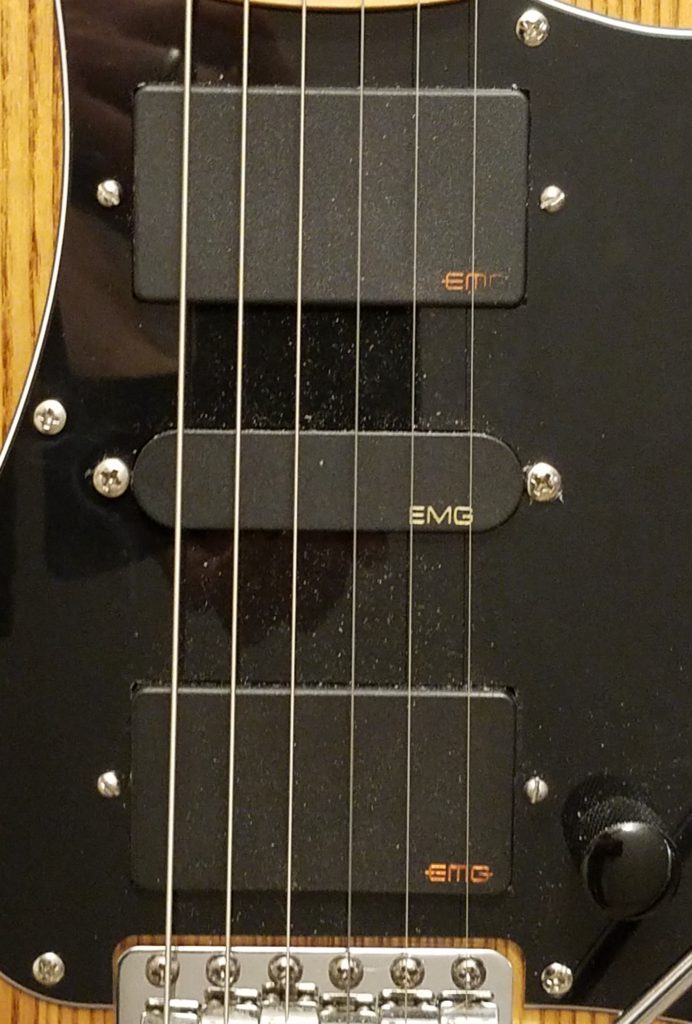
The neck, bridge & neck plate John bought new off EBay.

John put EMG pickups that he already had in this guitar, and coil tapped the bridge & neck pickups to give me a lot more diversity of tone. I can get so many sounds out of this thing, it’s truly inspiring.

It’s also an “active pickup” configuration, which is what I prefer at times for certain types of playing.

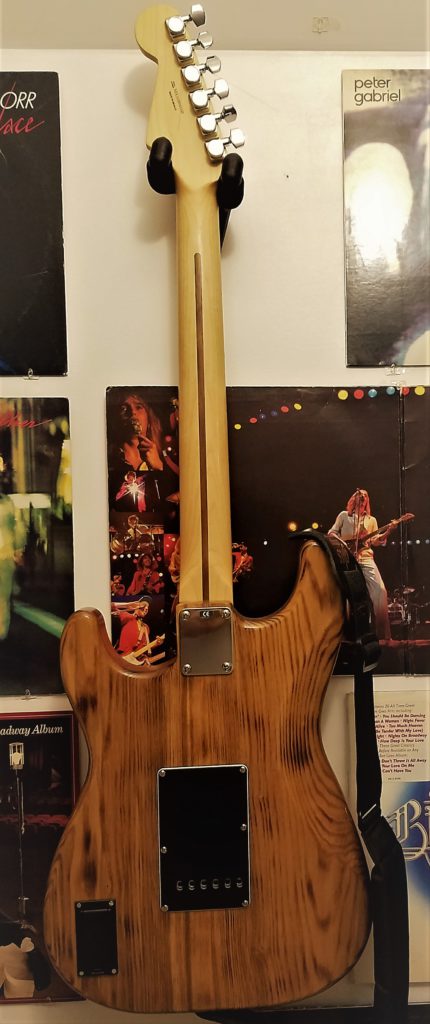
I had a Strat very similiar to this that I played for years. It was stolen in 1995. Yea. Totally sucks. Read my tribute to it in THIS POST.

That sting of stolen loss is lessened now that I have a guitar that’s so similiar, though. Feels good to be back in the EMG Strat saddle again!

I named this axe “Verbrannt” because that’s the German word for “burned”. I was so impressed by how simply putting wood into fire and then oiling it could produce such a lovely finish. It really stands out among my other guitars!

Now you can see why I’m a fan of Partscasters. Brian May’s story already had me interested, but now that I see how a guitar can be made to one’s exact specifications and turn out so well…

… I’m a believer!! Lol

Greater Than

A patiently-constructed Partscaster truly is greater than the sum of its parts. The sounds, looks and feel you can get when you “go your own way”, to quote Fleetwood Mac, is quite exceptional and can run the gamut from outlandish to pro quality “wowism”!

Ready to do it? Already have?? Gonna research a little more to get perfectly focused on your ‘dream axe’??? Drop us a line in the Comments and tell us. Let us know too if you need any further help in this area, or how our look today furthered your quest for tone.

We can never know too much about the instruments we play. It gives us just that much more intuition about how to eke the most out of our beloved music-makers. So building one ourselves?? That’s like a guitar Ph.D., my friends.

My graduation hat’s off to you. 😉

Now, go… make… sounds!!

Teaj

What Is A Kalimba? – Hypnotic Tones, Tines & Tines Again!

Above my Pearl drum kit in my studio hangs a massive poster of Earth, Wind & Fire.

It came folded up inside the LP record “All ‘N’ All” when you bought it in the 70s.

Around the sides of the poster also hang my favorite EWF records – the ones that I’ve listened to countless times and still inspire me to this day.

And on almost every one of those records… you’ll hear a Kalimba.

“What is a Kalimba?” you ask. GREAT question. In a nutshell, it’s a fantastic and fun percussion musical instrument played with the thumbs.

Treble Kalimba

Beyond that, It’s an instrument near and dear to my heart, with many cool attributes.

Let’s talk about what they are!

Vid’! A Vid! What the Kalimba Did!

First things first: talking about an instrument is useless unless we hear
it. That’s how we really know what it’s about.

To facilitate that, I’ve made a short video to introduce you to its unique
voice. Take a listen…

My Cousin, Mbira… !

The Kalimba (just like the Udu drum which I wrote about HERE) is a thoroughly African instrument.

Today it is still ubiquitously used in diverse ceremonies throughout Nigeria, the Congo, Zimbabwe and other African nations.

But, interestingly, if you look for the instrument on that continent, it will be called an “Mbira“, not a Kalimba.

Kalimba played by Suri Tribe member
Kalimba being played by a Suri Tribe member

So why don’t we call it an Mbira?? Well, it all has to do with marketing, and particularly the first person to market them to the United States and other Western countries.

His name was Hugh Tracey, and he had been an ethnomusicologist in Africa since the 20s. In the 50s, he finally founded his company called “African Musical Instruments“, or AMI. Through it he introduced the Kalimba to the world.

Hugh Tracey
Hugh Tracey recording an African musician.

Did Hugh know of the Mbira variation of the instrument called a “Karimba”, and accidentally change a consonant?? Or did he hear members of the Bantu tribe talk about “Kalimba”, which to them means “”little music”, and confuse it with the instrument itself??

Nobody seems to know at this point. What we DO know is that he respected African music highly, and eventually successfully marketed his “Kalimba” to Western countries by tuning the notes diatonically, according to the Western major scale. This was something the African cultures did not do.

Kalimba badge

What this meant was that, instead of the hundreds of regional tunings one could find in the sub-Saharan countries, Tracey’s instrument was tuned in a way familiar to almost everyone in the States and across Europe.

This was a smart move, since it made it approachable not only to Western musicians, but to children interested in music as well. In fact, Tracey’s first big import of Kalimbas to America was through a toy company!

Decades have passed since his successful product launch, and today the instrument is no longer considered a toy. Instead, there are serious, high-quality Kalimba makers all over the world now vying for a piece of this once-African pie.

Why? Well, because its sound is so… delicious!

Parts is Parts

The Kalimba is very basic in its design. Needfully so, since most of the time in Africa these are built from nearby trees and whatever scrap metal can be scrounged.

First, there’s a piece of wood. This can be flat, or it can be a number of wood slats put together to form a little box. If a box is made, the last step is to punch a round circle into the box so that the sound can resonate inside and increase the volume of the sound produced.

Next, there are two long strips of metal (the Saddle and the Z-bracket) and a half-round made of wood typically (the Backstop) that, as a collective unit, are called our “bridge” assembly.

Kalimba parts nomenclature

Finally, you take a specific number of “tines” that are different lengths and slide them into the bridge assembly. These will stretch out towards the sound hole and be plucked to make music.

The shorter the tine, the higher the pitch. Thus, with different lengths you get different notes, and can accomplish many diverse melodic compositions with just a pluck of your thumbs!

You can probably see that a Kalimba is a simple construction design. If you can round up the raw materials, you could make one yourself pretty easily.

Or, if you want to make one yourself, but prefer the parts to be all pre-cut and selected for you, there are kits available, like THIS ONE.

The Key to it All

It’s important to realize that the Kalimba is not a fully chromatic instrument. In other words, you won’t get EVERY note available in Western music typically.

Instead, Kalimbas are mostly made to include notes within only ONE musical key, giving you 7 different notes to work with instead of the full 12.

But the notes are not laid out in a way you’d expect: basically, instead of the notes being laid out in a linear fashion, they ping-pong, back and forth, from right to left above the wood and resonance hole.

Kalimba G tuning

So to play the G major scale in sequence, you alternate between your left and right thumb.

Because of this you can end up playing pretty fast, IF you get used to the layout.

It’s a bit odd and weird at first, but you quickly get used to it if you keep playing.

Thumbin’ It

The Kalimba is supposed to be played with the thumbs. It’s the only instrument I know of that is set up this way.

It might seem a little limiting, since the rest of your fingers are only used to hold the instrument, but once you get the hang of it you’ll find endless ways to express yourself.

If you want to go off the beaten path a bit though, you can lay the Kalimba down and, resting your palms on the wood, play it with most of your fingers. It’s a totally different sound and you’ll have to develop your own playing technique this way, but it is possible.

finger playing the Kalimba
Finger playing the Kalimba

So if chordal playing is more your thing, definitely set that box down and start playing in this UNorthodox manner. Might work better for ya.

Tune That Thing!

Tuning the Kalimba is a fairly easy and straightforward thing, although a subtle hand and patience is needed.

Here’s the simple rule to remember:

* MORE tine = Lower pitch

* LESS tine = Higher pitch

In other words, if you play your Kalimba into a tuner and find a certain tine sharp or flat, you can adjust it back into pitch by pushing it back into, or pulling it out of, the bridge.

Use a free tuning app on your phone to check make sure each tine is on pitch.

If not, you’ll need a small hammer to tap the tine up or down to adjust the pitch. Some Columbus actually come with a tuning hammer. Most do not.

Yes, you can use alternate tunings, but then the playing technique is out the window. You’ll have to figure out your own new playing style, but if you’re up for adventure… GO for it!!

A Man of My Tines

The Kalimba that I’ve used for almost a couple decades now is a “Treble Kalimba” made by the company that started it all, AMI.

Kalimba front
Teaj’s AMI Kalimba

It’s in the key of G, which is the default tuning when you buy a Treble Kalimba.

I’ve used it live and in the studio to great satisfaction.

In fact, on my next album I already have recorded a two-minute little interlude that features this instrument, along with heavily layered vocals and a little synth. It came out great!!

Size ’em Up

Today you can find different sizes, different configurations of wood, and different numbers of tines available on Kalimbas.

THIS WIKI ARTICLE will show you quite a few of the variations.

The common variable among all of them is that tuned, metal tines are held in place by wood. Besides that, the possibilities are endless.

The biggest one I’ve ever seen they call an “Array mbira“. (See picture below.)

array Mbira
The Array Mbira

In many ways, it’s just like playing a piano, only instead of keys, you’ve got tines there. Pretty cool.

Whenever I travel down to Florida or the Caribbean, I find a ton of little, dinky Kalimbas. Most of dubious quality. Even at Disney they sell these kinds of things for the kids.

Land on a Brand

No matter what size you want to end up with, buying from a reputable music instrument dealer is the way to go. At the very least, because of the warranty you’ll get.

I suggest getting at least the 17-tine Kalimbas. It gives you faaaaar more flexibility for fitting in a mix, as well as creating melodies appropriately within the context of other instruments.

For example, Guitar Center offers THIS KALIMBA from Stagg, which not only gives you a wide tonal spectrum, with 17 tines, but is also equipped with a 1/4″ jack so you don’t have to mic it. VERY cool if you want to play live.

Stagg Kalimba
The Stagg Kalimba

Or, if you want to spend less but snag a great deal, check this out from Amazon: the “Tanke” Kalimba is available in the key of A, B, C, D or E, and each comes in a different color to help you tell them apart.

This is excellent for the multi-faceted Kalimba player. See those OPTIONS HERE.

Tanke Kalimba
The Tanke Kalimba

Finally, if you don’t mind a longer shipping time… you can still order from Hugh Tracey’s South African company, AMI – the one that started the Kalimba ball rollin’.

The company is now run by his children since Mr. Tracey passed in 1977. They not only continue selling Kalimbas but they also stock many other African instruments that might, uh, strike a chord with you, so to speak. 😉

Navigate to their website easily by clicking HERE.

Wah Not?!

If you buy a Kalimba in the United States, most of them will come with a feature that is not always present in overseas models: the tremolo holes!

Some people just call them the “back sound holes”, but I think that’s missing the bigger point.

When you engage and disengage the pads of your fingertips on these two small holes, you can create the tremolo effect that I showed you in the video. It’s quite pleasant, and adds to the hypnotic, fantasy-sounding air of the instrument.

The Tremelo holes!

Though you may see it online frequently, it is an error to call this effect “Wah”. A wah effect is one that sweeps through different frequencies.

This is NOT what’s happening in the Kalimba. To prove that, I just tested my own with a strobe tuner, engaging the tremolo effect. It proved that there was NO change in frequency. Therefore,… no “wah”.

What you are hearing is a volume differential. When the fingers are placed over the tremolo holes the volume is louder. When you take them off, the volume is reduced. If you do this fast, it produces a sound wobble that is properly called “tremolo”.

As a side note to that, I saw one other online article call this “vibrato“. That too is a misnomer. Vibrato is defined, the same as wah, as a change in “frequency”, not volume. It’s tremolo, people. Just tremolo.

Regardless of what you call it though, this effect is fun to do, and beautiful to hear. It even works if you plunge your thumbs into the big soundhole in the front!

Oh, and the louder you play, the more pronounced the tremolo will be. Try it – you’ll see what I mean. 😉

A Pluckin’ Master!

I really couldn’t end this post any other way than to let you watch the man most responsible for not only MY interest in the Kalimba, the brotherhood of man, and grooves that make it absolutely impossible to NOT wanna dance…

… but also the one responsible for gettin’ the whole world to shake their booty and be all smiles, perhaps more any other…

Kalimba EWF album CARTOONED

… the trailblazer, the mastermind behind Earth, Wind & Fire, the soul that we truly miss since he left us in 2016, the immortal…

… Maurice White.

We’ll keep these tines a- tappin’ in your honor, Maurice. Rest in peace.

Tappin’ Into a World Beat

So are you as thoroughly stoked to get a Kalimba as I was back in the day??

Kalimba EWF poster

Maybe you already have a Kalimba, and know the magic of striking’ those tines and letting the hypnotic ocean of song wash over you?!

Let us know YOUR own Kalimba story by leaving a comment. Even share a link to your music. It’s a way to ensure that every instrument’s legacy, and men and women who loved them, never disappears.

Now, go… make… sounds!!

Teaj

Teaj in the storm fields!

What is an Udu Drum? – Trippin’ On A Slippery World Beat!

(Photo: Eliot Elisofon)

This past October I ran a half-marathon to Canada and back.

Why? Well, because I like to run, of course, but also because I wanted to raise support for people in Africa who don’t have any water. 

The Pokot tribe, numbering in the thousands, walk up to ten miles a day just to get a drink of water.

Teaj’s LP Udu drum

That sucks.  :-/

For centuries they’ve used clay pots, typically handmade by women in the village.

But somewhere in history, someone discovered that a jug with TWO HOLES could make… really cool sounds.

Voila… the Udu drum was born!

If you’re hearing the sloshing call of this instrument’s potential for your own music, today you’re in luck. In this article, it’s all about that Udu voodoo, so…

Let’s get wet!

Video Ud’- eo!

So let’s give you a taste of what the Udu can do for you… 

(Hmmm… sounds like a song there…! ) 

In this video, you’ll hear some tones from my own personal Udu drum and how I tend to play it. Enjoy!

It Rises From the Clay!

From the little documentation we have, it appears that the Udu drum originated in Nigeria.

The word “Udu” comes from the Nigerian tribe known as Igbo. In their language, it means “vessel”, or “container”. 

Even today, if you travel throughout Nigeria, you’re sure to find these clay pots everywhere you look. 

They’re used to store grain & field produce… by placing them in the shade, they’re the closest thing villagers have to a refrigerator… 

And of course, they are often used to collect a family’s portion of water for the day. 

They are all so interestingly put up into trees where bees begin a nest and produce honey for them. 

For hundreds of years this interesting take on a drum has been used during ceremonial rites, usually by the women. 

This is not only because they were the ones who gather the clay, mold it, fire it and carry it all the time. The location where the women collect the clay is considered sacred. The women even supplicate and make offerings to a female pottery deity there! 

To women who have served their craft faithfully, the Igbo people bestow upon them a “Potter’s anklet”, immediately confers upon them status and seniority. 

It’s good to know that, even in Nigeria, exceptional artisanship in the musical instrument field is admired and well-respected!

But beyond all the everyday, practical uses of the Udu, how cool that it’s now also revered as a tribal musical instrument. And WE get the benefits!

For a glimpse of Udus being made in Nigeria, WATCH THIS.

Or GO HERE to read what Wikipedia has to say about it. 

The Four Sounds

There are four ways to produce music on the Udu drum, which bring out very different sounds. 

First, there’s the SLAPPING the outer clay with the fingers. This produces high-pitched “CHICK”-s that grow sharper the harder you hit the surface. 

Next, there’s the BASS port. This is the whole that’s in the side of the pot, somewhere near the top or the middle. 

When you quickly cover the bass port with the palm of your hand, you get a very deep, sustaining bass note that’s almost like a low hum. 

Udu lizard!
There’s a LIZARD on my UDU!!

The moment you then LIFT your palm from the bass port, you get a more subtle, ascending tone it’s almost like a “whoop”. I think the sound is also very akin to the open-mouthed that a gorilla makes. 

Regardless, it’s a unique voicing that is usually the main thing that attracts attention on an Udu drum. 

The third timbre we can eke out of the Udu is made by using any RING you might be wearing to hit the surface. This will give a much louder, sharper hit that can drive your 2 and 4 like a snare would. The sound is noticeably different from simply tapping with fingers only.

Lastly, you can play the TOP SPOUT of the gourd, where the contents would usually be poured. If the bass port is open when you do this, the sound will be similar to the bass port, a sharp upper frequency added.

If your palm is over the bass port as you hit the top though, you’ll get a fun, mid-frequency “boink” that, used judiciously, always brings smiles out of the crowd. Especially kids. They’ll always be the first to tell you something sounds, looks or smells funny, right?! Lol 

You can actually get a kind of 4th timbre out of the Udu drum by simply RUBBING the outer surface of the clay. This produces an airy, subtle, almost rain-like sound.

It can be appropriate for softer songs, but honestly this method isn’t used often enough for me to do more than just mention it to you.

Combining these disparate timbres into flowing rhythmic patterns can produce a very hypnotic, organic, tribal kind of sound. It’s perfect for “World Music” but it can also complement Western music if used appropriately in the right kind of song. 

I find that the bass frequencies in most YouTube videos online are pretty hard to hear. I did find this one, however, by Fahad Zuberi that not only allows you to hear clearly all three voices on the Udu, but also showcases Fahad’s fine playing. 

Open to New Positions…

The Udu can be played with a few different positionings. Choose your favorite and slap away…

Traditionally, you see the drum sitting in the LAP of players with crossed legs. This is fantastic if you’re gonna go old school and sit on the ground as you play. 

If that’s uncomfortable for you, most Udu drums come with a foam, wicker or cloth RING to set it on. Using this, you can set it out in front of you which tends to set your arms free a little more. 

I find, however, that the leaning forward inherent in this position gets old pretty quick. For that reason it’s my least favorite way. 

The final method is a great one, but it hinges on you making a separate purchase. World Percussion Stands are made by several manufacturers (for example, THIS ONE) you to play Euro to drum up high, standing. 

This is the preferred way to go if you’re playing with more than one other person. It helps you not only play freely, but also lets you be seen more easily, as you mesmerized the audience with your ethno-savage rhythms!! 

Even if I’m on a stripped-down gig with a songwriter or instrumentalist, I tend to play the Udu on a stand, while standing. The reason is simple… 

… I’ve yet to find a guitar-playing songwriter that would sit on the ground with me!! Lol 

Slap Capturin’!

I’ve played the Udu drum both in the studio and live. I’ve used a variety of mic methods, and over the years of doing so I’ve landed on one technique that is my favorite. 

The reason? It catches the various sounds of the drum better than any other method. To my ears at least. 

If you tape a flat-headed, omni-directional lavalier mic INTO the top spout of the drum, and tape it close to the bass port, you’ll get a very full, rich representation of what the Udu can do. 

The only drawback to this method is the wire the way of you playing the top spout. I find you can still get the sound out of it, but I tend to avoid the spout mostly when doing this because, frankly, I don’t want to break my mic cable! 

I personally use the top spout hit least, so for me it’s not that big a deal. YMMV. 

THIS MIC by Countryman works great for this technique, though it’s not cheap. A little duct tape and this baby will get you rocking in no time flat!

Any mic that is small and flat, like the Countryman though, will work fine. Just remember that if you use a lav mic you’ll need a lav transmitter & receiver too. I have a whole package that I use live with everything.

The second best method I’ve found is to tape a flat-headed cardioid lavalier mic on the outside of the drum, near the bass port. 

If you use this method, just make sure that the microphone is out of the way of your playing. It’ll still pick up the nuances of the drum quite well. The bass frequency response will not be quite as full, however. 

If you don’t have any lav mics, then you can use the method I see all the time on YouTube. That is, just point a microphone on a stand near to the bass port about two feet away. 

A full-spectrum condenser mic is your best option here, though if you’re playing live and wanting to avoid feedback, you may have to stick with a simple dynamic mic and boost the bass on your mixer EQ. 

Whichever way you choose, the first time you hear your Udu drum through a sound system, you’re going to be transported to whole new worlds of inspiration. 

Go for it – you’ll have a slammin’ good time! 

Size ’em Up

Udu drums come in small to medium sizes. I have yet to see a really large one. 

The one I own is 15 in high, which is about the size of most that I see in stores. 

They make ones that are much tinier, but their bass response is diminished so I’m not that interested. The bass port tones are what make the drum the most compelling to me, so I wouldn’t want to do without them. 

I also find that the larger they are, the easier they are to play from a lap position. This is typically the route I choose when recording in the studio, so I’m usually sitting in my mixing desk chair. Works for me! 😉 

Land on a Brand

I can only speak for the LP brand of Udus, since that’s what I have. Mine has served me well for over a decade now, with nary a break, crack or change in timbre.

I know that Meinl also sells quite a few of these drums, and they also have a very good reputation. I’ve purchased many Meinl products in my day, to complete satisfaction. 

For example, if you missed our post on Cajon drums, where I talk about my Meinl Cajon, READ IT HERE.

In any case, a quick Google search of “Udu drum” will have you G.A.S.-ing for hours over the limitless options. 

Just don’t forget to eat. Like I did writing this article. 😮 

Other Variations

Various musical instrument developers and inventors have put their own spin on the drum over the past few decades. Here are the most popular reimaginings that I found: 

One drum not enough for you? Try three! The triple Udu drum, which you can SEE HERE, is bound to keep you busy… for a few sessions at least.

You’ll get slightly different tones and frequencies out of each pot, so it does make for good variety the more Udus you have.

The Utar is basically an Udu drum that’s been squished! Some find it easier to play, based on their hand size and shape. I don’t personally, but to each their own.

See MORE INFO HERE if that shape interests you.

The Hadjini is a fairly recent addition to the lineup. It’s like taking two Udus and joining them at the spouts. 

One additional plus in the Hadjini is that it comes with two small holes to fit in lav’ mics. That’s awesome for those of us that prefer this method of mic’ing. 

Here’s a very entertaining and insightful look into Udo expression during a live concert in Paris: 

These option are only just the tip of the iceberg. There’s a lot of variations on this clay drum. Some more bizarre than others. 

My take is go with the tried-and-true traditional Udu first. Then, once you’ve established a groove… you can go crazy!! 😉 

A Pro Class in Clay!

Before we leave, I thought I’d turn you on to a masterful percussionist who gives us a great glimpse into Udu potential. 

Bashiri Johnson is a New York City professional who’s played with the best (Sting, Michael Jackson, Whitney Houston, Lionel Richie, etc.).

In the following video he provides the perfect rhythmic complement, on an Udu drum, to some soulful original music. Check him out!! 

Tappin’ into a World Beat

The world is full of all kinds of music. Tonal, atonal. Organic, electronic. Ambient and percussive. The certain instruments may not be everybody’s cup of joe, but one thing’s for sure… 

It’s all good! Ain’t nothin’ but a groove thang, yo! 

So next time you’re in the mood to get all SLAP-happy… pick up an Udu drum.

It’s sure to be an instant HIT. 😉

Now, go… make… sounds!! 

Teaj

The Percussion Instruments List – Once Upon A Log… !

From the time man first picked up a rock, or a tusk, or a piece of wood…

Caveman hitting
By Margaret A. McIntyre – “The cave boy of the age of stone”

… and hit a log, or threw it at a boulder, or clicked any of those things together…

… there has been music. 

Nuts in an animal skin; bones against a cave wall; seeds shaken in a gourd… the sounds of percussion have been our rudiment soundtrack since time immemorial.

Was it the first Arctic humans, hunting huge woolly mammoths that first discovered the inherent musical qualities of hitting something?? 

Or perhaps their cousins down in Africa, throwing spears from trees at wildebeests, first began to relive hunting successes by the sound of striking things??

Whatever the case, today’s percussion instruments list traces its lineage all the way back to those forefathers, and there’s something in us, even as babies, that wants to bang out some sounds just like they did!!

Not a bad legacy for pastime based on hitting things.  Lol

Your Quick Hit Vid’!

Because talking about sound is about as inane as smelling a famous painting, let’s take a moment to introduce each of the instruments we’ll be going over today. 

It showcases seven of my favorites. I go to these time and again to add ear candy and groovalicious accents to the tunes I record in my studio. 

1) Hey, Mr. Tambourine Man!

First up is the tambourine. This awesome instrument is definitely one of my favorites. I use it A LOT, and it always adds that extra ZAP of energy that I need for a certain song section.

The tambourine has a long, rich history. Old Testament passages in the Bible talk of King David playing one, so it’s at least thousands of years old. Who knows what the first ones were made from, but they were obviously just as popular back then as today.

RhythmTech tambourine

Arguably the best rock band of the past century, The Beatles, used its jingly electricity every chance they could. In fact, you can’t listen to a Beatles album that doesn’t happen tambourine.

And then, of course, there were the Monkees. Taking a cue from our favorite British moptops, they raised tambourine use to whole new levels, mostly thanks to that god of teen girl eye candy, Davy Jones.

My favorite way to use this instrument is adding it to the chorus of a song, to give it that extra bit of lift to set it apart, and raise its excitement level to the brim.

In any section of your song that you want it to become more “driving” and compelling rhythmically, a tambourine is the answer to your prayers.

Or add a medium to large reverb to its signal, Pan it to one side or the other, use it for accents.

This is really one of those “can’t go wrong” instruments. Unless you’re just really bad rhythmically, the tambourine will probably add some serious sparkle to your music.

Try it out! You’ll love it!!

2) These Ship Pegs ROCK!

One of my other favorite is the claves (pronounced “Klah – Vaze”).

They’re basically two thick sticks about the size of hot dogs (without the bun!). When you hit them together they give a sharp, crisp, “cut through the mix” smack that almost rivals a snare drum.

Claves

They’re used a lot in Cuban, Puerto Rican, and African music.

Their origin is Cuban. Spanish slaves building ships there noticed that the “Cuban Hardwood” pegs that they were using to build ships (instead of metal nails which were too expensive) made quite an impressive, sharp, inspiring sound.

Soon they were using them to complement the music they played, which was derived in large part from their African heritage, and the rhythms and melodies they remembered from the time before they were captured and sold as slaves. The rest… is music history!

Claves are great to use if you want to accentuate a rhythmic backbone of some kind. If you’re doing a complex Latin rhythm that will have a lot of soloing and/or rhythmic improvisation over it, the claves will help keep the beat defined behind it all.

Totally by accident, I’ve also discovered that if you take the head off of a regular hammering mallet that you can get at any hardware store, it actually sounds very much like a Clave strike, only lower in pitch, when you hit the head with the handle.

Clave sound from Mallet

This is great, because now I have TWO different Clave sounds to add to my tracks instead of one. Whodduh thunk?!!

I’ve also at times doubled my snare drum hits with clave strikes. It adds a high-frequency sting that is just right for certain songs.

Bottom line? If you like to hit things, then you’ve gotta get a pair of claves.

Just don’t be surprised if a woman with sultry eyes & a rose in her teeth starts dancing around you.

Must be in the wood. 😉

3) Shake, Shake, Shake,Señora… !

Ahhh, shakers. Where would we be without shakers?! We couldn’t “Jump in the Line” nearly as well without ’em! 😉

LP studio shaker
The LP studio shaker!

If you’ve ever recorded any kind of ballad, then you probably know how awesome shakers can be.

In those moments where you can’t really bring a drum kit in because it would be too ostentatious, but you still need something to help keep the beat behind mellow instrumentation, the shaker is an indispensable tool.

My favorite shaker you see to the right, by Rhythm Tech. I like it because you can get TWO sounds out of it.

First, if you hold it like the picture above, you get a soft, gentle, airy kind of sweep that is subtle and mesmerizing.

But if you hold it lengthwise, like in the picture to the left, you get a much sharper, cutting accent that is perfect for medium-tempo songs, parts of a ballad that start to drive a little more.

There are many other types of shakers too. If I’m not using the Rhythm Tech shaker, then you’re probably going to find me with eggs in my hand.

Egg shakers with snare

Each egg has a different EQ frequency spectrum, so having a good selection allows me to pick just the right one, or two, that will complement the song without getting in the way.

They even make eggs with handles! I find these great to hold in the fingers of my snare hand, so that when I hit the snare you also hear the more subtle sweep of the sand inside the egg. Pretty cool effect, though certainly not one I would overuse.

You can’t go wrong trying a shaker on a song if you think it needs a subtle groove, but you know that drums would be too overbearing.

So go ahead – shake things up. if we end up in a glass-eyed trance, you know you’ve done your job right! lol

4) Bottle it Up

I happened to see in the “foreign foods” section of a grocery store one day: a bottle of Jarritos Guava soda!

Bottle Percussion

I decided I must try it. Here in the States, Guava ANYTHING is not seen very often. At least not in Detroit!

After I’d polished all the jamming ‘ juice off, I did what I always do when I have an empty bottle – I tapped it to see what kind of a sound it makes!

This might be a percussion player/drummer thing, but I’m frequently tapping things to see what kind of sounds they make. It often yields some pleasant surprises… things that wind up on at least one of my recordings!

This guava pop bottle was no exception. As soon as I tapped it, I knew the “TING” it produced was different than any bottle I’d experienced before. It sounded very… musical.

I remember this occured during the recording of my first album, so I immediately decided to use it on a song I had nearly finished. I put it in the Chorus sections of the tune, basically as a snare drum hit on 2 and 4. Underneath were acoustic guitar, a bed of “Oooooo” background vocals, my lead vocal and a shaker (my RhythmTech!) to drive the beat.

It worked great! To this day whenever I hear it I smile, knowing that most people will betrying to place whatthat sound IS when they listen.

Found objects make great percussion instruments. Anything can be music!

After all, if people take the time to listen to our music… why not make it interesting?! 

5) Three-sides that Shine

The TRIANGLE is a percussion tool that I use sparingly, but is always a welcome element of a mix when the groove allows its unique properties to shine!

Here’s a tip for playing the triangles that I discovered years ago: Instead of laying them down on a surface until you play them, hang them on a BANANA HANGER! I find it to be the perfect way to keep them at the ready during a performance.

Triangle on banana hanger

You can, in fact, play them ON the banana hanger, then move on to your other tools. Quite convenient – especially if you’re playing back and forth on many percussive instruments during a show.

Remember that playing the triangle while TOUCHING it will produce a staccato sound, but hitting it when it’s hanging free will allow it to sustain. Using both these methods, back and forth, can create some very entrancing tracks.

6) Mi Casa es CA-basa

Cabasa

The CABASA is a familiar instrument to all percussionists who play Latin music. It’s perfect for high-frequency rhythmic accents that sit well above the vocals and other instruments, helping to make the beat interesting without being ostentatious or in the way.

It only has about two useful sounds, but both of them can be just the ticket for the right kind of song.

I typically don’t have the cabasa that high in the mix when I use it. That’s mostly because I don’t do Latin-style music typically, and this has an immediate “flavor” of that genre.

Putting it subtly behind a drum and bass groove though can really make the beat more interesting, especially if you throw in some off beats against a more straight groove.

As always, just put up a mic and PLAY. You’ll find what works if you just relax and have fun with it.

Think of yourself playin’ on a beach in the Caribbean, with a roaring bonfire, hundreds of dancing guests and surfers, and a kickin‘ band all around you.

Works for me.  😉

7) Glock ‘n’ Roll

You might not have guessed that the Glockenspiel is a percussion instrument, but it is. Because you typically hit it with mallets, it’s always been found within the percussion family. 

Glockenspiel

I love, love, LOVE to use the glockenspiel on songs. It adds such brightness, such joy, such a sparkle and shimmer to any melody. I can’t imagine my studio without it, and I have used it on dozens of recordings. 

Yes, if you buy any synthesizer, there will be a glockenspiel sound in it. 

What that will NOT give you, however, is the mixing of the frequencies and overtones in the air that happens when you play one live. 

If you put a microphone on a real glockenspiel and record it, then play the same thing on a synthesizer, you’ll see what I mean. They’re not even in the same league! 

The Glock will sound different depending on the hardness of the mallet you strike it with. I have a large range of mallets, from plastic to brass, that help me tap out many tonal variations from those little steel bars.

Glockenspiel playing
Using the Brass Mallets!

My favorite secret trick with the glockenspiel? Doubling melodies!! Man, does this work well. 

These can be vocal melodies, but they don’t necessarily have to be. On a lot of songs, I have polyphonic melodies behind the vocals, maybe done by a guitar, or a piano, or a trumpet, or a saxophone. 

Regardless of what you’re doubling, the Glockenspiel will add a high frequency glistening quality to whatever you choose. Each note you strike will be like bright, tinkly happiness spread across your musical toast.

What a way to wake up the world to your songs!! 

Drum Roll, please!

Whoever first stretched an animal skin over a hollow log or bowl (probably a very industrious, not to mention creative, WOMAN), she’s my hero!! I shall forever play my Ludwig kit in her honor. 😉

It’s thanks to our smaller percussion items that we have huge drum kits today. We wouldn’t have found one without the other.

Regardless of to whom the honor belongs though, percussion has stayed with us for tens of thousands of years, consistently being the heartbeat and backbone of all that gets us shakin’ our money maker!

I have used the percussion instruments listed above literally hundreds of times. With each use, I escalated the “dance-worthy rating” of my songs to new heights, and intensified their “booty-shakin’ quotient” with a soul-stirring pulse of life.

Not a bad way to finish up a recording, is it?! 😉

Sweet Beat Candy!

There you have it – my percussion instruments list. Maybe you’ve used ’em; maybe you haven’t.

Either way, I hope you’ll try ’em out and utilize them in your own recordings. You’re sure to find that they spice up your aural landscapes in new and delicious ways, such that any Neanderthal man would stand up and start partying! 

Remember, too, that any thing you can hit, can be percussion. There are literally hundreds of sounds awaiting you, right at your fingertips everyday, that might be perfect for your song. Everything truly IS music!

If you’re curious what these percussive instruments sound like in a final mix, check out the last album I produced in my studio for lots of examples: the “Tempus” album by “Sweda“.

Percussion arsenal

Make sure to listen to it with a good pair of headphones (like THESE PAIRS) so that you can hear the intricate and complex vertical & horizontal placement of the percussion in the mixes. We spend a lot of time getting the percussive beat candy just right!!

If you’ve already used percussion a lot, or even if you are a newbie but decided to give it a shot and do some recordings, let us know. Leave us your thoughts in the comments section, or better yet… A link to your recordings showcasing YOUR favorite percussive groove.

Passing the beat around is one of our favorite pastimes here, ya know! 😉

Now, go… make… (percussive) sounds!!

Teaj

A Gearhead’s New Year’s Resolutions List – Pro Audio Promises & Digital Dreams!!

The end of 2018 is just hours away, and we here at Seriousgas are putting to bed our last, facetious article of the year.

It’s important to always have worthy goals, so today we submit for your perusal our “Gearheads New Year’s Resolutions List”.

Perhaps you’ll find some of these goals resonate with your own objectives for the new year. Or perhaps you’ve already tried them? Or maybe they remind you of a bad dream you had once?!

Regardless, no worries. Resolutions aren’t for everybody. And anyway… even slackers accomplish something eventually. lol

Defeat the Foam Monster!

It all started innocently enough.

After all, in order to properly construct an isolation booth, or corner, or room, you need… what? Acoustic foam, of course.

The gap between sound panel & wall.
The gap between panel & wall.

So I bought a big studio foam package and put it up.

Then I bought some more supplementary foam, and put that up.

Then some more.

And some more.

And some more…

About this time that I started to notice things disappearing. Not physical things, mind you, just sounds.

Sound foam
Photo: Victor grigas

Like when someone would try to call me on the phone would ring in the studio. I never heard it. Yeah, the ringer was on. But somehow the sound just got swallowed up.

But I kept putting up foam, thinking, you know, it’s just what you do in the studio, right?

Soon I was encountering a real problem. That is, I would record audio, see multiple waveforms clearly in my Pro Tools display, but couldn’t hear it, no matter how many times I press play.

I started disassembling, and then reassembling, gear; swapping out cables; trading monitors with other audio gearheads: making each and every plug-in inactive.

Nothing worked. All my work was as silent as the grave.

Then one day my wife walked into the control room. I turned to look at her and noticed she was talking right at me.

But I couldn’t hear a word.

I open my mouth and responded, saying, “Are you trying to pull a fast one on me by only moving your lips??”

But when I spoke I heard not a syllable that I uttered.

Then it hit me, like a ton of Auralex. My studio gear wasn’t malfunctioning – I just had installed waaaay too much foam.

Yes, friends, I had created a soundwave monster! It devoured every humming morsel, every ringing tidbit, every vibrating frequency from soft whisper to standing wave!

We were lost… in an aural vacuum of tonal nothingness!! Oh… the HORROR!!!

It’s because of this that, for the new year, I shall cautiously enter the control room and see if, bit by bit, scale by scale, square by square, I can reduce this sucking morass of a beast down to a manageable audio partner.

Wall of Hertz sound foam
Photo: ESA–G. Porter,CC BY-SA 3.0 IGO

One that mitigates noise, but cannot steal a newborn song’s soul before it can even crawl on its four verses!

Wish me luck. If you never hear from me again… It’s not because I’m not SCREEEEEAMIIIIIING into the VOOOOID… !!!

Fulfill the Sacred Monitor Quest!

For decades now… I have searched.

Easter Island.

Oymyakon, Siberia.

Tristan da Cunha.

Motuo, Tibet.

The clearance section at Target.

Studio main monitor
By Jon Gos

I’ve looked high, I’ve looked low, but nowhere have I found the treasure I seek…

The perfect studio monitor.

But I know it’s out there. I have read the legends.

Yak in Tibet
Yakkity-Yak! (Photo: Dennis Jarvis)

I have heard with my own two ears the whispers of its transcendence… from the palms of Siwa Oasis to the yak-driven plateau of ChangTang!

This cunning, elusive and beguiling entity is what we audio engineers have needed, desired, yea… even wept, and wailed for, in the inner sanctum of our Control Room.

The perfect monitor! Speakers that will sound out our mixes with perfect clarity, balance and layered nuance.

A revered transducer that will bequeath unto us a “Final Mix” that will sound absolutely perfect on each and every sound system known unto man!!

This… this is what I seek!! And I shall not be thwarted!!

And I believe this is the year my quest comes to an end! For I have laid eyes upon the Maeshowe’s Runes on the Orkneys, and have discerned its true, hidden meaning.


(Photo: John Erling Blad)

My 2019 journey to fulfill this ambition will not be easy, however, for, if I am right, I will need to travel thousands of miles.

First, by plane. Then, by boat… by helicopter, dog sled, kayak and, yes, even miles by foot to even get near the Sacred Speaker’s resting place.

But I shall do it!

I shall ascend the ice that circumscribes the settlement of Ittoqqortoormiit, Greenland!

I shall surmount the loose scree slopes!

(Photo: Brocken Inaglory)

I shall breach the veiled snow door of Manjkhapurtee!!

And there, for you… for me… for all audio kind… I shall at last obtain that coveted relic!

And, yes… I will do a selfie for Instagram. 😮

N.A.M.M. Will never be the same…

Dither Me, Baby!

If you’re a pro audiophile, you know about dither. You know that sometimes putting some NOISE into an audio file is just the ticket for smoothing things out and avoiding frequency content distortion.

Dither examples

What you might NOT know is that dither has so many uses even the mighty Wikipedia hasn’t dared to mention.

For example, did you know it can save marriages? Oh yea. No joke. It’s all about signals being clear, right? Discernible, with no distorted meanings.

So, the next time you and your significant other are having a moment of misunderstanding, where he or she just doesn’t seem to get that you’re right about something (‘cuz, ya know, you clearly are!), try introducing dither into the dialogue.

When he or she gives you that look (you know the one), and you know they’re going to go off on a litany of reasons you’re bonkers, just start dithering.

Remember, though, dither is not just uninterrupted white noise. It’s full-spectrum “filler” that’s put in between the real McCoy audio snapshots.

What that means for you and your, uh. “conversation challenge” is that you need to interject noise in a punctuated, non-continuous manner.

Here’s a recent example from my current family vacation at Disney World:

Wife: “You’re not in the right lane.”

Teaj: “Yea. So?”

Wife: “So you need to be in the right lane.”

Teaj: “Uh… why?”

Wife: “Because you’re going to be turning right soon.”

Teaj: “Um… that’s not for a mile and half, dear.”

Wife: “Yea, but these vacation tourist drivers are crazy. We don’t wanna get stuck! Or hit!!”

(It’s at this point that I introduce some awesome, marriage-saving pro audio DITHER to the conversation. My personal dither setting sounds like a mix between an old modem connecting to the Internet and Darth Vader breathing…)

Teaj: “Okay (KHHKHHKHKHKHKHHKHKHKHKHK), I’ll start switching lanes. But (KHHKHHKHKHKHKHHKHKHKHKHK), you know, there’s no real (KHHKHHKHKHKHKHHKHKHKHKHK) hurry. And the traffic (KHHKHHKHKHKHKHHKHKHKHKHK) isn’t really that bad here. Take a (KHHKHHKHKHKHKHHKHKHKHKHK) look. (KHHKHH)”

Wife: “Oh, yea. I see. You’re right. Wow, why didn’t I see that before?! You’re such a better driver than I am. Like so many things… Honey, let’s drop the kids off at Hollywood Studios and go back to the hotel. (wink)”

Teaj: “Sure, hon’. Whatever (KHHKHHKHKHKHKHHKHKHKHKHKHKHHKHHKHKHKHKHHKHKHKHKHKKHKHKHK) you think is best (wink back).”

As you can see, dither is a powerful tool when used sparingly, with discretion and the slightest fader push of informed whimsy.

Make it your personal resolution to engage some dither into your 2019 days. You won’t regret it!

2nds, Please!

Finally, I’m going to join in with a New Year’s resolution that audio engineers often make in professional studios. That is, to give their 2nd Engineers more time at the controls.

Gear Hounds Intro

My 2nd, Pippin (seen to the right with me), is always asking me for more time to practice tracking and mixing.

He’s really gotten a lot better in the last year. Before that he was too much of an undependable, juvenile adolescent to trust him with a big session.

But recently he’s really proved himself. Before Christmas, he tracked and mixed a new song he’d written all by himself, and it sounded great!

He called it, “To All the Bones I’ve Loved Before”. Says he thinks it could crack the Billboard charts. I don’t know about that, but his mix impressed me.

Yea, he still leaves fur in the faders, and I have to wipe off the occasional slobber on my computer keyboard. But he’s a responsible craftsman now, so for 2019… I’m going to let him take the chair more!

Maybe you can do the same for your 2nds?! You know… you need to throw ’em a bone sometimes. 😉

That’s a Wrap!!

Well, 2018 has been great!! Our website, just like your amount of GEAR (we hope), has grown by leaps and bounds its inception and this year was no exception.

And YOU are the reason! Thanks to all of you who stop by here at Seriousgas often and inflate your gear love with the rest of us.

There can never be to many stories of how our music equipment makes our lives more rockin’ so continue to share your comments, accolades, insights and absurd audio memories. We love ’em all!!

One thing’s for sure: in 2019, just like always, there’ll be no lack of exciting new music equipment to get a slavering and salivating for the latest and best.

happy new year scrawled

We’ll hit shopping carts online with ya later. But for now, may all your pro audio promises and digital dreams come true.

But until then, go… make… sounds!!

Free Music Recording Software – Why It’s Christmas Every Day!

In 1979, Michael Jackson’s “Off The Wall” album dropped and soon was rackin’ up the hits.


Our Florida vacation Christmas Palm!

Being into soul music, I was a fan, and for Christmas Eve that year, my parents gifted me his album AND a brand new Sony Walkman to listen to it on.

Just it time too. Christmas morning I was up at 5 a.m. delivering HUGE, heavy newspapers in a mild blizzard!

Michael’s hot, funky grooves made the storm far more tolerable, and I was more inspired than ever to make my OWN chart-toppin’ music one day.

Free music recording software was not even a thought in anyone’s MIND yet however, let alone a product I could use to start creating my own songs.

Today? It’s a different story. I’ve got no less than four different software programs on my computer for making music, and hundreds of hardware pieces to go along with them.

As we go into Christmas Eve tonight, I invite you to celebrate with me, not only the reasons for the season, but one of the most life-changing realities of our musical times…

…. the fact that we can now make our own albums… our own music… for FREE!!

Add a good pair of headphones, and we’re in audio nirvana!

Audacity

We’ll start with one of the simplest – Audacity. I’ve dabbled with this program for a few years now, so I know it pretty well.

If you’re just beginning to explore audio recording, I highly suggest this software. It’s intuitive, easy and offers just enough parameters to whet your appetite but not so much that you get lost in confusion. It’s also available on Windows, Mac and Linux.

If you’ve never experienced the joy of recording an instrument, then hitting record again to sing along to that instrument, download Audacity and give it a try. If you’re like me, you’ll be hooked for life!

Not only does Audacity allow you to multitrack, it also provides quite a lot of effects for you to use make your audio sound a lot less “ordinary”. Reverb, delay, chorus, flanger, fade in and out… the list is quite extensive.

Are these effects going to be professional-grade? No. But neither do they sound terrible.

If you go into the software knowing it’s not professional-grade, satisfied with its results.

Audacity dark colors

There are two drawbacks that I find, however, that you need to consider:

First, if you want to export your music as an MP3, you’ll have to download and install a separate encoder to enable that. With MP3 being so ubiquitous, it’s pretty lame that it’s not supported audacity, but hey, at least there’s a work-around.

The second drawback is a big one though – all the editing you do in Audacity is destructive. This means that every edit you do on your recording actually changes the waveform.

What this means for you practically is that if you decide that you’ve made a mistake, your only option is to “undo” it.

This is fine if you just made that edit, but what if TEN edits back you added EQ, and now you want to take it off?? And you’ll have to undo 10 times, losing ALL the work you did after that as well.

This destructive editing is the biggest reason why audacity is not used professionally. Downloader beware!

Pro Tools First

I first started using Pro Tools back in 1994. Amazingly, it was the industry leader then, and still is even today, over 20 years later!

There’s not a lot of products you can say that about.

The free version of Pro Tools known as “First” has its limitations, but compared to other free options out there, it’s quite powerful.

Its sound quality is great – you can put down 96 kilohertz/ 32-bit audio with this software. Of course that’s only if your hardware also supports that level of quality.

Pro Tools First also gives you 20 audio plugins right outta the gate. This is so cool for those who have not yet worked with plugins, gives you an insight into a whole new world of possibilities.

The number of plugins available is endless, and I have plenty of recording friends who are plug-in “junkies”. Pro Tools limits you to 20 here, but that’s not a bad thing. Better to use a few tools well, than many tools in a mediocre fashion.

Pro Tools First also does not offer MP3 or M4A file exporting, but since it’s a professional platform, those using it won’t typically WANT to export compressed audio, so it won’t be missed.

The only drawbacks to this software are:

1) you must have Internet access to use it. You will actually be recording to Avid’s Cloud setup, so all clips and files will not be on your computer.

2) You are limited to THREE active projects. To record more, you’ll have to finish one of your songs up and delete it.

3) It’s computer demanding. It’s around 800 megs just to install it. Thus, if you have a small computer with not much memory and storage capability, you should try another option.

On the other hand, this program it’s a big help for someone ready to invest money in recording software, but who is not sure which platform to use.

If you find, like me, that Pro Tools is the industry leader for good reason, simply upgrade to a paid version for unlimited projects and tracks.

Garage Band

For those of you who work on a Mac computer, GarageBand it’s probably quite familiar. It’s the program already loaded for free in your Mac when you buy it.

It’s quite easy to use, and gives you lots of options to explore.

One reason I like this software comes from the fact that I’m a music teacher: it has a built-in sound and loop Library that allows even non-musicians to make some pretty cool music.

This often has the encouraging outcome of leading people to try an instrument, or singing, or further loop production, or… whatever! As long as it gets people interested in music, I’m a fan!

GarageBand is typically not used professionally for one big reason: audio quality. It doesn’t support 48 kilohertz recording, which has become such an industry standard now the even I always use it every time I start a new song.

But if you’re not looking to actually put out an album with this software, it’s a good option to investigate on a Mac computer.

Reaper

Reaper is an excellent software platform. In fact, it has the best audio quality out of any product discussed here today.

How can I say that? Because I personally know the esteemed former Motown sound engineer and audio genius Dr. Ed Wolfrum. He tested all the major recording software programs extensively with his lab equipment and found Reaper to produce the best audio quality by far.

Nothing beats having an inside track on the business. 😉

After the 60-day trial period, you’re supposed to start paying for Reaper, but if you’re using it to learn recording techniques, and are making no money from it whatsoever, and you can keep using it.

The Reaper company hopes that eventually, if you do turn a profit, you’ll remember their generosity and become a paying customer.

Reaper is definitely more complicated than some of the other options here, but it’s because professional platform that has many more options available to you. More options = longer menus.

So the learning curve will be a little higher, but in the final analysis, if you’re all about producing serious audio, Reaper delivers in spades. I use it in my studio, and know two other professionals that I work with in an ongoing basis who also prefer Reaper over other programs.

It’s just that good. 🙂

Podium Free

I had not heard of “Podium” software until researching for this article this week. Not surprising though, since I keep up with pro audio stuff by going into stores a lot, and stores don’t tend to carry FREE items.

Gee… I wonder why. Lol

Reviewers are giving it a thumbs-up across the board though, and my subsequent glimpses of its specs, ease-of-use and feature set definitely show it warrants a closer look.

It’s a Windowsonly program, which may be its biggest detriment.

The developer of this program has been upgrading it slowly. Supposedly he’s more concerned with stability as the software ages than “bells & whistles”. For this reason, I didn’t find any user complaints of crashes at all. Quite the opposite. If you want a program that is stable, dependable and rock-solid, Podium appears to lead the way.

It has the look of a program that’s “not-quite-finished”, at least compared to the pro software that I use. But since it’s free, I don’t think we really have anything to complain about! Plus, how it works is far more important, and users are saying across the board that its got a winning, understandable user interface and workflow.

I like that this program also gives you full functionality compared to its upgraded big brother. It’s also great that it can work on a 64-bit computer system like what I work on. Very cool.

The biggest drawback to Podium Free is that it remains a SINGLE-CORE platform. No matter how many cores you have in your computer setup, Podium Free only allows one to power your plugins.

Thus, if you are the person who has serious, beefy, CPU-intensive plugins and are not afraid to use ’em, this probably isn’t your best choice. Sure, you could change and be “plugin conservative”, constantly monitoring how much you’re taxing your system and rarely bringin’ out your big guns, but who wants that?? I wouldn’t.

Other than that, I actually like the program. As always, it’s all about HOW advanced you are and WHAT you prefer in a DAW that matters.

Ableton Live Lite

This particular software is my least favorite among the bunch, but that doesn’t mean it’s not a powerful platform on which to create some dope music.

The drum & synth programs really rock on this program, and they’re incredibly easy to drop in and create music with, even if you’re not a musician at all. If you’re into Electronic music or Hip-Hop, you’ll probably REALLY like Live Lite.

You can tell that Ableton is into helping people learn to create music. The program not only has a vast “Help” section, they also provided tutorial videos right inside the program to help you get the hang of how to do things. It’s a music teachers dream, in that respect.

Like a couple others on here, you can’t export as an MP3 with this program. But there’s always the possibility of exporting your final song and then using an online file converter.

The user interface is very different from other DAWs, so if you’re used to any professional recording software program, you’ll probably find Live Lite very different, if not maddeningly un-intuitive. If, however, you’re new to recording software, you’ll find it quite ergonomic in feature placements.

There’s also a limit on how many channels you can access with this Lite edition. Once you reach 16 tracks you’re done. The party’s over – sorry!

But, hey, you can always start another song. Or upgrade to a paid version, which opens up many more tracks.

As usual, depends on what you deem important.

All I Want For Christmas is… Software!

With each passing year, there are more options for the recording musician. I was pleased to find at least 5 new programs this season that I had NOT ever heard of available to us. That’s awesome! It means more music, more of the time.

I considered some of these others for this article: LMMS, Cubase LE, Ardour… but after weighing them against what you see here, I found their limitations too much of a detriment. Instead I listed here the ones that I would actually consider using myself, based on feature set and user reviews.

Hope it helps!!

Do you use any of the free music recording software above? Do you think there’s another I should have included?? Do you think all software should be free, along with every video game ever created??!!

Well, let us know in the Comments. I can’t say we’ll agree, but it’s an interesting proposal. Lol

My Favorite ornament!

Oh, and if you want to know what some great options are for recording software that you purchase, you’ll appreciate THIS ARTICLE!

Merry Christmas Eve, everyone. Or whatever holiday you’re celebrating. Make it the best by… well, recording a new SONG, of course!! 😉

Now, go… make… sounds!!

Teaj

Tama “Tension Watch” Review – Precise Measurements For Your Cookbook Of Tone!

This week, my wife and I were watching a great cooking show called ” Salt Fat Acid Heat”.

It documents the travels of Samin Nosrat through Italy, Japan, Mexico and America as she explores the myriad of ways these four attributes are used in cooking.

Seeing the seemingly endless ways you can cook any given food product, I was reminded how drums, around the world, are tuned

In such endless varieties as well.

Which leads us to this Tama “Tension Watch” review. This li’l beauty is a tool for applying some specificity and science to what can sometimes come across as an airy-fairy, ethereal pursuit.

“If it sounds good, it is good!”

Well, yes, that’s certainly true. But what if you’re not sure what sounds good?

Or what if it seems like it’s taking forever to tune every time you have to change drum heads??

Well, pull up a chair and make yourself comfortable. This one’s for you!

The Movie

As usual when we’re dealing with all things audio, it pays high dividends to actually be able to HEAR something.

And when you get to SEE it too… well, that’s just… HOLLYWOOD, BABY!!! Lol

With that as our lodestar, let’s first get to know the Tension Watch through a little studio recording…

The How

Tension Watch face

So how does the Tension Watch do that??

Well, there’s a spring inside that compresses or expands when you put it on a drum head or take it off.

As you tighten or loosen a drum head on each lug, a pressure differential is sensed by the spring inside. The amount is then displayed as a number on the front numbered face.

Its engineering isn’t like Trapped ion Quantum Computing or anything. It’s really quite a simple machine. There’s even videos online of how to make your own.

But it works well, as the video proved, and that’s definitely worth something. For further tweaky info, check out its MANUAL PAGE.

Make sure that you calibrate it before you use it though. Simply put it on a completely flat surface, and check the meter reading to confirm it’s at zero. If so, you’re good to go!

Ross puts on new heads

So did the Tension Watch get us to an “in tune” head??

Yes! Pretty darn well, I must say. I actually didn’t expect it to be so accurate and helpful, but after choosing my goal and tightening up to it, I only had to make a few minor adjustments, about an 1/8th of a turn, on only three lugs.

Not bad!

The Why

Here’s why it even exists: if a drum head is tuned such that each of the lugs is holding about the same tension all around the rim, the head will be able to vibrate the most freely, and thus will be more resonant (in theory at least).

Tarzan

Since resonance equals “good sounding” to most players, this is why we drum tone chasers swing endlessly from our sonic vines, pursuing this elusive “perfectly in tune” beast through the jungles of unmatched rod tensions, warped hoops & uneven bearing edges.

(Insert Tarzan shout/yodel here. 😉

So will all drums sound best when all lugs are at the exact same tension??

Based on my experience, and that of many others, I would say “no”. What DOES help achieve great drum tone and resonance is having each head within a close range of tension proximity.

In other words, when all the drums have head/lug tensions that are close, and in the same ballpark, then good results will almost always be heard (meaning noticeably better resonance & sustain).

Most of the time, when I’ve tuned using the Tension Watch and gotten each lug perfectly matched according to the meter, I still and up tweaking them to “perfect” my tuning. “Exact same” has never been the final tuning point.

If you want to get your drums to “relatively in tune” quickly & easily though, even without hearing your drums, this is the tool for you!

The Who

Um, no, I’m not talking about that band!  ;-o

Anyway… who is the Tension Watch for, really?

Are any of you already “drum whisperers”?? A player who can superbly tune drums, with old heads or new heads, anytime, anywhere, with a few flicks of your expert wrists and a tuning key.

If you’re that good… well, you can leave now. There’ll probably be no benefit for you in having one o’ these.

Besides, you’ll probably just end up throwing at your lead singer when he shows up late for rehearsal.

Again.

Lol

If you’re a beginning drum student, this thing will really help you. Since you don’t have a backlog of head-swapping experience, this will help teach you the fundamentals and help you reach the final goal (a great-sounding kit!) in no time.

black & white drum kit pic

Being an intermediate player myself, I really appreciate how it can help me prepare a kit in the studio in swift, unerring fashion. When clients are in, I don’t want anything stealing minutes, and even before clients arrive, if I can reduce my prep time and actually see my family a bit… win/win all around.

Ultimately, it comes down to do you have the complete drum tuning skills, or not? Only you can answer that question, but if you’re not sure…

… you could probably use one of these. 😉

Help Amidst the Hubbub

Even if you are an expert at tuning drums, there is still one scenario in which you might appreciate having one of these with you: a noisy venue.

Let’s say you’re doing a gig where there’s no sound check. You’ve just got to walk on, set up quick and play.

While the other goth metal band is playing their music which can be heard eight miles away… you can still tune your drums!

As long as you know what reading you like them at, at least. What I do is keep tension numbers documented for each of my drum kits give it a good all-around sound for most genres.

Can’t hear? Lucky for you, the tension watch hears for you!

“What Was That Tuning Again???”

Another great way to use this little machine is to document important tunings for certain pieces of music… especially if a song calls for tunings that are quite extreme or “off the beaten path”, shall we say.

If you normally play rock/pop, for example, but every once in a while do a side gig with a jazz trio, you can keep a record of the drum tunings for that group.

Jazz snares are typically tuned quite a bit higher, so rather than try to find it the day of the gig, just call up your record of the tunings, tighten up your heads, and before you can say Thelonious Monk… Bird’s your uncle!

If you’re still scratchin’ your head about the universe of drum tunings available, and what it all means… well, you may need counseling.

JUST KIDDING. But it can be confusing, so if you’d like a more thorough glimpse into what your options are, take a look at THIS POST ON TUNING DRUMS.

No Substitute

The bottom line with this tool, however, is that it’s an aid for tuning your drums, not a replacement for the most important tools – your ears!

I’ve never had the tension watch tune my drums perfectly. It’s come pretty darn close, don’t get me wrong. But at the end, I still have to use my ears to refine the frequencies I want to dial in.

Even dog ears can hear that drums not tuned!

If you treat the tension watch like the assisting tool it’s designed to be, it’ll serve you well and be there if you need it.

For me it’s a time-saving device more than anything. I know that I can skip a lot of listening to the head and just get to my desired tuning as quickly as possible. BOOM! Ready for downbeat.

As usual, there’s no substitute for the real thing. 😉

The Latest Upgrade!

In writing this article, I was delighted to see that Tama had re-engineered this little tool and made it a lot better!

Check out the picture, at left, of the new design. The fact that the number dial now faces upwards is a much-needed bit of progress. It was always hard to read a dial facing your navel. Now, the optimum placement has been realized!

Also, you no longer need to find a felt washer or something to use as a spacer so that you get consistent readings. Now the tension watch is retrofit with a detachable nylon bumper it keeps you at a consistent distance from your drum hoop. This helps ensure tuning results that are evenly tensioned.

Way to go, Tama – you really listen to your customers!!

This is easily on my “buy next” list. If you’re also feelin’ the love, join me and speed up your next tuning session:

click map

Guitar Center

Sam Ash

Musician's Friend

Amazon

The Competition

There are other drum tuning tools on the market. Before Tama, there was “Drum Dial”. It looks almost exactly like the older version of the tension watch that I have.

The difference is it comes with a spacer, whereas the tension watch does not.

In the last few years, they’ve also released a new version that looks the same, except the “watch face” is a digital readout. So the mechanically engineered product has now reached the age of A.I. In a decade it’ll probably serve us drinks during the gig too.  Lol

There’s a separate category of drum tuning tools that measure the torque applied to the drum tension rods, and don’t measure the actual head at all.

One example is the Regal Tip DT1, which you can check out HERE. Another is the Rhythm Tech Memo drum key, found HERE.

The word on these “lug torque” models is not too flattering. About half of those experienced with them say they don’t “measure up” (pun intended)!

I can understand why. It’s the tension of a drum HEAD that produces the tone of a drum, not the lugs.

Get you in the ballpark for tuning? Probably. But since the reviews end up averaging around a 3 for these lug torque models, I’d spend a little more for something that works better.

The last category of drum tuning tools are electronic. The Tune-bot, which you can view HERE, has made quite a name for itself in drum circles, being the latest cutting-edge technology to assist in drum tuning.

The reviews, however, for this electronic route are still not “rave” at this point. Most settle on describing them as “pretty good”.

The biggest problem with them is described often in online reviews: they don’t seem to hear the drum head pitches as well as they need to.

Several have mentioned that they tend to produce consistent errors when working on the resonant head for some reason. Probably because it’s usually thinner and that’s has a lot more overtones ringin’ round.

Stay tuned here at seriousgas.com though, because this Tune-bot has me intrigued. I think the new year is calling for a review on one.

Don’tcha think?! 😉

The Final Flam

It was so much fun playing on my friend Jim Lewis’ kit today for the video. He is sorely missed, and every rudiment I roll on his kit shall be a tribute to his great skill and our laughter-filled friendship.

Ludwig CARTOON kit
Jim’s old Ludwig kit
Jim laughing

Thanks for joining me on this somewhat emotional journey today. In the past few years, I haven’t changed anything on Jim’s kit, so to swap out the snare head was a big deal.

But, hey, I know Jim would approve. After all, he was always about pursuing the greatest sonic results in all of our recordings together.

Groove on, beat Meister James!!

If you have comments or questions on the Tama tension watch, please leave them below. We appreciate your input and love to hear your own stories of drumming options and gear love.

ORange drum

Knowing how much of a difference hoop types, wood types, number of plies, and choice of heads can make on a drum’s sound, I think it’s safe to say that for most of us who like to bring out the glories of a drum kit, a tool like the Tension Watch is really cool, even if it is only a place to start your tuning process.

Yes, there will always be many other factors at play in seeking the “magic resonance” of each of our drums, but just having your head tension measurements goes a long way to getting you there… quicker.

So, if you’re a beginner striving to learn drum tuning…

… or an intermediate player who just need a little help remembering how to maximize your drum sound…

delicious food

… or even a pro (player or tech) who wants to make your make your drum tunings quick & “delicious”, Tama’s gotcha covered.

Tune when it’s loud; tune “in the ballpark”; tune “like it was tuned”… it’s all doable now that the Tension Watch is here.

So, go ahead – have a heapin’ helping. We’ll be back for seconds and thirds when your next hit drops! ‘-)

Now, go… make… (tuned) sounds!!

Teaj

Teaj in the storm fields!