Reference Tracks For Mixing – The Roads To Take You There!

The road to good mixes!

The last album George Harrison ever produced was released in 2002.

It was released the year after his death. His son Dhani, and his good friend and fellow “Traveling Wilburys” member Jeff Lynn, produced the tracks George had almost finished before he passed.

It’s probably my favorite album he ever made.

The opening song of the album is also one of my all-time favorites. It’s titled “Any Road” and, with an energized ukulele backing track, George lays out this catchy earworm of a truism as only he could do, singing:

“If you don’t know where you’re going, any road will take you there.”

What does that have to do with reference tracks for mixing? So glad you asked… 😉

A Mix That Needs No Fix

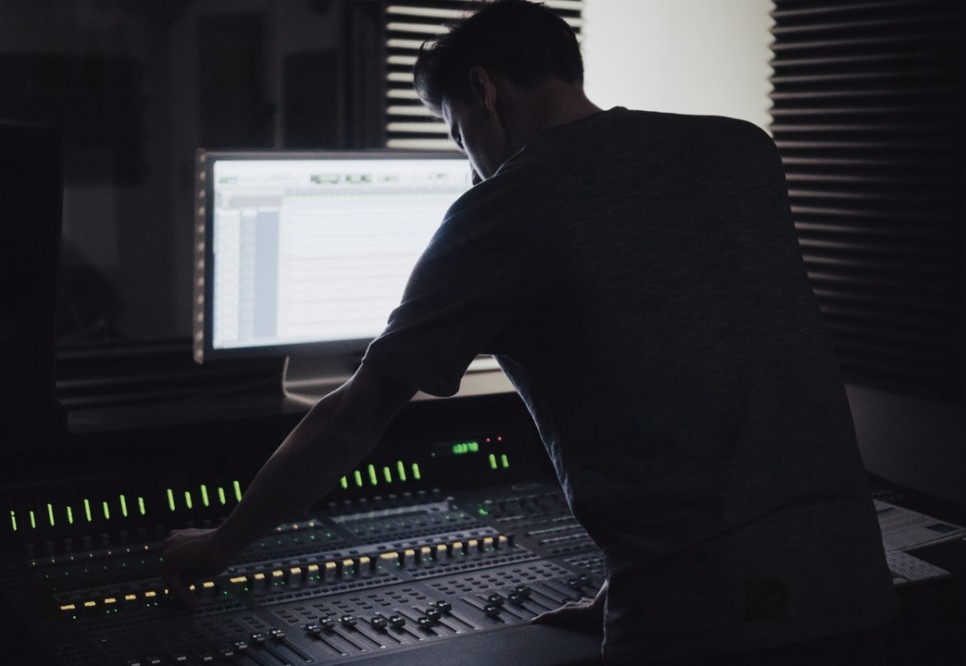
Those of us producing recorded music know that the mixing stage of any song is crucial to get right.

deep in a mix

The hard part is that “right” is a totally subjective goal, isn’t it? Who is the final arbiter who judges that one mix is better than another?? Who’s to say “where we’re going”??

US, of course! That judge is ourselves, so we gotta do the best we can to work out a final mix that will impress not only us, but all others who hear it. So before we start, we need to have our destination in mind. We need a good idea of where “there” is… what a solid, polished, impressive mix is.

One helpful aid towards this end is having outstanding audio tracks at the ready that will help tune our ears to the parameters of aural excellence. It’s setting an auditory goal up to our senses – something to shoot for, to compare against.

James Cameron, the extremely trail-blazing director, said, “If you set your goals ridiculously high and it’s a failure, you will fail above everyone else’s success.”

This is why we listen, deliberately, to the most awesome reference tracks we can: to boost our sense and understanding of what makes up a superior recording, to take our recordings to their highest heights, and to produce, as much as it is within our power, captured music and performances that would make our Engineer/Producer/Artist heroes… proud.

It’s all about, as George alluded, knowing where you’re goin’… and then stayin’ the course.

“Because Your Mix, Your Mix, is On My List… !”

There are lots of lists of “Best Audiophile Albums” on the Web. Some albums almost always make these lists, since they’re counted as among the best mixes in recorded music history.

Today, though, I wanna share with you the albums that I use to get my ears and brain in that “Genius Zone”. Some are the “winners” that you find on the Web lists. Others? They’re not on any list that I can find… but they sure are on mine! And shall remain so. They’re that good.

engineer bending over a mix

A lot of choosing tunes for mixing reference is answering the question, “What tracks to I really, really know super-duper-well? So well that there’s not an instrument or sound in the mix that I haven’t noticed or considered before?”

If you listen to a song off of one of your favorite albums, that was done by esteemed producers and engineers who lived in, worked in and achieved greatness with their hands and ears, then it sets you up to be in an optimized state of readiness to do the same yourself.

And who wouldn’t want that?!

Is using reference tracks for mixing something only beginners do? Not in the slightest! There’s plenty of pros that still prepare their ears for mixing by reminding them what “amazing” sounds like.

To that point, let me share a telling studio moment with you…

Jumpin’ Jack Flash!

The Yellowjackets recording in Schnee Studio
“The Yellowjackets” recording in Schnee Studio

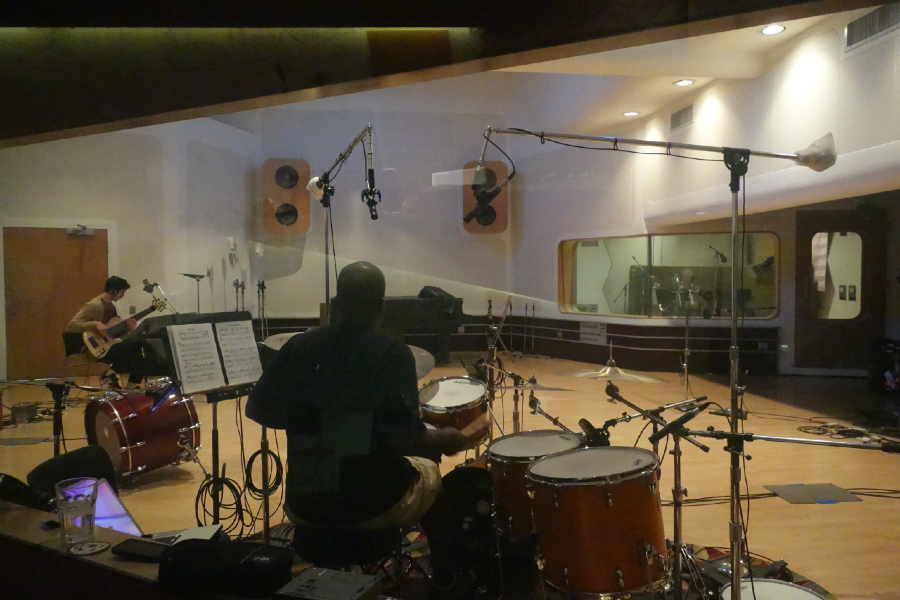
While pursuing my bachelor’s degree at Cal State Northridge, I worked afternoons and nights at a great recording studio in North Hollywood called “Bill Schnee Studio“.

I witnessed many recording “stars” and incredible bands lay down tracks there (including the Yellowjackets, as you see to the right) and, of course, set up hundreds of mics for the rhythm section sessions that helped propel them into further acclaim.

Well,… usually. lol

I also got to meet many top producers, and took in how they worked: their methods, their idiosyncrasies, their inspirations, their pet peeves. That is truly an education in itself, let me tell you!

JJP does a mix

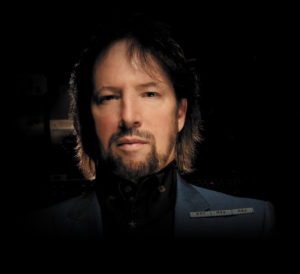
One year, we all had the privilege of working with Jack Joseph Puig, a young upstart of a producer who had just finished an Elton John record when he came into our studio with audio guns blazing.

The record he was hired for was Russ Taff‘s fifth album, eponymously entitled “Russ Taff”.

If you’ve never heard Russ Taff wail before, you are truly missing out on vocal that are among the best I’ve EVER heard, in any genre, on any record.

Do yourself a service and stop what you doing, go to YouTube and check this tune we recorded during those sessions called “Shake”:

One Saturday morning during these sessions, I came into work early and heard the muffled sounds of the Beatles “Revolution #9” being played, uh… quite loudly in the control room.

I walked over to the big, heavy, thick, carpeted control room door, swung it open and found Jack Joseph with a beaming smile on his face, incredibly animated and jamming along with the song blaring out of the Yamaha NS10 monitors (anyone still using those puppies??!) louder than I’ve ever heard anyone monitor anything…. EVER!!

When I asked him what he was doing he simply said he was getting ready for the days’ work. I immediately understood what he was saying.

It’s like what I say now about mixing: “You gotta hear the good stuff… to hear the good stuff!”

What I mean by that is, if you have trained your ear by:

  • listening to the best-recorded songstattooed mix engineer
  • through quality monitor speakers that you mix with
  • in a properly sound-balanced Control Room setting
  • with focused concentration and soulish convergence

… if you do those things, then (and probably only then) will your ears recognize the right tonal paths to take, as well as knowing when a mix is finished, which is a skill all its own.

Alright, so now that we’ve gone through the many reasons why mix reference tracks can rock our products and our listener’s ears, let’s get to some examples…

The following albums and songs have helped me time and again to achieve great mixes… to ascend the Holy Mountain of Sound, and bring forth to all people… glimpses of audio divinity!

Let’s see if you use any of the same ones that I do…

John Mayer, “Battle Studies”

john mayer battle studies mixThis fourth album from John released in 2009 is arguably his best-mixed work. If I’m ever wanting a modern-sounding, youthful Pop mix, I’ll turn to this collection of songs.

The drums on this particular album tend to be pretty front in the mix, so take that into consideration. If you’re working on a project where drums aren’t as sonically relevant, then choose something else.

My number one song from mix reference on this album? The last tune: “Friends, Lovers or Nothing“. It’s a fantastically well-written song with quite an overt Beatles flavor, believe it or not. It’s pretty atypical for John, but it’s a clear mix winner on this album.

My number to pick is usually “Edge of Desire“. It’s the more familiar John Mayer sound, and also a more typical pop production and arrangement.

Alan Parsons, “Try Anything Once”

I’ve been a huge Alan Parsons fan since high school. This man has the Midas touch of gold when it comes to audio.

In case you don’t know, this is the guy who not only was part of the “Abbey Road” sessions for the Beatles, he also engineered the “Dark Side of the Moon” album for Pink Floyd, a feat which has brought him unending, undying fame and appreciation the world over. He is one of the most esteemed producers of the past generations.

In short, the man knows what he’s doing.

Interestingly, this album probably got less attention and marketing than any album of his career. How ironic, then, that this album sounds better than anything he’s ever put out. It is stellar. It is awe-inspiring. It is the best of the best. The top of the tops.

Try Anything Once mix

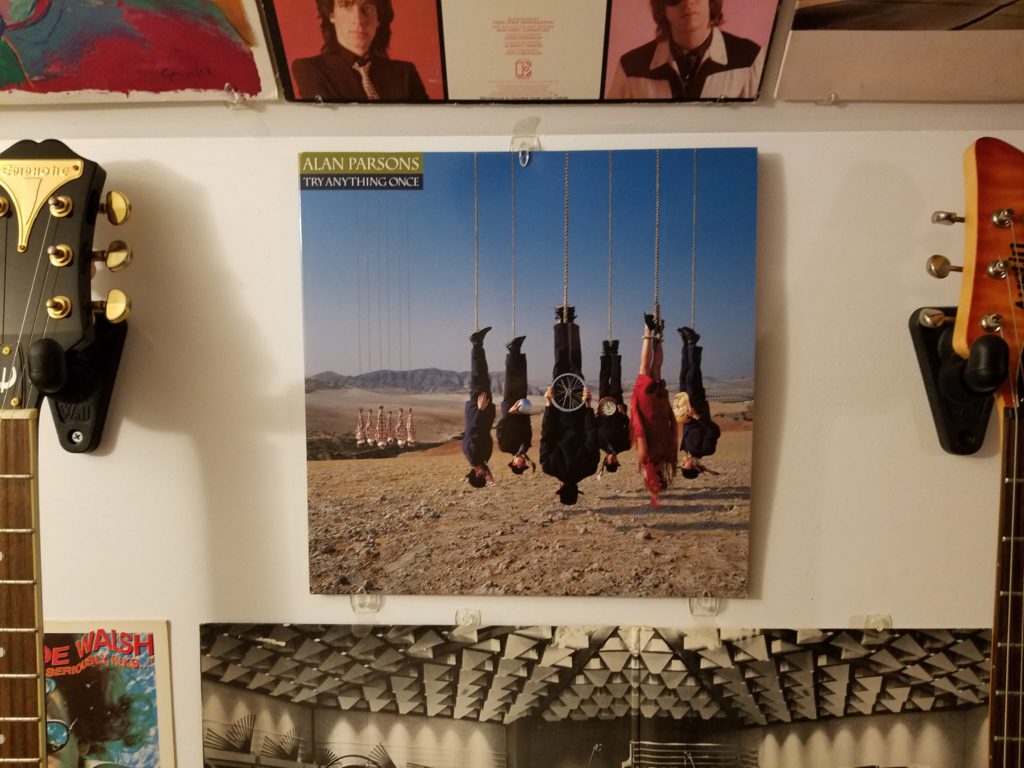
If I could only pick one album to have for mix reference… it would be this one.

There’s honestly not a song on it that I wouldn’t use for reference. But because it’s a mixed collection of slow and fast, loud and soft songs, I’ll usually just pick a track similar to what I’m working on at the moment.

David Pack in the mix!

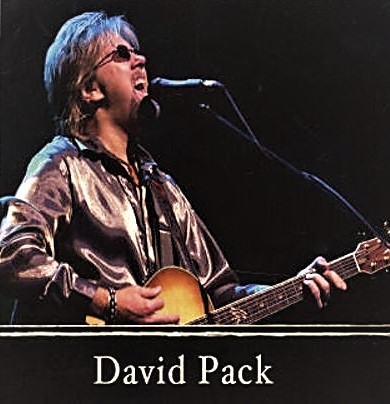
The best song off this album for mix prep to me is “I’m Talking to You“. The lead vocal was done by David Pack. Some of you might remember him from the band Ambrosia, as their lead singer.

Here on Alan’s record his vocals are as impressive as ever, and totally sit perfectly in with the progressive, yet singable, album vibe. David, in fact, co-wrote three of the songs on this album with Alan.

Parsons’ music has never been what most people would call “standard fare” for radio, but regardless of how progressive (some would just say ‘weird’) the songwriting is, the sonic clarity of this album is an apt target for anyone wanting to end up with an impressive modern song mix.

Rock solid production; depth; width; clarity; precision – it’s got it all in spades. It’s an incredibly captivating trip into a superior aural world.

If you’ve never heard this album, do yourself a favor and give it a listen. It just might become part of your mix reference track “must-haves”, as it has mine!

Peter Gabriel, “Up”

I’ve been a Peter Gabriel fan since his third album, which most people call “Security“. He gave no title to his first three albums, so people just kind of made up names to refer to them, usually based on how the album cover looked.

He achieved legendary fame and acclaim with his tour de force “So” album from 1986, but to me the album that has the best-sounding mix is the last original album he ever did in 2002, called “Up“.

Peter Gabriel GREAT mixes

These ten songs stun the brain with incredibly deft & skillful mix production. They’re mesmerizing.

And his choices of instrumentation? Unpredictable and fascinating.

Each song is chock-full of surprising little audio bits and ear candy that are interminably enthralling.

If ever there was a “headphone album”, this is it!

The song that gets my ears ready for mixing from this collection is “More Than This“. His creativity, especially with unexpected yet complementary noises, is, I think, unequaled in our industry, and it’s very shown overtly in this song.

It’s said that he takes years to complete an album, being maddeningly patient with his progeny, rarely satisfied with what he comes up with first. This album definitely shows that penchant for slow-moving, high-bar perfection.

My second song choice for prepping mixing ears would be “Growing Up“. It’s a fantastic tune that has beguiling layers of embracing sounds and scintillating ear candy that never stops drawing you in. It’s like an ever-moving carnival for your brain!

Like the Alan Parsons record, I wouldn’t use this one for a standard Pop mix, but if the artist I’m working with is at all off-the-beaten-path, I would use these tunes for sonically appropriate inspiration.

Ed Sheeran, “Divide”

Ed's Divide album has great mixes
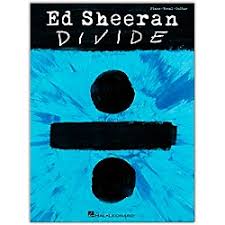
Ed Sheeran is doing a great job of putting the “singer-songwriter” vibe back on the map again. His cute “boy-next-door” demeanor, energetic yet romantic vocals, and high-quality mixes have the girls lining up around the block and audio engineers nodding their heads in appreciation.

Much of the time my own music is very much like Ed’s. I do a lot of writing on the acoustic guitar, and perform many solo gigs with just a piano and guitar.

For that reason, the song “Happier” is one of my favorites to play before mix time, especially if I’m mixing one of my own tunes. The vocal track is SOOOOO full and rich… perhaps more up front in the mix that I’ve ever heard a vocal before! But that’s part of his sound.. and it’s a sound that’s selling.

Obviously!

If I’m readying for a more full-band mix, then I choose the song right after that one called “New Man“. The drums are more loop-based, and the overall approach of the mix is more of a Pop/Hip-Hop hybrid.

If you haven’t picked this one up yet, give Ed’s new album a listen. Even from the engineering standpoint, he’s done a great job. And as you can tell from the Billboard charts… the songs aren’t half-bad either. lol

Van Halen, “1984”

So anyone that’s been on Seriousgas.com long enough knows that I’ve admired, respected and learned a ton from Edward Van Halen.

His are the first electric guitar songs I ever learned, and everyone can still hear him duck & cover whenever I pick up an electric to wail on a solo.

Van Halen 1984 remastered mixes are the bomb!

If I’m doing a hard rockin’ album, I don’t think you can get better than “1984“.

Crisp, in-your-face guitar; pounding drums that demand to be noticed; thump-you-over-the-head bass, and, of course, Diamond Dave’s primal tribal scream-laden vocals that just ooze with attitude and cock-of-the-walk Rock-God confidence!

The song that always gets me ready to mix a Rock tune? “Panama“!! What a killer pinnacle of rock pop excellence! I mean, dude… can there BE any better of a Rock mix??!!! I don’t think so!

There’s a reason it’s still played to death this day on the radio, folks. Spin this one and you will have a worthy ear goal to shoot for.

A close second to “Panama” to me is the album cut called “Top Jimmy“. I like it for mix reference because it has loud and soft sections throughout the song, so it really showcases a band that knows how to work dynamics, and a producer and engineer who know how to show it off in the mix.

As an aside here, I almost included Van Halen’s follow-up album to “1984” – the record that had Sammy Hagar joining the band when Dave left, called “5150“. That album also has really good mixes.

But since it was done in the mid-80s, I find the thick layers of reverb and effects that were prevalent at that time to be a little much. I don’t think they stand the test of time as well, so for that reason “1984” wins the day.

All around the block, the kids wanna rock!! And when they do, I pop this remastered CD into the tray! Pure Rock gold!!

Chagall Guevera, “Chagall Guevera”

Okay, so… I’m betting 99 out of 100 of you have never heard of this band before. Am I right??

Well, let’s change your fate right now, ‘cuz I’m tellin’ ya… this is a sonic masterpiece of Rock/Pop!

Chagall Guevara mix
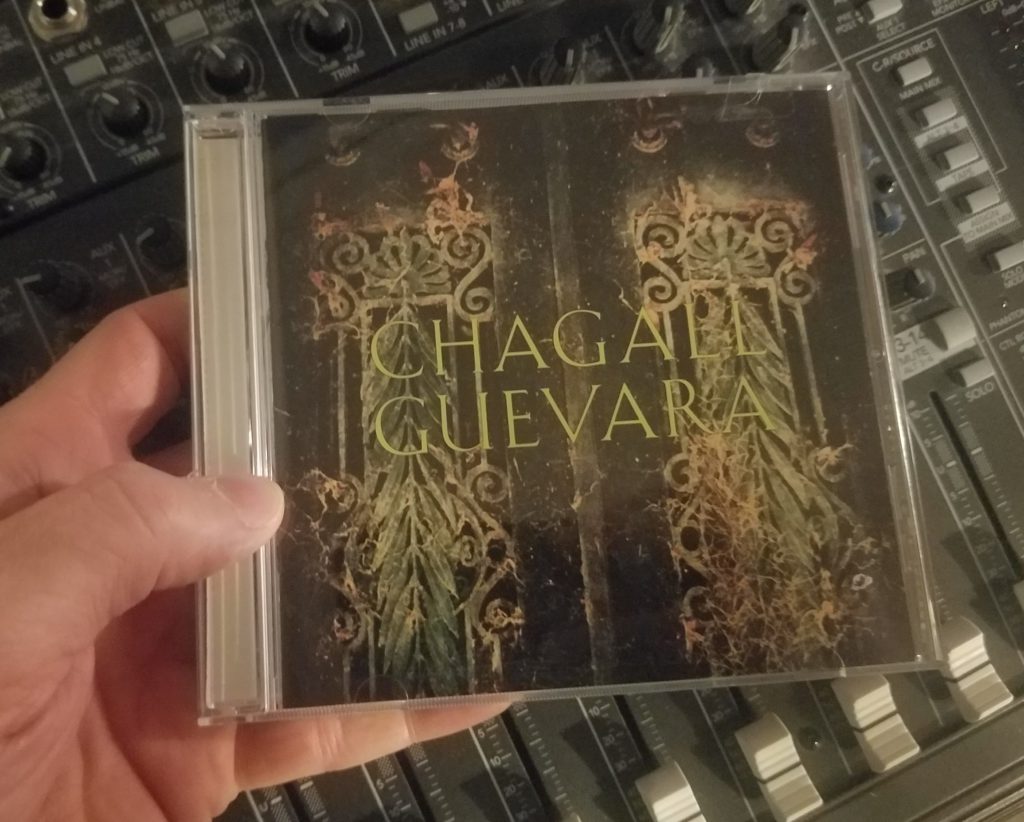
Matt Wallace, a renowned engineer and producer who’s come to fame via his work with Maroon 5 and Faith No More mixed this record, and it is a rare treasure.

Hardly anyone knows about this band since it only had this one record and was hardly marketed at all when it came out.

Don’t let that deter you, though, from giving this a listen. It’s extraordinary. The level of professionalism from writing all the way through to Bob Ludwig mastering it with his deft hands & ears is truly outstanding.

One of my favorite things about this record is how the bass sounds. It actually sounds like a live bass guitar through an amp playing live right at you.

And the guitars?? OOOOOHHHHH, man!!

There’s also lots o’ horns on some cuts, thanks to “The Blind Willy Boner Brass”.

If you want the perfect mix reference for powerful, guitar-accented Pop/Rock, look no further. These mixes are so well-done, if I ever get close to them I’ll consider myself having reached my goal.

So go on… go listen to this album. You won’t regret it!

More Prisms of Audial Ecstasy!

Here are a few more stars in the sky of mix royalty. I use them if the style of the project I’m on is similar. Otherwise, I just like listening to them through my computer monitors… and pretending I just finished these mixes MYSELF!! lol

  • Steely Dan, “Aja”
  • Prince, “Sign O’ the Times”
  • Dire Straits, “Brothers In Arms”
  • Stevie Wonder, “Inner Visions”
  • The Cars, “Candy-O”
  • Michael Jackson, “Thriller”

And finally, here’s a one-off – a song, not an album, that I just love to play to energize me for a funky mix:Uptown Funk is a great mix!

Uptown Funk” by Mark Ronson. “Wait…”, you say, “That’s a Bruno Mars song!” Nope. It’s by Mark Ronson.

I know, I know… “Who’s HE???”

Mark’s a British record producer. He invited Mars to sing on this tune from his album called “Uptown Special“. That’s why, if you go looking for this song on one of Bruno’s albums, you won’t find it.

Miiiiiind bloooooown. 😉

But ohhhh, the energy! The clarity! It’s a bomb of a mix, people, and pumping it through my monitors before I sit down to work on a soul or funk tune… aw. it just puts me in the ZONE, my friends!

Can ya dig it?!! lol

A CD is a CD, is a CD, is a CD, is…super bit mapping CD mix

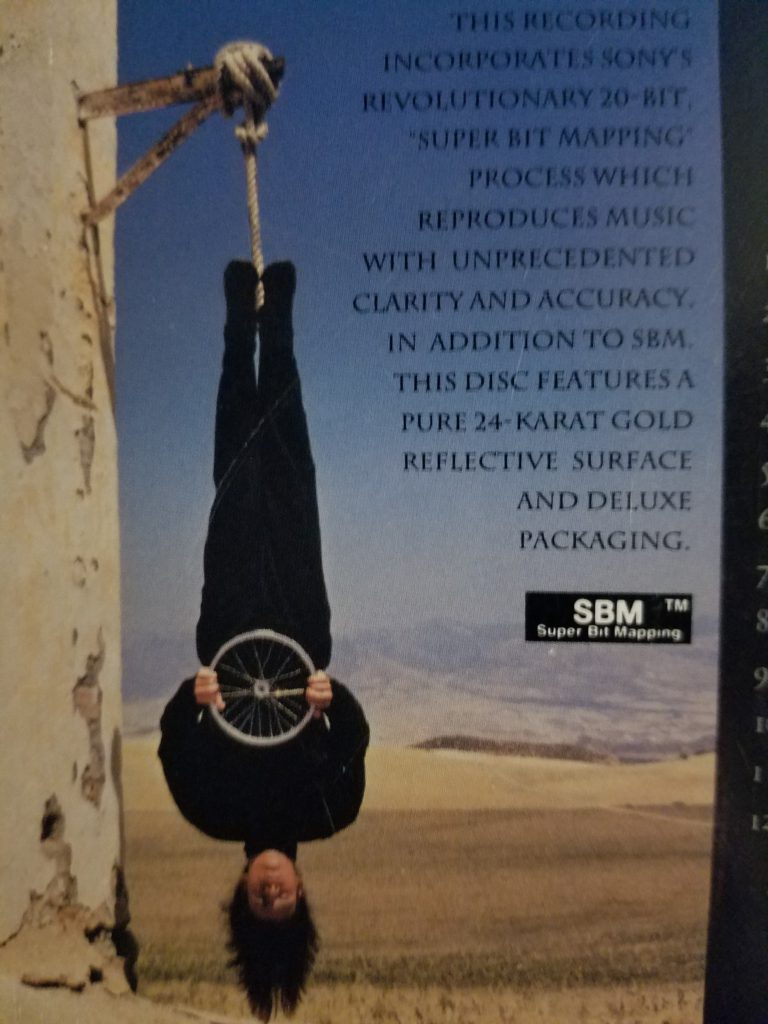
In case you’re not hip to it, there are “wayze deez dayze” of upgrading your music files to pro audiophile standards, getting a much better overall sound for your investment.

Investigate the options I regularly use below. They all, to some degree or another, improve the sound (usually in the form of observed dynamic range) of your favorite albums:

  • ProStudioMasters – This website gives you high-resolution studio masters that they get directly from the record labels. Not every label will give them all the albums they want, so your selection is limited, but if you find one of your preferred reference mix albums on here, GET IT. I hear the difference from CDs clearly. You usually have your choice of these files types: uncompressed AIFF, DSD or lossless FLAC, in resolutions up to 384 kHz / 24-bit PCM and 11.2896 MHz / 1-bit DSD, all free of Digital Rights Management (DRM). To find out what albums they’ve managed to finagle away from the record companies, CLICK HERE.
  • S.B.M. CDs – Super Bit Mapping is Sony’s method of delivering to you superior-to-CD high fidelity audio. CDs made with S.B.M. convert a 20-bit signal from a master recording into a 16-bit signal nearly without sound quality loss, using noise shaping to improve the signal-to-noise over the frequency bands most acutely perceived by human hearing. Find a long list of titles available under this format by clicking THIS LINK.
  • SuperHiRez – Another great site with lots of titles to choose from. A further way to gratify the discerning audiophile with 96/24-bit quality, 192/24-bit quality, or even, in a few cases, 352/24-bit quality! Wow!! Cut loose and run audio wild at THIS SITE.

Your References, Please!all hands on mixer!

So how about you? Do you have favorite mix reference tracks?

Do you use the same ones, for all styles of music? Or do you choose different ones for different genres?

Let us know by leaving a comment. Who knows – maybe we’ll use your suggestion on tomorrow’s mix and be all the better for it!

Henry Ford said, “Getting ready is the secret to success.” I think we now have quite a few albums to get our engineer ears ready and “on the road” to recording success. I feel much better about taking on our latest hit songs, don’t you?!

So let’s do it. Let’s shoot for gold, platinum and beyond! Let’s go… make… sounds!!!

Teaj

Teaj in the storm-fields!

Black Friday Music Equipment – The Best Deals We Could Find!!

black friday sale CARTOONEDMorning everybody!


It’s a beautiful Black Friday and it’s time to roll outta bed and greet the savings!


Oh yea, baby… it’s on!!

Lower Prices = MORE GEAR!!!

We’ve been scouring through the ads of all the music stores to find the best deals that impress us most as informed, selective musicians.


What follows below are our selections of the most outstanding markdowns we can find, that land at exceptional price points, have over-the-top reviews from players just like yourself, and that offer features and benefits that all of us at serious gas would be happy to place and play in our own studios, right now.


In fact, we’re counting our change and choosing which ones we’re going to buy right along with ya!


Let’s rock & save some money people!!


The iZotope Spire Studio!

Spire interfaceI first saw this fire interface this year in a marketing video that they put out. it looks really intriguing, and if I were new to recording, and didn’t already have ton of studio equipment, this would be just the ticket to get me up and running one fell swoop.


The fact that it’s wireless and works with your Mac or Android phone uber-cool.


It’s simple. it’s versatile. It goes where you go, and gives you every tool and effect you need to record, edit, mix and propagate your music to the world.


All in a shell a little larger than a softball. Pretty cool.


It was $349 up ’til today, so $50 off is nothing to sneeze at.


Get yours here:


SPIRE BUYcon


Ibanez Exotic Wood Series EW2012ASENTEW guitar

You may remember I did a review on the Ibanez exotic wood acoustic and how I’ve been playing it non-stop since I bought it this year.


You may also remember the picture of Joe Walsh I put up showing him playing one of these EW guitars on the current Eagles tour.


This is the 12-string model. If you want to play “Hotel California” and sound as good as the Eagles, well, first… PRACTICE!!! Then, buy this guitar. You’ll sound just like the band does, and do it in style.


The shape of the upper cutaway bout is incredible. Because of it I’m playing above the 12th fret frequently on this acoustic, which really is expanding my finger-picking technique and stylistic choices.


Overall, if you want to look good, sound good and have tone shaping control right from your axe that’s clean and versatile, have no fear – the EW is here!


EW single BUYcon


Epiphone Limited Edition Les Paul Studio Deluxe

Les Paul guitarI have to be honest there were some other guitars that looked a little more cool than this one in the sale lists, of them got as high of review accolades as this electric.


There’s just so many people who have bought this guitar hey it’s the bomb, I can’t ignore it.


Plus, even though I love a beautifully stylized guitar, it’s always been, to me, more about the sound-sculpting capabilities of an instrument then how it looks.


Not that this guitar looks bad, mind you – it just has a more simple facade than some other choices we might make.


The Classic Plus Alnico humbuckers, tune-o-matic Bridge and solid mahogany body are going to quickly and easily give you the Les Paul sound and exceptional sustain you’re wanting to play or record with.


With the 3-position toggle you’ll have at least six different tonal options this instrument to choose from.


Not bad for an electric guitar with an excellent pedigree that ships to you for under $400, right?! Gotta love that Black Friday mojo!! And since they dropped it another $20 today only… what more do ya need? A visit from Les Paul’s family with a signed coupon???!! lol


Epi Les Paul single BUYcon


Fender Special Edition Deluxe Ash TelecasterTelecaster

If this guitar looks familiar, it might be because I did an in-depth review of one very similar to it just last month in THIS ARTICLE.


The big difference though was that, even though that guitar looked almost identical to this one, it was almost $2,000 more expensive!


This guitar, at this price, is a great deal. If I didn’t already have a great-sounding tele, I’d snag this beast in a heartbeat.


Want some Nashville twang? Need some snap and crispness in your tone for a certain music genre? This’ll be your bullwhip!


Confirm that this is the spank you’re looking for by watching the video at this link:


Tele BUYcon

BLUE Bluebird SL Large-Diaphragm Mic

Bluebird micI have a friend that I record with frequently who owns the entire line of blue microphones. Yep, he bought the whole kit and caboodle.


So since I’ve recorded through his blue microphones so many times, I can tell you they are a high-quality series that will pretty much flat or any Sound Source you put in front of them.


They tend to have a clear tone that doesn’t color your sound source very much at all.


With its onboard high pass filter and -20 dB pad for higher decibel signals, this mic will provide you with the versatility and nuance the translates into excellent recordings.


Once you’ve gone large-diaphragm in a mic, especially with a hand-built capsule like this one, you never go back. Up until today it’s been $299, so, again, $50 further off the price is great!


Pick yours up while the sparkle is reduced:


BLUE mic BUYcon


Zildjian A Series Thin Crash Cymbal 17 in.Zildjaan cymbal

Zildjian cymbals have a long, rich, renowned history, and I have at least seven different models around my own recording kits as I type. I wouldn’t do without ’em.


This is an excellent value on a great cymbal. Follow my link and watch the video to see what I mean. It just sounds… right; like what a good symbol is supposed to sound like.


I can’t really put it any simpler than that. Since they dropped the price for Black Friday today, it’s hard to come up with a reason NOT to buy this cymbal.


Per the m.o. for today, get this super stinger before they’re out of stock and the deal is gone, baaaabe!


Z cymbal BUYcon


Breedlove Pursuit CE Acoustic-Electric Guitar

Breedlove acousticOkay straight up… this is one beautiful guitar. I have never owned a Breedlove guitar yet, but this year I ran across them for the first time and started researching them.


I’ve been supremely impressed by the sounds, looks and craftsmanship that Breedlove consistently produces.


If not for the fact that I have four or five other pieces of studio gear that I have to buy today, I’d be buying this guitar. The Myrtlewood and finish on this is beautiful.


I honestly have not seen a Breedlove guitar “on sale” before today, this is a cool moment to pick up a sweet axe with an excellent pedigree at a rarely discounted price.


If you get this puppy, leave us a comment and share the love. In fact, share a recording – I can’t wait to hear it!!


Breedlove gtr BUYcon


Mitchell FB700 Fusion Series Bass GuitarMitchell bass guitar

This bass immediately caught my eye since it looks so cool. I then checked out some videos that let me hear its tone, and the opinions of some players concerning it features and sound.


Bottom line? I’m eagerly intrigued!


Besides the sweet-looking top plate, you rarely see so many tone-sculpting potentiometers and an active preamp & EQ on a bass with this low of a price.


I also like the fact that the pickups have an outstanding reputation for reducing noise and unwanted microphonics.


Sounds like just the type of bass I want to play in the studio and live!


This same bass is still listed at a much higher price of $699 on Guitar Center’s site right now. Get this smokin’ deal from Musician’s Friend and take a ride on the rumble before it’s gone, gone, gone…:


Mitchell bass BUYcon


Musician's Friend audio gear

M.F. Stupid Deal of the Hour!!


If none of those outstanding bargains tickle your audio fancy, no problem – our buds over at Musician’s Friend will be taking up to 84% off select items all day today, and giving us a hot new music gear deal every hour!


It’s going on until 6 p.m. Pacific Time so make sure you get in before the curtain closes by CLICKING HERE:


Stupid deal of the HOUR


They’re giving us free Shipping too. Gotta love that. Looks like they’ve taken a page from the Amazon playbook! lol


As proof of the real savings available, I saw early this morning a D’Angelico 12-string acoustic-electric guitar on their deal of the hour box. It was going for $269.99.


As I was sitting reading about it, it sold out. That was within MINUTES! The rest of the hour the sale box was blank except for red print that simply said “Sold Out!!”


Know what the price is back up to right now?? $499.99.


Which price would you prefer?? I know MY answer… 😉


Sam Ash “Secret List” Now LIVE!!

Also, don’t forget that the Sam Ash “Secret Savings” that I told you to go get a few days ago are now LIVE!! Go check out what they’re practically giving away here:


Sam Ash Black Friday sale


These are real markdowns that are meant to crush their competition and have all the hallmarks of a grand “I-got-it-for-peanuts!” steal purchase.


The LOWERED Bottom Line!crowded black friday mall

So get out there and save some money! You know you wanna.


I’m doing the same. What else is Black Friday for, right?!!


Don’t forget to come back here to Seriousgas and tell us all about your cravings and savings. We love a good gear story!!


Now, go… BUY… sounds!!!


Teaj


Black Friday Music Deals, 2018 – ‘Audio Cha-CHING Day’, Here We Come!!

Surfin' Black Friday Savings!! CARTOONED
Surfin’ Black Friday Savings!!

Okay… did you know (according to SPRINZ) that surfers spend 54% of their time paddling, 28% waiting for waves, and only 8% of the time actually SURF!


Yea, me neither. LOL.


Well, in just a few days, WE are going to be surfing – not for the ultimate wave, but for the ultimate SALE! More specifically, Black Friday Music Deals!!!


Now, we don’t want to spend most of our time paddlin’ around, right?!


So Seriousgas is here to help you make the most of this golden opportunity with this, our “2018 Black Friday Pro Audio Insider’s Information Guide”! After all, it’s when WE spend the majority of OUR gear cash too!! 😉


Prices on Black Friday are SO rare, we’ve saved up for this circled-in-red calendar date we like to call “Audio Cha-CHING Day“!! We hope you have too, so we can all go WILD and pour ‘splurge audio gravy’ all over our stages & studios!


Whaddya say?! Grab your surf-mouse! Let’s RIDE this thing!!!


Your Quick Links!!

First thing’s first… if you’re in a hurry, here are companies we find that are posting unbelievable sales prices on pro audio gear. Instead of Googling all day, CLICK any of these ICONS!:


Sam Ash audio gear

Musician's Friend audio gearAmazon audio gear


Marvelous Musician’s Friend Deals!!

First thing’s first: head over to Musician’s Friend RIGHT NOW and look at their 40% OFF select products. Many of these PRE-Black Friday prices are low enough to justify buying today! Click this link now for those deals:


Musician's Friend Black Friday sale


Did ya find something cool? Was the price right??! Sweet. Tell us about it in the Comments section!


If you didn’t find the deal you’re waiting for, my bud Jacob M. at ext. 2409 at Musician’s Friend tells me that there WILL BE super values on a ton of gear that are only available on Black Friday. They’ll be called “Stupid Deals of the Hour” and, if you’re holding out for the ultimate value, you won’t want to miss them!!


Here are the two best ways to take advantage of this ever-changing, marching list of must-haves:


1) Subscribe to the “Stupid Deal of the Hour” email reminders


2) Use Your Phone Alarm

Stupid Deal of Hour
Available only on Black Friday!!


To get emails of these on the hour, just hit the “Share These Deals” button which is always just under the Stupid Deal photo. They will then email you each time the products changes.


I prefer the phone method, though. As soon as you wake up on Black Friday, go to the Musician’s Friend site and click on the “Stupid Deal of the Hour”. Keep that page open on your phone.


Next, at the top of the next hour, set up a phone alarm on your cell that will go off every hour. Then simply keep your phone on you all day (which most of you do ANYWAY, right?!) and see every hour what amazing bargains M.F. is cookin’ up!!


Musician’s Friend Return Policy covers you for 45 Days. You pay return shipping.


Stupendous Sam Ash Savings!!

Sam Ash is another really great store that I’ve worked with in the past. They’re in New York and have an excellent pulse on the latest gear trends and compatibilities.


They ALSO will be having Black Friday specials, but here’s a little Seriousgas secret… my slammin’ rep Ira Hoch at Sam Ash has told me that there is a hush-hush BLACK FRIDAY SALE LIST available RIGHT NOW, featuring crazy-low prices on tons of name-brand top-sellers immediately.


Cool, right?!! To get these deals, go to their home page by clicking this pic:


Sam Ash Black Friday savings


Once there, click the “Live Chat now” red button at the top. Once a Chat rep types hello, simply ask them for the “BLACK FRIDAY SALE LIST “. Easy-peasy-discount-SEIZE-y!!


Here’s an example of this “inside scoop”: if you go to Sam Ash right now, you’ll see this ad:


Sabian Cymbal sale!


That’s nice and all, but if you get the “BLACK FRIDAY SALE LIST ” you’ll see that Friday morning.. guess what? That price drops down to $159.77!! BOOO-YAAAAH, BABY!!!


Info worth havin’??? Ooooooh, yeeeeeessss!!!!


Sam Ash audio gear


So Friday mornin’, pop on over to their website and slip your favorite price reduction into the shopping cart and BOOM… you bangin’!!


Order as soon as you can Friday morning though, before these limited quantity specials blow out and all you’re left with is melancholy memories.


May ALL musicians WIN!!!


The list was supposed to remain confidential until Friday, however, as one of our best customers, we’re inviting you to shop early for the best selection of these!


The Sam Ash Return Policy is within 45 Days. You pay return shipping.


I’ve used their Return Policy, by the way, several times to try gear out that I wasn’t sure would work with my system. Several times it didn’t, and they took it back with no hassles, no questions asked.


You go, New York Musicians!


Awesome Amazon Aces in the Hole!!

As we’ve all noticed in the last few years, Amazon is taking over the world. LOL Those of us with a penchant for audio gear purchases are anxiously awaiting our first Amazon DRONE shipment to come to our studio doors. That’ll be a YouTube-worthy moment to see the latest Les Paul FLYING over the neighborhood trees and not being dropped into a million tragic pieces. Ohhhh… the humanity!!!


But seriously, Amazon always has awesome, epic deals on music and pro audio gear for every Black Friday. I’m sure this year will be no exception.


Amazon logo


As usual though, Amazon is being poker-faced and tight-lipped about giving us any heads-up about what those incredible values might be. No matter how much I tried to squeeeeeeze the secrets out of the Amazon reps I spoke to, they wouldn’t budge.


That Jeff Bezos runs a tight ship. 😮


But fear not! Friday morning I will be going to Amazons this Musician’s Friend and Sam Ash see if there’s any area in which they blow the doors off of both.


To Tune In on Black Friday here at seriousgas where we’ll spill the beans on all rockin’ reductions that you can’t live without.


And we’ll see if Amazon can fix it in the mix! 😉


“Day Of” Guide to Deals!!

So remember, on Friday morning, while Mr. Rooster is still sawing logs, the Seriousgas ‘on-a-budget bounty hunters’ will be hittin’ the virtual waves, and posting the ultimate deals for you here on Seriousgas! Stop back in and see where you can save SERIOUS CASH on the best values we can find!

midnight bargain girl
Midnight Bargain girl!


We suggest you wake up and smell the audio coffee early that day and buy those buck-bangin’ bargains before some of your favorites are sold out. Nothing worse than hearing that that guitar you wanted WAS on sale for 70% off… but there aren’t any left! DOHHH!!!!!


If you need some other insights, tips or pointers, don’t hesitate to comment or email us directly. This is not our first ‘audio rodeo’, if ya know what I mean.


That reminds me,  if you’ve not really entered into the whole “Black Friday” shopping thing before, take a look at THIS POST which will give you some insights as to how to make the most of it and what it’s all about.


Oh, and if you want to really be generous feel free to join us at midnight. We’ll make a Starbucks run to keep us rockin’ and have Sean riffin’ on his Egnator to keep us from fallin’ back asleep!!!    lol


Afford the Affliction!!

Black Friday surfing
A Surfer’s Black Friday blessing!

Gear Acquisition Syndrome is no laughing matter. It can strike when you least expect it, and knows no cultural or racial boundaries.


So don’t fight it!! Surrender to its beauty! Give it what it wants – a new instrument or piece of audio gear for YOU!!


Your next gig or session will be glad you did. 😉


Now, use this 2018 Black Friday music deals Buyer’s Guide to YOUR advantage and go… make… (Cha-CHING) sounds!!!


Teaj

Teaj in the storm-fields!


The Gear-Wise Musician, Part 2 – You’re Their Superhero!!

Hero sneakers

Faster than a speeding heavy metal lick!

More powerful than a 1,000 watt amp!!

Able to leap tall concert speakers in a single bound!!!

IT’S… YOU!!!!!

Or at least, that’s what your music equipment hopes you will be for them.

Protector.

Defender.

Mighty WALL against destructive onslaughts!

Your instruments & gear look to you, their gear-wise musician, to take good care of them… through touring, transport, temperature changes, seasons, storms, and all that the entropy of our universe can sling at ’em.

Are you ready? Let’s go save the world… of GEAR!!

The Case for Cases

Get those guitars out of their cases!

I once did a tour across Europe with a few other musicians from around the U.S. We started in Amsterdam and played the Netherlands, Germany, Austria, Hungary and finally to Romania.

It was a fantastic tour with lots of memorable, musical moments. We had our own big van that fit all of us and all of our gear. I was one of the main drivers and spent much of my time behind the wheel, which gave me a front row seat to the scenery we were movin’ through. Good times.

In fact, I can’t think of a single thing that went wrong or was bad in any way… except one:

I transported my electric for that tour in a soft case.

This was a really bad idea, although I didn’t really know it at the time. When I returned home from the tour, I noticed that the bolt-on neck of my Jackson Dinky electric guitar had a severe crack in it, where it joined to the body of the guitar.

This is probably why, in the last few concerts, I was struggling with keeping my guitar in tune. ;-(

Boy wonder hero

Moral of the story: if I’d have had a hard case for that guitar, that damage would have never taken place. I definitely learned my lesson, and that was the last time I used a soft case for any of my expensive instruments again.

Now, if you’re going on a gig and your instrument will never leave your hands? Fine – use a soft case. But if it has to be put anywhere else… with a bunch of other gear, in back of seats, on an airplane, a ship… whatever, then do your gear, and yourself, a favor – get a hard case.

These days there’s no excuse for not getting one, since you can defend Music City by jumping on eBay, Reverb or Craigslist and find one really cheap… pretty much any day of the week. Like THIS ONE, for example:

Take my advice: treat your instruments with the dignity they deserve and protect them in a hard case. You will be their Bat-cave hero forever!

You’ve Got the Pow-wah!!

Electricity. What a miracle! We take it so much for granted it, yet without it, astronauts wouldn’t have nearly as cool pictures of our cities, and we wouldn’t be sitting here sharing this internet moment in such audio bliss. lol

electric lights from space

In fact, life would be unfathomably more difficult without it. But wait… it does have its dark side! Power surges; megajoules spikes; sudden outages! All these things can wreak havoc on your delicate electronics gear, and send studio session players running for fearful cover!!

So what do you do? Well, over the decades of owning studio gear, I’ve always installed a power conditioner. These come in different grades, and with different options, but you basically get what you pay for. They’re also not really that expensive, especially considering how much we spend on just software plugins for our DAWs!

Even if you get the most basic power conditioner though, it’s still putting up at least one line of defense between you and a surprise electric villain that could zap your electronics into the Dead Zone.

Add to that that they are also extremely helpful in organizing your power cables. They give you a long strip of outlets, so you can bundle all of your power cables together, tied or velcroed, and string them in an orderly fashion throughout your studio, or in your rack-mount cases if we’re talking live gear.

Here are three power conditioners I use in my studio and live racks:

power conditioner 1
power conditioner 2
power conditioner 3

Do they work? Well, in my decades of doing studio and live music work I’ve never suffered loss due to electricity issues. Is it because of these conditioners? Who can say? But I know they certainly didn’t hurt, and since all it would take to destroy my computer with THOUSANDS of dollars worth of products on it, I’m not taking any chances.

I know it’s much more sexy to buy a new guitar, or keyboard, or mic pre, but sometimes… ya gotta be the responsible bloke, and look out for those that can’t look out for themselves.

If you’re just starting up, here’s a good, inexpensive power conditioner option that will start you down the road of defending your gear like the hero I know you are and being an organizational wunderkind with neat cables as well. 🙂

Does it Seem Humid in Here to You??

Old cracked wood acoustic

If you have wooden instruments then you need to seriously be thinking about humidity. If you have very expensive wooden instruments, all the more so!

That beautiful tonewood which makes up your favorite axe is very sensitive to temperature and humidity changes.

What happens when wood dries out? It contracts. What happens when wood gets too humid and absorbs water? It expands. This accordion action is no joke for the poor wooden instrument that takes the brunt of its push and pull brutality – it can literally crack under the pressure! The seams can come apart and, even worse, permanent warpage can occur.

Case in point: I went over one day to see a drum set that belonged to my favorite drummer, Jim Lewis. He had regrettably passed away a couple of years before, and one day subsequently, in conversation with his widow, I heard that Jim’s drum kit was still in their garage – their unheated-through-Michigan-winters garage!!

I was immediately concerned for its safety. This was no clear plastic acrylic kit – these were wonderful Maple wood drums made by Ludwig (See the review HERE). I surmised it probably had already taken some damage, so I went to have a look.

We went into the garage, pulled out each drum and looked them over, and I instantly saw the damage that the seasons had inflicted upon this kit. On most of the drums the black wrapping was cracking off. Some of the wrapping was even missing, cracked off in pieces somewhere.

It was too sad for me to walk away from. I paid her market-value price on the kit and took it out of that hostile environment and into its new, warm, loving home. Today it sits in my rehearsal room, safe in a humidified environment with a consistent temperature… a lasting tribute to a fantastic musician and a dear, departed friend.

To protect not only Jim drums, but all my other gear that’s made of wood, I do three things whenever the heat’s turned on for winter:

1) I switch on the whole-house humidification. Installing a humidification unit to your house furnace is obviously a more expensive option which some of you won’t be able to afford yet. But if you CAN afford it, it does make a difference. I keep a humidity meter anywhere I have music equipment and I can see, as soon as the humidification unit goes on, a 9% to 17% increase in the humidity reading. That’s a big win, and it goes a long way in helping protect your instruments and keep them in tip-top shape.

guitar humidification

2) I bring up a small reservoir humidifier from the basement and turn it on in my rehearsal room where all my instruments are kept. This is just so my instruments get a little extra humidification during the ‘indoor dry season’. It helps keep the humidity my rehearsal room at 40% to 50%, which is right where it needs to be.

3) I place small humidification hoses, or sponges, in all of my most sensitive instruments. The thinner the wood on a musical instrument, the more susceptible it will be to expansion and contraction due to temperature and humidity changes.

So you’ll also find that my violin (the thinnest wood of all my instruments), my cello (made in the 1800s & also of thin wood!), my viola, and all my acoustic guitars have little humidity sponges in them. These little bartenders for instruments are cheap, but they do an important job.

Every Monday morning, I collect them, take them downstairs & fill them again with purified water. I use purified water so that over time there’s no bacteria growth.

Then I take them back upstairs, plug each one into a beloved instrument, and look with pride on their well-maintained and protected craftsmanship. They don’t squeal with Joy or anything, but if I could see through their eyes… I bet I’d look like Iron Man!

So how about you? Are you maintaining good humidity for your susceptible instruments? If not, try taking just a small first step: order a humidification monitor so that you can know, at any time, day or night, whether your instruments are being placed in a vulnerable place or not.

Here’s the model that I have two of and that work great:

Or just go ahead an order a small humidifier now! I’ve got a lot of these, since they’re small, unassuming and get the job done. ‘Nuff said!

click map

Sam Ash Amazon Musicians Friend

You CAN Take it With You

Okay, quick survey: how many of you have gone into a restaurant or store and left your instrument in the car?

Uh-huh… gotcha!! Hey, even I was guilty of this at one time, so don’t be too hard on yourself. But a great part of life is being able to learn and grow and get better at things, right? So let’s get better at protecting our instruments: DON’T LEAVE THEM IN YOUR CAR!!!

guitar in car!!

Did you know that the temperature fluctuations in a parked car can be so extreme that a wooden instrument doesn’t stand a chance?!

According to THIS STUDY by the American Veterinary Medical Foundation, if the temperature outside is 80 degrees and your car windows are up, within 20 minutes the interior vehicle air temperature will be 109 degrees!!

Do you think that might do some damage to your guitar? Uh… yeah!

And for those of you in L.A. or other typically hot environs, if the temperature outside is hotter than 80 degrees? Then things get way worse inside your vehicle. The temperature differentials are staggering.

So don’t be a gear villain: take your instruments inside with you. No one will mind, really. I’ve taken guitars in hard cases into restaurants with me dozens and dozens of times with never a comment. I put them next to me under the table so it’s never been an issue with being in the way of customers.

Don’t let Mr. Heat Miser destroy your expensive instruments – take your instruments inside with you, and let your car be for driving YOU to Guitar Center, not as an oven, or freezer, for your expensive gear. 😉

Quick – Destroy That Villain’s Fry-Ray!!
Monitor speaker

Finally, here’s a quick tip for those of you who use any type of speakers/monitors for your studio control room, rehearsal rooms or gig setups:

  • For power-up, turn your speakers on last!
  • For power-down, turn your speakers off first!

I just had to add this to today’s post I have heard WAY too many times explosive sounds coming out of expensive speaker cones because the person running the sound didn’t follow (or didn’t even know to follow!) these basic rules.

Let’s cut to the chase in this superhero blockbuster: the Mega-Signal is on the move! You’re chasing him madly! He’s weaving, ducking, around audio corners, down triple-shielded cables, through the electronic jungle mazes! You almost nab him at the P.A. Aux Send, but NO… he slips out of your grip like the slippery sound eel that he is!

Oh, no – he’s made it to the speaker! He’s running towards the CONE…. NOOOOO…!!!!!

KER-POWWWWWWW!!!!!!
blown speaker

He just blew your speakers.

So, like, don’t be that guy (or girl). Don’t fry your electronics! You paid good money for those speakers. Don’t cripple ’em so cruelly when safety is just a button push away.

Listen for this is all the money pops clicks and POW-s that Electronics gear can produce when you first turn them on. I’ve got a big keyboard practice amp in my rehearsal room that does this every time I turn it on. that’s one of the reasons I never use it professionally… that and the fact that it’s huge!

Up, Up & Away…

Super GW CARTOONED
Gear-Wise Man Saves the Day!!!

It’s easy to fly high above all these destructive villains that I’ve mentioned today. There are many more to be vigilant against too, but the main point today is just keep up your due diligence to keep your gear safe.

All it takes is a little effort, mindfulness and, sometimes, a small investment, but nothing too drastic.

You can do this! So join me in the league up instrument Heroes DHR and banish all audio attacks from this realm!

Together, we can Vanquish tone Intruders, and put an end to all Sonic assaults! We can spread instrument longevity and electronics health across the humming globe!

You can, you will, you must… be the superhero!!!

Now go… make… sounds!

Teaj

Teaj in the storm-fields!

The 4 Cable Method – Now We’re Cookin’!!

Cookin' with 4 cables

Okay, who likes to cook???

Anybody?? Any galloping gourmets in the audience today??!

I like to cook when I don’t have to, especially when it’s a HUGE project that takes 4 or 5 HOURS to complete plus an overnight marinating!

One thing I’ve learned from cooking (and from watching my wife’s favorite show, “The Great British Bake-Off” with her) is that the ORDER in which you add the ingredients can make a crucial difference in how your food turns out.

Which is exactly why we’re focusing today on the 4 cable Method of setting up your guitar amp and effects. Maybe you’ve not heard, but there are some pretty solid reasons why you should put guitar effects in a particular order if you want to sound stupefyingly mind-blowing on your axe.

The Nutshell

The four-cable method of guitar/amp setup, sometimes simply referred to as “4CM“, is simply using four cables to place effects onto our guitar signal.

4 cables cartooned

Effects are applied in one of two places:

  • BEFORE the amplifier’s EQ section and gain stage, or
  • AFTER the amplifier’s EQ section and gain stage.

The “gain stage” of an amp is where we can turn on our overdrive, or distortion, effect.

If we’re talking pure quality of tone and clarity of signal, the 4-cable method is the preferred method for guitar/amp signal routing.

Let’s find out why, shall we?

The Rock ‘n’ Roll-y Trinity

All guitar effects fall into THREE categories:

  1. Gain-based effects
  2. Modulation effects
  3. Time-based effects

Break it down for us, Teaj! Okay. Gain-based effects are your overdrive, fuzz, distortion, or crunch effects. A lot of times a noise reduction unit, a tuner or an “Octaver” unit is also placed in this category since they all should be at the TOP, or start, of your signal chain.

Next, Modulation effects. Under this heading we find chorus, flangers, phasers, envelope filters, tremolo & vibrato. Modulation effects, as a rule, always follow Gain-based effects in the signal chain.

Finally, we arrive at Time-based effects such as Delay, Echo, Reverb, or Loopers. These work best at the END of a guitar signal chain.

Now, before we outline specific cabling diagrams, let’s get this question answered: why would we want to separate effects this way??

Because it SOOOOOUNDS BETTERRRRRR!!

Certain effects will be clearer and work better BEFORE an amp’s preamp stage, and other effects sound much better AFTER the preamp stage. The 4-cable method allows us to utilize all effects in an optimized fashion to get the very best sound possible out of our rig.

Want some proof?? Check out the following video. Aaron did a great job letting us hear just why we need to consider this setup. Pay close attention to the awful guitar sound at 2:15, then the quality, clean guitar sound at 2:30:

Go With the Flow!

I find that the easiest way to understand the 4-cable method is simply to grasp the signal flow that makes your guitar sound awesome when it comes out of the cabinet and spills onto your 80,000 cheering audience members.

It goes like this:

First, your guitar is FIRST plugged into your effects processor. We do this because that’s the first place we want to put on gain-based effects. Like a distortion sound. OK, so let’s pretend we’ve done that. Great.

Now the guitar signal, with distortion added, can go into the amp’s PREAMP stage. This is where the sound of our amp really comes in.

Where to next? Well, we probably have some more effects that we want to put on that belong to the Modulation and time-based effects family. For those, we’ve got to go back into our effects processor.

The processor then puts on those effects, like maybe some Chorus, a little bit o’ Tremolo, and after that finally some nice Reverb to make it sound like we’re playing for those 80,000 cheering audience members… even when you’re just in your room!

At this point we’re done with effects so we can send the signal out of the effects box once again back into our amp.

The amp, in the final step, directs your incredible-sounding signal into your cabinet and/or straight to the PA system, and voila – you’re gold, baby!

Did you follow that flow? If you can really get your head around how the signal passes through each stage, and why it’s passing in that certain order, you can master the 4-cable approach no matter what amp or effects processor you have, and be able to set it up without bowing before the almighty Google. 😉

But since I know that you probably appreciate specifics, let’s look at two popular ways to set up guitar effects with amps…

Today's rockin' rig!
Today’s rockin’ rig!

With Processors – Ports is Ports!

Most of the players that I’ve worked with professionally have used, like myself, a rack-mounted effects processor.

The Processor foot controller
Foot Controller for the GSP1101

Most of us also have a Foot Controller to change things on the fly, with just a tap of our foot. This is helpful because we don’t want to have to go side-stage to twiddle with any knobs. We want to be able to do it all from where we’re performing, and that’s where a foot controller really saves the day.

There’s one important caveat to successfully setting up the 4-cable method with the processor: the processor must have an effects Loop. A send and return, in other words. If not, the 4 cable method is not an option for you.

But let’s assume for now that your processor is loaded with all the necessary ports. Using the flow logic that we outlined above, here is our signal flow cable layout:

  1. GUITAR to processor INPUT
  2. Processor SEND to amp INPUT
  3. Amp SEND to processor RETURN
  4. Processor SEND to amp RETURN
4 CABLE Method

Cool! Now that that’s set up correctly, we know our signal will get to where it needs to go.

But wait – there’s more! In most processors, you must ALSO go in and assign the effects, either to ‘before the preamp’ or after it.

Why? Well, the processor doesn’t know whether you’re using a 2-cable, 3-cable, 4-cable, or 20-cable technique; you’ve got to tell it!

Each processor is different in how it assigns effects with regard to signal flow, so I won’t go into those particulars here. if you don’t know how to assign effects in your particular processor, it’s time to get out the manual, or head over to YouTube, and become a programming master of your gear. This MUST be done if you want to sound amazing.

And you DO want to sound amazing, right??!

Once you’ve successfully assigned the effects, based on your processor’s unique method and menu, the whole guitar wall of sound coming from your rig should make the most-celebrated Guitar Hero jealous!

Or maybe not. They’re probably using the 4 cable method too. 😉

Using Pedals

In the last 7 years or so, the popularity of guitar pedals has skyrocketed. When I was growing up in the 80s they were big, but then they kind of went the way of the dinosaur when rack-mounted processors showed up. Clearly though, they have had an incredible resurgence. I see younger players now with enough guitar pedals in front of them to make your amp spin.

Somehow they just love doing that toe-tapping dance!

Alright, so how do we set pedals up within the 4-cable method? Again, we must go back to the three genres of guitar effects & how they’re separated for optimal total excellence. Do you remember??

  • Gain-based effects go before the preamp
  • Modulation and time-based effects go after it.

Now that I’ve mentioned that a few times, I bet you’ve got it, right?

I knew you would. 😉

With that in mind, here is the cabling layout for utilizing foot pedals in a four-cable system:

GUITAR to, & through, Gain-based PEDALS (usually tuner first)

Last Gain-based pedal OUT to amp INPUT

Amp SEND to Modulation & Time-based Pedals.

Last Time-based pedal OUT to amp RETURN

4CM signal routing

Okay, so… did you follow the signal flow logic again? it’s just like following the course that a river takes – if you’ve got a map, and you understand why it’s flowing where it’s flowing… you’ll never get lost!

How My Own Rig Rocks with 4CM!

We humans always learn better when we’re given specific examples to peruse, so let’s take a look at my favorite guitar rig here in my studio: my EVH 5150 III & DigiTech GSP1101 combination!!

The 5150 III & the GSP1101!

If you’re unfamiliar with the 5150 III amp… oh man… this thing ROCKS THE UNIVERSE!!! See the full review of it I did RIGHT HERE. And if you ever PLAY through one… be prepared to never hear guitars the same.

The first thing I’ll do is take my guitar (which today is a Fender Partscaster with a cool “Burned Ash” body that I had hand-built) and plug it into the input of my processor.

The GSP1101 will then apply, according to how I programmed it, all of my gain-based effects.

I then send the signal out of the processor through the send port and I bring it into my amp by plugging into the input of the 5150. You can see this in the cable with the blue tape (I keep my cables all color-coded for fast hook-up at gigs).

Cable out of amp to processor

This is where my amp will apply all that beautiful EVH Magic in the preamp stage.

As a quick aside, the whole reason I chose my DigiTech processor is that it doesn’t suck tone from whatever amp I pair it with. a lot of processors the tone of the amp, sometimes in very unfortunate ways. this 1101 consistently let’s my 5150 shine in all its Glory.

And the choir sang “Amen!!”

Now that we have our real amp sound applied by the preamp send the signal out to the other effects that must come after it. You see this in the cable that has the red tape around it, coming out of the amp’s SEND, and going into the processor’s RETURN.

Back of amp cables

At this point the processor applies all the modulation time-based effects, fulfilling weird request that will create our signature sound.

Now we’re ready to go back into the amp, to the power amp stage, so that all that lusciousness can be amplified loud! the final cable, with the green tape, goes from the output of the processor to the effects return of my amp.

Back of processor cables

That’s it! Cables complete. If I hadn’t already done it, I would now program my processor so that it assigns certain effects either post- or pre-preamp.

If any of that was a little confusing to you, just go back and re-read it a few times. It’ll become clearer. And the good news is you really only have to do this ONE time. After that you can just leave the cables, and the programming assignments in the processor, exactly as they are. They will serve you faithfully until the time you want to make any changes in effects or cabling.

By the way, in the next week, I’ll be finishing up an article specifically on the DigiTech GSP1101. So if you want more particulars on it, check in here at Seriousgas.com and you won’t miss any of the tasty tidbits!

The Final Power Chord!

guitarist in smoke

I hope this post has shown you just how advantageous it is to use the 4-cable method and apply it to your guitar rig. Having reverbs, chorus fx and delays before high-gain effects can really, as Aaron showed us earlier, sound outright awful.

But with a bit of forethought, a cup of study, a tablespoon of trial, and pinch of error, you could just wind up COOKIN’!! With a guitar tone and effects selection that sounds better than any time in your life up to this point!!

I’d say that’s a goal worth pursuing, wouldn’t you??

Got questions? Have 4-cable technique experience yourself? Still wondering how you can get all your cables UNTANGLED, let alone in the right ports of your amp??!! Talk to us in the Comments section. We’d love to hear your story.

Tangled or knot. Uh, I mean… NOT. 😉

In the meantime, grab your guitar, your amp, your processor or pedals, and four free cables and…

… you know the drill – go… make… sounds!!

Teaj

Teaj in the storm-fields!


The Drum Mic Shield – How To NOT Let It Bleed!

I’ve got to confess right up front… there are some audio intricacies I still don’t feel I’ve mastered.

Doesn’t matter how many decades you work with music gear… there’s always something else to learn; somewhere else to grow; some new facet of our industry and our performance methodology that we can conquer.

This week… it’s the mic drum shield!

A Movie’s Worth a Thousand Clicks…

To start things off, here’s a very revealing vid showing the unboxing of the shield I used, and two subsequent recordings: one with the mic shield, and one without.

Do you think I found any difference between the two??

Time to wake up and smell the cymbal cleaner… !

What’s the Big Whoop??

Pyle shield ad

So, what’s a drum mic shield and why would I want one anyway??

Well, hopefully that groovin’ vid let you glimpse a little bit of the reason why, but as a quick primer, let’s just say they’re mostly to bring down the amount of CYMBAL BLEED in your drum mics.

When it comes time to mix a song, it always helps to have clear signals of each of your drums, where the mic on a particular drum hears it and not the other drums or cymbals or percussion that might be nearby.

If there’s too much cymbal wash, buzz, crash or sizzle oozin’ into your drum signal path, it makes it a lot harder to keep things sounding clean and tight.

Plus you don’t get as many options for leaving things OUT of the mix somewhere down the cable, because if you tried you’d still hear the unwanted signal through some other mic. DRAT!

Enter today’s shield test. I’ve heard of these little “sound caves” for decades, but just never bought in to their hype. This week, I decided to give ’em a try and share the results with all of you.

The shootout I did with and without the shield taught me a lot, and showed me a few things I didn’t expect.

What did you expect??!

Choose Your Guard

There are not many of these drum guards to choose from. I picked up the one that’s a little larger than the others. I wanted to be able to try it on varying mics, and that means size differences.

click map
Pyle drum mic guard

For the video recording, I used the “PYLE Drum Microphone Guard“. Here’s the specifics on how it does what it does:

  • For versatile Drum Recording & Sound Isolation
  • Great for Cymbal Sound Absorption
  • Ready for Session: Quick & Easy to Setup
  • Box-Style Engineered for Maximum Isolation/Reduction
  • High-Density dB-Absorbing Acoustic Foam
  • Ideal for Studio Drum Recording
  • Universal Microphone Compatibility
  • Works with many sized mics
  • Universal Standard 5/8” Microphone Threading
  • Portable, Compact Design
  • Charcoal Gray inner foam color
  • White Outer Shell
  • Microphone, Stand Mount not included
  • Weight: 0.93 lbs.

Mics! Mics! Mics!
the CAD 411 snare mic

When setting up for a live drum kit session, the decisions about WHAT microphones you’re going to use are paramount to eliciting a pleasing, powerful, attractive sound outcome.

To dig deep and maximize my profit for this experiment, I used many different mics, and eventually heard which gave me the best sound right off the bat. I’ll be featuring an article on all of those mics, and how different they sounded, in my next post, so stay tuned.

Suffice it to say that nothing sounded as good, and full, and slamming as my TSM411 snare mic. I ended up placing it at almost a 45-degree angle toward the head, with the Pyle shield angled slightly toward the high hat. This enabled me to get maximum isolation from the hi-hat jangle as possible.

After I had a blast layin’ down a beat with the shield in place, I then took it off and did the exact same thing with all the exact same settings, only without the shield. The recordings that you heard in the above video revealed how both of those sounded.

One important note I shouldn’t let slip without telling you: this drum shield really never got in the way of my playing at all. I honestly thought it would, and was expecting my hands to be like some sugar-craving kid at a pinata party!

Once I started playing though, I never got near it. No matter where I put it, I easily played around it and never felt nervous about its positioning.

An welcome surprise!

Location! Location! Location!

mic under shield

Anyone who’s recorded audio for long knows that where you place the microphone, and at what angle, makes a huge difference in the sonic outcome. It’s one of the first things you decide upon when setting up mics for a session.

For this test I placed the mic in at least 8 different positions, and at the drum at three different angles, to find out what the optimal juxtaposition is for this kit, for this song, at this moment.

I tried aiming the mic at 11 o’clock on the snare head, 12 o’clock, 1, 2… basically any position that wasn’t in my way when playing!

I also tried all the mics at different angles to the head:  90°, 45° and even almost horizontal with the head. Each placement gave, as we would expect, a slightly different sound.

It’s a Keeper!!

Now let me tell you why I’m going to keep this mic guard: I discovered that it didn’t really isolate the snare signal as much as I had hoped it would. I could still hear the hi-hat quite clearly, tho’ the dB level of the hi-hat, measured on my level meters, DID drop by a couple dB.

What it really does well is cuts the crash and ride cymbals dramatically. That’s probably the biggest, most obvious reason why right away I suggest you get one too and start implementing it into your recording method.

There were a couple of other things that I noticed though that make me want to keep it: first, the EQ differences. Each position changed subtly affected the EQ of the snare and the spilling cymbals. What you hear in the video is what I landed on as the best timbre of the snare, with the least-imposing hi-hat assault.

This final “best position” cut out many of the middle frequencies of the hi-hat, letting only the sparkly high frequencies come through. This is great, ‘cuz that means they’ll be easier to cut with a high-pass filter AND I won’t have to dip the shelf of attenuated frequencies as LOW as I might usually, giving me the maximum snare spectrum of sound.

Drum mic with no shield
“AAAhhh!! Somebody put a SHIELD on that NAKED mic!!”

The second thing I’m impressed with about this shield is how it improved the snare timbre. The 411, shielded, and at this particular angle, sounded better than any of the other  20 or 30 variations I tried this week. It has snap and crack in the high frequencies, where some of the other positions and other mics made the snare sound a lot more mid-rangey, and even, sometimes, somewhat BASS-y. Both of those we obviously want to avoid if there’s vocals, guitars and/or keys in the mix.

Oh, and yes, I tuned up my drums before the test, so they were optimized before I started. That’s how I know they were even better!

(If you want further training on the whole “tuning” thing, check out THIS ARTICLE!)

No Need to Fix it in the Mix!

I’m really pleased with how the mic guard substantially lowered the amount of cymbal bleed in my snare microphone. It was really obvious with regard to the crash and ride cymbals. They really didn’t stand a chance.

The Hi Hat still bled through, but what I liked was that the EQ was very different using the shield, such that it makes it EASIER to dial out those whiny hat frequencies with a high-pass filter.

Here’s a final recording to show you what I mean: this showcases my whole kit (minus the toms which I didn’t use in this test), plus I threw on some compression and reverb to make it sound closer to what I normally do for a real song mix.

The first take you hear is WITH the Pyle shield in play. The second is WITHOUT it.

Aaaaand… downbeat!    😉

That Isolated Feeling
foggy drummer needing a mic shield

One thing’s for sure: I’m gonna be using this shield EVERY time I record in the studio from here on in. In the final analysis, I don’t think it was amazing, but it managed to eke out a bit more clarity between my hi hat and my snare, and when it comes to recording, every step ascending the mountain gets you closer to the pinnacle… of your sound!

One of the reasons that I like doing these reviews is that you can take all of my work and experiments and bring them to bear upon your own recordings, hopefully improving them as I strive to ever improve mine.

How you install the shield towards your hi-hat, roward your particular snare, might be different than how I put it today. But no matter what mic you put on it, and no matter what the angle, it will admirably attenuate your crash & ride cymbals so obviously that you probably will find yourself wanting it in the mix from here on out.

I know I do!

So, are your drum signals sounding washed in a foggy bleed? Wanting that tight clarity of a Mick Fleetwood or David Robinson like me??! Then you’re in luck! For very little cash you can make a pretty decent improvement and make final mixing easier than ever.

Pyle Featured Image CARTOONED

So GO for it. Who knows? It could make the difference between sounding good… and sounding GREAT!!

Now, go… make… (clean) SOUNDS!!!

Teaj

Teaj in the storm-fields!

The Apollo Twin – The Tardis Has Nothing On THIS Interface!!

Above the couch in the living room of my house hangs this picture:

Dr-Who-Van-Gogh-painting-

Those of you who have a certain sci-fi bent to your interests might recognize that as a tribute painting to a really entertaining and memorable episode of “Dr. Who” that featured Vincent Van Gogh as a character.

“What in other worlds does that have to do with the Apollo Twin??”, you ask.

Easy: like Dr. Who’s legendary space/time ship called the “Tardis” (that just happens to look like a British Telephone booth) the Apollo Twin interface is (seemingly) BIGGER ON THE INSIDE!!!

Why?? Ooooohhh… wait ’til you see… !!

click map

Sam Ash Amazon Musicians Friend

Video Review!

For a good overview of all these specs, check out this quick overview from fellow pro audio guru Tosh, here in this video:

Twin Technicalities

Apollo top view

As Tosh just showed us in that video, the Universal Audio Digital (UAD) Apollo Twin MKII Audio Interface is so stuffed with amazing things, it’s hard to know where to begin, but I guess a good place is always with the specs, right?

(Caveat: the specs below are for the specific Apollo model that I purchased, which is the USB version. I work from a Windows-based PC so that was the appropriate choice. There is, however, as you just saw in Tosh’s video, a version for all Mac aficionados with a Thunderbolt connection.)

Here’s what this little sound-ship sails to you with:

Inputs

  • Total inputs: 10
  • Mic preamps: 2
  • XLR/TRS combo jacks: 2
  • XLR only jacks: 0
  • 1/4” only jacks: 0
  • S/PDIF in: 0
  • ADAT/optical in: 8
  • RCA in: No
  • AES/EBU: No
  • MADI: No

Outputs

  • Total outputs: 4
  • XLR out: 0
  • 1/4” out: 4
  • S/PDIF out: 0
    Apollo back view
  • ADAT/optical out: 0
  • RCA out: No
  • AES / EBU: No
  • MADI: No

Other Connectivity

  • Computer connection: USB
  • MIDI I/O: No
  • Headphone output(s): 1
  • Word-clock I/O: No

Audio Quality

  • Max bit depth: 24-bit
  • Max sampling rate:192kHz

Onboard Features

  • Platform compatibility: Windows
  • Phantom power: Yes
    apollo front view
  • Direct monitoring: Yes
  • Onboard DSP: Yes
  • Metering: LED Meters
  • Display: No
  • Latency control: Yes
  • Monitor control: Yes
  • Headphone control: Yes

Other

  • Width: 6.31 in.
  • Height: 2.60 in.
  • Depth: 5.86 in.
  • Weight: 2.35 lb.
  • Rack-mountable: No
  • Included software: Yes

What’s the Big Diff’?

Unless you already have a ton of expensive gear, get this interface and you’ll notice a big difference in the final products you produce. I’ve had this interface since spring of this year, and it has quite revolutionized the sound coming out of my monitors and my final mixes.

How? Well, it’s not just because the superb A/D & D/A converters get the audio into my computer squeaky clean. It’s also because of the insanely beneficial galaxies of sound-sculpting effects freely included in this interface!

Universal Audio logo

We’re talkin’ world-class sonics and options for your studio here, whether in-home or in a professional installation. UAD has a long, rich history of engineering the very best audio products big money could buy. THIS POST is a succinct glimpse into their acclaim and fame.

But let’s talk about NOW. Universal Audio was re-launched as Universal Audio Digital to bring us into the 21st century and put all those renowned hardware pieces of the past right at our fingertips, for small fractions of the prices they used to command.

“Yea,” you might say, “but are they GOOD??” An excellent question. My personal experience jumps up & down at that question and shouts to the heavens a resounding “YEEEEEESSSS!!!!”

But don’t take my word for it only – go hear the incredible A/B Shootout between real hardware units and UAD emulations done by a Nashville studio in THIS VIDEO. You won’t believe how faithful the reproductions are!

GET FREE STUFF!!

Whenever you buy an Apollo Twin, it comes packed with a free software bundle that will immediately give you some professional-grade audio effects to use with the system.

The free Apollo Plugins!
All the free Apollo Plugins!

Sweet, right?! These freebies give you a real taste of what’s possible when you engage the power of this unit.

Currently, these are programs that comprise the studio recording gift package in the Apollo MKII:

These are such useful plugins, I can’t begin to tell you how much I appreciate them. They upped my game in an instant as soon as I added them to my signal chains. Epic awesome audio quality.

Also, there’s usually one or two ADDITIONAL programs that UAD throws in depending on WHEN you purchase the Apollo. Case in point: as of RIGHT NOW through 12/31/18, if you buy any Apollo MKII interface you’ll also get from UAD:

  • The Neve 1073 Preamp & EQ Collection
  • The Oxide Tape Recorder, &
  • The Fender ’55 Tweed Deluxe

FYI, I just demo’d the Fender Tweed plugin for a song I recorded that needed some good R&B chickin’ pickin’, and, oh man… the sound was perfect for the tone I was wanting. I decided it was worth buying just from that demo.

Apollo Fender Tweed plugin

Finally, if you’re over the moon about how incredible these plugins are, and decide you want MORE, baby, then guess what? You have full access anytime you want to the entire UAD catalog so within seconds, right from the software console, you can either demo for 15 days, or purchase, any other plugin your humming heart desires.

Yes, folks, constant, haunting G.A.S. shall weigh heavy upon thee!!   lol

Work Your Core

The biggest decision you’ll have to make about purchasing the Apollo Twin MKII is which core to choose. You have three selections to choose from, based on how much processing power you’ll want to the Twin to handle instead of your computer doing it. You can choose:

Twin MKII & box
Teaj’s Apollo on his desktop!
  • The SOLO core (a single processor)
  • The DUO core (two processors), or
  • The QUAD core (four processors)

Basically, the core strength you choose will determine how many plug-ins you can run at the same time. If you get the basic model, the SOLO, you’ll probably max the unit out at three, or at most, four plugins running simultaneously. If you want more, then you’ll need a bigger Apollo core.

Unless the computer you use has superhero specs. Think of it this way: if you have a wimpy computer, you’ll want a bigger Apollo processing core. If you have a computer with lots of RAM, quality sound cards and a processor that rocks, OR if you already have another UAD rack interface, like the “8P”, then the SOLO core will be just fine, because those will provide the brawn needed to run chains of plugins without breaking a sweat!


Apollo Console
That App’s Sleek, yo!

The interface “Console” software that you install to run the minutiae of the interface is totally intuitive and a no-brainer to use and integrate into your DAW system.

It has its own levels window, inserts panels, typical mixer operations and is totally configurable just the way you want it by adding or subtracting channels.

Because of this, I often find myself working in this UA Console window more than Pro Tools when I’m tracking. To dial up just the right tone and flavor before coming into your DAW you’ll park here, twiddling knobs, for minutes on end… and smiling!!

I also really like how UAD integrated the actual hardware unit to be able to manipulate a lot of the faders, buttons and menus so I don’t have to use the computer mouse all the time. Brilliant!

Apollo Plugins roster
The Plugins Roster!

If you need a quick, streamlined look at which UAD plugins you have at your disposal (and which you can buy to have more!), a simple click on “Settings” brings up a menu where you can scroll through with delight the effects to choose from.

If you need a little refresher on what each of those effects DO, well, right there in the list you can instantly link to an online explanation to get you picking just the right tool for the job in no time.

They really thought of everything!

Latency, Shmatency!

Apollo Processor
The Apollo shows at all times how much you’re taxing the processor

This may be the biggest, most persuasive testimonial for the MKII I can give: since owning this unit I have had (wait for it… ) ZERO latency issues. Yes, I said ‘zero’. And I have run up to four plugins on one instrument coming into my DAW.

Now, it’s true I have a powerful computer, so that helps. But it’s always worth mentioning when a pro audio unit works flawlessly and gives you absolutely NO problems, hiccups, or surprises when tracking or mixing in the studio, with or without clients checking their watches in the chair next to you.

YMMV, but so far everyone that I know who has one of these things has said the same: “Dependable, rock-solid and powerful delivery of signal, with effects easily manipulable and legendary in quality.”

Less time trouble-shooting; more time for music-makin’. YESSSS!

‘Rome Studio’ Wasn’t Built in a Day

One of the best features long-term about the MKII is its scalability. As you get more money to expand your studio, you can add on further UAD-2 devices to your original interface for more power & flexibility.

UA Apollo rack mount units

Because I track live drums most of the time for all my tunes, I need a lot of inputs to capture them all. Currently I’m using the Tascam 16×08 for that (see its review HERE). But eventually, I hope to add more and more hardware over time to this Apollo chain and get to the place where I won’t need the Tascam anymore.

Not that the Tascam is bad at all! It’s just that the ability to implement the UAD software bundles and programs on my inbound instrument tracks is the BOMB! They make such a difference on the sound of drums, especially.

So if you’ve only got a small budget currently, but eventually want more inputs, no problem – start small with the two combi connectors (XLR & 1/4″ capable) on this unit for now. You won’t have to get rid of this investment later to upgrade, you’ll just add onto it to increase your audio might.

Specifically, you are able (thanks to the foresight of UAD) to daisy-chain FOUR Apollo interfaces together, or SIX total UAD-2 devices. This enables you to grow your studio capabilities slowly until you achieve that giant recording hit-making machine called your studio. This console software makes it easy to see and manipulate however many units you string together. It also grows with you, with the click of a mouse!

I Hear the Doctor Owns Three…

Just the high-resolution sound card alone in this unit will bring the quality of your mixes up (and noise levels down!) if you don’t already own a more expensive interface.

Apollo box & Dr Who CARTOONED
Bigger on the inside indeed!!

Then consider the DSP you’ll no longer be taxing your computer with and the disappearing latency issues.

Add to that the software that immediately revolutionizes your tracking and mixing options and you’ve got a recording package that is a must-have – there’s simply no conceivable reason for you NOT to have it!

That’s why it won “Best In Show” award at N.A.M.M. when it was released. It’s no mistake. For the price, it packs the most wallop for your hard-earned bucks and makes your music sound the best it can be at this price point.

The Twin MKII is easily my favorite piece of studio hardware from the past decade. Like the Tardis of Dr. Who, it’s amazingly bigger on the inside… ‘cuz it’s packed with the amazing power of some of the best plug-ins Universal Audio has ever offered.

If you wanna give your music production a well-deserved BOOST in quality, tone & pro effects availability, join me and get the Apollo interface in your studio today! Here are your links to legendary sound:

For PC:

Apollo BUYcon

For Mac:

Apollo BUYcon

When you finally get the Twin in your anxious hands and get it running in your own system, give us a shout here at Seriousgas.com and let us know whatcha think, how you use it, what your favorite plugins are, etc. Share the love, man!

Until then, let the music guide you and go… make… sounds!!

Teaj

Teaj in the storm-fields!