Salutations, all you weekend warriors!!
I’m sure you’re probably all getting ready for your latest gig tonight, or that pressing recording session comin’ up.
Regardless, I thought I’d share the wealth and let you look over my shoulder as I show you how to set up an electric guitar – specifically, for this first article, how to do an archtop electric.
These are a little different from the other types for one reason: they often have a separate, totally detached “floating bridge”.
That calls for a li’l bit of extra work. But it’s always worth it!
I heartily recommend that you learn the ins and outs of your own axes, and how to do your own maintenance on them. You’ll be that much closer to understanding how to coax the very best and the most diverse tones out of them!
Well, at least you will, once you watch my video… 😉
Oh, I See… !
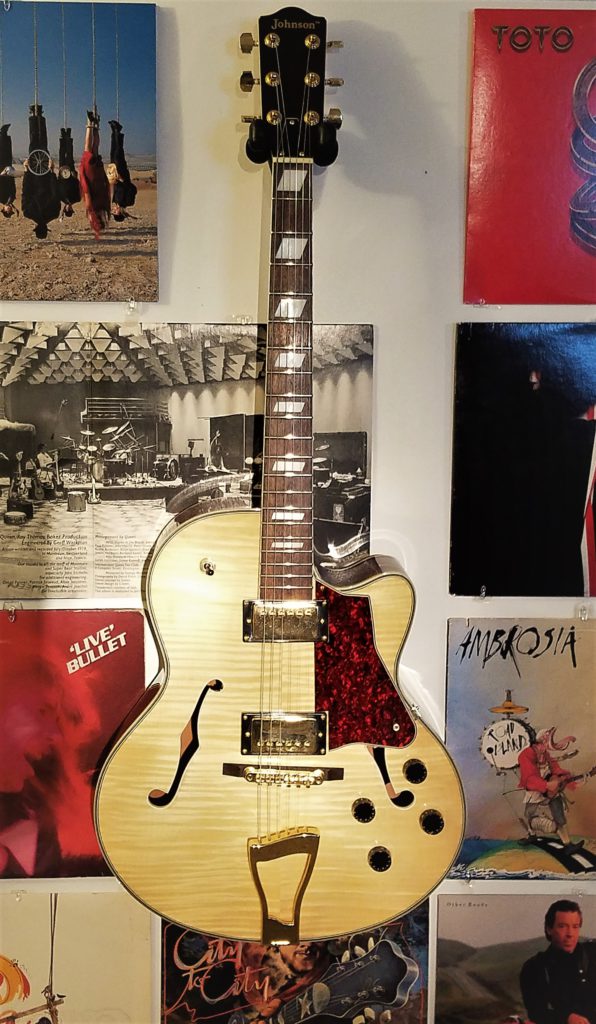
So I filmed this little documentary for you about how I just set up my new “Johnson hollowbody archtop electric guitar”!
I was actually very excited to put the work of perfecting intonation into this guitar. It’s gorgeous! And, being a hollowbody, it has tons of potential for adding a slightly different “spice” to my music.
It’s the first complete hollowbody I’ve ever owned, so naturally… I’m PUMPED!!
Watch my walkthrough below and gather your thoughts and questions. We’ll discuss the details below…
Gettin’ String-y
Before we actually get to setting up any guitar, you’ll first want to change the strings.
New strings will put a lot more pressure on the neck and bridge, so you don’t want to go through all the time and effort of setting up your guitar, only to find that, when you put new strings on, it’s all changed!
Also, new strings will be more consistent in tone AND intonation. These things will work in your favor as you set up a guitar.
For the tutorial video above, I had just acquired the Johnson hollow-body archtop guitar from a local guy who had bought it originally.
I was immediately struck by the impressive looks of the girl, but the sound was pretty bad. I could tell it had really old strings on it that desperately needed changed, so I knew much of the “BLECH” I was hearing was that.
In fact, the intonation was so bad that, I kid you not, the guitar had at least 10, maybe 15, dead notes spread out across the neck. Mostly between the 8th and 12th fret.
I knew that with skill and effort I could fix this, ‘cuz I could see that the frets were even and didn’t need replacing.
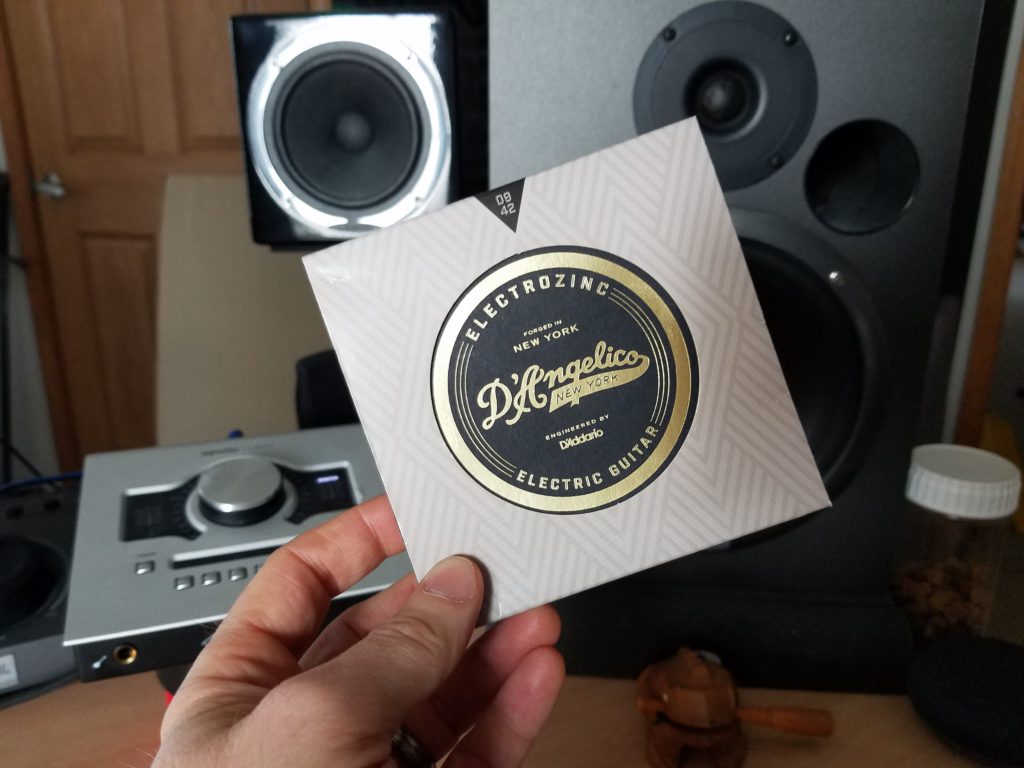
So, after I purchased it and got it home, I immediately put fresh strings on – D’angelico Electrozinc strings. They’re what I consider the perfect string for a darker jazz tone.
Guess what? No more dead notes. I could tell that the guitar still really needed a setup, but at least now I was certain that the frets were not an issue.
By the way, if you want to know more about the ElectroZinc strings, and why I used them for this particular guitar, read through THIS POST ON THE BEST ELECTRIC GUITAR STRINGS.
1) There Once was a Caveman…
Alright, now that we have some fresh vibration-makers strung across our axe, let’s move on to the first part of setting up an archtop: adjusting the truss rod.
For those that don’t know, there’s a metal rod inside the neck of most guitars, it’s there to help stabilize the neck, and thus, the intonation of the guitar, as well as for adjustment when necessary.
It’s designed so that it can be turned, clockwise or counterclockwise, which will either tighten or loosen the neck, respectively.
If you tighten the rod, neck will be bent back, bringing the strings closer to the fingerboard.
If you loosen the rod, the neck will be brought forward, creating more space between the strings and the fingerboard.
When the rod is tightened, the neck becomes takes on a convex curve. When it is loosened, it becomes more concave.
I explain all this in such detail so that you can understand how to adjust the truss rod in your guitar, without having to consult Google, like me.
But how can we remember it for when we need it??
Try this little mental picture trick: if your strings are too close to the fingerboard because of the neck, you’ll want it more conCAVE, by loosening the truss rod COUNTER- clockwise.
So, just think of a CAVEMAN, in his CAVE, COUNTING rocks to buy a new spear for woolly mammoth hunting! Need conCAVE? Go COUNTER-clockwise. Get it?!
As long as you can remember the counting caveman, you’ll know how to adjustthe truss… and you’ll know that the opposite is true: if your neck needs to be convex, you’ll turn clockwise.
But how do we know if it’s the neck that needs to be adjusted, and not the nut or the bridge?
By first starting with a simple measurement:
Place a capo on the first fret, right over the metal.
Next, push down with a finger the fret that is right at the place where the body of the guitar meets the neck.
Simultaneously, use a .010 feeler, or thickness, gauge (found easily and inexpensively HERE) to slip between the string and the metal at the 7th fret.
If the gauge fits perfectly, no neck adjustment is needed – you’re good!
If there’s extra space, you’ll need to tighten the neck (i.e. make it more convex).
If the gauge raises the string when you slip it in, then you’ll need to loosen the neck (i.e. make it more concave).
When you adjust the neck, do it in very small increments. Think 8th of a turn.
A final caveat: if you hear any creaking, cracking, or even squeaking as you turn the rod, let a professional look at it. You DON’T want to break the truss rod!! It’ll basically mean that you’ll have to replace the whole neck, and that’s no fun at all.
2) Height, Ho!
The next step in our setup is adjusting the bridge height.
For this you’ll want to pick up a tool called a “string action gauge”. It’s cheap, it’s crucial, and it also sets you up well for a lot of other guitar-related maintenance tasks.
So do yourself a favor, just GO GET ONE HERE now.
With gauge in hand, you”re ready to rock: place the corner that’s labeled “1/64 inch” down onto the fretboard, next to the low E string, right where the body of the guitar joins the neck.
The typical measurement here for an archtop is 5/64s of an inch.
These measurements are very minute, so don’t be surprised if you need a flashlight or glasses to see where you’re at!
Next, jump over to the high E string. The typical measurement for that is 3/64s.
If either of these measurements are off ( i.e. too high or too low), you need to raise or lower your bridge to compensate.
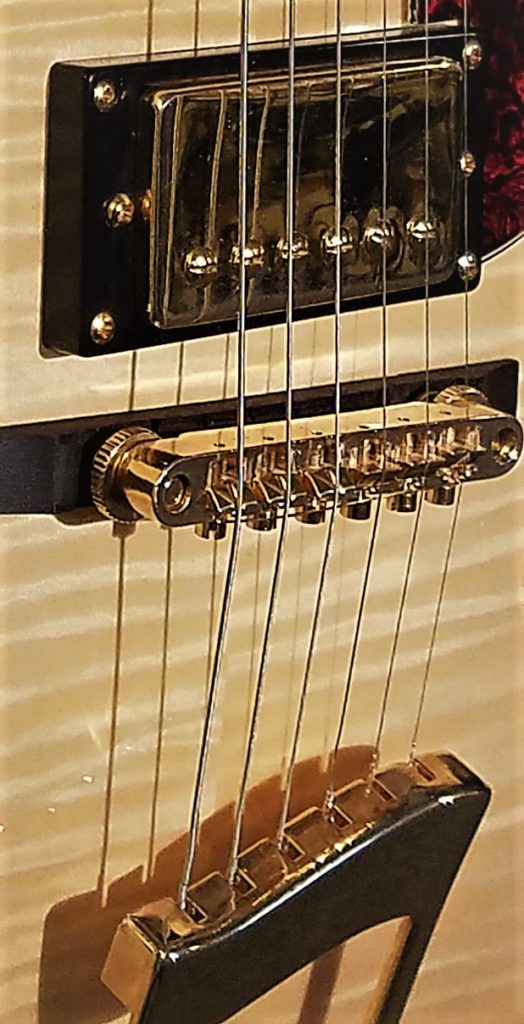
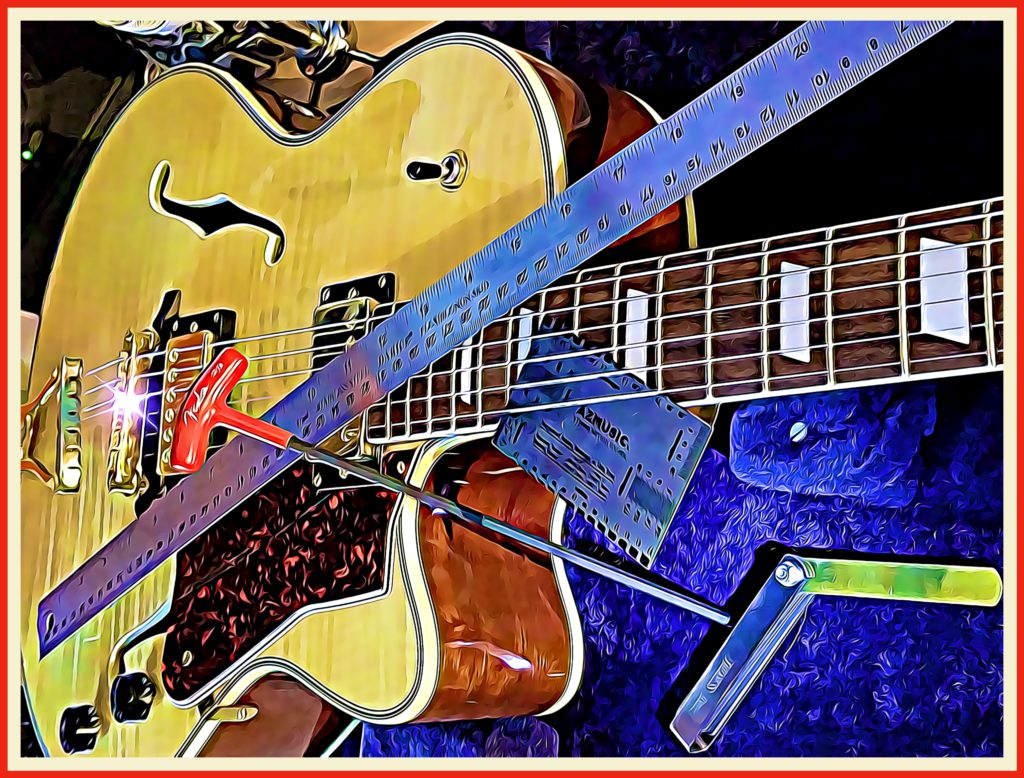
Tune-o-matic bridges are very common on archtop guitars. As seen below, they have thumb screws on either side, which you would turn to adjust the height of either side, or both.
Typically, turning the thumb screw counterclockwise will raise that particular side. Clockwise will lower it.
You may have a different kind of bridge, however, that may be the opposite, so if you’re not sure, turn a screw a couple times and watch – it’ll be obvious which way it’s moving.
Once the action feels good to you, move on to the third step… where we all go a bit nutty… !
3) What a Nut Job
If you’re a beginner to intermediate player, you spend a lot of time around the nut. Gotta love those open chords!
This is why it’s crucial we get this area fixed up well. To do so, we’ll need our thickness gauges once again.
This time, choose the .018 thickness gauge.
Slip it between the metal fret and the low E string. If the nut it is perfect, then it will slip in without pushing the string UP, but also with no EXTRA space either.
If you press down on the string and you can feel it moving down and hitting the gauge, then you’ll need to file that string’s nut slot down a little.
If you want to always be tooled up and ready for any guitar nut maintenance, buy what I use: THIS COMPLETE SET OF NUT SLOTTING FILES.
Now, if you’re pushing the string up when you insert the gauge, that’s a bigger issue: it could mean that the slot is too deep.
Consider this though, before you get all replacement-crazy: if the measurement is off but you DON’T have any buzzing notes, AND it feels totally comfortable to you… then just leave it alone! No need to create a problem where there isn’t one.
But if that measurement is off and you ARE getting buzzing notes, or dead notes still, you have three options then:
1) Put a shim under the nut to raise it.
2) Fill the nut slot and refile.
3) Buy a whole new nut.
I much prefer the second option, because it’s cheap, easy, and works great in most cases.
Here’s a video that will walk you through exactly what to do:
There. Now when someone asks, ” What does a guitar and baking soda have in common??”… you’ll be able to answer with a knowing grin. 😉
When you do any filing of the nut, remember to file in the direction of appropriate string post that the string goes to.
Also, if the strings slant down from the nut to the posts, make sure you are filing with that downward slant also.
Your work here is about creating the easiest path possible for the string to follow, without catching, and without sharp turns.
Like when you’re trying to explain chords to your bass player. LOL
3) When an Island is a Bridge…
This section of the post shows you why this article is specific to archtop guitars: many times we will have to deal with the floating, removable bridge.
This isn’t always the case: old Gibsons, for example, often have bridge post holes hat are drilled into the top resonating wood and are unchangeable because of that.
But all too often, we’ll be dealing with a little tonal island that will need to be placed strategically if we want to be at ALL in tune.
Your first clue in deciphering where your bridge should be placed from knowing the scale length of your guitar. You can find this out easily by Googling the name of your guitar and “scale length”.
The Johnson guitar you saw in my video is listed by the manufacturer as being a 25.5 scale length guitar.
Knowing that, I measured that length perfectly and placed both sides of the bridge right there.
After that, it’s time to check the intonation. Here’s how:
* Tune your Low E string perfectly. Use a precise tuner, not a cheap-y model!
* Now play the 12th fret of your low E string. Is it in tune? Then your intonation will be good.
* If the twelfth fret note is flat, you’ll need to slide the bridge closer to the neck. Do this in small increments, And re-check the tuning until open and the 12th fret are both in tune.
* If the twelfth fret note is sharp, then the bridge needs to slide further away from the neck. Again, do this a little at a time, always re-checking, until both notes match are well-intoned.
* Repeat this process for the high E string as well. Since you’ve already perfected the low E string, make sure you’re only moving the high E side of the bridge. Otherwise, all the work you just did will be for naught!
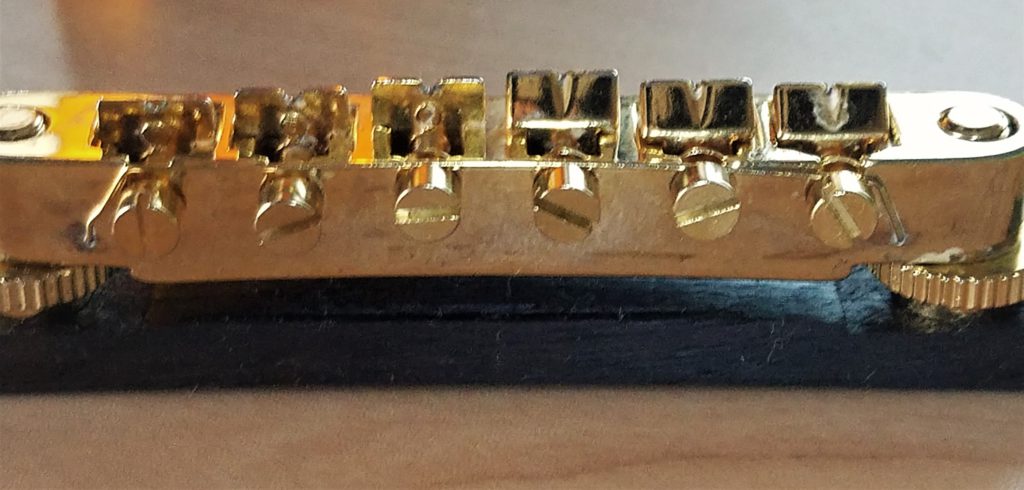
Don’t be afraid to, as I did on this Johnson guitar, place your bridge at an angle too, instead of completely level with the pickups. For me, that was the only position that fixed all notes on both strings.
Feel free to also turn your bridge around if that helps you attain stable intonation.
For example, the saddle screws on my bridge, according to factory specs, face away from the neck. That worked for me, but if it hadn’t, I could have turned it around so that the screws faced the neck, and tried again.
It comes down to whatever works, my friends. If you are guitar reaches professional intonation, then it doesn’t matter how you got there.
As the old adage goes, “If it sounds good, it IS good!”
4) Saddle up, Boys!!
Okay, we made it to the last step: setting good intonation on the other four strings!
We’ve already perfected the low and high E strings, but we haven’t touched the A, D, G or B strings yet.
These we will set by adjusting the individual saddle screws for each string.
Use the same method as before: tune the open string perfectly, then push down the 12th fret and see if it’s in tune.
If it’s flat, the saddle needs to move closer to the neck.
If it’s sharp, the opposite.
Use a small screwdriver to turn the screws, and make sure you know which way to turn in order to go a certain direction.
If you can’t get the other four to reach perfect intonation, this would again be the perfect time to try turning the bridge around, or putting it at a slant to fix the issues.
There’s a reason why guitar luthiers and instrument repair people charge upwards of hundreds of dollars for a complete setup – this is sometimes NOT a quick process!
If you really want your guitar to sound like a million bucks, you must invest the time necessary to ensure that it is as true to perfect intonation as possible.
For the Johnson archtop you saw in the video, I spent over three hours perfecting it.
The good news is, however, once you figure out where it’s perfect, it’ll probably always be perfect with those measurements.
Unless, of course, it gets thrown around, left in your car, has to endure extreme humidity changes, or sits too close to a hot sunny window.
So, uh… don’t let those things happen, ya know? 😉
OWN it!
Owning a fine musical instrument is a privilege and a joy. Investing time, money and effort into its well-being will pay off in rich musical dividends… for years, if not decades to come.
I mean, let’s face it… if you sound your best, your fans will love you the more for it, and you’ll be one step closer to the respect, recognition and fame that someone who works their gift hard truly deserves.
And now, knowing how to set up an electric guitar yourself? Priceless! Tho’, truth be told, the price you save on yearly maintenance charges will be astronomical, I’m tellin’ ya!!
Now put the rulers and tools down like I’ve now done…
… plug in that cable and that amp…
… turn on those sweet, stereo effects…
… and let’s go… make… sounds!!
Teaj

Probably the best video on YouTube that I have seen. Thank you!
Always loves jazz Gibson full-body cutaway way back, when growing up back home in Malaysia (listening to West Montgomery’s LPs). I’m a beginner again; and decided to give another go, in my late life at 83. I got a Slimline Gretsch which I’ve been putting away to do my own set-up, after have been practicing on a cheap Strat. Your video is great and inspiring; I’m ready, and have all the confidence to succeed. Yours is the same style as my Gretsch – just the kind of tutorials I’ve been looking for.
Thanks a million.
Hey, Seun, glad you like it! You are most welcome.
What kind of guitar do YOU play??
Thank you, Adamu2! Sounds like you’ve got serious G.A.S. for another axe – join the club!!! lol
Check out one of my favorite electrics on THIS EVH GUITAR POST. You can’t go wrong with one of those!!
Excellent, Louis! What are you thinking of getting??
I just posted THIS BEST ELECTRIC GUITAR UNDER $200 article for one of my students who was in exactly the same state of readiness as you. He ended up getting the Fender Squier and I got to play it. GREAT axe for the money!
I hope you DO, Sammynathaniels!! More than any other instrument besides my voice, the guitar and piano have been the most inspiring, thrilling, and generous music-makers in my life. You should definitely give it a try!!
A good starting place will be THESE ACOUSTIC GUITARS. You won’t have to spend much, but you’ll still get a reliable product.
Let us know when you join the “guitar club”. We’ll celebrate with ya!!
All good questions, Phranell86!
A guitar should give you the sound that you need for YOUR music, first and foremost.
If you’re NEW to recording & making music, then you probably aren’t completely sure what ‘your sound’ is. That’s ok; it will come with time.
So, instead, just get a guitar that has a good reputation, positive reviews and is used by the musicians you like to listen to and are a fan of.
As for strings, most guitars ship with strings that are not of top quality. I almost always put MY favorite strings on. The sound usually improves as soon as I do.
Hope that helps! Start going through OUR GUITAR LESSONS HERE on this site and start learning. I think you’ll find them very comprensible and easy to follow!
Sure thing, Noor! Start with THIS GUITAR LESSON and you’ll learn 7 very important chords, and even a song to go with them that will teach you a LOT about how to play AND understand guitar very well.
Enjoy!!
No problem, ajibola40! Happy to help.
Over time, you’ll find it’ll save you a lot of money to do these things yourself. Plus, it helps you know your instrument so much better. It really is a win/win all around!
Thanks, Fortune! Great to have you visit.
Do come back again, and, to help you progress, click these HOW TO PLAY GUITAR posts to increase your skill & understanding.
Lemme know how your tutor likes our site! 😉
Wow…… Thank you for the insight. Your article has really been a blessing go my musical life. This article explains deep how to set up electric guitar,setting of the string,the height and setting of the cords. I would prefer owning another electric guitar soon,it would be my joy and happiness. Investing my time,money and effort will earn me fortune.
thanks for this musical review. Best regards
Divine13, I most certainly CAN!! In fact, you won’t find a fresher answer to your question – I just posted what you need to know a few days ago!!
Read through THIS BEST ELECTRIC GUITARS post and you’ll see 7 to choose from that are (wait for it…) all under $200!! Can you believe it?!
Then come back and take some lessons from us for free. Start with THIS HOW TO PLAY GUITAR post and follow the series.
Let us know how you progress! We’re music teachers too, so we’re all about helping you progress and flourish!!
Rachael, you made me laugh right out loud! 😉 I see you’re no stranger to “bass player jokes”. Lol
Your question is great, and guess what… I’ve already answered it!! With as much detail as you found in this article about setups.
You sound like a girl who could REALLY do well at guitar. You’ve certainly got the attitude for it! 😉
Take a moment and READ THIS BEST ELECTRIC GUITARS post I did. They’re ALL under $200, if you can believe it. A student of mine just purchased a brand new Stratocaster last night through my links and he is SO STOKED!!!
Once you have your guitar, come back here for free lessons. Start with THIS GUITAR LESSON and follow the series. You’ll learn a lot!!
You’ve certainly covered every possible step to setting up an electric guitar. I am in awe of that amazing Hollowbody archtop it’s truly beautiful and one of the many reasons I love craigslist. And who would have thunk that baking soda could help to tune a guitar? That stuff has a million different purposes right??? Anyway, love your take on this, particularly the effort you’ve put into the tutorial video, it was easy to follow and understand even for a novice like myself. To be honest, I have only ever played the air variety of guitar, and I used to date a Bass player once but they don’t really count. For someone interested in learning electric guitar, what kind of instrument would you recommend for a complete beginner starting out?
I am a beginner in playing a guitar and I fell in love with your site getting to read about setting up an electric guitar. I really love the video in this post. Even though am just learning but am enjoying the fact that am on your site to learn and improve my playing skill on guitar. I will show my tutor this article on how to setup an electric guitar. I have bookmarked this page to get to your site anytime for further learning on guitar. Thanks.
Thanks for this informative post, Guitar has been my favorite instrument and you have done a great job by creating these videos on this post about adjusting relief, action, and intonation is the groundwork for getting the dream playability out of my guitar by sighting the neck, we gain insight into how the neck is reacting to the string. I can’t thank you enough for helping me with this amazing post, I’m indeed honoured to visit your website, looking forward to more post from you.
I’m a big fan of rock music and would love to play the electric guitar. I have searched online for some training classes but most end up being so complicated. I love the way you began your lesson with how to sting an electric guitar. I was thinking a new guitar should naturally come with a new string. Is your suggestion to change the string based on getting a particular tone that you desire or simply because you don’t trust the quality of the string that originally came with the guitar?I enjoyed reading your explanation, though with a lot of imagination. Thanks for the accompanying videos, I still need to watch them over and over to get a hang of all the processes involved. For a starter, what would you advice as the most important factor for picking an electric guitar, if money is not a problem?
Thanks for this guide on how to set up an electric guitar. I currently play with an acoustic guitar because, an electric guitar is a little beyond my reach at the moment. However, I’m saving up to buy an electric guitar, and when I do so, I’ll come me back for your tips because I know they’ll be very useful for my first set up.
Nice article on how to setup an electric guitar. I have not be able to setup my electric guitar by myself since I started my training lessons on guitar, It has always been my brother or his friends that do that for me.seeing how to do that really makes me feel happy and I have already note every step done somewhere in my diary. Thanks for this lesson I really appreciate it
seriously i love music and i always play the guitar during my free time thank you for this beautiful article how ever this is a request if thrre is any way you can teach us how to pluck a guitar like the diferrent types of chords am sure ill be interested in buying the guitar if you can teach us the different types of chords
thank you NooR
I’m not a guitar person but this article is drawing me closer to it coupled with my love for music and string instruments -they produce the most thrilling sounds after all if proper care and steps are taken towards them.
This is a nice, comprehensive article. I might buy a guitar one day
Cheers.
Hello. I have read a previous article on this site and it’s informative and accurate as usual. I am looking to buy a new electric guitar as my old one is past it’s best and I will like you to recommend a brand for me to buy which isn’t too expensive and is of a great quality. Thanks.