The Fender Jazz Bass

Living in L.A. as a musician, you learn a lot of things:

– Watch where you park your car, or your rent will be gone to tickets.

– Know what your “one thing” is as an artist, or you’ll never stand out among the hundred others… who also don’t know.

– And finally, no matter how good you think you are, there’s always at least one person who’s better.

Probably more!

But I also learned in L.A. about the Fender Jazz Bass, so… you know, it wasn’t all bad!

Jaco Pastorius with his Jazz bass
The one, the only… (Photo: Pino Alpino )

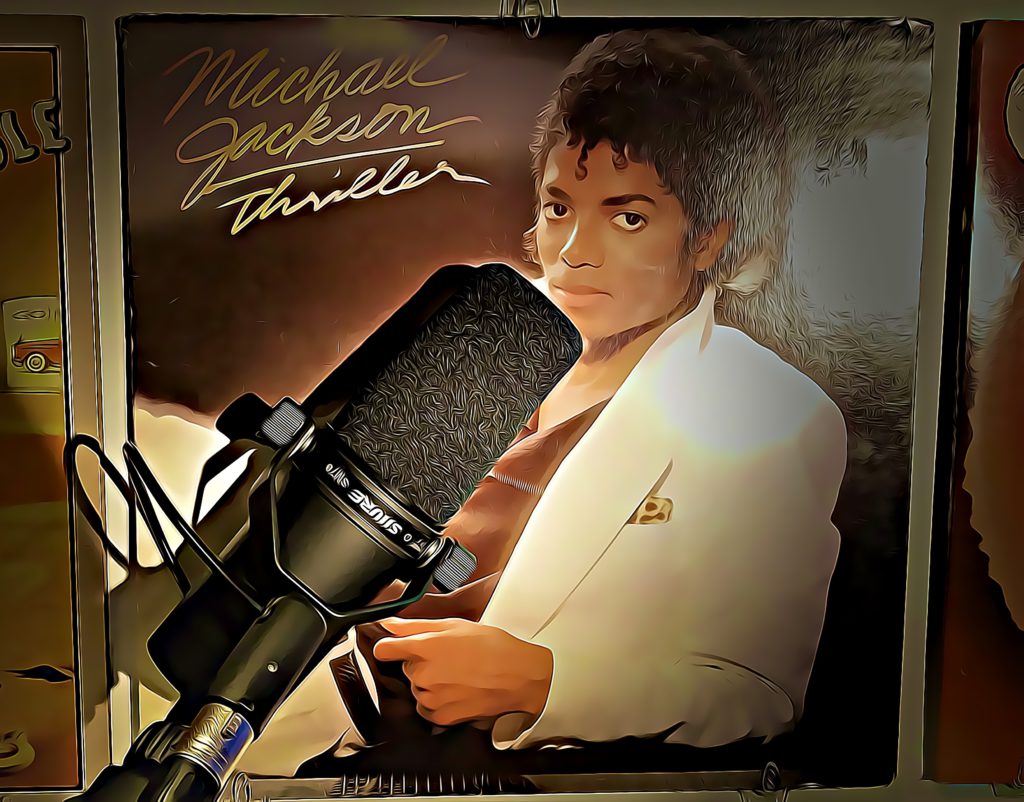
I was turned on to the “Heavy Weather” album by Weather Report by a friend out there, and heard Jaco Pastorius play for the first time on one.

Mm, mm, mmm… the things that that man did on that jazz bass!

I always thought that the first melody coming in on that song was a synth or something.

Nope. It was Jaco, playing and bending those thick bass strings while plucking artificial harmonics way up high on the neck.

Genius!

I have a feeling that Jaco has been, for at least a few THOUSAND of us, that “person who’s better” I spoke about ! ‘-)

But every great player needs a great instrument, and for Jaco, as well as thousands of other players over the decades, there’s only one that growls, loud and proud, above the others:
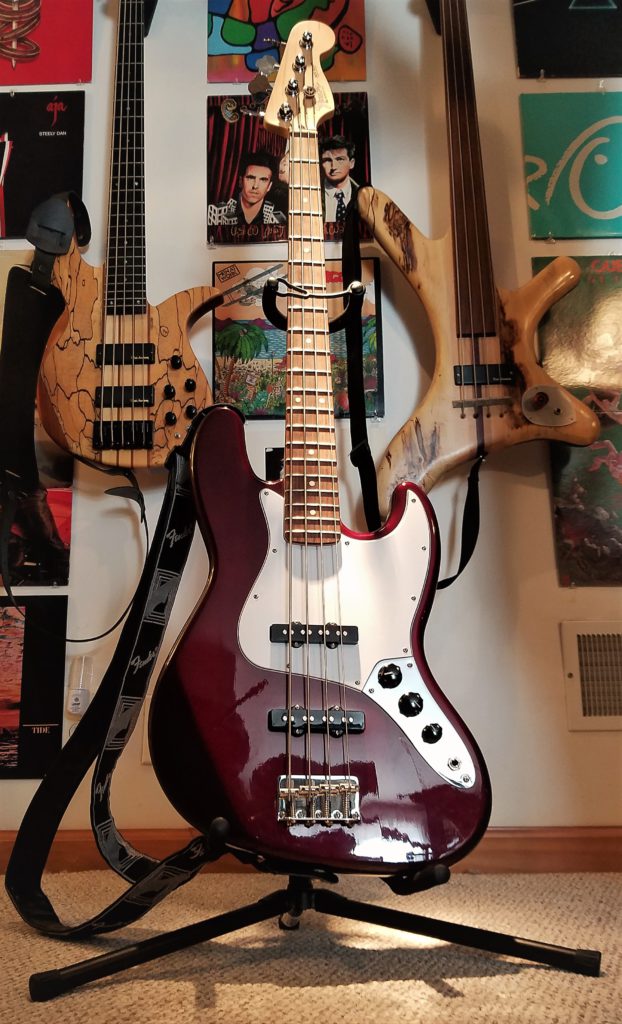
The Fender Jazz!!

Our Little Boy’s All Grown Up!

The story of the Fender Jazz Bass begins in 1960. That was the year that Fender decided to offer a bass that was complimentary in style and in tone to their “Jazzmaster” electric guitar.

Up to that point, Fender had only released one bass model: the Precision Bass, or “P bass”, as it’s come to be called.

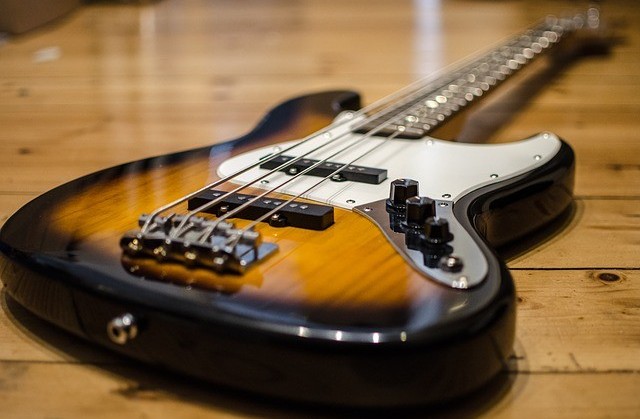
They engineered the Jazz Bass to be quite different from the Precision. The Jazz, by comparison, had:

* A more offset, sculpted body

* Two pickups instead of one

* Single coils instead of humbuckers

* a narrower & more rounded neck

* a tone that emphasized the mid to high frequencies more

The original intent of these changes was to lure Jazz musicians to the fold, though over the decades since then every genre of player has chosen the jazz bass for their voice.

The tonal versatility made accessible by having two pickups instead of one caused this bass to be an instant sensation, and its popularity continues to this day.

Many slightly modified iterations of the Jazz Bass have popped up over the years, but the essential Fender plan remains the same: keep the Jazz Bass brighter, and the P Bass boomier.

And that’s the way their woods warm us to this day!

Juke Box Jazzers!

One of the reasons the Jazz Bass never disappears is that so many notable, prolific players continue to sing it praise.

Considered these glowing endorsements from players that have played on hit after hit:

Geddy with his Jazz Bass!
Get ’em, By-Tor! (Photo: Enrico Frangi)

Geddy Lee, of “Rush” fame, on his signature Jazz Bass model.

“There’s never been a bass that sounds like that bass (his black ’72 Jazz bass he calls “#1”)…. there’s a particular mojo to that instrument.

I think we’ve come up with a bass that’s affordable and very close to what a Custom Shop Bass would deliver for you.”

(By the way, although Geddy had his jazz bass for years, he didn’t actually play it on any of Rush’s recordings until their biggest-selling album “Moving Pictures“.

Now we know why it sold so well!! Lol)

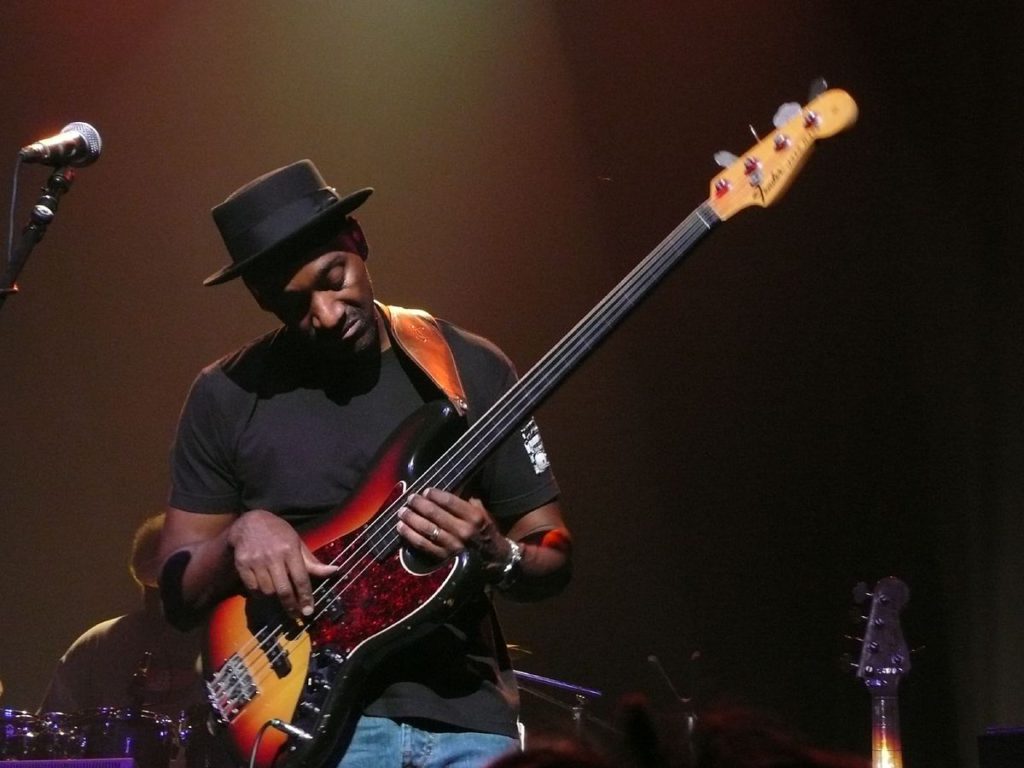
Marcus Miller (Miles Davis; Luther Vandross; Donald Fagen; Herbie Hancock) on why he plays a jazz bass:

“My heroes such as Larry Graham and James Jamerson both played Fenders. I’ve been playing them my whole life…

A Jazz Bass works in most situations. I made it work for me in every situation.

Fender Jazz when I was 14.”

Adam Clayton (U2):

My first Sherwood Green 1965 Jazz Bass…

I played that a lot on the “All That You Can’t Leave Behind” tour, and I really loved it.

It had a great sound, the pickups were really, really punchy.

This is a great bass. I’ve been using it on the new album, and I’m going to be playing it live.”

Flea and his Jazz Bass

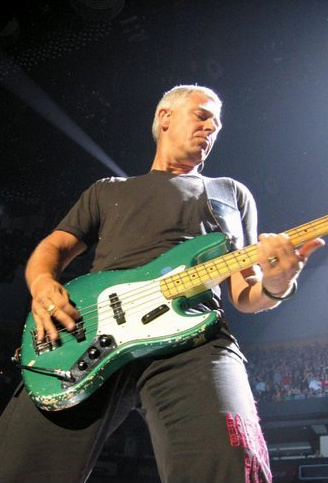
Flea (The Red Hot Chili Peppers):

“The greatest bass I’ve ever played is the ’61 Fender Jazz Bass.

It’s just a magic bass! It’s been a bass for so long, I guess it stopped being a tree a long time ago.

“The weight of it… the way it feels in my hands, the way it plays. When I hold it I just feel like, ‘Aahhh… !’

“I’m in love with this instrument!”


There are plenty of other respected players who devoted an extended period of their careers to the Jazz bass:

Noel Redding; Larry Graham; Greg Lake; John Paul Jones; Sting; Marcus Miller… the list is long, folks. And it speaks for itself!

If One is Good… ?

Then two is better! Right?!!

A big reason why many choose the Jazz bass is that, unlike the P-bass which sports only one pickup, the Jazz is engineered with two pickups, each with its own volume control.

This by definition means you will have a larger variety of tonalities to choose from for any genre you want to play in.

The neck pickup will yield a rounder sound, so this is what you can roll into if you want a more P-bass type tone.

If you turn the volume up on only the bridge pickup, you’ll get a treble-y tone. It will emphasize the upper frequencies a lot. It won’t, however, be the most snarling choice available to you.

That will come if you BLEND both pickups together at full volume. This is where the signature Fender Jazz “growl” starts snarling, darling!

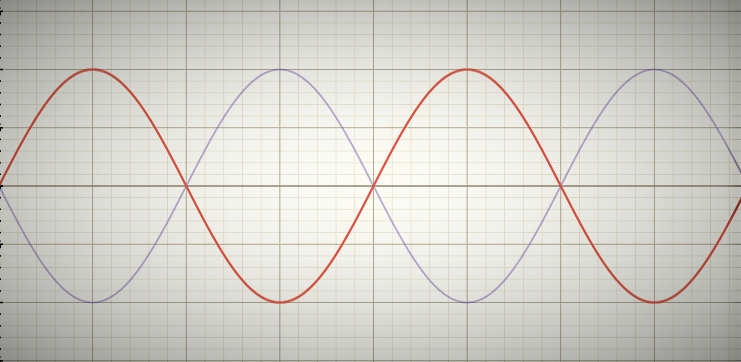
What you hear when you do this is specific frequencies being out of phase between the two pickups. Those frequencies cancel each other out, and that leaves a pronounced “scoop” in the midrange.

R&B, disco & funk players love this captivating cut… and with good reason! It pounces through the mix with a howl and a hunger, and is so eloquently percussive, it gives sharp teeth to any predatory groove you set loose on your booty-shakin’ crowd!

Some “Deluxe” Jazz Basses feature an active pre-amp instead of the usual
single passive tone control. Not only does it afford you more tonal options, but it also usually comes with three bands of EQ to further facilitate tone-sculpting madness!

Changes Through the Years

When the Jazz bass was first put into production in the 60s, it came standard with dual, stacked-knob volume & tone controls, one for each pickup. This configuration only lasted a couple years; in 1962 it was ousted as an option.

Instead, they replaced them with a 3-knob arrangement, in which each pickup had its own volume knob, but only one Tone knob influenced the overall darkness or sheen of your sound.

Still, either version allows a Jazz player a rich variety of blended nuances in their tone. The two are just different ways of achieving the same thing – a pleasing palette of boomin’ bass!

You can still find some early Jazz basses out there if you try. Prepare to pay through the nose for them, but they’re out there!

Some think that those early Jazz basses sound more similar to a P bass. I can’t say, ‘cuz I’ve only played modern ones. It IS clear tho’ that today’s Jazz basses do sound different from the originals. The best way of putting it is probably just to say that the high end is more pronounced, as is the mid-range “growl”.

Jazz Bass G.C. BUYcon

The first Jazz basses also featured felt, or foam, mutes under the strings to help tame overtones and keep the fundamental tones pure. These fell out of fashion after the 60s, but were all the rage then.

As an example, I remember years ago seeing a Carol Kaye interview in which she talked about the importance of this mechanical trick being one secret to her sound. And what a sound it was – she played on THOUSANDS of songs!!

The Lollipop type
Clover, Elephant ear tuners

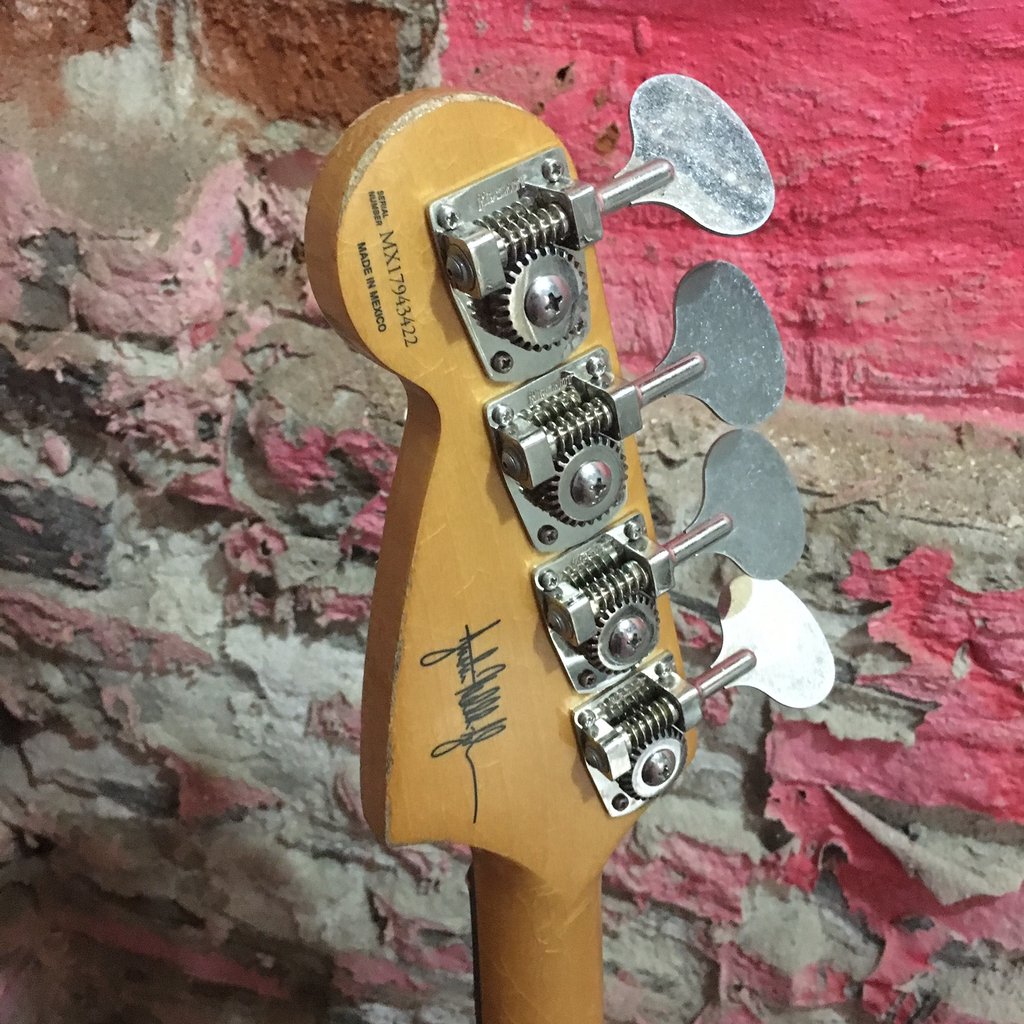
If you find an old Jazz bass with oval tuning pegs, known as the “lollipop tuners“, it’s probably a vintage ’65 through ’68, as they tried those out during that period. Otherwise, you’ll see the more prevalent “Elephant Ear” or
Clover” type tuners.

There’s a ton of other little things that have come and gone on this fine axe. If you want an exhaustive list GO HERE.

Suffice it to say that the basics have survived, but, like any instrument, over the decades Fender through little twists at us to keep us intrigued.

But in the most important ways, “the song remains the same”, to quote a group which featured yet another Jazz player – John Paul Jones in Led Zeppelin!!

Slap the Funk Outta You!

I absolutely love the sound of the Jazz bass for funk. If pop & slap mean something more to you than a mixed martial arts term, then you know what I’m sayin’ – the Jazz tonal spectrum is perfect for servin’ up hot slices of stanky funk!

I know Parliament said, “Make my funk the P-funk”, but, trust me, they were talking about the name of their band, NOT the name of Bootsy’s bass!

How do we know this?? Because Bootsy started, with his tenure in James Brown‘s backing band, the JBs, with none other than… a Fender Jazz!!

Obviously, the REAL funk comes from what’s on top of your shoulders and what’s at the end of your arms. You can only make those bodies boogie if you’ve wood-shedded enough to have your technique slippery smooth and contagiously strut-worthy.

But if you’ve done your dance-band due diligence, the Jazz bass is your ace in the funkin’ hole, baby!!

Take, for example, the following video uploaded by bass maestro Davey Pollitt. Yes, he’s obviously a Jazz bass AND a “Level 42” fan, but if you play bass… aren’t YOU??!!

So get slap-happy. Grab a Jazz, bounce that laughin” vibe into a wide-mouthed Hartke or Mark Bass amp head, into some complementary cabs, and within seconds… the glass ball will be spinning, the colored lights will the ricocheting, and oh, yes and verily do I say… the people SHALL FEEL THE FUNK!!! Lol

Top of the Heap??

Now, whether the Jazz bass is TRULY the best-selling bass of all time… still remains a mystery. If you doubt me on this, just read through THIS ANIMATED DEBATE about it vs. the Fender P bass.

Man, you’d think they were talkin’ about their KIDS or something! Lol

One interesting insight concerning this comes from the behemoth of sales and provision we call Amazon. If you search under “best-selling bass” right now, as I just did, you’ll see that the first Fender bass that is near the top according to Amazon sales, is… the JAZZ bass! Pretty convincing testimonial that.

Of course, their stats are updated every hour, so who knows if it’s always beating out the P-bass. As of today though… it is.

Okay, But Which Series??!

Now let’s inch our way out onto a dangerous limb – Squier, Mexican or American??!!

This question can really raise some hackles, but it need not. There’s a place for all instruments in our world, just as there are people with varying economic options that still really want to make music.

The Squier series is the cheapest. In the middle is the MIM, or Made In Mexico, series. Finally, the most expensive standard model (without getting into Custom builds) is the American Standard.

I watched a ton of vids to see if anyone out there had really done their homework and could really show AND PLAY the differences.

I was ready to go buy an American & a Squier to compare it with the Mexican model in my studio…

… when I found this:

The vid was a bit long, to be sure, but I thought the Andertons fellows did a thorough comparison which told me all I needed to know, and hear, to make a wise buying choice.

I still come away wishing for the American Standard one day. Big surprise, right??! Lol

But, you know, I think my 2nd choice might be the Squier now! It was brighter than the Mexican, which I like, and really held its own against the other two.

The MIM was significantly darker, which might be good for some mixes, but I tend towards a tone with a smile of high frequencies in there somewhere, like my awesome axe from BASS MODS, which you can read the REVIEW OF HERE.

How ’bout you?? Got G.A.S. for a certain series of Jazz now??! ‘-)

Come on, Feel the Noise

We’ve probably all been there: you go to play a gig and, for some unforeseen and unfortunate reason, there’s a ton of NOISE in your signal.

Fender thought of this eventuality in their design, and implemented an effective fix, though with certain parameters.

Jazz Bass pickups

They designed the pickups as “reverse wound, reverse polarity”, or RWRP. This simply means that when both pickups are at full volume, all hum is eliminated from your signal.

In other words, they’re humbucking when they’re up and hot!

If, however, you turn either volume knob down, it could (depending on your rig, the quality of electricity you’re getting, and if there are any dimming lights screaming through the circuitry nearby) introduce some noise into your signal.

There are some fixes for this if you truly want to use the bass with the volume knobs at substantially different levels:

* Swap out the pickups for noise-cancelling ones

* Wire the two standard single-coil pickups in parallel instead of series

* Swap out the pickups for humbuckers

* Install “shielding” in your control cavity

* Always play with a kill switch or a trustworthy gate in your effects loop

Each of these will either change your tone slightly, or limit the amount of tonal variety you’ll be able to eke out of the beast.

My ultimate choice?? Use copper foil shielding inside the control cavities. From my research this will all but eliminate the nastiness that tries to claw through your single-coil heavenly tone.

It’s something you can do yourself with minimal time and effort, even if you’re not a true “luthier”. THIS STEP-BY-STEP GUIDE will take you all the way there!

58 is… the New 20!!

Hard to believe that the Jazz bass celebrates its 58th birthday this year. Wow! Time flies when we’re thumpin’ a groove!!

There are so many varieties of Jazz bass these days: signature models, classic throwbacks, Custom Shop options, different country of origin Series…

I just did THIS SEARCH at Musician’s Friend, under “Fender Jazz Bass”. As you can see through that link, it brings up no less than FORTY-SIX different iterations of this cherished axe.

Choices. Choices. So many choices!!!

So happy 58th, J.B.! As Rod said so eloquently, “You wear it well! A little outta time, but I don’t mind… !”

Modern, curvaceous, snarl-snarky and as revered and relevant as ever… you’ve GOT to try… the Fender Jazz Bass!!

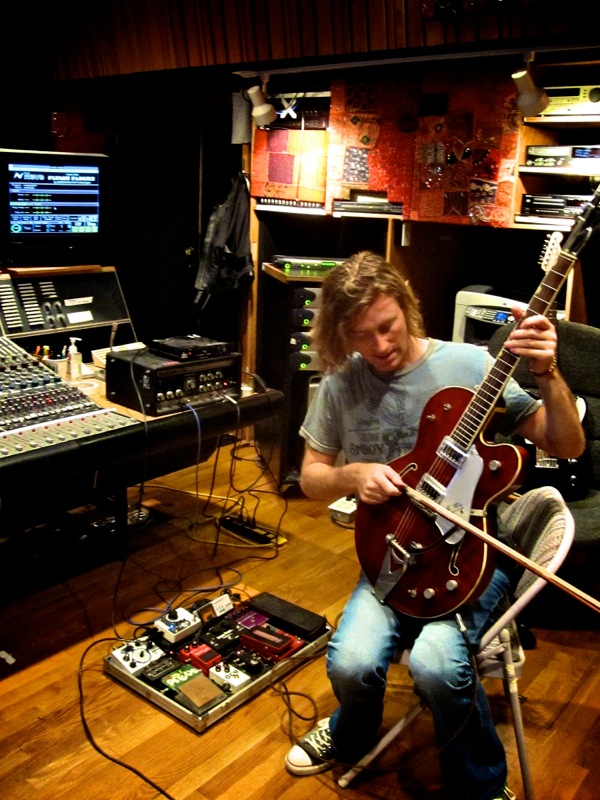
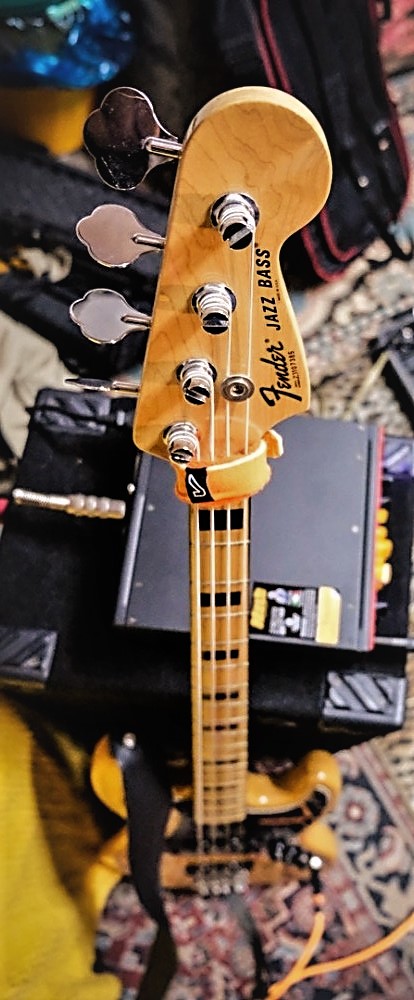
Special thanks to our boomin’ good friend Chris Oesterling for letting us examine his personal Jazz Bass for our article today. You rock, Chris!!

See ya on the funk floor!!! 😉

Now, go… make… sounds!!

Teaj

Shure SM7B Review – A Shot At Michael’s Mic!

Is there such a thing as “Concert Envy”?

I think there is.

See, my wife just loves to tease me with the fact that SHE got to see Michael Jackson on his tour after the release of the “Thriller” album, and I… did not.

Not fair!

But I’ve got something over her too –  I record with the same mic that Jackson used for most of his “Thriller” vocals… the Shure SM7B!!

Of course, it’s not the EXACT same mic that he used. Engineer Bruce Swedien or Producer Quincy Jones probably has that, and, man… could they sell THAT for a lot of money!!

Improve it or Lose it!

The SM7B has a long, rich history in pro audio.

It was first introduced in 1976 as a step up from the SM57, and as a smaller design than the SM5, a widely used broadcast mic.

Basically the owners said to the engineers “Redesign the sm57 cartridge element from the ground up, and make it better. Spare no expense.

The result? The SM7B!

There are some who dismiss this mic because it’s a dynamic and not a condenser, but the word is quite widespread on the street that the SM7B is without question a quality option for any serious audiophile’s mic cabinet.

In fact, some ardent supporters really sing its praise, inventing outlandish superlatives that are hilarious! How about this gem I found online:

“It’s whispered that with careful positioning… you can use an SM7B to record the future!”

Humor aside, the popularity of this mic has not waned since the 80s, probably bolstered by the “Thriller” association that makes anything linked to it seem more important. That album continues to be a juggernaut in popular music’s influence.

In any case, I thought I’d put this mic through its paces in the studio and give us some sound bites so we can all decide whether the hype is well-founded or not.

Let’s dig in!

The Specs

For those of you who want the engineering specifications, as I always do, these are the SM7B parameters that give it its unique sound and tonal flexibility:

Type: Dynamic
Frequency Response: 50 to 20,000 Hz
Polar Pattern: Cardioid
Included Accessories: Foam windscreen; close-talk windscreen; locking yoke mount
Emphasis Controls: Bass roll-off & mid-range emphasis; Slotted response
     selector switches.

Microphone Connection: 3-pin (XLR)
Cartridge Shock Mount: Internal air-suspension shock & vibration isolator.
Case: Dark gray enamel aluminum and steel case with dark gray foam windscreen.
Electromagnetic Hum Sensitivity:
     60 Hz: 11 dB
     500 Hz: 24 dB
     1 kHz: 33 dB

Net Weight: 765.4 grams (1 lb, 11 oz)
Polarity: Positive pressure on diaphragm produces positive voltage on pin 2 relative to pin 3.
Output Level (at 1,000 Hz) Open Circuit Voltage: – 59.0 dB (1.12 mV)
     0 dB = 1 volt per Pascal

Swivel Assembly: Integrated, captive nut for ease of attachment to stand, fits
     5/8 in.–27 thread.

Impedance: 150 ohms for connection to microphone inputs rated at 19 to 300 ohms.

The two most important diagrams I always want to see with regard to microphones are these two – the polar patterns… :

… and the frequency response:

Knowing these facts helps us choose mics appropriately. If we consider what instrument we need to pick up, and how the response and polar patterns will either flatter, or worsen, the instrument’s most appealing characteristics, we’ll always have “the right tool for the job”. And THAT will mean… an excellent recording.

See? Even the dullest of specs can be pretty exciting when they’re working for YOUR music!

That Michael Thing

So are we hearing the SM7B on the entirety of Michael’s “Thriller” album??

Not exactly. First off, Bruce Swedien, the engineer for the project, was using the SM7 at the time, which was the original iteration of the mic. The SM7A, then the SM7B, followed from Shure some years later.

Famed Engineer Bruce Swedien

Now, according to Shure, all three versions of the mic sound acoustically identical.

Swedien, however, begs to differ. He says he can hear the difference. Given the high caliber of the products he’s put out, I tend to believe him.

But that doesn’t mean that the SM7B isn’t useful, or dependable, in the studio. In my experience, it is.

Second, Swedien has said himself that he used the mic on most of the songs, but not all.

In his book, “In the Studio with Michael Jackson“, Swedien recalls that he definitely used it on ” Billie Jean”, “The Way You Make Me Feel”, and all of Vincent Price‘s voice-over work the song “Thriller”.

Even if it were just those, that’s pretty impressive for a dynamic mic!!

The remainder of the songs were tracked using a Nuemann U-87 mic.

Think of that! Arguably the greatest pop artist in the world sang, on his most popular album, through two mics: one that cost over three grand (the u-87) and one that retails, today, (the SM7B) for under $400!!

Wow. This must be why artists like “The Weeknd” are today still using it, all the time. And since their albums are also at the top of the charts, well… I think they’re onto something, don’t you?

The Low Gain problem

There is one shortcoming to the SM7B – it’s low output.

This is “par for the course” in dynamic microphones; they just don’t put out a lot of signal.

And what is the natural by-product of that?? It means that you have to have some type of mixer, preamp, or gain staging device to boost its signal.

If you don’t, you’re going to deal with that dreaded pro-audio headache… NOISE!

The first thing I heard when I listened back to my voice, recorded through the SM7B, was substantial noise. And I had even run it through my Apollo Twin interface which puts a LOT of gain at my disposal.

I knew immediately that, if there wasn’t a fix for this, I was taking it right back to the store. The music we create these days is too digitally clean for that to be acceptable.

Luckily, I then hooked up the Cloudlifter (which I reviewed in THIS POST!) and it took care of the problem in a BIG way.

I mean, this thing really made all the difference. It was not subtle at all, what the Cloudlifter accomplished and, in the final analysis, I had a great, clean, clear signal to work with.

Gotta love technology!!!

My Test Gear

SM7B and Oktava mic

In this mic shootout test, I used the following hardware and software:

  • the Ibanez Exotic Wood Dreadnought Acoustic
  • the AT4050 as a 2nd mic on guitar
  • the Oktava 2500 tube mic as a 2nd mic on vocal
  • the Apollo Twin MkII interface
  • Pro Tools

I used NO processing, either in the Apollo or in Pro Tools, on any of the individual recordings. What you hear is exactly what the mics provide and nothing else.

For the very last video clip, where the song was mixed and all mics put together, I simply slapped on a little compression for the vocal, using my favorite set of plug-ins, the SSL bundle:

As well as a very slight and fast plate reverb to “put ’em in the same room”.

Of course, they actually were recorded in the same room, but… you know, I couldn’t help myself!   Lol

Finally, I put on the mix bus the same thing I almost always do: this fantastic tape machine emulator by Slate. LOVE THIS PLUG-IN!!!!

Curtain… OPEN!!

Enjoy the results. I can’t wait to hear what you think of the differences!

What I Noticed…

First off, in this test I think the Cloudlifter makes this mic SO much better.

Here’s the gain staging for my first recording. The SM7B is on the left channel, and my Oktava tube mic is on the right:

Now take a look at the same set-up, but with the Cloudlifter added to the SM7B:

Do you see that amazing reduction in gain??!! I got a 17 dB reduction. Did that affect my noise floor?? You bet it did! I couldn’t hear the awful hiss anymore. Problem solved!!

Switch Me!!

On the bottom of the SM7B you are given two switches to manipulate if you have one of two problems:

SM7B switches
  1. You’re getting too much low-frequency noise coming through your signal, e.g. mic stand bump noises.
  2. You’re NOT getting as much “body”, or “sheen”, that is, mid to high-frequency content in your signal as you’d like.

If the first is your issue, you can simply engage the high-pass filter switch. It rolls off the bass quite well, starting at 400 Hz and sloping downward.

Unless you’re a real bass-y singer, or prefer a lot of low end in your voice, this filter will clean things up for ya without getting into any territory that normal vocals might occupy. 

I would NOT, however, engage this while recording acoustic guitar. The Low E on a guitar clocks in at 82.4 Hz, so whenever I’m tracking or mixing a song with just acoustic and vocal only, I cut off everything below 82 with a high-pass filter, but without exception leave the low E territory unmarred by EQ or filters. I wanna hear the BEEF, people!    😉

If that sparkly second problem is what your ears want fixed, you’ve got a really useful “Presence” switch on the bottom too. It gives quite a significant bump in the 1k – 9k region.

Here’s a little recording I did to let you hear exactly what each switch will do to your sound. Headphones, of course, will do it the most justice, so… don those cans and push play!

It’s a Lifted Keeper!!

So what’s my final verdict on the SM7B?? It’s this: without the Cloudlifter, I probably wouldn’t use it. 

With the Cloudlifter, however, it’s absolutely a great transducer that I expect to use in a great number of signal chains for years to come.

I’ll probably also use the high-frequency boost switch quite often, depending on the instrument. You can really hear the difference when it’s engaged, and since the mic has a darker, rounder sound to begin with, that switch adds a lot of versatility.

Is that what you would do? Do you prefer different settings? Or completely different mics?? Have you used the SM7B on any recordings we can hear???

Let us know by dropping us a Comment. Besides getting to know you, we can get to know your music too!

Now, go… make… sounds!!

Teaj

Teaj in the storm fields!

The Cloudlifter – Activate That Mic, Will Ya?!

The Saturn V, breaking the sound barrier!

Quick – what’s the most powerful rocket ever made by man?!

It’s not Elon Musk’s “Falcon Heavy”, if that’s what you guessed.

It’s the “Saturn V”, our tallest and most powerful rocket that took us to the moon and back seven times.

We needed that conquering power to boost us up and beyond our gravity, and give us all the strong, consistent juice we needed to complete a successful space voyage.

In the world of pro audio mics, the Cloudlifter Mic Activator is doing just that for our signals – boosting low output consistently, so we hand over a strong product to our clients.

Let’s bust through its atmosphere some more!

What is This Thing?

This little box by the “Cloud” company, designated the “CL-1“, is a compact, single-channel, in-line device that smacks down the self-noise of any passive mic in your collection, by taking phantom power from your interface or mixer, and using it to increase your gain structure up to 25 dB! That’s a big increase!!

The full contents of the Cloudlifter box!

The company’s tag line on this product is “All gain is not created equal!” By providing us with a lot more gain, we get a lot more tone, dynamic range, headroom, clarity… the list is long.

They also make a TWO-channel version, the model # of which is “CL-2“.

Both of these you can read up on by visiting the CLOUD WEBSITE HERE.

What can these do for you? Simple: they really enhance the familiar characteristics of your favorite mics while lowering the signal-to-noise ratio.

Cloudlifter Warranty

Because of that, whatever you like about a certain mic (its warmth, sparkle, sheen, etc.) will be bolstered and delivered mightier, and clearer, via the activation circuits in these units.

Not bad for a box only 4.5 inches long! 😉

The 60-Day Warranty means you’re covered if you change your mind. But honestly… I don’t think you will. You’ll see why soon enough…

Who Needs it, and Why?

First, anyone with low-output dynamic mics. These tend to be a lot more noisy than condenser mics, and these days, with digital highlighting every little nuance in our signal path, the presence of hiss (think the ‘cloud’ that needs lifted!) is just not acceptable. We’ll put a mic away that has that and never use it again if we don’t have a way to get rid of such undesirable sibilance.

Mics like:

  • the Sennheiser MD 441-U
  • the Shure SM7B
  • the Electro-Voice RE20
  • the Shure SM58 or SM57
  • the Telefunken M82
  • the Sennheiser MD 421-II

There are lots of others too, but these are all mics that are considered “standards” in the industry. You’d probably find each of these in any large studio’s mic collection.

Cloud Lifter on stand
Plugged into my SM7B

Second, anyone who wants a lot more signal from soft, quiet instrument sources will benefit greatly from this unit. Recording a shaker, or a KALIMBA, in the studio? Need more oomph from the percussion being played behind that loud band?? The Cloudlifter’s gotcha covered.

Third, anyone who has to deal with long cable runs, like live sound engineers.

Fourth, anyone who wants to interject a ton more headroom before feedback during live concerts will love this little guy. The brings out smiles for miles!

Fifth, anyone who has a really cheap audio interface, or really old audio gear, can massively benefit from running a much more beefy, sharper signal through that gear.

Sixth, anyone who wants more dynamic diversity in their tone. Because this lifter gives you a ton more headroom, that means, by definition, that you’re louds will be louder, your softs can be softer, and overall your dynamic range will be increased to the point of outstanding expressiveness within any style of playing or singing.

Acoustic guitar players, for example, often find they play with more feel and dynamic content with one of these babies, due to its bountiful dynamic spectrum. The signal also sounds more “snappy”, with the acoustic feeling like it’s responding to your technique more, all because you’re hearing the nuances much more.

And if you’re a vocalist who often sings really soft, then really loud?? Oh man… you’re gonna really dig this beast!

Open Cloudlifter box

Finally, anyone who just wants their mic’s tone improved will benefit from the Cloudlifter. What I’ve discovered is that the sound of any mic you add this to just, in the words of drummer Simon Phillips who uses it, “sounds better“.

It gives it more presence; more “bite”; some have said more “high-end crispness”. In other words, more of the mics own innate good qualities, while diminishing the bad noise output.

Now who doesn’t want some o’ THAT action?!!

Get Up on the Set Up

The Cloudlifter is a cinch to use. Simply run an XLR cable from its Output (to the right of the cloud logo) into an interface, preamp, mixer, or any other device that can supply phantom power.

Then, run another XLR cable from your passive mic into the cloudlifter Input, which is to the left of the logo.

That’s it! Pretty simple, right? No buttons. No switches. Just true plug ‘n’ play.

Velcro for attaching to mic stand
Velcro-ready!

What this means practically is you will need two XLR cables for your mic instead of one. Besides that, it’s business as usual.

Except, of course, for how much more astounding your sound will be!

One other thing: the CL-1 comes with a black Velcro strip. You use this to attach the lifter to a mic stand, so it doesn’t have to rest on the floor where you’ll inevitably kick it when you go roarin’ into that overdrive guitar solo that always drives your fans mad!! 😉

Who Loves Ya, Baby?!

Simon Phillips has used the Cloudlifter for years on the SM57 mic on his snare, for example. We all know how important the snare sound is, and we all know (hopefully!) how amazing a player Simon is, so… I think we can safely say if he’s doing it… we probably should too!

Simon says… buy one! 😉
(photo: Luca Fiaccavento)

Warren Huart of “Produce Like A Pro” (one of our favorite channels) is also a big fan. Check out the glowing superlatives he gives this unit as he tries it on acoustic with a Royer ribbon mic, and on his electric guitar amp with the humble SM57.

But wait – there’s more! My favorite pro audio Web zine, “Sound on Sound“, also gave it thumbs-up,

Here’s what they had to say about it exactly:

“(It will)… produce much cleaner-sounding results without paying out for a high-end dedicated ribbon preamp.”

Sounds like a win across the board, don’tcha think? And if we can save money by not having to buy preamps that are a LOT more pricey for our mics, that leaves more cash for other things.

Like guitars…

Or keys…

Or drums…

Or basses…

Or… whatever’s giving you serious G.A.S. at this particular moment!! Lol

Testing… Testing… !

To put the CL-1 through its paces, I picked up a Shure SM7B microphone. This dynamic mic is notorious for its low output, but also well-respected for its sound.

I mean, come on… Michael Jackson didn’t use it for his vocals on “Thriller” because it sounded BAD. 😉

(The review on that to be published soon, if you want MORE insight into this cool mic!)

I routed the mic through my Apollo Twin interface and straight into Pro Tools with no processing whatsoever.

To my ears, the results were obvious. 

Besides, of course, that for a real tune I’d put a @#$%-ton of dynamic and EQ effects on it to make it shine (De-esser, anyone?!)!   Lol

Let’s see what your ears say:

So? Whadja think??

Could you hear a difference?

Did you think the CL-1 improved sound?

Thumbs Up

I certainly did! The amount of noise and hiss I heard present in the SM7B signal was waaaay beyond what I would normally allow in my recordings. I just wouldn’t use this mic, honestly… unless I was recording really loud signals, which would cover up the hiss.

With the Cloudlifter added, however, I can now use it on practically anything, without worrying that the noise floor is going to be too offensive for digital mixing.

So, yea, it’s a clear win for me. The CL-1 will be staying with me in my studio, and I have a feeling I’ll be using it in more ways than I even mentioned in this article.

That’s always the case when you pick up a great piece of gear. 😉

Only Passives???

So, this Activator can ONLY be used on passive mics, right??

Well, not exclusively. But you have to be careful. Sending 48v into a Ribbon mic, for example, can fry the ribbon transducer!

But if you really want to use this activator on Condenser mics for example, and see how much more of their sweetness or gravitas you can fire up, you can… but you’ll need a separate 48v generator.

They’re usually not too expensive, say, thirty to 60 bucks. THIS GENERATOR by Behringer will work fine. Or THIS SUPPLY BOX from Mackie.

The reason you need this is that the CL-1 is going to be sucking up the phantom power sent from your interface, so it can’t go on to the mic. If you place a 48v supply between your condenser mic and the Activator though, they both will have all the fuel they need to send your sound skyrocketing!


Propel Your Sound Heavenward!!

Clean, strong, uncolored sound.

Isn’t that what we all want most of the time?

The Cloudlifter helps us get there with mics that, er, might not always be so up-to-snuff with regard to noise floor. Consider it your “rocket to through the clouds” in pro audio!

Oh, and for what is does to improve sound across a variety of low-output mics, its price is nominal. I’m even considering getting three more! To get more gain from your wimpy mics today, get a Cloudlifter for yourself by CLICKING HERE!

Cloudlifter magnet!
Magnet time, baby!!

Have you used the Cloudlifter? Getting one for yourself? Let us know your experience with this product in the Comments. It helps us all make sense of the endless march of pro audio devices at our Internet fingertips.

And after all… it comes with a fridge magnet. I mean… who doesn’t want THAT?!! 😉

Now, go… make… (boosted) sounds!!

Teaj

Stop Comparing Yourself To Others! – You + Gear = YOU-niqueness!

We do a ton of music equipment research here at Serious G.A.S.

And we LOVE IT! Not only because of YOU, our super song-forgin’ friends, but also because we genuinely dig music and the gear that makes it.

Throughout all this research, we often find ourselves watching live, or virtually online, some uber-skilled, insanely-impressive musical artists. Stars. Legends.

concert screen show

After being sonically washed in the flood of their musical excellence, it sometimes makes us feel…

“Less than”.

Inferior.

UN-impressive.

A wanna-be.

Been there??

Today we’d like to float up a much-needed reminder: stop comparing yourself to others!

Why? Oh… that’s easy. ‘Cause…

… you’re awesome. 😉

Worth vs. Skill

There’s a distinct difference between skill and worth.

Many of us have worked for decades to hone our skill at various instruments, and yet, if we’re honest, we would say we’ve still got a long way to go to say that we’ve mastered the instrument.

But none of that speaks to the worth of our person. Or the worth of pursuing those instruments and the passion for music.

Parents seem to know this intrinsically. Those of us with kids have all experienced babies playing instruments… badly.

Very badly!

Yet, we laughed and hugged and encouraged them, because it was the broadening of their inner horizons that mattered.

As we get older in life, more is expected of us. Unfortunately, that often means that as we try something new we are not supported as much as we were in our youth. Or we’re afraid to try anything new, lest we be seen as “being lame at something”.

If you’re new to an instrument, yet really feel the call to share your music with others… do it! Don’t let anyone else tell you “you’re not ready”, or “you’re not good enough.”

Sure, maybe your sixteenth notes are little uneven. Maybe your barre chords have the wrong fingering occasionally. Maybe you don’t always sing the note perfectly in pitch.

That doesn’t matter right now. What does matter is: do you feel called to do this?

Is this something you think about all the time and can’t get your mind off??

Do you feel most alive when you’re playing music??!

If so, play on, comrade!! Haters gonna hate. Let ’em. They have to live with the stress of their own disparaging spirit, not you.

Now, when your technique needs some work, definitely put in the effort to improve. It’ll show that you’re serious about the craft. And you’ll feel the satisfaction of a hurdle that’s overcome.

And don’t be afraid to study the greats. EXPECT that you’re gonna feel inept compared to the legends of music. That’s okay. Just learn from them, little by little, and know that you don’t HAVE to do what they do. Just learn what works for YOU from them, and keep moving.

This month, for example, I’ve taken in performances and lessons from:

  • Steve Vai performing a piece at N.A.M.M. last month.
  • Allan Holdsworth and Vinnie Colaiuta playing on Allan’s album “Secrets“.
  • Tori Amos playing her compositions with piano parts that only she could think up.
  • Jaco Pastorius playing bass for Joni Mitchell in film footage to celebrate her 75th birthday recently.
  • Eddie Van Halen‘s guitar parts for “Take Me Back”

With all of these I was again floored by their technique and creativity.

But at the same time, I didn’t let the fact that I still have things I can learn keep me from spending all week recording a new tune I wrote recently.

fortune cookie

Express your inner music. Work hard to bring it to life. Practice, practice, practice, knowing that it’s FUN.

And remember… it’s totally WORTH it.

An Audience For All

Here’s another reason why comparing yourself to others doesn’t make any sense: everybody likes different things.

An audience listening to one artist might hate another. Yet that other artist might be a better musician than the first!

Where’s the logic in that?? Well there IS no logic in that. It’s not about logic. It’s about preference, penchants and predilections – in other words, we all just like… what we like.

Thus, it’s important to recognize no matter how good your music is, there will be an audience that will hate it.

But the flip side of that is also true: no matter how bad your music is, there will be an audience who loves it.

Therefore, what’s the most important thing for us to do?

Get our music out there!!!

You can play it safe and never release anything, and never play live. Do that, and you will be safe; that’s true. You’ll never hear a word of disdain from anyone.

But neither will your songs earn you any words of praise, or understanding, or empathy or any whisper of applause. You’ll never have the chance to read a critic’s review of your album that says it’s the most moving he or she has heard in years.

And most importantly, you’ll never develop important, lasting relationships with really loyal fans if you never take the chance to put your sonic creations out there for the world to see, and hear.

Could your recording be better?? Probably! Billy Joel has stated that he always thought his recordings could be better. Every single one!

But there comes a time when they’re good enough, and that’s when we must let them go, like children sent into the world, and see what kind of bonds they can create with others.

So let the words of those who believe in you guide your path.

And the voices of those who don’t like what you do??

Put studio headphones on and let your newest song drown out their sophomoric scoffing.

The eventual applause from your fans will teach ’em!!

Learn, Diverge. Learn, Diverge…

mic & guitar

Becoming a master craftsman, or even just becoming “good enough” in audio engineering, music writing and production, means studying the craft.

We can’t do that without listening to the techniques, tips and tricks of the best audio gurus out there and applying them to our own content creations.

That means that there actually is a time when we SHOULD compare. But not OURSELVES! Making it personal is the big mistake. It’s not about YOU. It’s about skills and choices.

So go ahead – go wild at comparing:

mix desk
  • EQ
  • Volume levels
  • Lyrical content
  • Rhythm section instrumentation
  • Compression levels
  • Instrument choices
  • Melody shapes
  • Vocal interpretations
  • Soloing chops
  • Song Form
  • Reverb selections
  • Effects usage

We definitely need to set our decisions in these areas next to the choices of the greats, and see how we sound. This is how we learn what the goal is – sonic excellence.

This is also why, as I go over in THIS REFERENCE TRACKS POST, we listen often to the best albums ever made, to set up a well-defined target to shoot for, every time we track, mix or master anything.

Kim Carroll bowing the electric. (Photo: Maryg1975)

BUT… (and this is, as Shrek’s friend Donkey would say, a BIG BUT) after comparing what you have done with the best that’s out there, recognize that YOU could be the one to come up with a NEW way of playing, producing or recording that one day everyone will want to copy. So don’t forget…

… BE DIFFERENT! Don’t feel like you have to do everything in the ways that you’ve learned from the masters. Instead, diverge. Veer away from “standard protocol”. If you have an idea that you think will work., try it.

If it doesn’t work, no harm, no foul. You still learned how to use your equipment in new ways, and that is really worth something.

Pablo Picasso

Work with the gear you have, incessantly, and learn how to use it in ways that work for YOU. That will be different than how anyone else does it.

What was it Picasso said? ” “Learn the rules like a pro, so you can break them like an artist.”

Truer words not often spoken!

Du Bist Du

Each of us has a special spark of life, and a temple of understanding, a manner, and a style, that no one else on the planet has.

In fact, not one on this Earth has EVER had exactly what goes into making you the singular creation that you are.

It’s true.

And because of that, everything you do will come out in a unique way. You won’t have to TRY. It just will. And that is a reflection of the distinct identity that only you possess.

No one else can do you like YOU!

Ever notice that the same song can be performed by countless people, and yet every time it’ll sound different??

That’s the distinctiveness of each human mind, body and soul coming through.

Is one better than the others?? You could argue that one performance is more technically sound, or proficient, than another.

But is their worth better??

I believe the universe has plenty of room for ALL of our personal expressions. And even more, it WANTS to hear them. See them. Feel them. Unlike the opinions of other humans at times, creation smiles, not derides or questions, when you try anything.

That what being alive is for! And, like all things, we get better as we go.

I can really put this in no better way than German artist Jürgen Werth did in his song called, “Du Bist Du“.

This song was sung to me, as a gift, by my good friends in Germany, Irene and Manuela, decades ago.

I recorded it then on cassette tape, and I’ve had it ever since. The quality is what you’d expect from simply pushing the record button on a boombox.

But you know what? I take this recording over most of my CDs any day. If you’ve ever been gifted with a song then you know what I mean.

Here are the original lyrics, in German, as Jurgen wrote them:

Vergiss es nie: Dass du lebst, war keine eigene Idee,

und daß du atmest, kein Entschluss von dir.

Vergiss es nie: Dass du lebst, war eines anderen Idee,

und daß du atmest, sein Geschenk an dich.

Vergiss es nie: Niemand denkt und fühlt und handelt so wie du,

und niemand lächelt, so wie du’s grad tust.

Vergiss es nie: Niemand sieht den Himmel ganz genau wie du,

und niemand hat je, was du weißt, gewusst.

Vergiss es nie: Dein Gesicht hat niemand sonst auf dieser Welt,

und solche Augen hast alleine Du.

Vergiss es nie: Du bist reich, egal ob mit, ob ohne Geld;

denn du kannst leben! Niemand lebt wie du.

Du bist gewollt, kein Kind des Zufalls, keine Laune der Natur,

ganz egal, ob du dein Lebenslied in Moll singst oder Dur.

Du bist ein Gedanke Gottes, ein genialer noch dazu!

Du bist du, das ist der Clou,

Ja, der Clou. Ja, du bist du!

Now, my own English translation of his lyrics:

Never forget: the fact that you’re living wasn’t your own idea,

and that you’re breathing isn’t a decision you’re making.

Never forget: the fact that you’re living is the idea of another,

and that you’re breathing, its present to you.

Never forget: Nobody thinks, and feels, and acts just like you,

and nobody smiles in that exact, special way you do.

“Never forget: No one observes the sky quite exactly like you,

and no one has ever known… what
you know.

Never forget: no one else in the world has your face,

and those eyes? Those are yours alone.

Never forget: You are rich, identical whether, whether without money;

because you can live! Nobody lives like you!

Chorus:

You are wanted. You’re no child of chance, or mood of nature,

It doesn’t matter whether you sing your life-song

in a minor key or a major one.

You are a thought of God. And a genius one at that!

You are you. That’s the whole point,

Yep, the whole point:

Yes, you… are YOU.”

Can you believe that? Can you really take in the statement that you are a genius thought in this universe??

If not, copy these lyrics, print them out, and hang them where they can be seen every day.

Whether we’re talking art, relationships, education, career, life skills… whatever the pursuit, the truth remains: your existence is a gift to the world. Your song is a needed harmony.

You are you. That’s the whole point. 🙂

Be Reasonable

Here’s yet another reason to not compare yourself with others: their sound, or their products, are not the reason you put forth the effort you do.

Be the standout!

Nobody spends weeks, or even months, on a song hoping to be told that they sound like somebody else. We want our own thing! We’re seeking to find our own voice. Our own way. To stand OUT in the crowd, not blend in.

Some music sounds more derivative than others. But you know what? If the song you wrote sounds a little like another artist, IT’S OKAY!!

As long as you haven’t directly copied or plagiarized another artist, there’s nothing wrong with letting your song have a little tip of the hat towards your favorite artist.

I mean, did ANY of you hear the song “Uptown Funk” and not think of James Brown??!! It’s a fantastic homage to Brown’s classic sound. But so what?!! It’s awesome!!

At the same time, it also sounded like Bruno Mars, “cause (Duh!) he sang the tune.

Should we disparage Bruno, and call him “unoriginal”, “inventive” and a “copycat” cuz we’ve “heard that funk before”??

Bolony!! Not at all. He’s a fine artist, a masterful singer and a songwriter who’s not afraid to use hooks of the past to dress up the present.

If you’re going to compare anything, compare yourself to yourself. Start an inner revolution that takes no prisoners, but is totally committed to working hard to bring the dream to life. As I heard someone say recently, “Originality is the best form of rebellion!

Ask these questions of yourself:

Am I striving to be a better writer? Am I striving to be a better performer?

Do I play my instruments better now than I did?

Am I improving my vocals through ongoing study and practice?

Does my music sound like it’s on the journey of discovery, we’re stuck in a slough of sameness??

To put all that in a nutshell, I’ll share with you the most important sign in my studio. It hangs just to the right of my console table, in easy line of sight as I’m working. It underscores everything I do:

Can you say that about your own pursuits? Are you striving to be “the best”? If so, you’ve got at least a thousand people in front of you, who are all probably better than you.

Good luck. :-/

Perhaps a better tactic is to follow my sign’s advice, compare your work to yesterday’s efforts, and see if you’ve improved.

If you do this every day, committing to your own advancement and enhancement, your progress will so SKYROCKET that it will awe the world.

And probably you too. 😉

I Robot

This website is all about music gear. It’s interesting, isn’t it, how we can have the same machinery in our studios, even the same instruments, and yet the products we churn out sound totally different from each other?

Too many recording musicians get caught up in the mantra of “I don’t have cool equipment like so-and-so”, or ” I need more expensive gadgets to sound good.” It’s like a musician from the year 2112 whining because their robot instrumentalist doesn’t have the latest “Beatles” upgrade.

I totally believe that’ll be a thing. 😉

That’s only true to a very small margin. Especially these days, when pretty good digital effects and recording are available to everyone… FOR FREE!

Again, compare yourself to yourself. As you keep working with specific instruments, and specific pro audio components, and even the A.I. systems that are coming into the market now, how you integrate with them will be unique.

The combination of effects, Dynamics processing, and EQ decisions that you make, for example, will make your music singular and unmistakably you.

You + A.I. = musical progress!

And the more you work with your outboard gear, and software plugins, the more you will start to merge with that technology to the point of developing your own sound.

That’s why we here at serious gas say to work with your audio equipment as much as you possibly can. Play with it. Try things with it. Do recordings for no other reason than to learn. Have friends over and record silly songs for fun.

All these are ways we uncover new ways to express ourselves. And as our choices coalesce with the possibilities inherent in today’s technology, a new A.I.-human partnership is formed that will ongoingly be honed into a feel, a style, even a genre all your own.

One day this will really be taken to the pinnacle when our brains are hooked up synaptically to our computers. I have no doubt that’s coming… and sooner than we might think.

But for right now, we’ll just keep using our mouse, and let our hardware, our software and our brains wetware take us onward…

… to all our destiny is capable of!

Be A Never-Relent-er!!

There’s something to be said for pursuing work that you never grow tired of, because you’re so into the products, services or results that at the end of the day… you can’t wait to do it again!

Whatever you’re pursuing, pursue it with discipline, courage, consistency and relentless focus.

And though it’s harder to do than ever, with all those ubiquitous social media posts, commit to comparing yourself and your work to what you’ve done and been in the past, not to others who have completely different skill sets, goals, habits, and even DNA than you!

Now, go… make… sounds!!

Teaj

Teaj in the storm fields!

Event Monitor Speakers – The Case for Clarity!

glasses with Event monitors CARTOONED

Who’s got perfect vision?!!

I don’t know about “perfect”, but I’ve had 18/20 vision & never needed glasses for most of my life.

In the last couple years though, things have started to get blurry. If I take my beautiful wife out for a romantic dinner in a dimly-lit restaurant, for example, it’s difficult to read the menu. Weird!!

We all want clarity in our lives, right? Sight. Knowledge. Direction.

Sound!

Which is why today we’re looking with clear lenses at Event monitor speakers, pro audio godsends that revolutionized the market when they were released, and continue to impact our studio environments positively to this day. Think “20/20 vision” for your recorded audio.

Heard of Event’s monitors before?? New to their impact?? Either way, let’s dig in and see what we can learn from their facility…

Ayyyy! DAT’s a Great Company!

Event Electronics” is a company that has been helping us keep our pro audio sound in focus for over two decades now.

Event Electronics LOGO

The various lines of Event monitor speakers we’ve witnessed over the years since they launched in 1995 have testified to engineering expertise, durable craftsmanship and their company-wide desire to bring the pinnacles of audio excellence to all levels of consumers – even, and especially, to the home studio aficionado!

The company was founded by a man whose skills were behind a recording system VERY familiar to anyone recording in the 90s.

Ever heard of the ADAT machines?!

ADAT machine
When ADATs ruled the world… !!

Russell Palmer was a former executive at Alesis, the company that brought that incredible leap forward to those of us wanting to record at home.

He left Alesis to put his own stake in the ground with “Event“. He wanted to continue the trend of introducing high-performance pro audio systems to the market that didn’t cost an arm, a leg, and our rent for the next ten years. Gear that the “average joe” could afford, instead of prices so astronomical that only Grammy-winners could even consider them.

Their very first product, the one designed to take the industry by storm with a BIG SPLASH, was the 20/20 line of studio nearfield monitors. I was working at Sweetwater Sound, a music technology and instrument retailer, when the guys from Event stopped by in 1996 to show off these brand new, awesome-sounding speakers.

Oh, and they also offered a generous, and I mean GENEROUS discount to those of us there so we could put a pair in our own studios.

I, um… well, … I think you can guess the rest of the story. Lol

It wasn’t long before these monitors made Event a household name in the business. I’m sure my recommending them to hundreds of customers I served didn’t hurt their bottom line either.

Heck, I even discovered, for the 1st TIME this week, that my hero Alan Parsons has been using the same speakers as I do, the 20/20 BAS models, for years! Wow, do I feel validated!!

Mr. Parsons with his Event monitors!

In the ensuing years Event continued to put out exemplary studio monitors: the TR5; ALP5; the Tria system; 20/20 vsII; the 2030s. And in recent years, they’ve once again won awards and gained fresh acclaim with the introduction of their new speaker line, the OPAL series.

Event Opal speakers

Event is obviously around for the long haul, not just to hit the
piñata and leave with the best candy. They have maintained their reputation for great gear at reasonable prices quite well. If you haven’t looked into them yet, you should.

And if you are in the market for studio monitors?? I can tell you a good place to start. 😉

Take an in-depth look at THIS EVENT HISTORY PAGE for a lot more info and an inspiring chance to window-shop as only an audio gearhead can!!

The Proof’s in the… Albums!

So, what’s my own experience with Event speakers like??

Gold!

My Event 20/20 BAS active monitors have been exemplary in their ability to transmit clear representations of my recorded audio. Every nuance of EQ boost and cut is instantly evident. Dynamic range is unequivocal and obvious. And distortion?? I’ve never heard any.

Granted, I protect my hearing and never have my volumes up above around 110 dB typically, and that not for long.

Another reason I can vouch for the quality of these speakers is that I have used them many times to start and finish fully-produced albums, including two of my own.

The latest project I tracked and mixed on these monitors is called “Tempus“, by the artist Sweda. If you listen to music on any of the major streaming platforms you can find it there.

As always, when it came time to master that album, the mastering engineer liked my mixes. We made a couple tweaks based on genre, and that was it.

To hear samples of our work, and the great songs of Sweda, FOLLOW THIS LINK!

And that, my friends, is the greatest reason to be devoted to a particular set of studio monitors: because they deliver a great final product. If it’s hard to get an album sounding good for mastering on the speakers you have, try another pair.

Of course, no speaker set can compensate for lack of mixing skill, so… always make sure that’s up to snuff first. 😉

It would be hard for me to part with the Events at this point, since I now have decades working with them behind me.

Still, I’m open. One of these days, when I’m not blogging, researching, writing, producing, recording, mixing, graphic designing or playing gigs, I’d like to try out those new Opal monitors & see how they compare to my old stand-bys.

But, something tells me it’s gonna be a while. Lol

The Picture’s Worth…

Since I know a lot of people are into this, I’ve photographed each page of the 20/20 BAS reference manual for your perusal.

These first couple pages were useful and knowing how to properly align the monitors for optimal frequency and stereo spread reproduction.

The middle pages of the manual went into all the tweaky explanations of the back panel controls and diagrams.

I went through all these when I first got the speakers, and set the trim controls exactly where I thought the fidelity was best.

Haven’t touched ’em since!

Finally, you can see here all the various specs inherent in the speaker design.

None of these are as important to me that’s how the speaker translates the sound. When I first played “Dark Side of the Moon” through my 2020s, I knew… these things ROCKED!!!

Oh, and yes the monitors did come with a one-year warranty.

That was up in 1997 though, so, uh… I’m glad I haven’t had any issues. 😮

20/20 Vision

When it comes to studio monitors, I don’t believe there is a perfect speaker. Nor do I believe there needs to be.

My active monitors don’t have a perfectly flat frequency response, for example. But then, I’ve never seen a monitor that DID. Have you??!

What is crucial for those of us working with recorded audio is a set of monitors that have a fairly flat frequency response, low distortion and the ability to handle a wide spectrum of SPLs.

If you have those things, then it’s just a matter of getting used to your speakers and how they will reflect your audio, such that you can produce a final mix that is ready for mastering in every way.

My Event monitor speakers have consistently given me all I need to do this… over and over again. I highly recommend their approach & their design to anyone wanting a dependable, transparent set of studio monitors. The price is certainly right for what you get.

At least in one area of my life, audio reproduction, I know I’ll never need glasses. Our cat, on the other hand…

Now, go… make… sounds!!

Teaj

Teaj in the storm fields!

Computer Audio Troubleshooting, Ep.1 – It’s Never Too Late To Learn!

Smooth sailing.

Isn’t that what we all wish for?? No problems; no trip-ups. No sudden interruptions to our progress, only the sea of tranquility leading us to our desired ends.

Too bad that we all know… that ain’t how the ocean rolls, baby! Sometimes we feel like chucking the whole thing into the ocean ‘cuz nothingis… WORKING!!

We all come across obstacles and those mocking wrenches of monkeys occasionally. Learning how to handle them with patience, informed direction and (with our clients) tact and ameliorating confidence will win the day every time.

But that only comes with persistent study, practice and serving ‘in the trenches’ of audio long enough to know a thing or two.

That’s why, in this post, we’re going to start sharing some of the little hiccups we find happening in the studio occasionally. We hope they’ll help YOU should the same audio gremlins sneak up into your creative space and become a nuisance.

I’ll even share an audio problem I encountered just this week that I NEVER have before that took several hours to rectify. As always, perseverance paid off.

Let’s embark!!

Not Tray Cool

The NT1 mic shootout session

I first got Pro Tools a few years back when version 11 was up and running.

Until that point I had worked on the Roland 2480 Hardware system. I knew that thing backwards and forwards… Every little menu, every little command.

Ever switched DAW recording platforms? To say it’s a DAW-nting task would be an understatement, especially if you’re moving from a hardware-based system to software.

It took probably five months before I really felt like I knew what I was doing in Pro Tools. It’s a very powerful program; menus and sub-menus abound. Only with time and effort was I able to get back to swift and deft control of this platform.

Avid Customer Care was also masterful in their assistance. No matter what issue I had, day or night, someone would always answer my phone call, and most of the time the issue was resolved immediately.

One example of this was a P.T. problem I had that was very weird. It wasn’t a big thing, but it was aggravating. I put up with it for about 2 weeks, but then couldn’t take it anymore and called Customer Care.

Here was the issue: if I was working in Pro Tools, and decided I wanted to do some work in another program, say, Gmail, I would minimize Pro Tools to get it off my desktop, and then open up the other program.

Pro Tools minimized

Once I was done in that other program, I would close it down and click the Pro Tools icon in my toolbar to bring it up so I could get back to work.

The annoyance?? Every time I did this, Pro Tools would not open back up. It was still running… I hadn’t lost my session or anything. I just couldn’t get it to maximize back onto my desktop!

The only work-around I found on my own was this:

* push Alt-Ctrl-delete

* call up “Task Manager”

* right click on Pro Tools

* click “bring to front”

This was obviously a royal pain in the %@#!

Don’tcha hate it when something that should take one second takes a lot more?? Grrrr… it’s one of my pet peeves.

I don’t know about you, but I’m always looking for ways to maximize my work efficiency. If I can get MORE done in LESS time, that’s a win for everybody.

Anyway, I’d finally had enough and called Avid Customer Care. The first assistant I talked to had not come across this problem before.

He assured me though that he would pass on this issue to someone more knowledgeable and that I would receive a call soon.

A couple hours later a second representative called me. The conversation went like this:

“So, you’re not able to maximize the Pro Tools window after you’ve minimized it, is that correct, Teaj?”

“Exactly.”

“Okay, do you have Pro Tools open right now?”

“Yes.”

“Alright, go ahead and minimize the window.”

“Done.”

“Now try to bring it up again.”

“Nope. Not working.”

CD in tray

“Okay. Does your computer have a CD tray?”

“Yes.”

“Is there a DVD or CD in it currently?”

“Uhhh… I have no idea. Why would that matter??”

“It might have something to do with it. Could you check and see please?”

“Sure. Hold on.”

At this point I went behind my control desk to my desktop Mainframe and clicked the CD tray button.

Sure enough, there WAS a CD in the tray. If I remember rightly, it was Don Henley’s latest album that I had been listening to through my studio monitors.

(An incredible album, by the way, if you haven’t heard it yet!)

Back to the phone I went:

“Yeah, it was a CD in it.”

“Did you take it out?”

“Yes.”

“Okay, Teaj. Now try to maximize Pro Tools.”

“It worked!”

“Good! Problem solved.”

“So, you mean to tell me that simply having a disc in the tray created this problem?? What does one have to do with the other??!!”

“It has something to do with the coding, I’m not sure. As long as your tray is empty, you shouldn’t have the problem again.”

“How bizarre. Alright, well… thanks.”

“Thank you for contacting Avid Customer Care.”

Talk about coming out of left field! I’m still incredulous that having a disc in a tray can make software malfunction, but, hey… you can’t argue with results.

And, long before the end of the day, it was back to smooth sailing in the studio again.

Ever happened to you?? Now you know what to do. 😉

Special thanks to Nolan and Nestor from Avid C.C. for their patience, professionalism and ability to fix our Pro Tools issues lickety-split. You guys rock!!!

Hello?? Is this Mic On???

The next audio troll we’re going to push from the fjord cliff is one that I faced many times when first starting out.

Sometimes you just don’t know what you don’t know. If you’re trying to track down the source of an audio problem without having an informed grasp of all the individual components, you might just glide by the answer without even knowing.

mic closet

The issue? Microphones not working.

Have you ever hooked up microphones to cables, plugged those cables into your interface, and routed your interface correctly to your DAW, only to find that you’re still not getting any sound from the mics??

When you’re ready to record, the more time passes with something preventing the signal from getting through, the more exasperating it becomes.

I’ve been there; I feel your pain. But it’s all part of the process. The more you deal with these recording headaches, you become that much more of a professional, able to bat out of the park whatever is thrown at you.

Here’s the number one reason why you might find no signal coming from your mic:

The PHANTOM POWER isn’t on!

mic with battery

In case you don’t know, condenser microphones need to be powered. Some you can put batteries in.

Most, however, are made such that they draw power through the microphone cable from a source of electricity labeled “phantom power”.

Now, even if you know this, you can forget. It happens. If, on your last session, you used a lot of dynamic mics, and your phantom power button is off, then the next time you plug in condensers for another session you’ll have “dead” mics.

Unless you remember to flip the switch.

To the right you can see the phantom power switch on my Tascam interface, which I use primarily when I’m tracking live drums.

It’s a great interface. I’ve had ZERO problems with it, so if you need one with quite a few XLR inputs, check it out by reading THIS POST.

If I forget to turn this on when my condensers are set up, I’ll be scratching my head in wonder… until I remember.

As usual, the big takeaway here is: know your gear. Know which mics need phantom power, and which ones don’t. Know where the phantom power switch is on your interface or mixer.

If you want to explore and research phantom power further, click over to THIS WIKI PAGE.

Or, as always, just throw us your questions and we’ll be happy to answer them. 🙂

The Panning Troll!

Okay, now the biggie…

Just this week a major source of audio aggravation hit my studio.

I finally finished writing my latest tune, and I had spent hours setting everything up for my acoustic guitar and vocal recording session.

Ready for Downbeat in the Studio!

The mics were perfectly placed.

My guitar had fresh strings and was perfectly in tune.

My Pro Tools session had every track, effect and routing optimized for success.

I was ready!!

I laid down my first pass on acoustic guitar, then came back to my control desk to listen to playback.

Something was wrong. Something I had never faced before. A dilemma so odd, I was stupefied.

I like to record my acoustic guitar with five different microphones, plus a D.I. This allows me a lot of options during the mix stage.

It’s rare that I use more than three in the final product, but having six to choose from to get to that final masterpiece… I wouldn’t have it any other way!

This week though, when I started to listen back to the acoustic tracks through my headphones, it was clear that every single track was suffering from some kind of phase issue. Every one!

The details help explain: if the panning on any track was dead center, the signal would be very low and thin. I recognized it immediately as what phase cancellation sounds like.

Pan problems!!

But get this: if I panned any of the tracks, left or right, the signal would start to get clearer, and louder.

Any track that I then panned fully left or fully right, would sound totally normal and full, like there was no problem at all!

But wait – there’s more! Those signals I had hard-panned? They didn’t sound panned AT ALL!! Yeah, that’s right; even though I had every single track panned to the extreme left or right, what I HEARD through the headphones was all tracks dead center.

Can you believe this??! I was dumbfounded. Flabbergasted. A back and completely bewildered. Never before had I experienced anything like this.

In a way, it was totally cool! I mean, how often do we get to experience something totally new that we’ve never encountered in the recording studio? Not that often.

Still, my musical momentum had totally crashed in the face of this obstacle, and I was so itching to get this song recorded that this latest hindrance was really getting on my nerves.

I Googled for an hour. No whisper of anything like this.

I searched YouTube. Nada.

So I started to troubleshoot. What do we do when faced with audio anomalies?? Start at the source and trace it forward.

I knew that I had placed my mics in such a way that there should be no phase issues. So I thought, “Let’s do a single mic test recording and see what happens.”

Amazingly, the same issue occurred when recording with only ONE MIC!!

Clearly then, this was not related to phase issues. There was only one waveform! Only one or more other waveforms could cancel cycles out!

Out of phase waves
Out of phase waves

Being at my wit’s end, I decided to call a good friend of mine who is an informed, professional audio engineer and prolific artist: Sidney Howard.

Sidney Howard
Sidney Howard of lakegennesaret.com

When I told Sid the problem, he offered a few suggestions, but since he had never come across the issue himself, and since I’d already performed his suggestions, we ended up just grasping at sound straws with no clear remedy

Back to Google I went. Another hour. Still no solution.

I decided to totally close down my Pro Tools session, start a brand new THIRD session, and try it with only one mic again.

After setting up my tracks and routings, I recorded one more pass.

Same problem.

Aw. I was so frustrated. What in the $@!$% was going on???!

Then it happened: I had decided to get up and go double-check the electronics on my acoustic, just in case there was some switch or button that I had missed there it might be causing this weirdness.

As I got up out of my chair, I heard some sort of a pop or click in my headphones. I sat back down to see if it was something coming from the software. I pushed play…

… and the problem was gone.

WHAT???? Now I was more perplexed than ever! I hadn’t done anything. Nothing had changed!! I had simply got up out of my chair.

“Okay,” I thought, “Do it again. See if I can replicate it.”

Sure enough, when I stood up I heard the pop again. That’s when I realized…

headphone hookup problem

… it was coming from my headphones connection.

I picked up the end of my headphones cord, where it was plugged into an adapter, and then into a headphones extension cable.

I discovered that the adapter was not totally screwed on to the headphones plug. It had come a little loose. We’re talking only, maybe, an EIGHTH of a turn! But that was it enough to cause this problem.

The lesson I only just now learned after decades in the business?? A simple headphone adapter maladjustment can trigger what APPEARS to be phase cancellation… but isn’t!

So there you have it – technological proof that no matter how much experience you have, you can always learn something new.

And I definitely have!!

Rectify that Vexing “Why??!”

We’re bound to run into problems and conundrums occasionally in the recording studio environment.

The best thing we can do is keep working our gear hard, actually record as much as we can, and try to head these issues off at the pass before they can rear their ugly head during a session where we actually have other clients present! That’s when it gets really tormenting.

Keep up the good music and you’ll bound to serenely sail past those choppy waters in no time.

But keep your life vest on… just in case. Lol

Have you come across any outrageous DAW anomalies? Have any hardware issues stopped you while tracking??

Let us know in the Comments section. When we share what we know, we all learn and grow.

Sounds like a new song coming out, doesn’t it? 😉

Now, go… make… sounds!!

Teaj

Teaj in the storm fields!

The 7 Best Keyboard Stands of 2019 – Be A Solid Synth-er!!

Todd Waites putting his stands to the test! (Photo:
Stuartdigital)

Stability.

It’s what you want when you’re flying.

It’s what you want people’s mental faculties to have.

And according to all my friends when I was still dating, it’s what girls want in a guy’s financial plan.

Well, that wasn’t always the case for me as a traveling musician (understatement?), but there was one area in which I was always secure and steady…

My keyboard stands!!

So today, let me share with you what’s worked for me through the decades. Then we’ll show the best specific models out there right now for you to pick up.

Sounds like a plan!!

Questioning the Crucials

There’s certain things I always ask when I’m getting ready to buy a keyboard stand.

If you were doing the same, I think you’ll benefit from thinking through these issues:

  1. Will this stand fit my keyboards size?
  2. Will this stand handle my keyboards weight?
  3. Can my keyboard be easily knocked off this stand by an oblivious, frenzied guitar player (a question that should be asked much more frequently!)??
  4. Will this stand give me the legroom I need??
  5. Does this stand provide enough for all the foot pedals I use??
  6. How easy is this stand to transport??
  7. How quick can I set this stand up??
  8. Is the stand expandable at all??
  9. And finally: What do the players who review this stand have to say about it??

If you can answer all these questions according to your own needs, you’ll be well-prepared for making an informed and gratifying purchase.

Based on those questions, the following options are ones that I would buy, or already have bought, myself and feel very confident that they will serve you well.

Time to brace yourself!! 😉

1) Musician’s Gear KBX1 Single-Braced Stand

Okay, first up we have the cheapest stand I could find that still got good reviews – the KBX1.

I didn’t find any single-braced “X”-type stand that got five stars, but honestly that’s what I would expect.

I say that because it’s really easy to knock over an X stand. Unless it has really long feet, which none of them do that I can find.

Still, I have seen this used in live concerts and it does work well if you keep its design shortcomings in mind.

The “X” shape you can make taller, or more squat, by using the spring-loaded handle. It’s easy to do, but don’t try to change it with the keyboard sitting on it. That would be asking for trouble.

Basically, if you have very little money, buy this stand.

If you have a keyboard that doesn’t get moved at all, like, say, in your house, and you don’t have kids or pets running around knock it over, then this is also a good option.

If you play a church gig, where the guitar players don’t do Chuck Berry struts, jump over speakers or do 360s every tenth lick, then you’re probably safe with this stand too.

If you play a church gig where the guitarists DO do those things, then

1) Don’t buy this stand, and

2) Please invite me. Please. LOL

For transport keep in mind that, when folded, it’s still pretty long. If you’re looking for a stand with a small footprint on tour, for example, this isn’t it.

Also, here’s my main beef with X stands: if you have long legs, as I do, your knees will take a beating because they’ll keep hitting the stand legs.

Hate that!!

But again, for the money, with those things in mind, this stand got the best reviews under twenty bucks.

Here are its simple specs:

Item Weight: 5.44 pounds

Item Dimensions: 36 x 4.4 x 3.2″

Shipping Weight: 5.85 pounds

Adjustment settings: 6

If this is your cup of synthy tea, you can get one from MUSICIAN’S FRIEND HERE.

Or, if you have Prime like I do, pick one up from AMAZON HERE, and save the shipping price!

2) Musician’s Gear KBX2 Double-Braced Stand

KBX2 stand

The KBX2 is the big brother to the kbx1. It’s double-braced instead of single-braced and that makes it a lot more stable.

Personally, I would never buy a single-braced stand. My keyboards are too expensive and I too much to trust singles. I’ve seen keyboards get bumped into too frequently!

So this double-braced stand is a much better option just a little more money.

Now, if the players you gig with really move around a lot, I still would avoid an X stand. But if they’re pretty sedentary, go for it – this will do the job.

Amazon doesn’t carry this double-braced model, but our good pals at THIS MUSICIAN’S FRIEND LINK certainly do, so if X marks your spot, get it there!

3) Yamaha PKBZ1 Z-Style Stand

Teaj’s Z stand from 1990

I am a fan of Z-style stands. I have used one for over two decades. I’ve even seen other musicians bump into my keyboard while on my Z stand.

It didn’t fall. It didn’t wobble. That’s the kind of stability we’re looking for when playing out.

This particular Yamaha stand is the closest thing I can find to what I have.

Notice that with this stand you have with and height adjustments. That’s good versatility, and will enable you to use a variety of keyboards on it.

Yamaha PKBZ1 stand

Another big reason I prefer to use a Z stand when I play live is that I always have two pedals, at least, at my feet. My Z stand always gives me plenty of room to place my pedals where I want them, without my legs bumping into anything either.

Winning!

The only caveat I have about this stand type is that it’s still not the best bet if you have an 88-key weighted keyboard, or some other board that’s really quite heavy. I wouldn’t trust this for that.

Also, if you are really an energized player who aggressively pounds when you play… It’s probably best to move on to our next choices.

Chillax, dude! 😮

There ARE holes in the arms of this stand for screwing in keyboards so that they remain more stable. The trouble is you have to have holes in your keyboard that will match where the holes are in the stand. Not all will fit correctly.

If your keyboard’s a Yamaha though, there’s a good chance it will fit. It’s recommended to fit keyboards in the PSR, PSR-E, DJX, and EZ Series.

  • Dimensions: 29″H x 13.25″D
  • Width adjustment: 19.75″ to 35″

Get to the AMAZON LINK HERE.

Or snag your Yamaha stand through THIS MUSICIAN’S FRIEND LINK.

4) On-Stage WS8550 Heavy-Duty T-Stand

This On-Stage stand is really rugged and versatile. This is the first one I would give thumbs up on for a really heavy keyboard, or one that takes up a lot of real estate.

It folds into a “T” shape and actually becomes quite compact. Pretty amazing for as sturdy as it is!

Great for gigging, but also really good for at-home use if you want stability in the face of pets or kids that like to emulate Mario Kart. 😉

Notice too that we have three dimensions to adjust with this stand: height, width AND depth. You want options?? You got ’em!

This stand is a great choice for those that SIT and play most, or all, of the time. In fact, I’m writing this post specifically for a young lady I know who needs one for her move to Boston where she just landed a swanky new job at Staples’ headquarters. You GO, BECKY!! 😉

She needed the whole shebang, including a bench to sit on (I told her get THIS ONE!) so that she doesn’t lose all the musical progress she’s gained because she doesn’t have the simple accessories.

Also, people that have heavy keyboards, as well as players that really strike their keyboards hard and play aggressively, have said that this stand provided the most sturdy option they’ve ever comes across for the money. By the looks, size & construction of this thing, I believe ’em.

Specs, anyone?!

  • Weight Capacity: 250 lb.
  • Height Adj: 25″-33″
  • Width Adj: 26.5″-45″
  • Depth Adj: 17″-27″
  • Tubing: 30mm
  • Construction: Welded and bolted
  • Color: Black Powder Coat Finish

“Prime” your On-Stage deal with free shipping with THIS AMAZON LINK.

THIS MUSICIAN’S FRIEND LINK will serve you well though, if you’re not a Prime member at Amazon.

5) Proline PL402 2-Tier Double X-Braced

Everything we’ve looked at up to this point has been for a single keyboard.

The Proline PL402 is made, out of the box, for TWO keyboards.

This was the cheapest stand, designed for 2 keyboards, that I could find that had good reviews. All four stars and above for this one.

Yes, it is an X Stand, but it’s double-braced, so you should be fine unless you face the dangers I’ve listed earlier. You know… the frenetically thrashing solo guitar player we talked about?! 😉

This is your last option if you want to keep things under a hundred bucks. The next two options will break that ceiling.

I’ve used this particular stand before and I like the flexibility gives for angling the upper keyboard. Sure, you can’t raise or lower the upper arms, only change their angle. But I found how they are positioned to be pleasing.

If you have a real beefy keyboard that stands quite high, then it might be a little tough to see the upper buttons on it when the second keyboard is there. If it’s normal-sized though, you should be fine.

  • Double x-brace design
  • Locking height and width
  • Quick release lever
  • Fully-welded contact points
  • 2 tiers
  • Supports medium to full-size keyboards

Stop your double tiers from flowin’ by using Amazon at THIS PROLINE LINK.

Or make our M.F. comrades happy if you’re not into the free shipping thing by clicking THIS PL402 LINK.

6) Quik-Lok M-91 Monolith Single-Tier

Next up is the only keyboard stand in this list I have NOT used. But I really want to! It looks fantastic!!

It’s the first time I’ve seen this newer, more practical design in a stand. The M-91 folds, and locks, and transports compactly like others we’ve looked at, but when assembled it looks substantially more robust than most stands out there.

And talk about legroom! WOW!!! Get Happy Feet all you want – this stand can take it! And plenty of room for pedals! MANY of ’em!!

If, one day, you want a second-tier installed, that option is available with the M-91.

Not to mention that there’s NO WAY you’ll ever watch your keyboard get knocked to the floor by a wanton, frenetically thrashing “in-the-moment” soloing guitar player.

I’ve been that. I should know. Lol

Add the limited lifetime warranty to the mix, and we’ve got a stand that I would order immediately… if I didn’t already have three! Lol

  • Lotsa leg room!
  • Adjustable tier height
  • Computer-welded, lightweight steel
  • Folds and locks in seconds
  • Compact & transportable
  • Optional second tier set
  • Limited lifetime warranty

Carrying this stand is quite different than I’ve done with any other stand I’ve owned.

It also takes up more room in your transport vehicle than others on this list, but if stability is important to you and you’re NOT tight for space, this product rocks!

To get one for yourself, take your pick of THIS MUSICIAN’S FRIEND LINK, or…

THIS AMAZON LINK.

7) Standtastic 103KSB 60″ Triple-Tier Keyboard Stand

Alright, here it is: the last pick on my list.

Did I save the best for last? OOOoooh, yea, baby!!

Standtastic 103KSB stand

I have had this 103KSB 60″ since 1990! It’s my favorite stand if I’m going to play with more than one keyboard.

This thing is so stable you could throw it in with Optimus Prime, Megatron and Bumblebee and it would still remain UN-transformed!!

Rock solid, man. Totally.

It takes up a little more real estate than your average keyboard stand, but I, for one, have never minded. Its tough, anchored, reliable design has always left me carefree about my keyboards, and that’s what counts.

Not to mention that it looks SO incredibly cool and boss when all my keys are up on this monster and we’re cookin’ live! Oooooo, can’t you just feel its eminence?!!

One way that I’ve also used this stand is to have two keyboards on it, but on the top arms put a long strip of wood on which I can place any sound modules, rack units or midi routers that I might want to use for the show.

Not to mention that stuffed caricature doll of Keith Emerson that sits staring at the audience! 😉

For as strong as this stand is, it’s really cool that folds down to a bit more than a javelin. Yeah, it’s 60 inches long, but folded up its width is only 4 inches and depth only three. Basically, if you can fit a long plank of wood in your car, you can fit this.

In a nutshell, this beast is rock solid, even for pounding keyboardist GORILLAS!

It comes with a padded carrying bag too which I’m very jealous about – when I BOUGHT it, in 1990, it did NOT come with a case. Not fair! Lol

The angle adjustments really help. Not a flick of flimsiness here, folks. Just brawny, able-bodied stability and versatility, all in one unit. Without question, my best pick of the bunch! It’s anything and everything I’ve ever wanted in a stand.

Looks like Amazon is missing out on the best keyboard stand I’ve ever used, but have no fear… M.F. is here! Get your own epic stand at THIS STANDTASTIC LINK!

Take A Stand!!

So there you go – seven awesome options if you’re in the market for a stand that will not only help you play your keyboard well, but also keep it safe from musical marauders, to varying degrees.

What do you think? Itching to get one of these? Already have one or more?? Got a favorite that I didn’t list??? Let us know in the Comments section. We always like to hear from real players like you, and like ourselves, about real world gear experience!

Oh, and if you’re new to the whole “buying online” thing, check out THIS ARTICLE I did which should help you find great deals on what you’re just aching for!

Until our next post, hope you’re havin’ a slammin’ great day creating some jammin’ new music. That’s what this gear is all about anyway, right?!

Now, go… make… sounds!!

Teaj

Teaj in the storm fields!