The Takamine EC-132C Classical Guitar – The Timeless Taste Of Classic Tone!!

The first time I knew I had to have a classical guitar, I was listening to Pink Floyd’s “The Wall”.

I played it incessantly (through headphones, of course!), and with all the lights off except for the dim glow of the stereo dial. It was magic!

The Wall had classical guitar
Love that Gilmour classical guitar!!

The song “Goodbye Blue Sky” was mesmerizing to me. That gentle, centuries-honored sound of a classical, played expertly by David Gilmour, just drew me in!

So the fact that I ended up with a Takamine EC132C Classical Guitar is no accident. I needed a great classical guitar so I could do those songs myself!

Nylon strings are sometimes just the ticket, when a steel string guitar is just a little too brazen for the song at hand.

Later, I also heard and learned to play other transcendent classical songs:
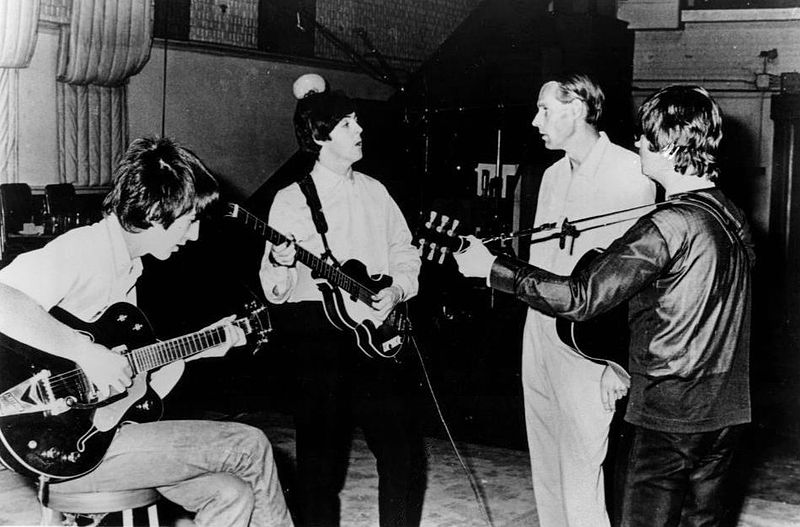
  • The Beatles’ “And I Love Her
  • Rush: “The Trees
  • Van Halen: “Spanish Fly“!!

That last one, of course, was like the cherry on top of the sundae, Eddie blew all of our minds with that one. And it was also the hardest song I’d ever learned up to that point. We’re talkin’ major woodsheddin’ to get that one down!!

Heck, because of my French class in college, I even studied the classical songs of “The Singing Nun”, a French musician who actually had a hit here in the States called “Dominique” (to my knowledge the only French song ever to make U.S. radio).

Whatever peaks your interest about the Takamine classical, there’re worlds of musical options to discover that this guitar can bring to life, with panache, class and captivating depth.

Let’s see what makes her so special, shall we?!

Guitar of the Rising Sun

In the town of Sakashita, at the foot of towering Mount Takamine in central Japan, a small family-run instrument workshop opened in 1959 that would later take the world by storm.

The company was named after the mountain itself, and just like that landscape behemoth, Takamine has, over the last five decades, become a titan in the world of stringed instrument design and manufacture. Read their FULL HISTORY HERE

Bruce Springsteen playing Takamine
(Photo: Becker1999 https://bit.ly/2CUfboS)

Since that inauspicious beginning, there are many well respected and renowned guitarists of the modern era who have played, and continue to play, Takamine guitars. Here’s just a few:

Bruce Springsteen

Jon Bon Jovi

Bruno Mars

Don Henley

Toby Keith

Paul Jackson Jr

Garth Brooks

Whatever they’re doing, they must be doing it right – the number of their guitars selling is rising higher than ever. Check out their whole line of acoustic & classical guitars on THEIR WEBSITE HERE to see examples of why.

I, for one, can give you a personal reason why: my Takamine classical guitar has never let me down in any way, after 20 years of being under my fingers, on many stages, many times.

That kind of quality and longevity just doesn’t happen. It’s designed, and meticulously executed, by craft-savvy artisans who, day after day, apply their skills to make sound history.

Now let’s see how they set up a particular guitar’s history… mine!

Got a Show?? Play a Pro!

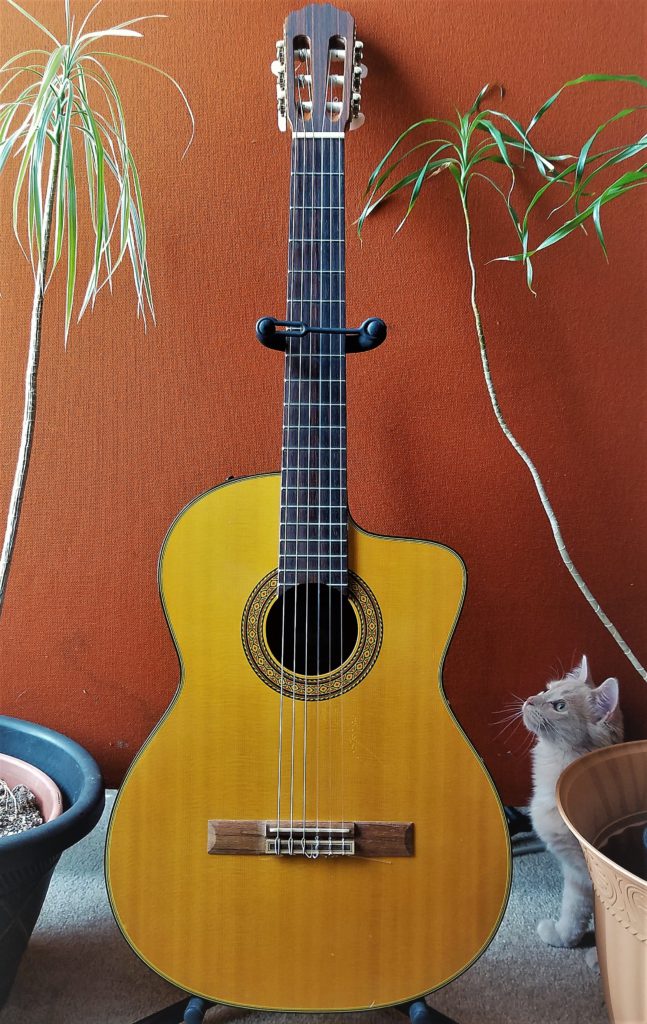
The Takamine EC-132C is part of their “Pro Series“, and it shows. My own pick of this model was created in Japan in January of 1998, the same year I bought it new at Guitar Center.

Pimenny, our cat, is a big fan of the EC132C!

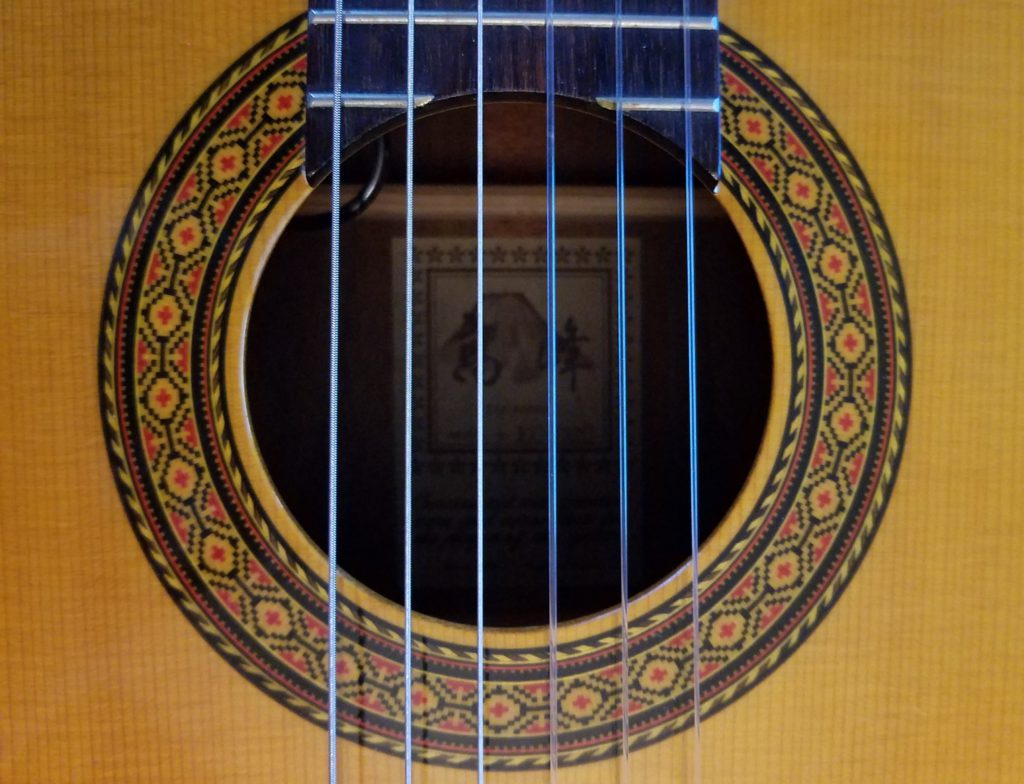
It was the 905th guitar made that month, according to the serial number which is always found on a badge on the neck block inside the instrument. If you look just below the truss rod adjustment port you’ll see it.


Here’s a brief rundown of its main features:

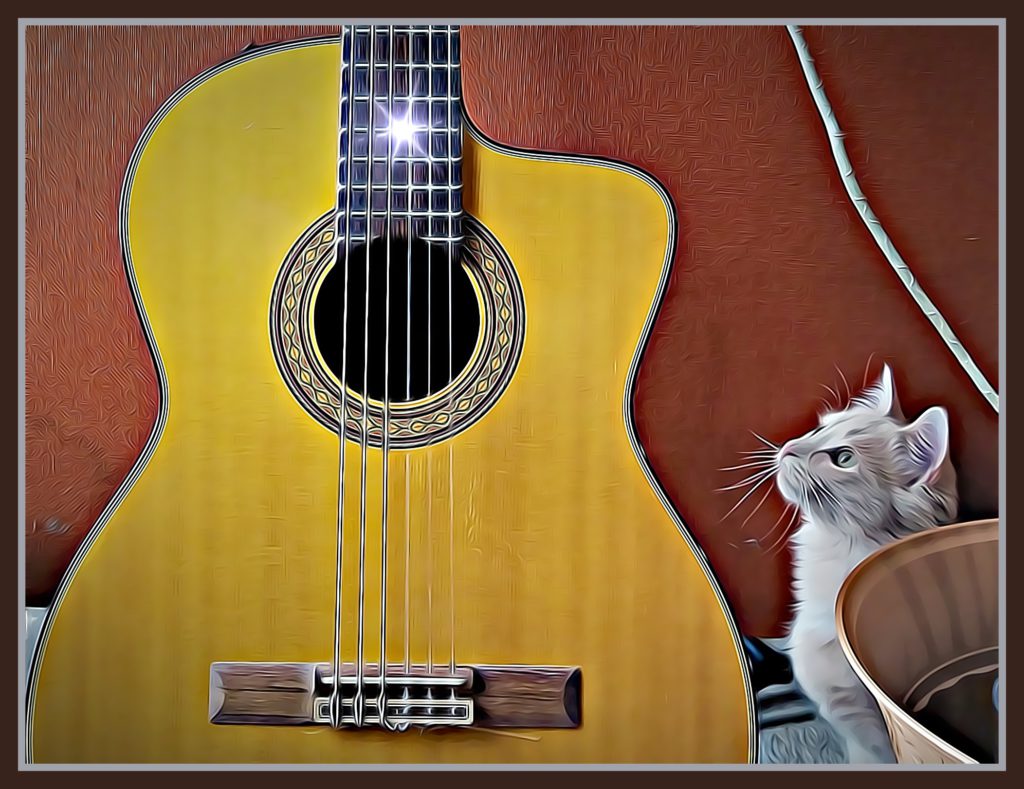
  • Body Shape: Classical Cutaway
  • Rosette: Marquetry
  • Top: Spruce
  • Back: Rosewood
  • Sides: Rosewood
  • Finish: “Natural” Gloss
  • Fingerboard: Rosewood
  • Bracing: Fan
  • Neck: Mahogany
  • Frets: 19
  • Strings: Nylon, tied at bridge
  • Electronics: Takamine Graph-Ex preamp
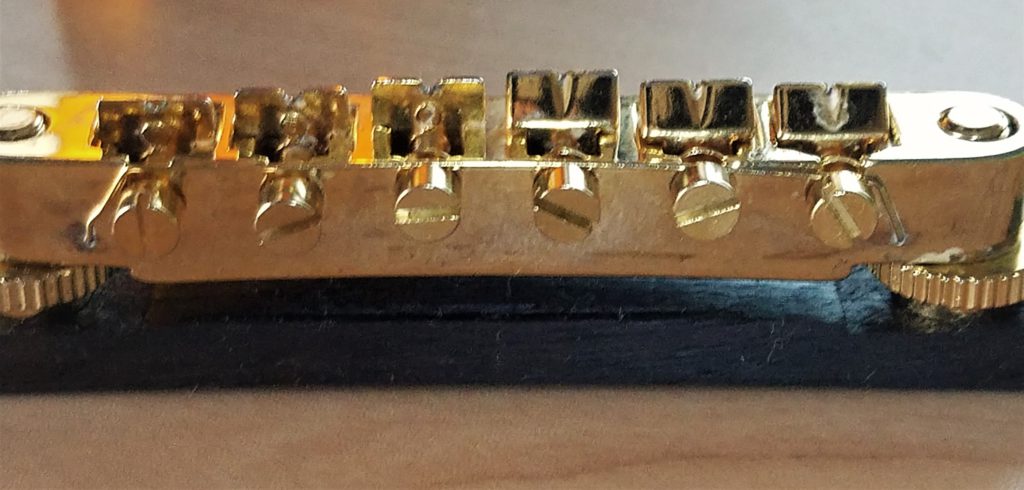
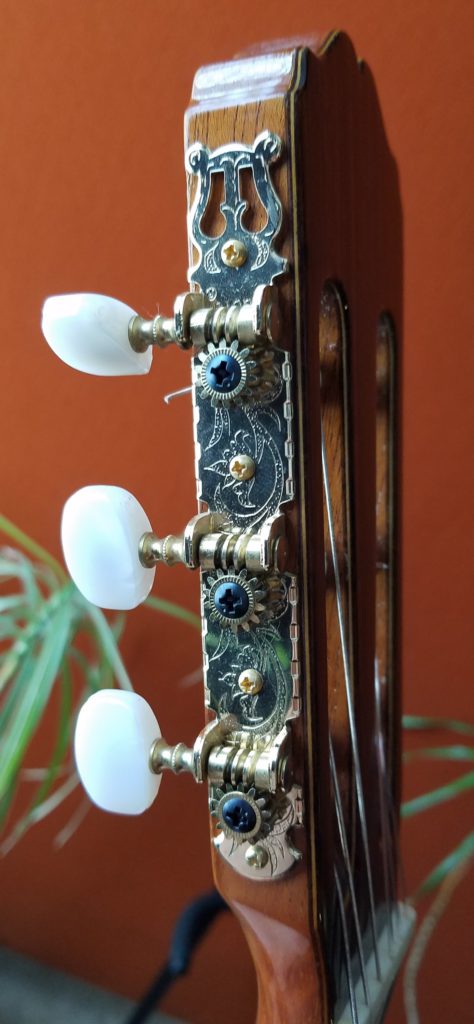
  • Tuners: Gold Classic
  • Nut Width: 2.008″ (51 mm)
  • Scale Length: 650 mm

If you’re not familiar with a classical guitar, the two big main differences are:

  1. The strings are made of nylon, not steel. They’re much softer so the guitar sounds gentler.
  2. All strings are tied, using knots, to the bridge. No strings have a ball end, like on a steel-stringed guitar.

Classicals tend to all look about the same: simple and elegant with all the attention on the sound of the instrument.

This model does sport a beautifully-detailed rosette around the sound hole though, so there’s at least some hint of ‘fashion’.

Oh, and the tuners all have gold trim, so, yea, that looks pretty sweet too.

But at the end of the session… we all know what’s important. It’s the sound, baby, the sound. So let’s address that next…

More Nylon, Please!

Since there’s nothing like actually hearing an instrument you’ve got serious G.A.S. for, we thought we’d make your sickness even worse by showing exactly how this girl struts her classy stuff in the studio today.

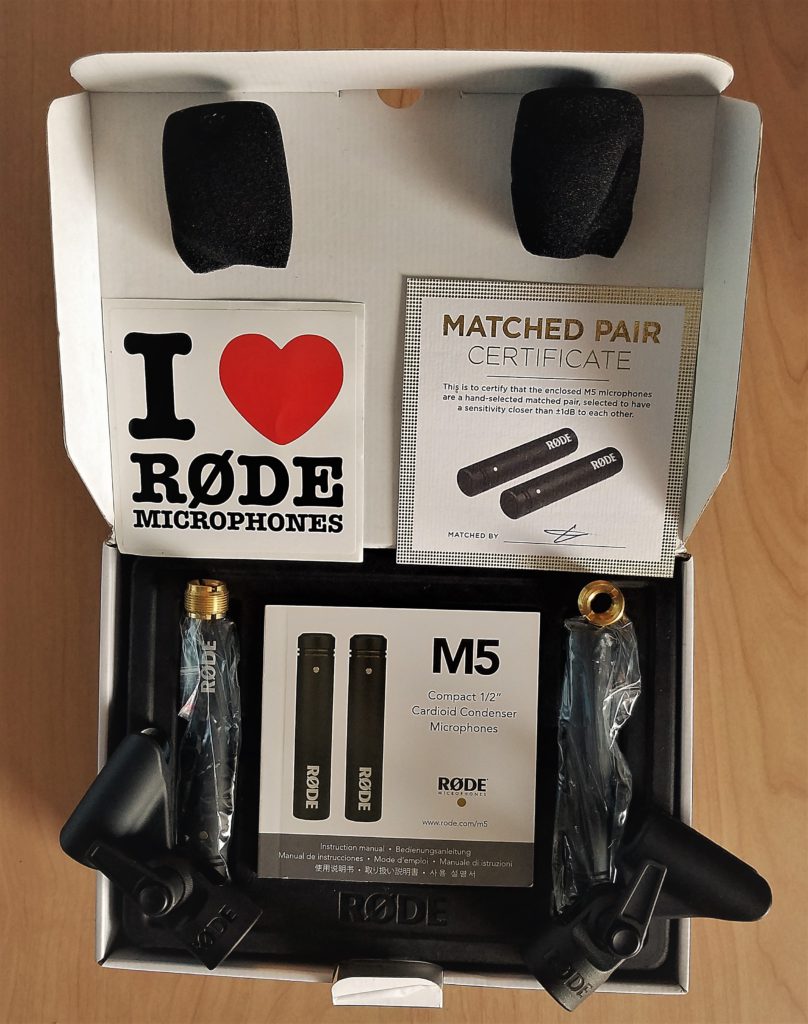
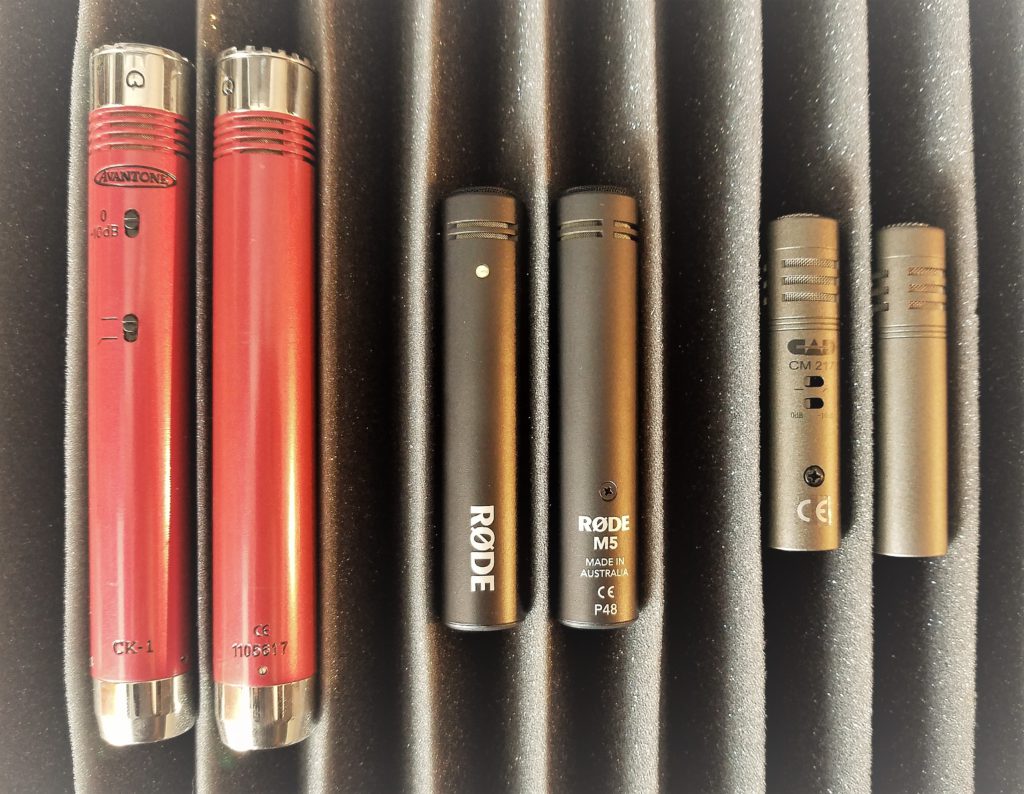
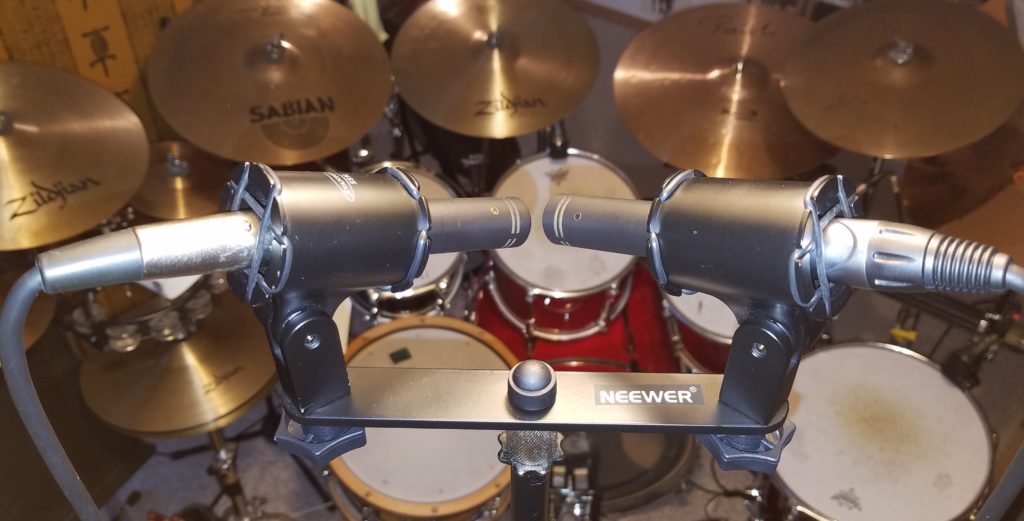
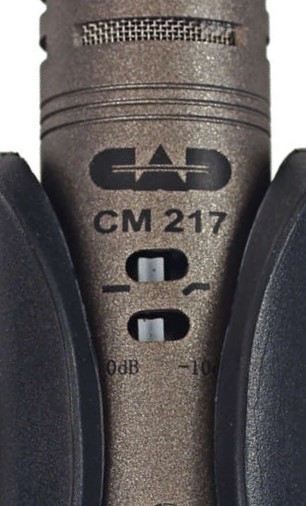
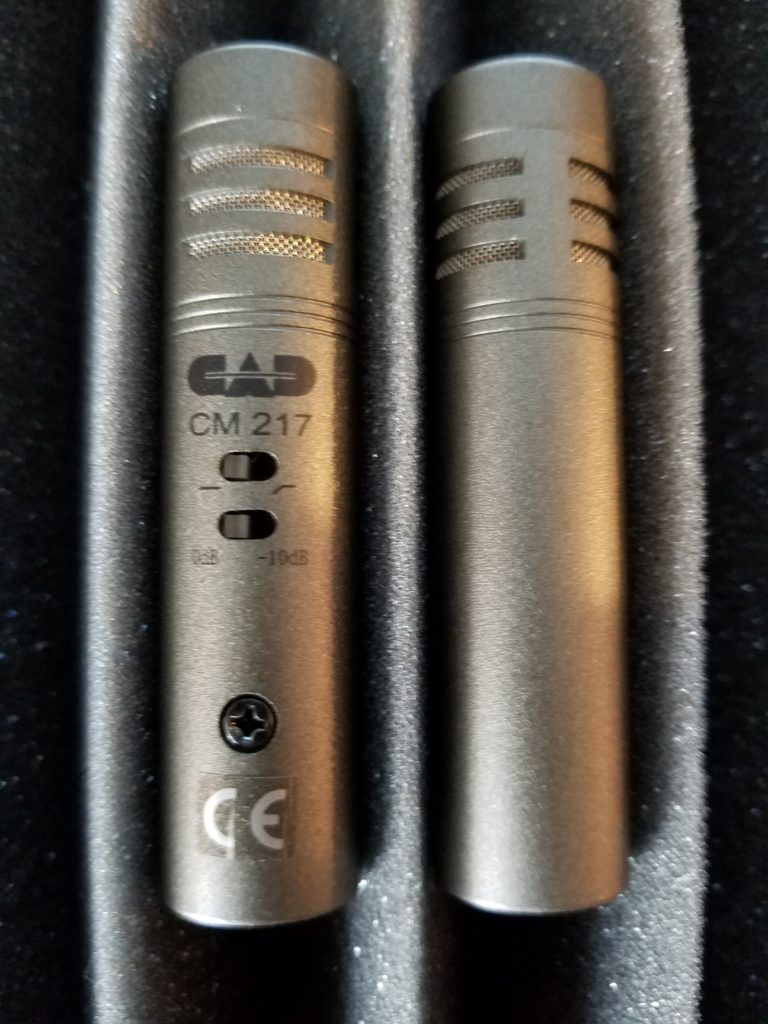
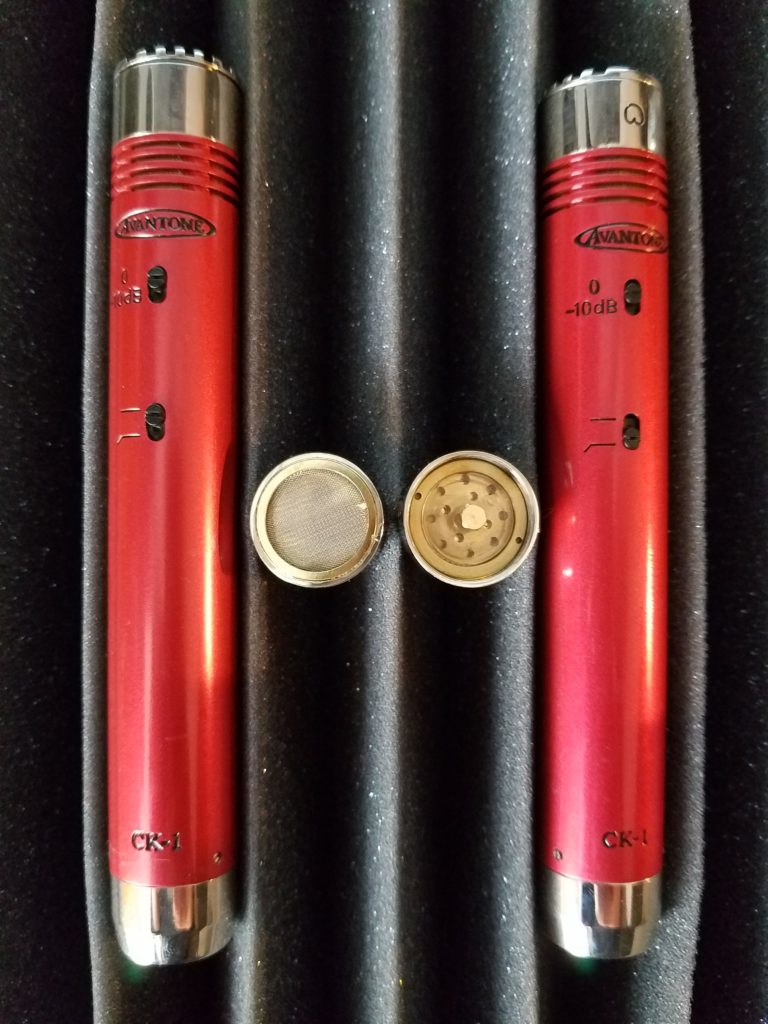
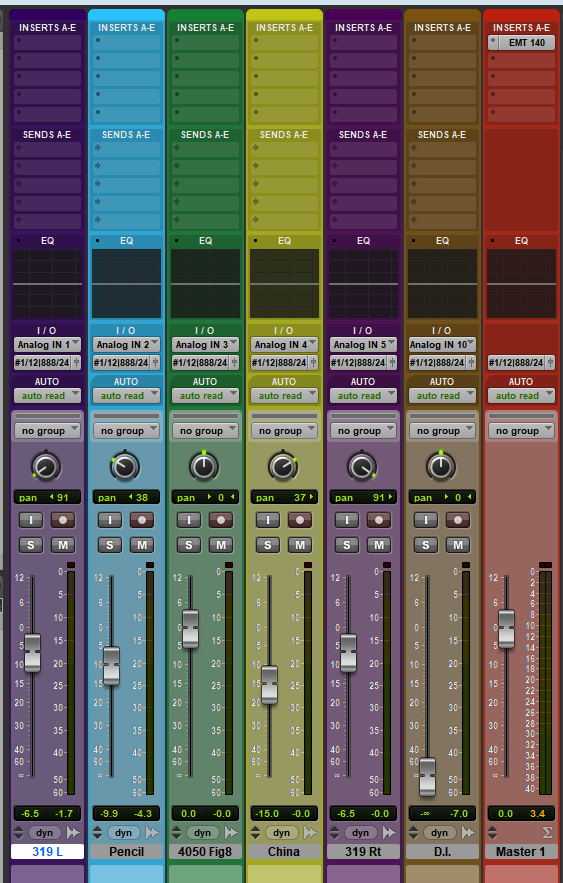
As usual, I recorded the Takamine with five mics, plus a D.I. You’ll hear all five mics, panned as seen below, in the video recording. The D.I., also as usual, didn’t make the cut. It just doesn’t sound at all as wonderful as this guitar’s natural, “in-the-air” sound.

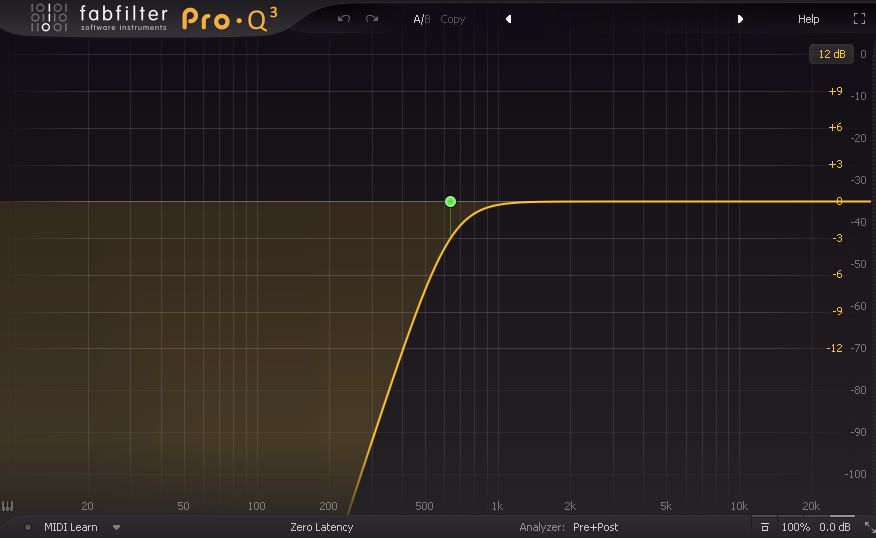
The only processing I put on this recording is a little plate reverb to glue all the mic signals together. Otherwise, you’re hearing just the Takamine in all her glory. And that’s the point, isn’t it?

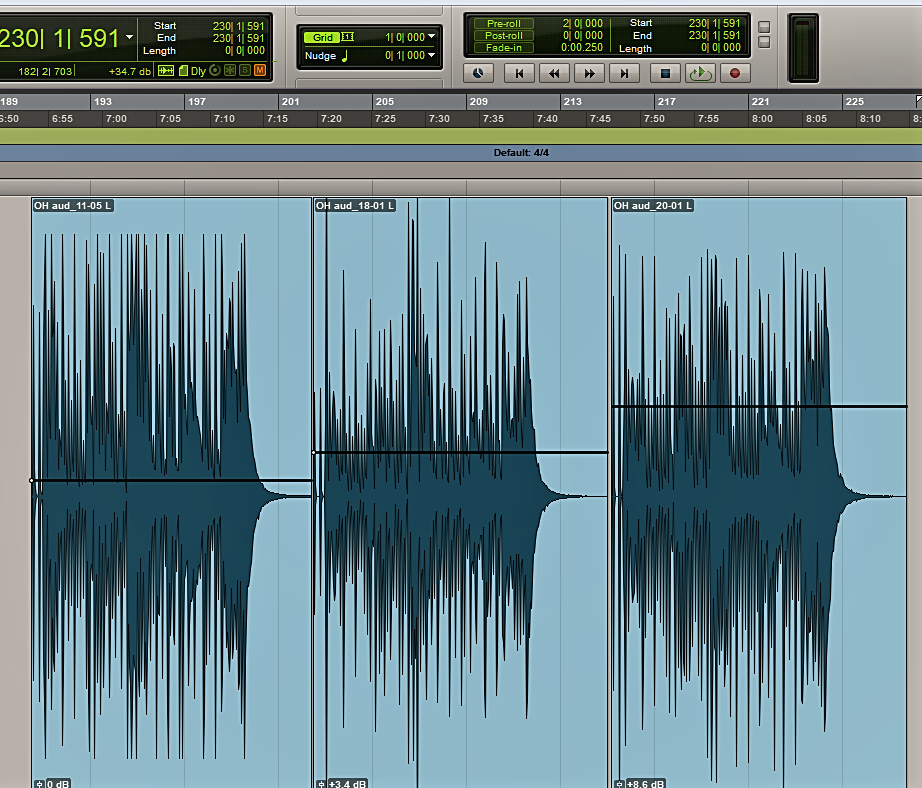
Here’s what the final Pro Tools layout looked like:

Alright, well, if you’re ready… just sit back, put on your headphones and enjoy this gentle ride.

But a word of caution – you may need a handkerchief to wipe the sweat from your brow. Once a classical nips at your heart…you’re never the same again.

“I’ve got a fever… and the only prescription… is MORE NYLON!!!” LoL

WOOD-n’t You Know it!

The c132c BACK SIDE

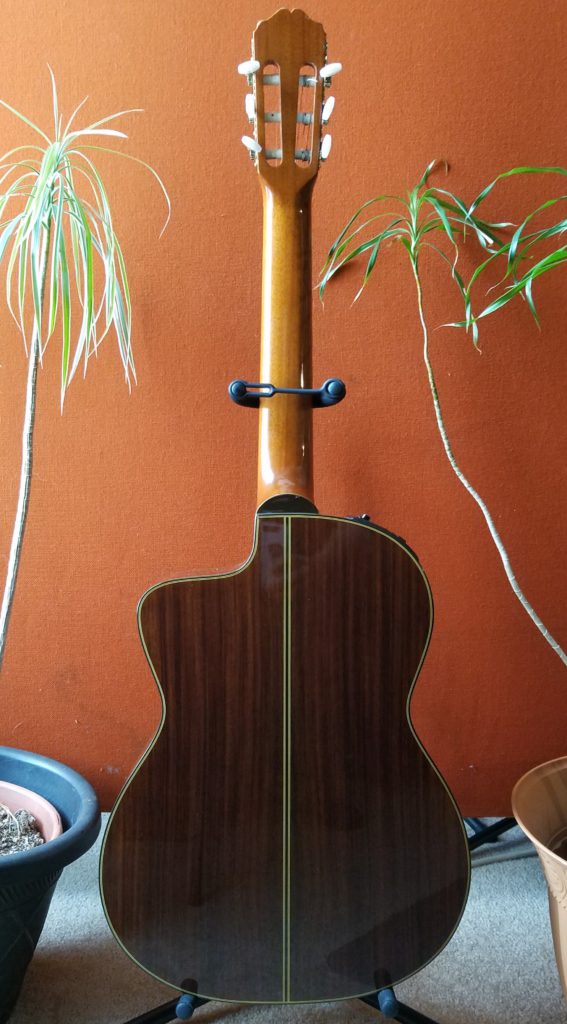
With all the restrictions that are placed on Rosewood these days, I feel extremely lucky to have a guitar that’s made with so much of it.

I confirmed with Tom from Takamine U.S.A. that the back and sides of this Takamine classical are both made of
East Indian Rosewood, which is beautiful and toneworthy.

Brazilian Rosewood is considered the top of the line, but it’s almost impossible to get that wood because of trade restrictions.

In 1992 the CITES treaty strictly banned the its exportation. Today you can only get it under TWO conditions:

  1. It was harvested & exported prior to the CITES ban, or
  2. It was harvested from trees that fell over naturally.


In both cases you’ll need a certificate of provenance to prove you didn’t snag it illegally, and those are not easy to come by! Get the whole story IN THIS ARTICLE.

The reason Rosewood is so desirable, for back and sides specifically, is because it’s a hard & dense wood that reflects sound very well – which is of course the most important duty of those pieces on a guitar. A solid rosewood back, especially, really projects and enhances the sonic brilliance of any guitar.

Rosewood characteristically helps produce a clear, crisp, ringing tone.

The Spruce top on this classical guitar is no slouch either though. It’s often what you find as the top soundboard for high-end (read “high price tag”) boutique guitars.

THIS “MIKE FRANKS” HANDMADE STEEL-STRING ACOUSTIC that I had made according to my specifications, for example, has an Adirondack Spruce top. It sounds perfect to me, in every way. A clear, strong, well-balanced voice, with plenty of dynamic range.

Spruce. It does a (guitar) body good. 😉

The neck on this beauty is mahogany, and features a dual action truss rod. This is handy for making sure the guitar plays perfectly in any environment, tho’ I’m quick to say… I’ve never needed to adjust it once for playability reasons. Not ever.

Twenty years later, it still sounds, and plays, like only dream wood can!

Your Biggest Fan!

Parallel bracing under the soundhole.

Every great guitar starts with a great, resonant design. Since acoustic guitars have been around for a few hundred years now, there’s a pretty clear consensus of what is necessary to make one that offers excellent frequency response and impressive dynamic content.

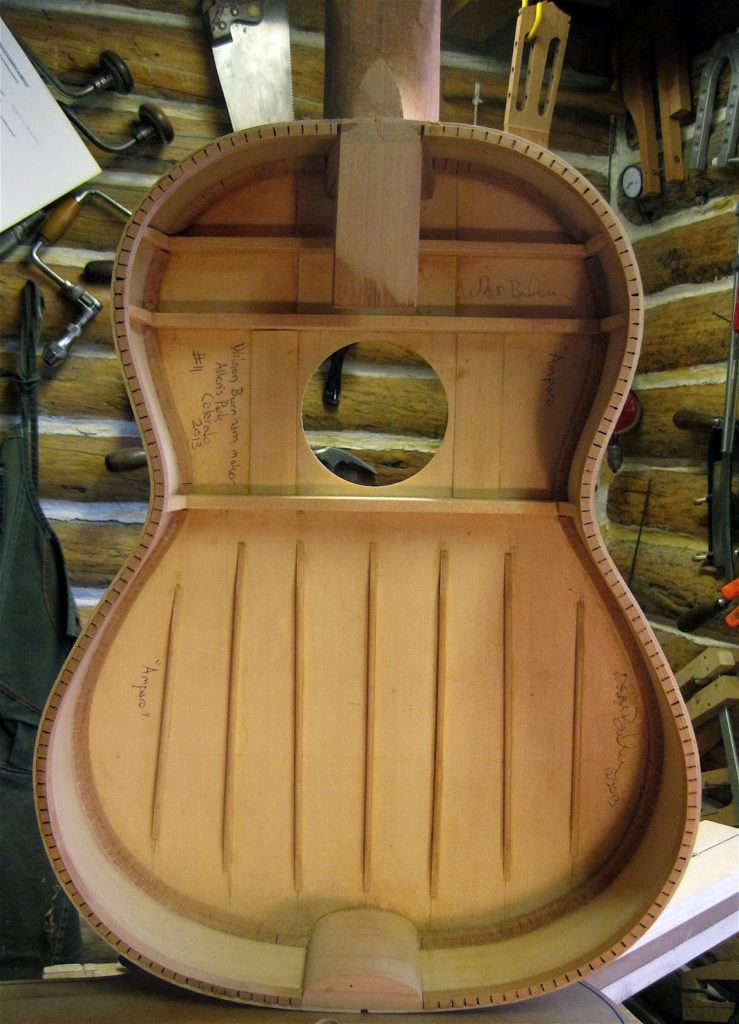
The EC132C pays homage to traditional classical instruments and follows closely to the drawings of Antonio Torres, a Spanish luthier of the 1800s that has been hailed as “the most important Spanish guitar maker of the 19th century.”

One of the most important ways they stayed true to his design is that they incorporate “parallel fan bracing” into the guitar (where the struts run in the same direction as the strings), rather than “ladder bracing” (which uses braces perpendicular to the strings).

Where the wooden struts are placed, and how, under the soundboard of a guitar, are crucial to an instrument producing a pleasing sound and being able to reproduce the frequency spectrum evenly, or at least pleasantly.

Going with the tried and true layout of a historically-respected master luthier is one obvious reason why this classical guitar has been a best-seller for decades.

Inner bracing of the Takamine classical guitar
My Takamine uses SIX vertical struts under the soundhole.

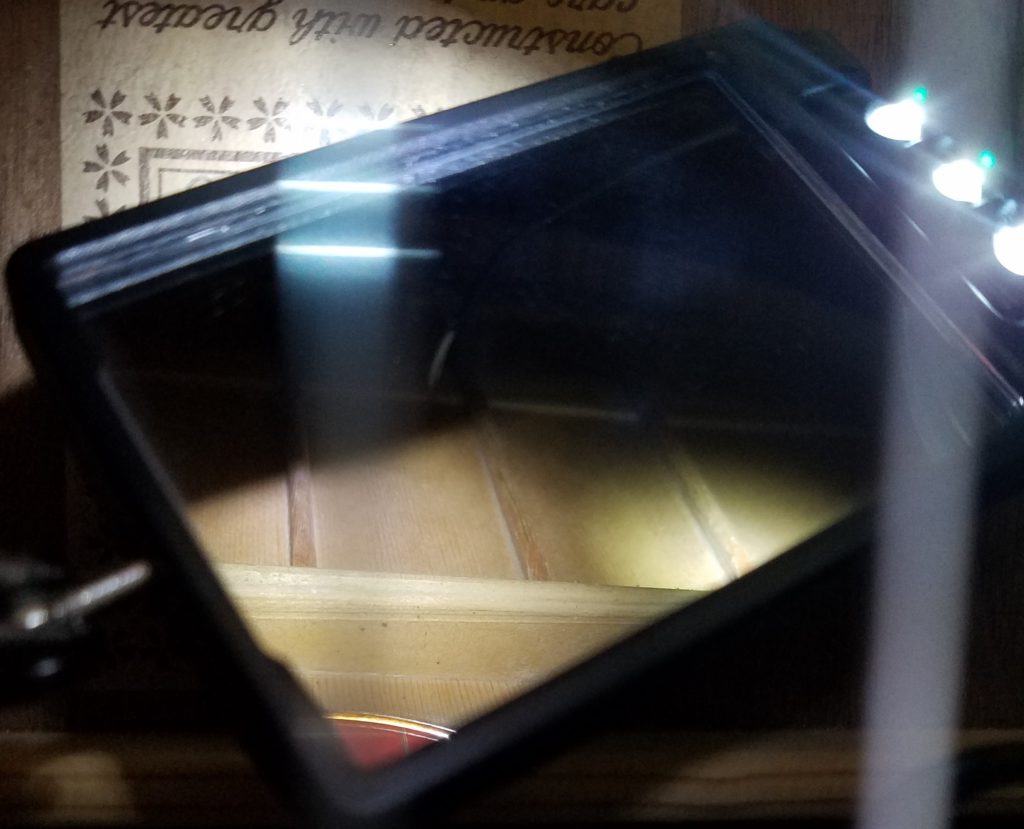
I dove my guitar mirror down inside my Takamine to see the exact strut layout. You can see in the picture to the right what I found: struts running parallel to the strings. This is a derivation of true fan bracing, where the struts sweep in an arc, like a peacock tail.

The picture above, showing “parallel bracing”, is exactly how the struts are placed in mine, the exception being there’s only SIX struts there instead of seven.

All that to say Takamine has obviously kept to the truism “if it ain’t broke, don’t fix it.” This guitar has consistently put out excellent sound, and thus wonderful music, and that is why it’s been a successful product for them for decades.

The EC132C was made, virtually unchanged, for over two decades now. That kind of longevity without any modification is a true testament to its craftsmanship and popularity.

Electric Dreams

Graph-EX electronics

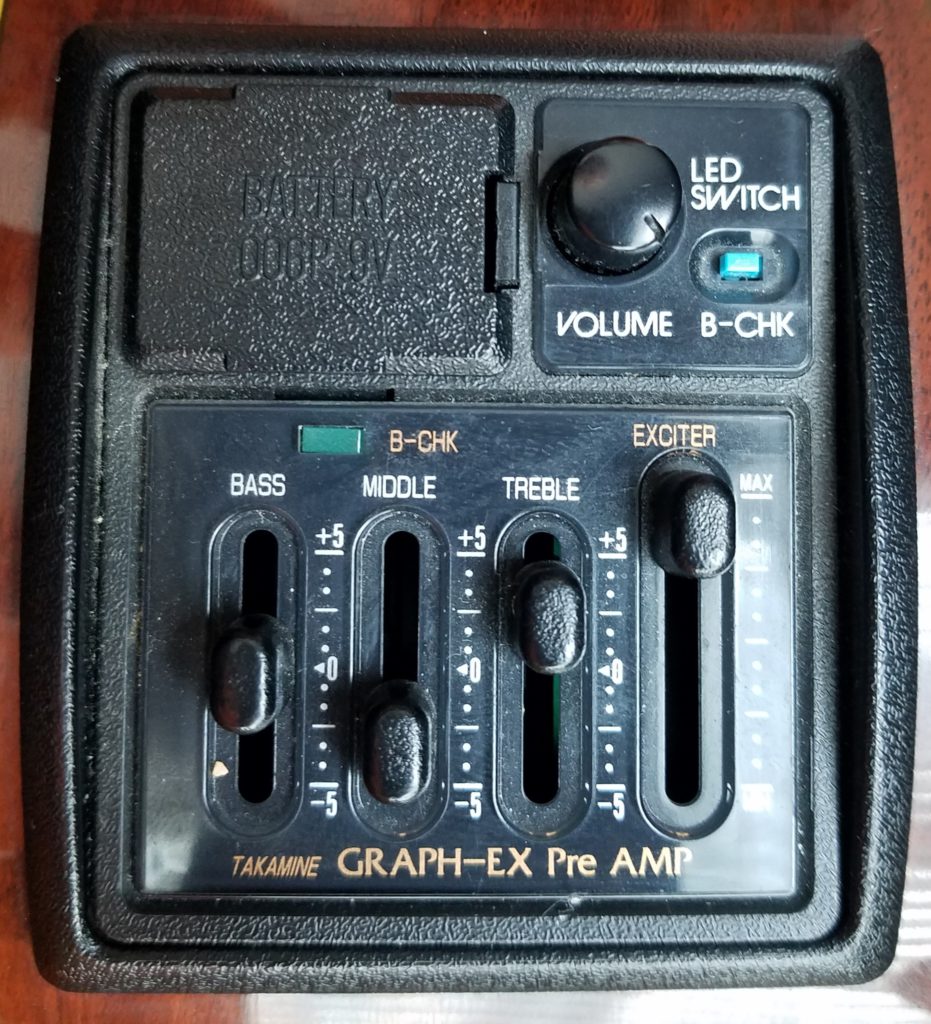
Most classical guitars are made to be played with no amplification built in. The EC-132C, however, does have electronics on board, called the “Graph-EX preamp”, and it has worked flawlessly for me right up to today. Since I perform a lot live, I knew I’d need an electric-acoustic, not just a great “body sound” for mics.

That’s not to say that I like the sound of its electronics. I actually don’t. This guitar only sounds truly warm and alive to me when it’s mic’ed up and its ambient clarity is captured via a nice large-condenser mic capsule.

Now, I’ve used this guitar live many times, and most times I’ve just plugged into the electronics. That’s because it’s almost always what the sound person prefers. By plugging in, they don’t have to deal with feedback.

Plus, back at the soundboard, they can give it a good going over with their channel EQ to make it sound better than what’s coming straight out of my preamp.

Takamine Graph-EX info

These days, however, the preamp has changed. If you buy one of these today you’ll get the “CoolTube (CTP-3)” preamp. I’ve heard that it’s better than mine, and I’m not surprised – it’s twenty years younger!!

Takamine’s latest electronics – the CoolTube!!

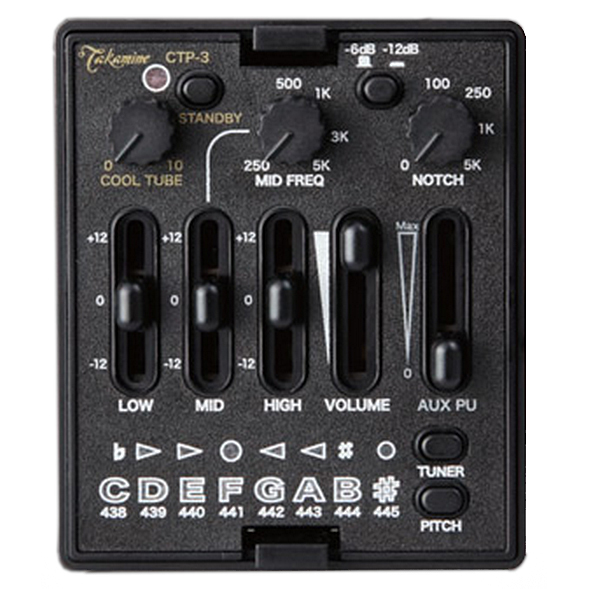
Here’s what today’s preamp will give you:

  • a low-voltage tube to warm the sound
  • 3-band EQ
  • Semi-parametric midrange
  • Auxiliary input & volume
  • Onboard chromatic tuner
  • Notch knob for precision cutting of feedback frequencies
  • PItch knob for overall tuning adjustment

This “Cool Tube” preamp actually uses a real low-voltage vacuum tube in the gain stage that warms up the sound quite a lot, and it’s got its own knob so you can judiciously sculpt just the right sound with just a few twists of your fingers.

A nice feature of these “Cool Tube” electronics is that it includes a second pickup port, ready to go, in case you want to add another guitar pickup, like a soundhole pickup or a top-plate transducer. You can then blend this 2nd pickup in with the on-board electronics for a much more, complex and varied tonal spectrum.

I would definitely do this, as it would be similar to what my favorite songwriter, Bruce Cockburn, uses in his internal setup. Other acoustic masters like James Taylor & Paul Simon do similar things as well.

The other really cool thing (I wish I had this on mine!) is the Pitch button, which provides an overall pitch adjustment for the tuner. It allows you to offset the pitch center of the open strings buy a few cents up or down.

This is fantastic if you have to play with an actual piano! They can often be just a little bit out of tune… usually flat. Given this, the ability to program the on-board tuner to coincide with that dip in tuning is extremely helpful when playing live.

Your All-Access Pass!

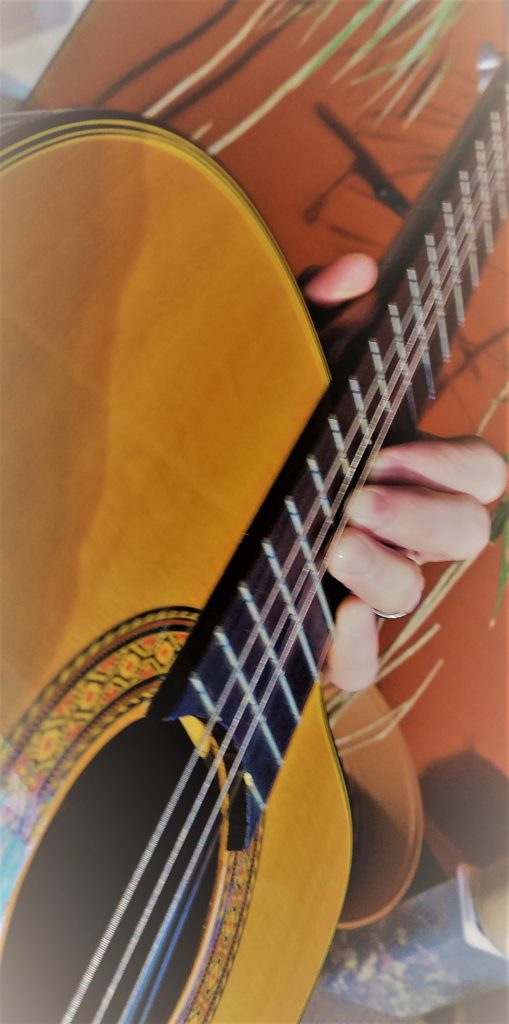
One big reason I chose this specific model is because I wanted the cutaway profile high on the neck.

I often like to play above the 12th fret, so I need the access that a cutaway provides. It makes all the difference when you’re trying to get all your fingers moving fast in those tight, small frets up there!

Whether you’re constructing chords, or swimming fast and furious just above the soundhole diving board, having this cutaway for your hand comes in so… well, HANDY. In fact, at least half the guitars that I own all have this cutaway design.

I also appreciate this style of cutaway. It’s more like a flat cliff ledge, which means I’ve got nothing hitting the back of my hand when I’m up there. Some other guitars have a lot more of a “horn” there, even though it’s scooped out, and you end up hitting the back of your hand on it. I like Takamine’s take on this much better.

If you don’t make it up above the 12th fret much, then it’s a feature not so important for you. But don’t worry – there’s plenty of other things to love about this guitar that make it the perfect fit. 😉

No GPS for This Guit’-Trip!

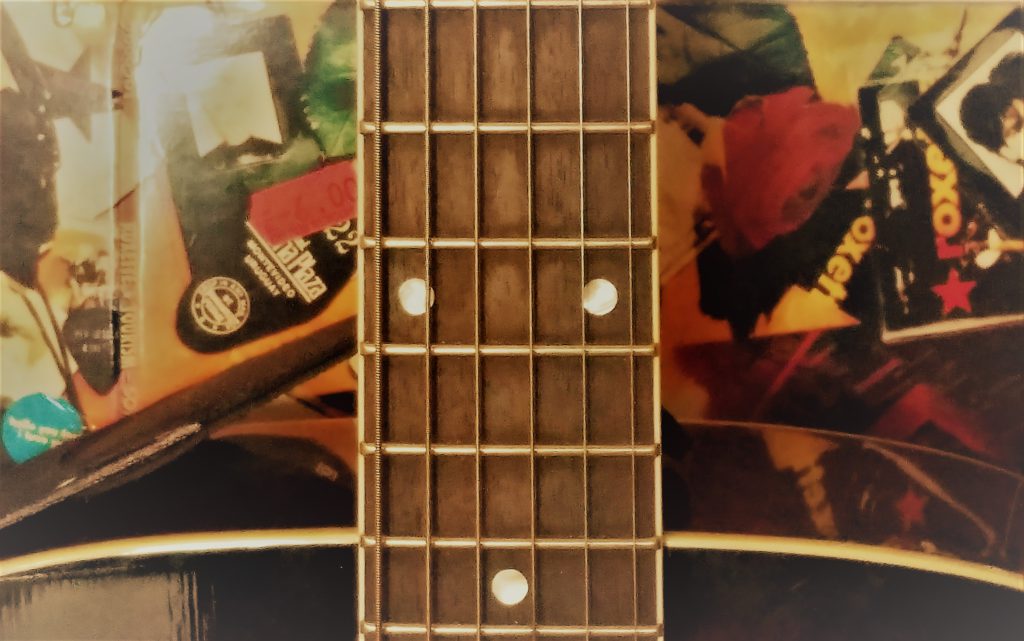
One trippy little thing that you have to know about most classical guitars is that they do not provide (typically) any fret markers of any kind.

No neck markers on this Takamine

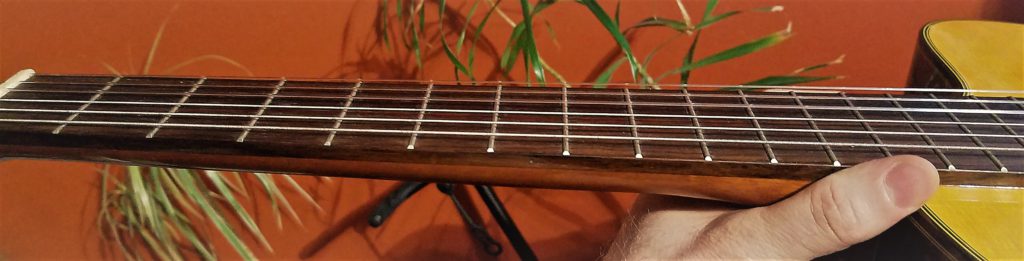
No circles, bars or birds line the fretboard, and no dots are there to help you know your location or position on the neck.

Because of this, if you’re a beginner you may find playing a guitar like this more difficult. There’ll be no “cheat dots” to help you know where you are.

Sean Barret playing the Takamine EC132C

Add to that the fact that a classical neck is much wider than a steel-string guitar (51mm instead of the slimmer 42mm!), And you got what could that mean some serious challenges to your guitar chops!

Once you’ve practiced enough though, and put enough years of playing guitar behind you that neck positions are easily familiar and you don’t even have to look at the neck when you play, then a guitar like this is a beautiful thing.

My good friend and sometimes contributing author here at Seriousgas.com, Sean Barrett, knows this all too well. He’s once placed second in an international classical guitar competition and is VERY well-acquainted with any & all guitar necks. No dots needed!!

Like anything, it’s all a matter of practice. Just know going into it though that these differences are present and, depending on your experience, they will affect your technique and overall approach to finger positioning.

A Bob Dylan of Guitars!

Finally, let me talk a little bit about why I like having a classical guitar, regardless of what brand it is.

A classical guitar can bring extraordinary emotion and depth to musical storytelling. This is how I like to use it most of the time.

It’s like having a Bob Dylan in a box – it lends itself so expertly to weaving an interweaving a storyline that captivates and draws in any ear that happens to listen!

The sound of a classical guitar is very human… very organic-sounding. It intensifies and brings to life narrative lyric writing like no other instrument except piano.

If you’ve got a great story to tell, with intriguing characters, engrossing action and unpredictable plot, consider performing it on a classical guitar. It just might make the song more attractive to the average listener.

I’ve written many songs on classical, and I consider them among my best – I perform them consistently in my solo gigs, where I sing forth word-films and lyric-pictures to the audience, accompanied by my favorite axes… of which the Takamine is always one.

To give you some idea of its power, take a listen to a couple of my favorite classical songs below. I find them magnetically captivating.

This first one is “Romance Anónimo”. You probably have heard this and just don’t know it. Check out this video of Christina Sandsengen playing it for an “Oh, yea!” revelation:

This is another favorite of mine that I hope to learn one day (when I’m not making my own material!) is “Afro-Cuban Lullaby”. This is a great version of it by Hilary Field, a very gifted guitar player:

New Lullabies Await!

That Afro-Cuban piece is the bomb, isn’t it?! Can’t wait to learn it!!

My Takamine has inspired me over the years though to write many of my own lullabies and story songs. I’m sure you’ll find the same to be true when you have a good instrument like this on your lap. I find it enlivens the imagination, with enveloping harmonic richness that can only positively inspire your songwriting!

If you’re a performing musician who needs a smooth, calming sound for Latin, jazz, classical or even folk/pop, a classical guitar can be just the temperate ticket.

And if that gentle sound needs to be amplified, say, above other louder instruments like electric guitar, drums, bass and the like, the Takamine EC-132C Classical Guitar has been an up-front winner in classic tone for decades!

Takamine has finally discontinued the EC132C, but not really… they’ve just upgraded with a few modifications! Their most affordable comparable option now is the Takamine GC5CE. It fills the gap quite well, with some very nice improvements:

Now, the true successor to the EC that I have, according to Tom from Takamine, is the TC132SC. It priced in the middle of the three I’ll list here.

It looks, and probably sounds, a lot like mine, but it does have a Cedar top, not the Spruce top like mine.

If you’re like me and prefer the Spruce top, for a more high-end, professional tone, the Takamine TC135SC is their best option right now – an exceptional guitar with a Spruce top and Rosewood back and sides, just like the classic that I play!:

If you join me and Pimenny our cat in taking on a Takamine classical, tell us all about it in the Comments. It helps others who are weighing this guitar and ones like it as potential additions to their sound arsenal.

The EC132C & Pimenny closeup CARTOONED

Or maybe you already own one?! Tell us about that as well. After all, it’s pretty clear all we do all day is talk about music gear here, so… you’re in good company!!

Now, go… make… (classical!) sounds!!

Teaj

Teaj in the storm fields!

The Bugera Veyron BV1001T – Listen To That Volcano Rumble!!

Did you know Paul McCartney didn’t want to play bass?

When the Beatles lost their gig in Germany and were deported back to England, their bass player up to that point, Stu Sutcliffe, didn’t leave with them. He was smitten with a German girl!

But somebody needed to play bass.

John Lennon had a brand new Rickenbacker guitar, while Paul’s had just broke.

George Harrison could pull off their great guitar solos; Paul wasn’t as good.

That left only Ringo but DUH… he’s the drummer! So, voila – a bassist is born!

The Bugera Veyron BV1001T amp sits in my studio due to a similar set of circumstances, and therein lies a tale…

“I’m Fixing a Hole…”

So one day, out of the blue, the bass player in a band I was in said “Hey, for the next three months I’m unavailable. Sorry.”

Great. Don’t you just love it when sudden member departures create a huge hole in your band? It makes things so…so… calm and trouble-free.

NOT!!!!

Anyway, with gigs pretty much every weekend, we needed to fill the gaping vacuum at the bottom of our frequency spectrum. We were gonna have to hire a stranger, or somebody needed to jump in.

Since I had already played bass for years, and already had the gear to prove it, everybody just kinda looked at me. The McCartney moment had struck!

It was no biggie to me, so I said yes. Except for the challenge of learning how to sing my vocal parts while playing the bass lines (which is MUCH different than singing while playing guitar, I’ll have you know!!), I reveled in the opportunity, and ended up enjoying it so much I almost didn’t want to let the old bass player back in! LoL

One big, booming reason? The Veyron amp!

Getting In the (Lava) Flow

Whenever I play live, I take a lot of gear with me. This is mostly because I play multiple instruments and sing, so I’m taking a bunch of electronics that covers a lot of ground!

For this reason, I didn’t want a huge bass head to lug around. I was looking for strong, but ultra-portable and lightweight; with a big voice, but a small footprint.

low light bugera

The Bugera Veyron caught my eye immediately, not only because it fit those criteria of mine, but also because it’s red-orange lava-like glow shown out pretty dang awesome on the music store floor.

Playing it through a cabinet in the store, I found it lacked nothing: punch, clarity, strength, warmth, lots of controls to dial in your tone… it had all that fiery goodness!

At the same time, its Class-D amplification meant there was no heavy power supply or massive heat sink… so it’s the most light-weight bass head I’ve ever played through.

Add to that that it has a gig-ready carrying handle built right into its case and it fits into my Ampeg cabinet like a charm… I was sold!

Which is why I walked out with one. 😉

If you’re interested, this might be the best time for you too as well. Stick to the end of this article for a pretty rare deal I’ll spell out for ya…

“If It Sounds Good… “

Veyron is a lot less money!

“… it IS good!” You’ve heard the truism, and it’s no different with the Veyron T. I chose its sound over other amps made by more “renowned” companies with longer histories ‘cuz nothing else in its price range came even close to sounding as good as this hot licks geyser of tone.

Could you get better sound by spending more money?? Yes, but you’d have to spend a LOT more.

I’ve played this amp live, and in the studio, a lot, and I’ve never come away wanting for anything. Its basic sound is beefy and wide, and the controls allow you to sculpt your own particular groove color easily and quickly.

For under $500?? That’s incredible!!

To give you some idea, I made the video below for you. Nothing beats hearing the real thing, so take a moment and listen to the range of voices available in this beast!

Magma Math

Okay, so… didja like how this amp vented forth some very usable sounds, across a wide spectrum?! That’s the biggest thing I like about it – it’s so versatile.

For those of you all hot and bothered for the specs on the Veyron T though, here they are, by the numbers:

Volcano from above

Inputs:

Instrument input: ¼” TS jack,

unbalanced Impedance: 1 MΩ

FX loop return: ¼” TS jack,

unbalanced Impedance (when DI out is pre/post EQ): 20 kΩ / 9 kΩ

Aux input: ¼” TRS jack,

unbalanced Impedance: 10 kΩ

Outputs:

Phones out: ¼” TRS jack, unbalanced

Impedance: 180 Ω

Tuner out: ¼” TS jack, unbalanced

Impedance: 500 Ω

Volcano

FX loop send: ¼” TS jack, unbalanced

Impedance: 1 kΩ

Direct output: XLR jack, balanced

Impedance: 1 kΩ

Max. level mic / line: Pre EQ (-9 dBu / +12 dBu), Post EQ (-12 dBu / +9 dBu)

Loudspeaker outputs: 2 x locking connector (Speakon)

Min. load impedance: 4 Ω

Footswitch I/O: 1 x 1/4″ (FS-112B footswitch sold separately)

System:

Preamp tubes: 3 x 12AX7

Max output power: 2000 W peak

Power:

Europe/UK/Australia/China/Korea: 220-240 V ~ 50/60 Hz

USA/Canada/Japan: 100-120 V~ 50/60 Hz

Power consumption: @ 1⁄8 max power 110 W

Mains connection: Standard IEC receptacle

Physical:

Dimensions: 293 x 279 x 80 mm (11.5 x 10.9 x 3″)

Weight: 3.2 kg (7.0 lbs)

Comps for the Concert

Bugera compression button

One of my favorite features on the Veyron T is its internal optical compressor. I can’t say enough how unobtrusive yet effective it is. Probably the best internal compressor I’ve ever heard on an amp.

Many times, with amps under 500 bucks, if there is a compressor on board it’s not a very good one. They pump; they breathe; they click. In a nutshell, they’re usually way too noisy and way too obvious.

But our friends at Bugera really came up with a winning processor here. No matter where I set the compressor dial, the tone always sounds extremely smooth and elegant. No artifacts present at all, and there’s nowhere on the dial I need to avoid, like on some lesser amps that I’ve used in my time.

The higher you turn the compressor knob, the more you’re going to have to turn the master volume up. It will definitely affect the total outgoing gain. In other words, there are some pretty high compression ratios available on this baby, but no matter where you set it you can always finesse your total volume with ease using that big red-ringed knob!

When Bugera says in their marketing for this amp that the compression is “studio-grade” I believe ‘em. It does the job in a musical, transparent fashion that compliments your playing style rather than eclipsing it. That’s probably because they modeled the compressor to match a legendary pro audio compressor from the 70s – the Teletronix LA-2A!!

Ring any bells?? If you’ve been involved in professional recording at all, you know that piece of gear. It’s processing and tone to die for.

In fact, I’ve been mixing drums for a song of mine all week, and used this exact emulation on the snare, to make it stand at attention in the mix and give it that extra pro “Oomph!” that separates the newbs from the pros.

The Dynamizer – It’s Gonna BLOW!!

Another way that Bugera has brought in recording studio prowess into this amp is by integrating its “Dynamizer” technology. Basically, it’s funnelling off a second, separate parallel signal off of your main bass signal, heavily compressing it, and then adding it back to your main signal right before output.

Sound familiar? This is the famed “New York compression”, or parallel compression, that has made so many albums sound so amazing over the past decades. To this day it’s used to beef up drums and bass signal… sometimes even vocals. Heck, I’m even using it right now on one of my songs that I’m mixing – that’s how ubiquitous it is!

How cool, then, that Bugera has already implemented this processing into the power management system of the amp itself, so that you get the explosive volcano richness of its technique automatically, without having to deal with any extra channels, knobs or processing.

The detail and powerful punch that you hear in this amp is due, in large part, to this integrated, automatic signal processing.

Way to go, Bugera. Keep those advancements coming!!

Those Hot Lava TUBES!

Okay, so… if you’ve read any of my other posts on guitar amps you know that I’m a tube guy. Yes, there’s a place for solid-state amps in the world. Every once in a while even I want to use one.

But most of the time – not. LoL

One of the biggest reasons I wanted to try this amp in the store was the fact that it came loaded, stock, with three 12AX7 preamp tubes. This is what really delivers the goods.

Veyron glowing tubes!

Bringing the highest voltage gain in their class, these twin-triode vacuum tubes are also known for being low noise. The best of both worlds, in other words.

On the Veyron T, the sweepable mid-EQ is also tube-driven. This keeps any Equalization change that you make from sounding too sterile or obvious.

It maintains the warmth and smooth sonic curve of the gain stage signal throughout your entire dynamic range, all while providing exceptional headroom that never trades power for nuance.

There’s a reason why these tubes, first produced in 1947, are still being used by the thousands today for amps and studio gear. You want warm, buttery tone, that can still glisten in the high-end for slap or funk playing?? Or to duck it all down to bottom-end tones that lay a darker foundation with legato lusciousness??!

12AX7 tubes deliver those goods time and again. Just ask any electric guitarist.

But be prepared for them to wax on about it for a while… and on… and on… LoL

A Crater Full of BOOM!!

Okay, let’s just get it right out there: TWO THOUSAND WATTS!!!!

Yes, this amp can pretty much handle anything you throw at it. Now, I know that there are major players rocking it out in huge arenas that will want more than 2000 Watts. I get that.

But I am not one of those. I’ve only played venues that seat a couple thousand, and I’m very happy entertaining those folks, thank you very much.

Maybe one day I’ll need to climb a taller volcano, but for right now… there’s way more power in here than I’ve ever needed.

Volcano and sun

It says a lot that not one time have I ever heard this amp stutter, gasp or get flabby with my tone. I’ve always played it in the context of a full rhythm section, and it’s always held its own with room to spare.

Two thousand watts.

‘Nuff said. 😉

No Rock-melting Looks from the Sound Mixer!

I’ve worked with a lot of sound people in my day, and they’re all very different. But one thing that is usually the case with all of them is that they want control – control of your sound.

That’s understandable, since it’s their job to make sure that the sound hitting the audience is well-balanced, and rich with clarity and color.

A big plus of the Veyron T is that every sound person I’ve worked with really likes it. The reason? I can send them a direct signal through the XLR port on the back that still allows me, and them, to sculpt the tone in many ways.

Veyron T back panel
Veyron Control explanations
Veyron front face

I once sat down for a few hours in the studio and messed with all the direct output switches above the XLR Jack. I couldn’t believe how many shades and nuances of tone I could construct using those switches.

With most amps, you get an output jack and that’s it! No modifiers, no switches. Nada. But with this Bugera amp, I was able to give the sound man exactly what he wanted by adjusting the EQ and changing the switch settings until he said “That’s it!”

And as we all know, if the sound person’s happy, your sound will be happy. 😉

Most of the time, I run the direct output POST-EQ, because I like how I’ve dialed in the sound and the sound person does too.

But there was once when a sound guy wanted the PRE-EQ signal. I acquiesced, ‘cuz onstage I still get to hear my personalized EQ through my cabinet (an Ampeg cab!). Now that’s what I call a win-win!

By the way, here is the “normal” connection method for this amp that I’ve used for all my gigs:

Typical Veyron setup

If you’re in the BIG LEAGUES though, you’ll probably want to hear your bass on both sides of massive stages, so for that, you’ll want this configuration:

This latter setup demands TWO Veyrons instead of one, but, hey… if you need this setup… something tells me you can afford it!! 😉

The Behringer Connection

In researching for this article, I came across so many differing opinions about who makes the Bugera amps, it was making my strings spin.

So let’s set the record straight, shall we? I did what normal human beings used to do a lot more before social media set in – I called and actually talked to someone. A real live human being. Imagine that!  Lol

Leah, who works for “Music Tribe”, a pro audio collective that owns Behringer, amongst several other companies, fielded my call.

She responded professionally and answered all my questions to the nth degree and I couldn’t have received better treatment by a pro audio manufacturer.

You rock, Leah!

Not only did she verify my understanding of the Dynamizer technology that I detailed earlier, she also answered this question:

 “Is there a separate company called ‘Bugera’ that makes these amps??”

Her answer? No; there is not. In fact, there never has been. “Bugera” was the name given to a new line of amps manufactured by Behringer when they designed a new radical line years ago.

I read a couple people online saying that Bugera was a separate company once, but they only made speakers for Behringer. Then one day they merged.

According to Leah, that is incorrect. The speakers in their line are made by “Turbo Sound”, which is yet another company owned, though not created, by Behringer since 2012.

To sum it all up, Leah said that basically everything is manufactured in the same huge, quite cutting-edge factory and warehouse in China and then shipped to us here in the States and other countries abroad.

Now, I’ve been in the music business for decades. I know the bad rap Behringer has had in the past. All I can say is that this Veyron T amp has worked flawlessly for me for three or more years now, both in live and studio settings. 

It’s this type of dependability that we look for in our audio gear. Maybe that’s why Behringer continues to grow as one of the largest manufacturers of music products in the world today.

 If my Bugera Veyron head is the kind of product Behringer creates, then I’ll just put it simply…

Consider me a fan.  🙂

Cause Your Own Eruption!

We hope you’ve enjoyed our look at the Bugera Veyron T today. Since it’s a huge part of my primary bass rig, I’m sure you could sense “the love”.

If you want a big 2000 Watt volcano of sound, with lots of headroom, and the warmth of tone that 12AX7 tubes always bring to the amp equation, all for under $500… you won’t find a better option than the Bugera Veyron T.

Amazon, Musician’s Friend, and Guitar Center all offer “no-questions-asked” return policies, so for more information about this exceptional amp head and to check availability, just CLICK THIS LINK or any of the others above.

But wait! I mentioned a “rare deal” earlier for you. Here it is: for some inexplicable reason, Amazon is (as of TODAY at least) selling this unit for a HUNDRED BUCKS LESS than Musician’s Friend OR Guitar Center! That’s huge!!

I have no idea why, or if it’s a mistake they haven’t caught, or how long it’ll last, but, man… if you want to play this amp like I do, I’d be jumpin’ on Amazon pronto. You don’t often find a hundred bucks off music gear!!

Alright, so… go tear up that bottom end. In the meantime, you know where I’ll be…

Playing through my Veyron!!

Now, go… make… sounds!!

Teaj

Teaj in the storm fields!

The Rode M5 Review – Call Your Witnesses!!

Prosecutor Doug Jones at the Trial of Bobby Frank Cherry

If your life we’re on the line in an important court case, and you could only choose one kind of testimony for your defense… which of these three would you choose?:

  1. Material testimony
  2. Expert testimony
  3. Eyewitness testimony

If you chose number 3, I’ve got bad news for you – it’s the least reliable of any testimony in a court of law!

As we delve into this RØDE M5 review today, let’s set up the case by stating what we all want out of a mic:

“To be… either in the studio or live on stage… a reliable witness!!

A fellow drummer told me recently that he’d upgraded his drum overheads to the M5matched pair. It got me curious. It started my G.A.S. churning. It made me wonder…

… could they be better than what I already have??

I see you want to know the answer to that question as well, so… let’s rock this!!

The VIDEO Courtroom!

Some mics make better witnesses than others. I’ve found that the only way to prove the mettle of any piece of gear is to test it against other machinery in its field and measure the results. That’s exactly what we did this week with this well-known RØDE mic.

So, if you’re ready to let truth prevail, we’ll show you what we’re talkin’ about instead of just writing about it. Make sure you wear HEADPHONES to really be able to ascertain the differences. In at least a couple cases, they’re subtle.

Here’s the shootout!:

M5 Evidence!

Okay, now let’s look at all the pertinent facts concerning the M5 mic pair, straight from the horse’s mouth at THIS RØDE WEBSITE:

Active Electronics: JFET impedance converter with bipolar output buffer

Capsules: 0.50″, matched

Output: XLR

Polar Pattern: Cardioid

Frequency Range: 20Hz – 20kHz

Output Impedance: 200Ω

Maximum SPL: 140 dB SPL

Maximum Output Level: 13.5mV (@ 1kHz, 1% THD into 1KΩ load)

Dimensions: 100.00mmH x 20.00mmW x 20.00mmD

Weight: 80.00g

Warranty: 1 year with free extension to 10 years following registration here

Today’s Witnesses

Approaching the stand today, concerning the drum track that I laid down this week, are three different mic pairs:

  • The RØDE M5s
  • The Avantone CK-1s
  • The CAD CM217s

Each of these mics is well-known for being used as drum overheads, though they can certainly be used for other instruments as well.

We will be hearing testimony from each of these pairs to ascertain which of them proves to be the most reliable witness to my drum performances here in the studio.

Each mic pair was placed in exactly the same spot, with exactly the same settings dialed up on my interface and software.

The only differences heard are from the mic capsules themselves.

So, in order to prove which is the most trustworthy… this court is now in session!

The Prosecution

For any microphone to stand up to Pro Audio scrutiny, including the M5 and all the other mics tested in this shootout, they must answer to the following accusations:

Honore Daumier "L'argument"
Honore Daumier, “L’argument”

“This mic is not quiet!”

“This mic does not reproduce frequencies faithfully!”

“The dynamic range reflected by this mic is much too thin!”

“Versatility is sorely lacking in this mic!”

“The frequency response of this mic is not germane to the task at hand!!”


If these allegations prove true for any microphone, it could be put away for good.

But every trial calls for caution: marketing hype, online verbosity and fake reviews permeate the Web. You can’t believe everything you read.

The only place where the truth resides is in the testing studio, where fact is separated from fiction, and a microphone’s true colors can be heard.

Of course, their manufacturers love to speak on their behalf… !

The Defense

What formula are theyusing??

Every microphone company is going to send up a litany of specs in its mic’s defense, just as we saw the M5 specifications above, whenever reliability is questioned.

But after being in the music business for decades, and working for years at a pro audio retailer, I’m well aware of how companies can use different measurement protocols to skew their facts, and thus manipulate our interests.

In other words, you may think you’re comparing numbers that mean the same thing, when really they were tested with completely different calculations.

Every list of specs that you read must be taken with a grain of salt. It’s only in using a piece of gear, testing it, and listening to it against comparable pieces of machinery, that a fair judgment can be passed.

As always, if it sounds good, it is good! So let the waveforms speak for themselves.

Exhibit A

For this test, the M5 pair, as well as two other pairs, were set up in an XY configuration behind and above me as I played the drum kit.

M5 mics in XY pattern

Each capsule was 50″ from the center of the snare drum.

Both capsules were exactly 67″ high off the ground.

The capsules were positioned at an exact 90 degree angle from each other.

The XLR cables were run into my Tascam 16×08 audio interface.

Tascam 16x08

The signal was then run into my computer and recorded via Pro Tools Ultimate.

Pro Tools M5 mic shootout

As you can see on the ten drum channels, no compression or effects of any kind were used in the recording. . What you hear in the video above are bare microphone signals with no extra processing.

The stand, cables, interface, software settings and faders were kept completely the same for each pair of mics.

The one thing I DID have to adjust was the gain for the M5 AND the CM217 mics. Both of them were significantly lower in gain than the CK-1 mics.

Notice, in the picture below, how the black line, indicating gain, is raised on the M5 (the middle waveform) and the CM217 (the waveform to the right).
I did this so that all mics pairs would sound equal in volume when listening, eliminating any unfair advantage the Avantones would have because of its stronger signal reproduction.

What this reveals immediately is that the CK-1 has a much more robust gain structure internally than the other mics, providing us with more strength of signal right off the bat.

Closing Arguments

Let me state, before closing the book on this case, that I am not endorsed by any microphone company, nor do I have any axe to grind with any of the manufacturers involved in this shootout.

You read our blog here; you know us. We’re simply performing musicians, recording in the studio, who always want the best bang for our buck when we buy music gear. Just like you.

Musicians work hard – give us the BEST price!!

Every effort was made to present the mic signals fairly, with no preferential treatment for any.

I also don’t care what the price tag says. There are plenty of other articles on our site here that prove you can’t judge a piece of gear by how much it costs.

Take THIS GUITAR POST, for example!

For me at least, my inner “jury” didn’t have to deliberate for long after hearing the recordings. It was pretty clear.

But before the gavel comes down, really listen to those recordings with headphones and make your own determination. Which did you think was the most reliable witness?

If you’ve passed your judgment, I’ll pass mine… !

The Verdict!

All three mics in today’s shootout are good overhead drum mics. None of them sounded “bad”.

Each of them was excellent at handling the high SPLs that the drum kit put out.

There were subtle differences in frequency response for sure in these three mics. As usual for studio work, knowing where those peaks and dips are will allow you to choose the right mic for the right instrument.

It always comes down to the same thing, doesn’t it? Know your gear.

The RØDE M5 mics does approach the bench with some clear advantages for drum overheads: the biggest plus, over the CK-1 and the CM217, is that the M5 mics are a matched pair.

This is always preferential when recording a stereo image. I did find them to sound identical so it’s not just hype. If this is a crucial need for you, the M5s will do the job and do it well.

I mean, come on… a TEN-YEAR Warranty?!! Now that’s a company that stands behind their products!

No switches like these on the M5.

On the negative side though, the polar pattern of the M5 cannot be changed. It’s Cardioid and forever shall it stay. The CK-1 provides three patterns, by contrast.

The M5 also doesn’t have a pad switch to decrease the dB sensitivity at all. Both of the other mic pairs have this.

Finally, there’s also no high-pass filter on the M5. The CAD mic (shown at right) AND the Avantone both do have this as well. Right outta the gate then, those issues are not in the M5’s favor.

But they DO work well as overheads, and price-wise, they are not the most expensive, so you’ll save some money, especially compared to those mics of global esteem, the Neumann KM184 – the holy grail of overhead mics, some say. Those’ll put ya back $1,500, dude!!!

CM217 mics

The CAD CM217s, which I used when recording my first album, sounded familiar and capable as always. They did, however, have a bump up in the mid-range that was fairly pronounced by comparison.

That can be just the ticket for certain instruments, so I’m definitely going to remember that for future recordings. Acoustic guitar, for example, especially when it’s strummed.

Because these have the dB cut switch AND a high-pass filter switch, unlike the M5s, I would probably tend to use these mics over the RØDE option, honestly. They just give me more flexibility of processing during a session.

Oh, and probably the best part of all about these mics… they’re UNDER $100 for TWO!! Big shout out to the CAD company for helping all us musicians save a ton of CASH!!

But here’s where it gets real: I haven’t used them for drum overheads for quite a while now. Why?? Well… I simply found a pair that sound, oh… waaaaay better.

So it’s confession time; I can’t hold it in any longer…

CK-1 mics
THREE capsules!!

To me, the clear winner, by far, were the Avantone CK-1s!

When I first listened to the recordings, I was truly surprised at the big difference between the Avantones and the other mic pairs. It was not subtle!

The CK-s sounded so much more rich, full and just… alive!!! They made my kit sound amazing… and I hadn’t even put new heads on! Lol

One reason for that must be the larger capsule in the CK-1. There was so much more bottom-end and low-mids, that was obvious.

Add to that that the CK-1 comes with THREE capsules (Cardioid, Hyper-cardioid and Omni), and it’s really a no-brainer.

Exhibit B

Yea, yea, I know… I just read the verdict… what am I doing bringing in another exhibit??!

Well, I couldn’t help it… I thought of one more test to do that might give the M5 another chance to come out on top…

See, most of the time during mixing I set an pretty extreme high-pass filter on the overheads, which essentially cuts out all that low-end richness that I heard in the CK-1s, and instead let’s me EQ the cymbals just right.

So I thought, “Let’s do to all three mics what I would normally do during mixdown, and THEN see which one I think sounds best.”

The picture below shows how I used my favorite EQ plugin, FabFilter Q3, to apply a low-cut filter at 634 Hz. This is actually lower than I usually set it, but I didn’t want to go too extreme for sake of clarity.

After this, I put the overhead faders AND the close-mic faders all up, as I would in a mix, and then played them in the same order as the video above: first the CK-s, then the M5s, then the CM217s.

Here’s what I heard:

What did you think??? I thought, once again, it was no contest: the Avantones made it sound like I was more “there“, next to a real player on a real kit… even with all those lows cut. More depth; more width. More…. amazing!!

Taking back the M5s
Bagged & ready for return.

So, with that preponderance of audio evidence, I hereby pass my judgment…

… I’m taking the m5s back. Lol

To my ears, they just don’t reproduce sound as faithfully and as impressively as the CK-1s. And when it comes time to mix my drums in my songs… I want to sound AWESOME, baby. The CK-1s? They take me there!!

The Avantones are not made in a matched pair. But I don’t care. They chocolate-y loveliness coats my caramel grooves with lusciousness like no other overheads thus far and I don’t hear any discrepancies come mix time.

They’re just that good, people.

“All rise.” 😉

Court is Now Adjourned

To Kill A Mockingbird pic
Gregory Peck in “To Kill A Mockingbird”

What a case, eh?! The “To Kill A Mockingbird” court trial wasn’t such a nail-biter!! 😉

I hope you enjoyed and learned something from this review and shootout. I know I always do. These kind of tests are really the only way to cut through the bull#$%@ and find what truly lives up to the reputation of “pro audio”.

And because we often save money in the process… you better believe we’ll be doing a lot more of ’em!!

What did you think?? Did any of the three surprise you?? Any appeal you want to make on behalf of the losers?? Making any changes now to your own mic cabinet based on this case’s outcome?!

Leave us a Comment and let us know. We’re all just looking for the best sound possible, right? Your input helps. ,-)

Now all I have to do is finish my article on the six big DRUM OVERHEAD CONFIGURATIONS and we’ll really be in the know!!

But until that one hits (with a Vic Firth stick!!), go… make… sounds!!

Teaj

Teaj in the storm fields!

The DIY Musician – Why You & Captain Marvel Have A Lot In Common!!

Captain-marvel

I love space.

Anything to do with it, really.

Which is why, when any film comes out that deals with space, my gravity-bound butt will be in a seat watching it! Lol

Yesterday, my family and I saw “Captain Marvel“. Great film! Powerful superhero! Lots of Marvel backstory explanations!

Perhaps most impressive though, is that the hero discovers what needs to be done, then decides to do it… all by herself.

The DIY musician takes on the same mission every day. We might not be saving worlds or lives like Carol Danvers, but our adversaries are also strong and relentless:

  • Apathy
  • Confusion
  • Uncertainty
  • Indulgence
  • Scarcity
  • Distraction
  • Inadequacy
  • Lack

It takes superhero courage and skill to conquer those things that stand in opposition to our craft. To our success. To our legacy.

But there are many advantages to be gained. If we, like Captain Marvel, pick up the gauntlet and rise to the challenge, we will ‘save the world’ in a myriad of musical ways.

Let’s see how… !

You Try More

First off, when you’re in a certain industry, it’s very beneficial for you to become acquainted with all the instruments and tools that are made for your career field.

Especially in music, no one can possibly play or know them all. There’re thousands!!

But we can keep our ear to the ground, and our eyes open… perusing the catalogs, scanning the stage gear, reading the music blogs (not-so-subtle plug!) and always being ready to apply the latest technologies to our private disciplines.

In the new Captain Marvel film, our hero discovers a VERY powerful piece of tech, that shall have profound ramifications for ALL superheroes soon enough.

Does she run from it? Does she destroy it? No. She places it where she thinks it shall be put to best use.

When was the last time you tried some new gear? And I don’t just mean a new model something you already have; I’m talking a piece of hardware, or software, that you’ve never tried before?!

Putting yourself out on a limb with something new can be daunting, but it’s also extremely exciting!! Plus, it could usher in a whole new chapter of skill development that you never knew you’d even be interested in.

So no matter how long you’ve been doing music, always stay open to the latest developments. It’s never too late to take out a new skill, and if you’re going the DIY route, you have to wear a lot of hats.

So try ’em on. Know your options. Know what’s out there.

Chances are, you’ll look super stylish!! 😉

You Buy More

The right tool for the job.

There’s a reason why that phrase is so ubiquitous. Ever try to complete a project with materials and tools that were second-rate? Or even not have them at all??

Not only can it take four times the effort and time, it often means the project never gets finished at all.

There’s a scene in “Captain Marvel” where she “buys” some materials necessary for her to construct a communications device.

Well, at least she gets them from a store, I’ll leave it at that. Lol

Over the decades of being a professional musician, I’ve seen first-hand how the right tool can launch you to higher heights.

A dependable, well-intonated guitar.

A keyboard synth with a broad range of patches, both old and new.

Recording software, that not only makes everything sound better, but makes everything more efficient to boot.

A microphone that makes your voice sound the most amazing!

All of these things, and many more, are products that upped my game, helped me reach many musical goals, and continue to help me reach professional sounding mixes again and again.

So never hesitate to buy what you need to reach a goal.

Waynes World guitar

If money is short, buy things used on Craigslist or eBay.

Or do what I did in the 90s: go work for a music store where you can buy everything at cost. That one decision alone saved me thousands of dollars on audio gear, and is the biggest reason why I was able to put out my first album.

In the end, the DIY musician does whatever it takes to get the right tools for the job. Our reputation is carved in sound, and that sound is only as good as its weakest transducer.

So buy more! But buy well. Better to have one excellent piece of gear, than three mediocre ones. It’ll cost more, but will always be worth it.

Oh, and if you currently have no idea WHAT to buy to get your music out to the world, check out THIS HOME STUDIO POST that explains it all. It’s so easy these days, every musician should do it!

You Know More

guitar behind the curtain

No one understands your music better than you.

But it’s also true that you haven’t yet discovered all that you are capable of.

The more time and effort we invest in music, the farther back an interesting curtain is pulled…

  • Self-realization
  • Personal style
  • Preferred techniques
  • The deeper meaning you ultimately want your art to express.

In following what she feels made to be, Captain Marvel uncovers surprising things about herself. Her inner amalgam of hunches, memories and historical facts give her insight that no other human has. Just like us… she’s unique in vision, and skill.

While avoiding spoilers, I’ll simply say she knows more about her true self when the movie ends, because she was relentless about pursuing “the right thing to do” in light of what she discerned by “trusting her gut”.

Let Your True Self Out!

It’s only when we pursue our craft and our passions relentlessly that we truly know the full scope of who we are.

You Practice More

Any musician who has ever played live knows that, when you have an upcoming gig, you practice more and practice better.

Drummer Brad Giaimo

… or you’re going to suck.

I mean, come on – you’re going to be up in front of a lot of people playing your instrument, and you’re either going to do it justice…

I think we all know which is preferable. 😉

Captain Marvel doesn’t have a full understanding of her powers in this film; she doesn’t know for sure if she can defeat an enemy alone.

But she practices. A LOT. And not in a mamby-pamby way either… she goes FULL BORE in her space ‘dojo’ against other soldiers.

It’s ’cause she knows what’s at stake.

But she also has an inkling, a subtle feeling, that there is more in her than even she has ever seen.

Then, later in the film, having discovered that something important needs to be done, she sets out to do it, trusting that her training is enough for the task at hand.

The do-it-yourself musician has goals, not excuses: she takes on gigs. He puts out singles. She creates soundtracks. He scores music for hire contracts. She writes another hit!

Avis try harder ad

The Avis Rent-A-Car company became famous in the 60s for their “We Try Harder” commercials. The ad campaign was so successful, it continued all the way up to 2012!!

People respect, and are inspired by, those whose work ethic is clearly above the norm. That’s why we all gather round to watch the Olympics. We know what it took to get there.

With superhero stamina, a successful DIY musician sets out on the plan of action they’ve devised, and doesn’t stop until that mission is complete.

So keep practicing. Keep training. And play out. Record in. Send up your social media fireworks showing how hard you’re working.

And don’t stop simply… trying harder!

You Produce More

With rare exception, here’s another thing I’ve discovered about producing music by yourself: you can actually get a finished product out faster when others are not in the equation!

When I think back on all the times that I let others mix my products, one thing becomes clear: too often, in the time it took for me to explain what I wanted, I could already have done it myself.

Mixing music

Now that I am trained in tracking, mixing, and even mastering recently, I no longer have to wait for anybody. My product launch is totally in my hands. I now have everything it takes to put out song, after song, after song.

And wouldn’t you know it – that’s exactly what I’m doing!

These are exciting days for me, ‘cuz I’m finally seeing a lot of musical dreams come to fruition. The biggest reason?? I’m producing it myself, exactly the way I want it, and not being stuck in “standby” due to others holding me back.

This may be the biggest endorsement for being a DIY musician. I’m so glad I didn’t limit myself by listening to that voice that said “But there’s so many others better than you at that!”

Even Captain Marvel in her film ends up accomplishing more, in a short time, that hundreds of others have tried to accomplish over many years.

Why? Because she said, “I can do this.”

Why shouldn’t you say the same? 😉

You Master More

Everyone has a breakthrough point.

You never know when it will be, or why, but when it happens… you know it!

Captain Marvel has an obvious, thrilling breakthrough moment in her first film, where, because of the things she has mastered previously, she discovers a whole new level of precision and power.

As a DIY musician, you can definitely experience the same. As you tenaciously work towards your personal best, you WILL have moments were you realize you have achieved new levels of proficiency, and become a “master” at certain skills.

Yes!! I mastered the Locrian Scale!!!

It’s a great feeling, and one that I personally hope to repeat many times over!

It can happen for many reasons, but interestingly… they don’t always have to be happy ones.

Great example: when I had finished tracking my second album, I handed it over to a few people to mix. At that time, I had not really studied mixing, and thus had no confidence I could do it myself.

Years passed. My album still was not done. Grrrr….

Trying to get everyone’s schedules to match was one issue.

Availability was another, since I couldn’t pay full studio price.

A three-hour + driving time was another issue.

Frustrated musician breaks her guitar!

Finally I’d had enough. I was so frustrated, I could’ve smashed a guitar.

Well, okay… not really. But still… Lol

It was DIY time. I started to study books, videos and websites to get my head around how to successfully mix an album.

It took a good year and a half before I felt ready, but I dove in head-first at that point. I tested my skills on an album that eventually was released onto all the streaming music platforms. After repeated listening, I’m still very pleased and proud of the end product.

The lesson? If it’s related to your art, you should look into it. Try it. You may end up mastering, or at least being proficient in, a further skill that can really widen your horizons.

Beatles_and_George_Martin_in_studio_1966

Beatles producer George Martin once couldn’t play music?? Yup.

Remember: every legendary producer, engineer or artist at one time… had no CLUE how to do what they would end up being famous for!

But they gave it a shot, and became a master.

So don’t sell yourself short; stop reminding yourself of what you CAN’T do. Keep expanding your art and your skill set.

One of those could very well make you a household name!

You Learn More

With each new elevation in your skill, status, understanding and discernment, an interesting and surprising twist arises…

… you learn how much you still have to learn!

In this day and age of ever-expanding scientific research, we are more and more coming to grips with the infinite possibilities latent in every object, every moment, every thought.

From pre-birth gene editing, to quantum super positioning and Quantum computing, to 3D printing of human organs and tissues, accomplishments once thought outlandish are now becoming commonplace.

Quantum discoveries

Yet even in the light of these incredible advancements, we see further and greater shadows – things we have never understood because we hadn’t even considered them as possibilities!!

I’ve played guitar for over 30 years now, and no matter how much I practice, I STILL see so many areas in which I could improve, expand, or develop whole new techniques with the right amount of dedication and woodshedding.

practice that guitar!

Even after years of discipline and training, Captain Marvel found the same. The movie unpacks all the many things she hadn’t had a clue about, and what she decides to do in light of that knowledge.

It’s not always easy knowing what path to commit to, with so many opportunities around us these days.

But if we take a cue from our superhero friend, we’ll apply ourselves to the most pressing matters… that matter most, and learn whatever is necessary to complete what’s unfinished.

And every lesson learned? It’s just one more way the world is made a better place.

You Teach More

I’ve been teaching music privately for decades now.

It started innocently enough: people saw me play live and soon they were starting to ask if I taught any of the instruments. Not seeing a reason to say no, I said “Sure!”

And you know how it is with us musicians: we always need more music gear! So it was a good way to bring in some extra cash to invest back into my craft.

Over the years teaching has become more than that first impulse. Now it’s a way for me to empower youth, and to paint a realistic depiction of the music industry to those attracted to its glittering promises.

Doing it yourself in the music industry means you have a lot of knowledge to impart. You’ve “Been there, done that,” so you can help guide the uninitiated.

Hopefully, that means they can avoid some of the pitfalls you’ve falling into, as well as take your advice as to the wisest and most efficient roads to musical success.

Although you won’t see it this time, there’s a young girl named Monica Rambeau in the latest Captain Marvel film who, according to the comic books, follows in her friend’s footsteps and becomes a superhero herself.

Superhero girl

Supposedly her name will be “Photon” a.k.a “Pulsar“. We’ll see if the movie franchise ever picks up on that, but since Monica’s in a movie… there’s a good chance it’ll expand into her story too.

How much you wanna bet that her good friend Captain Marvel had a part to play in “Photon”-s transformation?!

If you’ve never thought of it before, consider teaching what you know to others. Not only is it a secondary source of income, it’s also very inspirational.

Until you’ve experienced it for yourself, trust me that it’s a great feeling to see a student of yours go from being inept at an instrument to playing out publicly in a group with great success.

Now that’s creating the future!!

Go Save Your World!

It takes a lot of determination and stick-to-it-iveness to be a DIY musician.

But just like achieving superhero status, the pluses more than make up for the difficulties.

Have you been a DIY musician? What lessons have you learned? Would you recommend it as a viable route for others? Would you teach what you’ve learned to others considering that path??

Let us know in the Comments. More than ever these days, you can accomplish SO much all by yourself that can go on to be acclaimed the world over.

Not bad for some that just have a computer, some software and a mic!

Yup. It’s a great time to be alive and singin’! 😉

Now, go… make… sounds!!

Teaj

Teaj in the storm fields!

How To Play Guitar For Beginners, Pt. 5 – The KEYS Of Your Success!

Have you ever gone to a foreign country??

If so, did you try to speak their language??

If so, then you know how exhilarating it can be to have a firm grasp on the basics and know how to communicate without fumbling over your words.

Before I moved to Germany years back, I study German on my own for three months. I was amazed when I got there, that I could say these new words in this brand new world, and people would actually understand me! Mind blown!!

Learning how to play guitar for beginners is a lot like learning a foreign language – the quicker you can get the basics down, the sooner you’ll be smiling from the rewards of effective conversation… and your audience will be smiling too!

Play it when you know how to say it!

Just picture it… people leaning in as you play… eyes wide… mouths slightly open… transfixed on what you’re communicating through your guitar and your voice…

So let’s get you to that same place musically-speaking. By knowing the basics of the Western music system, you’ll be empowered to communicate with a far more “informed” creativity. And that will translate into mesmerizingly interesting music.

… instead of being confused as to ‘what you mean’. ‘-)

Let’s set those fundamentals flying, shall we!

The Video Lesson!

Understanding music’s basic language empowers you to be a very accomplished player, and writer, if you so choose.

Just think of trying to write something in a language you barely know. That would be frustrating not only for you, but for anyone who suffers through trying to read your ideas!

So let’s make you “fluent” in music.

First off, if you have NOT already read and studied THIS POST ON DIATONIC CHORDS, go do that now.

Why?? ‘Cuz everything I’m going to talk about today is based on it. You don’t wanna miss out on any of the good stuff!!

Now that you have that proper preparation, watch the new video below that I filmed for you. I explain some cool music theory basics in a very easy-to-understand way.

Afterwards, I’ll meet ya back here to break it all down further with the written word. 😉

Open Up & Say… STRINGS!

Okay… Didja get all that? Did it make sense?

If not, let’s go through those same principles here in writing. Sometimes analyzing the same facts in a different way can really bring it all home.

Open guitar strings from middle
Low to high strings, from left to right!

The first thing we talked about is fairly simple: the open strings of the guitar.

Those six strings are designated by the notes they sound when you pluck them.

Those notes, from low to high, are:

E – A – D – G – B – E

Notice that your lowest note, and your highest note, are both “E”.

To help differentiate between them, we call them the “low E” and the “high E“.

Related term you should be familiar with is “open chords“. These are chords you play that have one or more open strings in them.

Now, it always helps to use mnemonic devices whenever you’re trying to memorize something. With that in mind, let’s read through those six different acronymic phrases that will help us remember the open strings…

This first one is not one I came up with; my guitar teacher in L.A. shared it with me and I’ve continued to pass it on ever since:

“Elvis Ate Drugs, Good Bye Elvis”

Sad but true. Let’s let Elvis’s lapse in judgment be a lesson to us all. Stay away from drugs, folks!

Next are some phrases I invented, for students of varying ages, over my years of teaching:

“Enough Artistic Discipline Guarantees Brilliant Expression!”

“Every Aardvark Digs Grubs Before Eating!”

“Extending Aragorn’s Defense, Gandalf Battles Evil!”

“Eating Avocados Delivers Great Body Energy!”

Or finally…

“End All Dumb Garage Band Excuses!”

My favorite is that last one. It cuts right to the quick of any excuse a student might have for why he or she did not practice.

Just like the old famous adage says:

“Excuse me –  how do you get to Carnegie Hall??”

“Practice.”   Lol

Diatonically Speaking…

Understanding song KEYS empowers you to be a very accomplished musician in many ways: writing; improvising; comping; modulating; arranging.

Oops!

Not understanding them, though, will leave you guessing most of the time at what’s really going on in any song.

And do you know what that does?? It increases the odds dramatically that you’ll succeed at one thing really well… making MISTAKES!

I’m going to assume that you’ve already read and studied the post I mentioned above. If not, you could get real confused quickly in the next few moments… 😉

Let’s review, in a nutshell, some of the more salient points from that post:

  • Western music consists of 12 different notes.
  • A key comprises 7 notes.
  • Playing those notes in sequence is what we call the “major scale“.
  • If we build a chord on each of the notes of the major scale, we get  seven “right” chords for each key.
  • We call them the 7 “Diatonic” chords for any given key.
  • Those seven chords are either major (happy-sounding) or minor (sad-sounding).
  • Which ones are which? Here is the breakdown:
  1. The ONE chord is MAJOR
  2. The TWO chord is minor
  3. The TWO chord is minor
  4. The ONE chord is MAJOR
  5. The ONE chord is MAJOR
  6. The TWO chord is minor
  7. The TWO chord is minor (& diminished)

Once you’ve successfully committed all those facts to memory, you can easily do what I did for you today: write a simple song using the seven diatonic chords of a certain key.

If all of this seems as comprehensible as watching the movie “Brazil” while under anesthesia, fret not (pun intended!). Just read the posts again, watch the video above again, read the posts again, watch the video above again…

You get the picture. We’re human. Humans learn by repetition. And don’t worry, … this won’t take long.

Also, most things become a lot less ambiguous when we try to do them ourselves and put knowledge to use in our own day-to-day actions.

So, as you practice guitar, just think on these things and try practicing them.

Don’t get uptight about it; just relax, have fun, and play to enjoy yourself. As you keep coming back to these theory concepts the fog will clear, and pretty soon… all that anesthesia will be just a dream.

Kind of like “Brazil” was.  Lol

By the way, if you want an excellent resource that clearly reinforces what I’ve taught here today, plus a LOT MORE, pick up my favorite guitar instructional book, called The Guitar Handbook” by Ralph Denyer.

I first got this sometime around 2002 and I have referred to it countless times.

It’s chock full of awesome pictures, diagrams, and clarifying diagrams that I’ve shared with my students literally hundreds of times.

You can see from this pic below that I have dozens and dozens of instructional books in my music library…


Ralph’s is my favorite. That’s saying a lot!

The Logical Song

Yes, I’m a Supertramp fan, but, no, this is not that!  😉

The song I wrote & sang for you in the video, called “This Is How It Sounds”, uses all seven diatonic chords in the key of C.

The key of C is the easiest key to learn, because it has NO sharps and NO flats in it.

Those chords are:

C,  Dm,  Em,  F,  G,  Am,  Bdim

If there are any of these chords that you haven’t learned yet, do so this week. Here are the grids for each chord so you can learn the fingerings:

Then, play along with me in the video until you can play that song with no issues, no hiccups, no stops or drops, from beginning to end.

At that point, guess what?! You will be a BOSS and very proficient in the key of C!! Which is a GREAT start at guitar as a simple pastime/hobby, or even further… into a very satisfying music career!

Follow the Bouncing Ball…

Here are the lyrics to the song, by the way, so you can understand what theory I’m teaching you, as WELL as sing along at the top of your lungs, telling the WORLD you are “key-of-C-literate”!!

 “This is how it sounds,     this is how it sounds

To use 1-5-4 in songwriting!

Yes, this is how it sounds,     this is how it sounds

To use 1-5-4 in songwriting!

And with the minor 2,                   and the minor 6

The minor 3 will sound even better in your mix.

Yes, with the minor 2,                       and the minor 6

We can move on        to the 7 chord

WE call di – min – ished!

So THAT is how it sounds, THAT is how it sounds,

To use all KEY chords in songwriting!

So THAT is how it sounds, THAT is how it sounds,

To use all KEY chords in songwriting!

They’re called ‘Diatonic’

Yea, those chords are ‘Diatonic’!”

No, Not Google Chrome… CHROMATIC!

Now, if you want to move past the key of C, into the other wonderful keys available to you, you’re going to have to memorize a SIMPLE map – it’s a list of all notes available to us in music. It’s called the Chromatic Scale, and you can start it on any note, anywhere on the guitar neck.

It goes like this:

A    A#/Bb    B    C    C#/Db    D    D#/Eb    E    F    F#/G    G    G#/Ab

Here’s a graphic of it if your more of a visual learner:

Memorize this, and you can name the note that’s on ANY fret of the guitar! Plus, you’ll be WELL on your way to understanding music in a more creative, productive fashion.

To make this easy to practice, just like in the video, start on your “A” string, like where the alphabet starts.

Play the open “A” string, then play up towards the guitar body, one fret at a time, while saying what note it is out loud.

The notes will follow the Chromatic Scale map, just as they would on ANY and ALL Western instruments.

Once you reach the twelfth fret (where there are ‘double dots’ on most guitars) you know you’ve gone through the whole scale, and it’s starting over.

You made it! It’s the 12th fret!!

To test yourself further, and really burn it into your memory, practice saying the Chromatic Scale out loud as you start with all the OTHER open strings, and ascend chromatically up the neck to the 12th fret.

Soon enough you’ll not have to consult notes again on this topic – trust me!! ‘-)

YOU GOT THIS!!

Okay, enough mind expansion for one day!

I know it might seem like a lot, and that your head’s gonna explode, but that’s only ‘cuz it’s probably the first time you’ve heard any of this. The bewilderment won’t last, I promise!!

Continue to take all this in, bit by bit, and you will grasp it!! It’ll be like remembering your name, or your favorite song, or that dumb thing your best friend did a while back that still makes you laugh!

Yes, in less time than it takes to say “Enough Artistic Discipline Guarantees Brilliant Expression!”, you’ll be more “key-literate” than most bands on the radio.

Frets & Keys HowPlayGtr5 CARTOONED

Come to think of it, I believe I could re-string my whole guitar in the amount of time it takes to say that. LOL

Thanks for dropping by. We’ll continue to share our take on how to play guitar for beginners in upcoming articles & videos, so stay tuned.

Until then, keep your guitar out, in your hands, and with all the frequency you can carve out of your schedule…

… go… make… sounds!!

Teaj

Teaj in the storm fields!

How To Set Up An Electric Guitar, Pt. 1 – The Archtop!

My New Johnson Archtop!!

Salutations, all you weekend warriors!!

I’m sure you’re probably all getting ready for your latest gig tonight, or that pressing recording session comin’ up.

Regardless, I thought I’d share the wealth and let you look over my shoulder as I show you how to set up an electric guitar – specifically, for this first article, how to do an archtop electric.

These are a little different from the other types for one reason: they often have a separate, totally detached “floating bridge”.

That calls for a li’l bit of extra work. But it’s always worth it!

I heartily recommend that you learn the ins and outs of your own axes, and how to do your own maintenance on them. You’ll be that much closer to understanding how to coax the very best and the most diverse tones out of them!

Well, at least you will, once you watch my video… 😉

Oh, I See… !

So I filmed this little documentary for you about how I just set up my new “Johnson hollowbody archtop electric guitar”!

I was actually very excited to put the work of perfecting intonation into this guitar. It’s gorgeous! And, being a hollowbody, it has tons of potential for adding a slightly different “spice” to my music.

It’s the first complete hollowbody I’ve ever owned, so naturally… I’m PUMPED!!

Watch my walkthrough below and gather your thoughts and questions. We’ll discuss the details below…

Gettin’ String-y

Guitar STRINGS

Before we actually get to setting up any guitar, you’ll first want to change the strings.

New strings will put a lot more pressure on the neck and bridge, so you don’t want to go through all the time and effort of setting up your guitar, only to find that, when you put new strings on, it’s all changed!

Also, new strings will be more consistent in tone AND intonation. These things will work in your favor as you set up a guitar.

For the tutorial video above, I had just acquired the Johnson hollow-body archtop guitar from a local guy who had bought it originally.

I was immediately struck by the impressive looks of the girl, but the sound was pretty bad. I could tell it had really old strings on it that desperately needed changed, so I knew much of the “BLECH” I was hearing was that.

In fact, the intonation was so bad that, I kid you not, the guitar had at least 10, maybe 15, dead notes spread out across the neck. Mostly between the 8th and 12th fret.

I knew that with skill and effort I could fix this, ‘cuz I could see that the frets were even and didn’t need replacing.

So, after I purchased it and got it home, I immediately put fresh strings on – D’angelico Electrozinc strings. They’re what I consider the perfect string for a darker jazz tone.

Guess what? No more dead notes. I could tell that the guitar still really needed a setup, but at least now I was certain that the frets were not an issue.

By the way, if you want to know more about the ElectroZinc strings, and why I used them for this particular guitar, read through THIS POST ON THE BEST ELECTRIC GUITAR STRINGS.

1) There Once was a Caveman…

Alright, now that we have some fresh vibration-makers strung across our axe, let’s move on to the first part of setting up an archtop: adjusting the truss rod.

For those that don’t know, there’s a metal rod inside the neck of most guitars, it’s there to help stabilize the neck, and thus, the intonation of the guitar, as well as for adjustment when necessary.

It’s designed so that it can be turned, clockwise or counterclockwise, which will either tighten or loosen the neck, respectively.

If you tighten the rod, neck will be bent back, bringing the strings closer to the fingerboard.

If you loosen the rod, the neck will be brought forward, creating more space between the strings and the fingerboard.

When the rod is tightened, the neck becomes takes on a convex curve. When it is loosened, it becomes more concave.

I explain all this in such detail so that you can understand how to adjust the truss rod in your guitar, without having to consult Google, like me.

But how can we remember it for when we need it??

Try this little mental picture trick: if your strings are too close to the fingerboard because of the neck, you’ll want it more conCAVE, by loosening the truss rod COUNTER- clockwise.

So, just think of a CAVEMAN, in his CAVE, COUNTING rocks to buy a new spear for woolly mammoth hunting! Need conCAVE? Go COUNTER-clockwise. Get it?!

As long as you can remember the counting caveman, you’ll know how to adjustthe truss… and you’ll know that the opposite is true: if your neck needs to be convex, you’ll turn clockwise.

But how do we know if it’s the neck that needs to be adjusted, and not the nut or the bridge?

By first starting with a simple measurement:

Place a capo on the first fret, right over the metal.

Next, push down with a finger the fret that is right at the place where the body of the guitar meets the neck.

Simultaneously, use a .010 feeler, or thickness, gauge (found easily and inexpensively HERE) to slip between the string and the metal at the 7th fret.

If the gauge fits perfectly, no neck adjustment is needed – you’re good!

If there’s extra space, you’ll need to tighten the neck (i.e. make it more convex).

If the gauge raises the string when you slip it in, then you’ll need to loosen the neck (i.e. make it more concave).

When you adjust the neck, do it in very small increments. Think 8th of a turn.

A final caveat: if you hear any creaking, cracking, or even squeaking as you turn the rod, let a professional look at it. You DON’T want to break the truss rod!! It’ll basically mean that you’ll have to replace the whole neck, and that’s no fun at all.

2) Height, Ho!

The next step in our setup is adjusting the bridge height.

For this you’ll want to pick up a tool called a “string action gauge”. It’s cheap, it’s crucial, and it also sets you up well for a lot of other guitar-related maintenance tasks.

So do yourself a favor, just GO GET ONE HERE now.

With gauge in hand, you”re ready to rock: place the corner that’s labeled “1/64 inch” down onto the fretboard, next to the low E string, right where the body of the guitar joins the neck.

The typical measurement here for an archtop is 5/64s of an inch.

These measurements are very minute, so don’t be surprised if you need a flashlight or glasses to see where you’re at!

Next, jump over to the high E string. The typical measurement for that is 3/64s.

If either of these measurements are off ( i.e. too high or too low), you need to raise or lower your bridge to compensate.

Tune-o-matic bridges are very common on archtop guitars. As seen below, they have thumb screws on either side, which you would turn to adjust the height of either side, or both.

Typically, turning the thumb screw counterclockwise will raise that particular side. Clockwise will lower it.

You may have a different kind of bridge, however, that may be the opposite, so if you’re not sure, turn a screw a couple times and watch – it’ll be obvious which way it’s moving.

Once the action feels good to you, move on to the third step… where we all go a bit nutty… !

3) What a Nut Job

If you’re a beginner to intermediate player, you spend a lot of time around the nut. Gotta love those open chords!

This is why it’s crucial we get this area fixed up well. To do so, we’ll need our thickness gauges once again.

This time, choose the .018 thickness gauge.

Slip it between the metal fret and the low E string. If the nut it is perfect, then it will slip in without pushing the string UP, but also with no EXTRA space either.

If you press down on the string and you can feel it moving down and hitting the gauge, then you’ll need to file that string’s nut slot down a little.

If you want to always be tooled up and ready for any guitar nut maintenance, buy what I use: THIS COMPLETE SET OF NUT SLOTTING FILES.

Now, if you’re pushing the string up when you insert the gauge, that’s a bigger issue: it could mean that the slot is too deep.

Consider this though, before you get all replacement-crazy: if the measurement is off but you DON’T have any buzzing notes, AND it feels totally comfortable to you… then just leave it alone! No need to create a problem where there isn’t one.

But if that measurement is off and you ARE getting buzzing notes, or dead notes still, you have three options then:

1) Put a shim under the nut to raise it.

2) Fill the nut slot and refile.

3) Buy a whole new nut.

I much prefer the second option, because it’s cheap, easy, and works great in most cases.

Here’s a video that will walk you through exactly what to do:

There. Now when someone asks, ” What does a guitar and baking soda have in common??”… you’ll be able to answer with a knowing grin. 😉

When you do any filing of the nut, remember to file in the direction of appropriate string post that the string goes to.

Also, if the strings slant down from the nut to the posts, make sure you are filing with that downward slant also.

Your work here is about creating the easiest path possible for the string to follow, without catching, and without sharp turns.

Like when you’re trying to explain chords to your bass player. LOL

3) When an Island is a Bridge…

This section of the post shows you why this article is specific to archtop guitars: many times we will have to deal with the floating, removable bridge.

This isn’t always the case: old Gibsons, for example, often have bridge post holes hat are drilled into the top resonating wood and are unchangeable because of that.

But all too often, we’ll be dealing with a little tonal island that will need to be placed strategically if we want to be at ALL in tune.

Your first clue in deciphering where your bridge should be placed from knowing the scale length of your guitar. You can find this out easily by Googling the name of your guitar and “scale length”.

The Johnson guitar you saw in my video is listed by the manufacturer as being a 25.5 scale length guitar.

Knowing that, I measured that length perfectly and placed both sides of the bridge right there.

After that, it’s time to check the intonation. Here’s how:

* Tune your Low E string perfectly. Use a precise tuner, not a cheap-y model!

* Now play the 12th fret of your low E string. Is it in tune? Then your intonation will be good.

* If the twelfth fret note is flat, you’ll need to slide the bridge closer to the neck. Do this in small increments, And re-check the tuning until open and the 12th fret are both in tune.

* If the twelfth fret note is sharp, then the bridge needs to slide further away from the neck. Again, do this a little at a time, always re-checking, until both notes match are well-intoned.

* Repeat this process for the high E string as well. Since you’ve already perfected the low E string, make sure you’re only moving the high E side of the bridge. Otherwise, all the work you just did will be for naught!

Don’t be afraid to, as I did on this Johnson guitar, place your bridge at an angle too, instead of completely level with the pickups. For me, that was the only position that fixed all notes on both strings.

Feel free to also turn your bridge around if that helps you attain stable intonation.

For example, the saddle screws on my bridge, according to factory specs, face away from the neck. That worked for me, but if it hadn’t, I could have turned it around so that the screws faced the neck, and tried again.

It comes down to whatever works, my friends. If you are guitar reaches professional intonation, then it doesn’t matter how you got there.

As the old adage goes, “If it sounds good, it IS good!”

4) Saddle up, Boys!!

Okay, we made it to the last step: setting good intonation on the other four strings!

We’ve already perfected the low and high E strings, but we haven’t touched the A, D, G or B strings yet.

These we will set by adjusting the individual saddle screws for each string.

Use the same method as before: tune the open string perfectly, then push down the 12th fret and see if it’s in tune.

If it’s flat, the saddle needs to move closer to the neck.

If it’s sharp, the opposite.

Use a small screwdriver to turn the screws, and make sure you know which way to turn in order to go a certain direction.

If you can’t get the other four to reach perfect intonation, this would again be the perfect time to try turning the bridge around, or putting it at a slant to fix the issues.

There’s a reason why guitar luthiers and instrument repair people charge upwards of hundreds of dollars for a complete setup – this is sometimes NOT a quick process!

If you really want your guitar to sound like a million bucks, you must invest the time necessary to ensure that it is as true to perfect intonation as possible.

For the Johnson archtop you saw in the video, I spent over three hours perfecting it.

The good news is, however, once you figure out where it’s perfect, it’ll probably always be perfect with those measurements.

Unless, of course, it gets thrown around, left in your car, has to endure extreme humidity changes, or sits too close to a hot sunny window.

So, uh… don’t let those things happen, ya know? 😉

OWN it!

Owning a fine musical instrument is a privilege and a joy. Investing time, money and effort into its well-being will pay off in rich musical dividends… for years, if not decades to come.

I mean, let’s face it… if you sound your best, your fans will love you the more for it, and you’ll be one step closer to the respect, recognition and fame that someone who works their gift hard truly deserves.

And now, knowing how to set up an electric guitar yourself? Priceless! Tho’, truth be told, the price you save on yearly maintenance charges will be astronomical, I’m tellin’ ya!!

Now put the rulers and tools down like I’ve now done…

… plug in that cable and that amp…

… turn on those sweet, stereo effects…

… and let’s go… make… sounds!!

Teaj

Teaj in the storm fields!

The 7 Best Electric Guitars Under $200 for 2020!

Ever teach music??

I have for over three decades now, and every once in a while the inevitable gear questions come up from a pupil.

Like this week’s… :

“Hey, Teaj, I’m going to buy my first electric guitar. Which one should I get??”

And he thought he was going to get a simple answer. HA!! Lol

To help facilitate an informed, confident purchasing decision for my student, and for you, I’m showcasing here the 7 best electric guitars under $200 that I could find.

I spent lots of time researching on the Net, and some hours at Guitar Center playing most of them, and all through amps.

Not every guitar from every manufacturer is perfect, but rest assured that our research has proven these options to be your best bet in 2020.

Let’s plug ’em in and turn ’em on!!

Epiphone Les Paul Special-II

Epiphone has a long, rich history, dating all the way back to 1873!

Today, they continue to make instruments for all echelons of players, from all economic backgrounds.

I’m listing this particular guitar first because I saw more positive reviews for it, at many stores, than any other listed here.

It was even sold out at Guitar Center, so I couldn’t play one! That alone showed me how desirable it is.

You can get it in three colors:

  • Black
  • Heritage Cherry Sunburst
  • Vintage Sunburst

The engineering of this guitar is quite basic; there’s not a lot of parts to it. To see the complete list of specs click to THIS EPIPHONE WEBSITE.

Having few gizmos tends to be good for a beginner – it means there’s less to break. Lol

You’ll get three different sounds from this guitar by utilizing the three-way switch that is between the volume and tone knobs.

An amp or a processor that you can plug through a sound system is necessary for electric guitars, and this one is no exception. If you simply pick it up and strum the strings, there won’t be much sound.

Plug it into something though, and WATCH OUT! It’s a barn burner!!

Pretty much can’t go wrong with this one, with their ONE YEAR warranty, but check this out… as of TODAY, Musician’s Friend has it on sale!! Get it while it’s reduced, before it goes back up to the usual price Amazon shows!!

Yamaha Pacifica PAC012DLX

Besides being the world’s largest piano manufacturing company, Yamaha also makes a lot of guitars.

Yamaha PAC012DLX guitar

They have a reputation in the Pro Audio industry for making stable, decent long-lasting products.

In the guitar niche, you don’t see many professionals play them. But I’ve seen beginner to intermediate students play Yamaha instruments all my life… and I’m sure that’s not going to stop anytime soon!

Even the three Representatives I spoke with at Guitar Center all spoke highly of this Pacifica series for those starting out.

THIS YAMAHA PAGE will fill you in on all the features of this series, tho’ this particular guitar has a few extra special bits, since it’s the “deluxe” model.

You can tell that the company stands behind their products well through their warranties: a Limited 1-Year Warranty for Parts & Labor, and a Limited Lifetime Warranty for the Guitar Neck & Body!

On top of their reputation though, I thought it played and sounded the best, of the ones that were in stock that I could plug in and test out.

But then, I’ve always been a sucker for a Stratocaster. 😉

Another great benefit to buying this guitar (as well as the Sterling, which I’ll talk about next!) is that you get FIVE usable sounds out of it. The 5-way toggle switch engages different combinations of pickups which creates five unique voices.

And finally, as the cherry on top, you ALSO get a whammy bar. Crucial for anyone wanting to play those Hard Rock or Metal solos that get our blood moving and heads bangin’.

So whadda ya waiting for… ?? Get jammin’!

Sterling “Silhouette” Guitar!

Okay, right off the bat I have to give Sterling credit for building a guitar that has a fresh, innovative look that’s not the same ol’, same ol’.

In fact, of all the guitars listed here, this is the only one that I actually want to purchase. From the distinct, offbeat headstock, down to its wavy silhouette body, it just looks so cool!!

Of course, guitars are mostly about how they sound, and based on the reviews all over the Web, it’s clear that this has great tone also. Go WATCH THIS VIDEO to hear just how good this bad boy sounds!

It’s highly versatile, which is a plus for beginners OR stage veterans. Just like the Yamaha guitar, you can cycle through the three pickups with the 5-way toggle switch to find just the right voice for your music.

Also like the Yamaha, it comes with a whammy bar so you can dive bomb high notes with the best of ’em!

Here’s a unique Plus: this S.U.B. can handle any depth, as it’s the only one to feature a 5-bolt neck joint. Up ’til now, I’ve only seen three and four bolt necks.

What does that mean?? Easy – more rock solid stability, and better intonation and tuning.

Way cool, right?! ‘Cuz after all, if you’re going to play an instrument…

… it might as well be in tune. Lol

For a full look at the scope of coolness this guitar fills up, take a look at THIS SPECS PAGE on Sterling’s website.

Their warranty on the “Silhouette” is above average too: if you register your instrument within the initial 12 month warranty period, you get an additional 3 months of warranty coverage. That’s 15 months of factory warranty protection from the initial purchase date!

As of this writing, Guitar Center AND Musician’s Friend both have this priced lower than $200, unlike Amazon which has it $23 higher. They both have it listed “on sale” though, so better act fast if you want this great mark-down.

Even at Amazon’s price of $220 though, I STILL think that’s a killer deal for all this guitar offers.

So get this “break the mold” guitar for yourself, or your son or daughter, and start being the trend rather than following one!!

Fender Squier “Affinity” Stratocaster

You probably won’t find a more trusted name in beginner electric guitars than Fender.

Not only have they been at this a long time (since 1950), they also have long had many guitar models to choose from. Their variety, and their quality, are second to none.

But as you’d expect, a guitar this cheap won’t have their very best options in it. You will, however, get a solidly-built instrument, with basic features, that will stand up over time and use. Check out all its specs on THIS FENDER PAGE.

Not to mention that the Stratocaster guitar is one of the most iconic guitars in history!

Again,… hard to go wrong here. Especially since they back it up with the most impressive support on this list – a TWO YEAR Limited Warranty!

Any beginner should be ecstatic to get their first Strat. I still remember mine with loads of fondness, and would still have it… if it hadn’t been stolen after a gig (read that story HERE)!!

Fender has really produced a winner here: solid construction, expected features, sonic look and low price.

Could the pickup sound better? Sure. It’s not their best sounding pick up by a long shot. It tends to sound more treble-y than the warmer pickups on more expensive models.

But if you wanna record with this guitar, that can actually work in your favor. I’m always cutting the lows from electrics in a mix. The Squier does that for us!

To hear how this Affinity series axe compares to a Strat that costs over a thousand dollars, watch THIS GREAT MARTY MUSIC VIDEO.

How about playability? Well, you might get a little buzz on the low string from the factory. That happens with cheaper guitars. But that is almost always fixable by just paying a music shop 30 bucks or so to give the guitar a good set up.

A “set up” is just a process by which a guitar is optimized for playing.

You can even do it yourself, if you have a couple hours to spare and the right measuring tools.

I always paid others to do my guitar setups, until two years ago when I learned to do it myself by studying on YouTube. If I can do it, so can you!!

Your Squier may come perfectly set up and ready to go though. You just never know.

Regardless, if you choose to strap on this Strat, you’ll be getting a ton of crunch for your buck. Rest assured, it’ll be money well spent.

As of this post, Amazon is the only one with a price break – they are offering it $2 cheaper! Not much, but if you’re a Prime member and pay no tax and no shipping… that can add up to substantial savings!

Put one in your cart today and we’ll both be card-carrying Strat shredders!!

Ibanez GRX70QA

For those about to rock… we salute you! LOL

Ibanez guitars have a good reputation in the rock music world. If you, or your prospective student or child, is into the heavier side of rockin’, they’ll be happy you bought ’em an Ibanez.

I mean, just look at that quilted top. Beautiful, isn’t it?!

Many well-known rock artists play this brand, all while struttin’ their fast, gunfire licks to adoring audiences.

Get a full rundown of its capabilities and features by reading THIS IBANEZ PAGE.

As is “par for the course” in this price range, the pickups are not the quietest, and your guitar may arrive needing a setup to get rid of buzzes or strings being too high.

Small price to pay though, for having a guitar that has five tones, a whammy bar, and true Rock swagger.

Want an example of how it sounds??? Say no more… give THIS VIDEO a listen… but put on your shred belts!! Lol

One last thing: this particular guitar will sound best when plugged into and amp that has some beef to it. And amp with “cojones”, as my guitarist friend Chuck likes to say. All electrics need this, but this guitar is really meant to ROCK, so make sure you’ve got some power behind it so it can shine.

Add that to the equation, and your little Rocker will be a star in no time…

… Even if it’s only in your living room. Lol

The warranty on all Ibanez guitars, no matter the price, is a
 Limited 1-Year Warranty.

The price is identical everywhere online, but, as always, if you order through Amazon today there’s typically no tax, and no shipping
if you’re a Prime member. Gotta grab deals where you can find ’em!!

Squier Affinity Telecaster

Next up is another Fender classic instrument. This time, though, we’re catering to a different crowd.

The Telecaster has been the go-to guitar in Country music for decades. If you counted the number of Telecasters in Nashville, well…

… let’s just say you’d be there a while!

That’s not to say that the Telecaster doesn’t show up in Rock or pop from time to time (Bruce Springsteen, anyone?!). Just not often.

So if you, or your child, wants to pick and grin while playing Bluegrass, or Country, or simply want to add a little crispy “twang” to whatever music you’re creating, give the Tele a try.

For an in-depth look into the world of Telecasters, let your fingers do the walkin’ over to THIS POST I did a few months ago on this acclaimed axe.

Another advantage of this particular guitar is that it comes in different colors. When you follow the link below, see the other options that are open to you.

A Telecaster always has three different sounds, called up by the 3-way toggle switch that chooses or blends the two pickups.

And that’s pretty much it. The Telecaster has always been a “no-frills” guitar. It has few distinct sounds, but they’re perfect for certain musical approaches.

As stated before, since Fender makes it, you can trust it’s going to be a good instrument. They’ve got too good reputation to mess it up.

This guitar tends to be paired with an amp that’s very clean. You usually hear it with very little distortion, unlike the guitar as mentioned above.

Here’s a little video of some Telecaster classics, just to give you an idea of its approach and how it’s been used in the past:

As mentioned in the Strat section, you also get the standard excellent Fender support with the Fender/Squier 2-Year Limited warranty. Now that’s putting your money where your mouth is.

If this Telecaster bite has bitten you, check it out further at these links, and go get your twang on!!

Epiphone SG-Special

Our seventh and last option comes once again from Epiphone.

Not surprising, since, for decades they’ve shown great marketing skill, and a real business acumen for knowing how to get good instruments into the hands of new players… cheaply.

The SG body style was made famous by Gibson decades ago. It first arrived on the scene back in 1961.

But like a fine wine, the SG-style guitar has only gotten better with age. Want proof? To this day, it’s still the best-selling guitar Gibson’s ever made!!

If you want to know all the facts, Jack on this baby, go to THIS EPIPHONE PAGE and read all about it.

If this guitar looks familiar, it’s because bands and artists like AC/DC, Black Sabbath, Frank Zappa and even the Beatles have burned its look into your memory. Not a bad legacy for a curvy piece of wood and electronics!

One feature of the SG special that was immediately noticeable was how light it is. I don’t think I’ve ever played a guitar that weighed so little. If your budding musician is on the smaller side of stature, this lightweight guitar could be just the ticket for him or her.

On a personal note, I personally have never liked guitars that have the cable jack on the face of the guitar. SG guitars always have, and that’s one reason I’ve never bought them.

When I’m onstage running around, I think it looks kind of silly to see your cable flopping around in front of everybody. All the other guitars on this list put the cable jack on the SIDE of the guitar.

That’s where I prefer it. It looks more discreet that way, and makes it easier to feed the cable through your guitar strap, which is what the pros do to keep the cable from accidentally coming out.

But aside from my own pet peeve, the sound of an SG is well-known & beloved for Rock ‘n’ Roll, so if that’s what you’re after, you’ll be in good company holding one of these beastly beauties.

Plus, you get something EXTRA on this instrument that’s not in any of the others: a kill switch!

For you non-players, a “kill switch” is a button, switch or pot that, when engaged, immediately mutes the sound of the pickups. Flicking this on and off quickly creates a “stutter”-like effect, similiar to what you hear at the end of Eddie’s solo on the “You Really Got Me Now” tune.

You’ll be covered by Epiphone’s famous Lifetime Limited Warranty on this instrument too, so if there’s any issues… you’ll get ’em remedied easily.

So hop on over to Guitar Center below, where this continues to be one of their top sellers, year after year, or Amazon with it’s VE version, in different colors.

Either way, start making iconic, memorable licks and melodies in your own music, to go along with its legendary profile!!

Setting Yourself Up for Success!

Trust hands that make guitars!
Trust hands that make guitars! (Photo: ElenaGuiadeAlmeria)

So I hope you now feel empowered and informed, knowing what the best electric guitars under 200 bucks are.

Let me just say that when you get one of these economical treasures , I highly suggest that you:

  • Get them set up by someone who knows what they’re doing, and
  • Put new strings on them.

Even more expensive guitars are often shipped with cheap strings. It’s amazing how much better a guitar can sound when you put good, quality strings on.

As for the setup, you can study and learn how to do it like I did, but just make sure you do it right.

  • Take your time
  • Order the right tools from Amazon, or from StewMac (where I get mine)
  • Only proceed to the next step if you really understand what you’re doing.

The last thing you want is to damage your brand new guitar!

I trust this has helped you as much as it has myself and my student. It’s always great to be able to know and understand what the best options are… And we love bringing you that information here at Seriousgas.com.

So which one are you ordering??? Let us know in the Comments… and let us know how it turns out when you finally receive it.

We always love a good gear story!!

Now go… make… sounds!!

Teaj

Teaj in the storm fields!