What is the Thalia Capo? – Making You Look Good & Play Better!

When I was first learning guitar in my teenage years, I had two heroes:
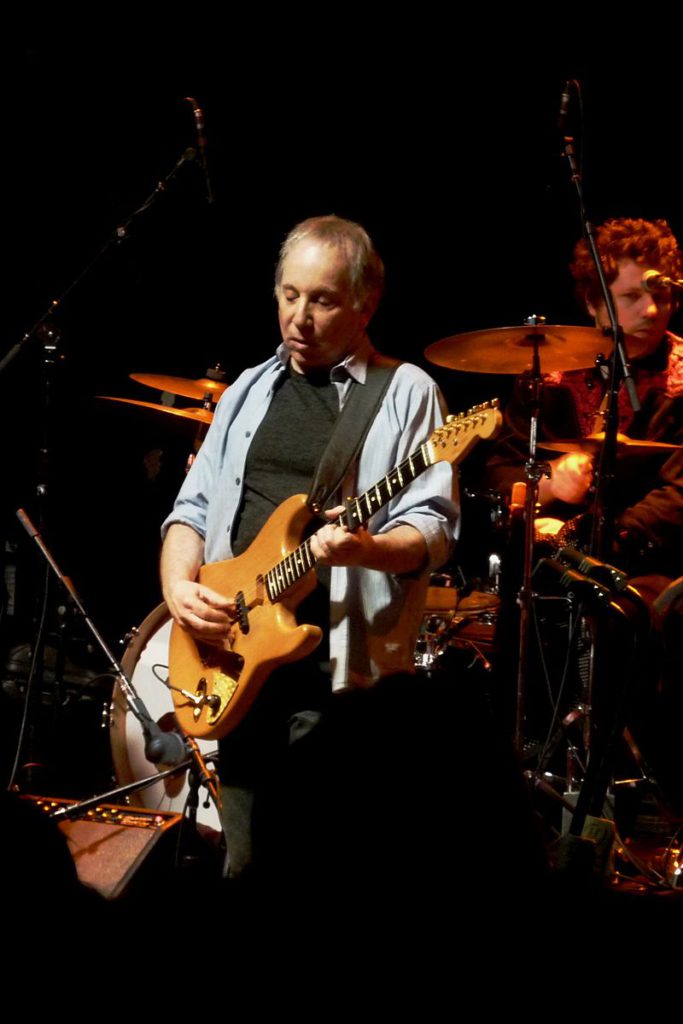
  • Paul Simon
Paul Simon uses a capo
Paul Simon live. Notice the capo on the 7th fret. (Photo: Matthew Straubmuller)

  • Eddie Van Halen
EVH

Teaj's Capos

Both of these men have created seemingly unending genius work, captured as recordings for us to listen to, enjoy, and, often, be in awe of. And both of these men have taught me years & years of musical knowledge.

Through Paul Simon I learned finger-picking, lyric-writing, melody construction, harmony producing, story development, song forms, and…

… how to use a capo.

So it’s no surprise that today I’m filling you in on the Thalia capo, since decades later, here I am – still using all KINDS of capos with creativity and regularity.

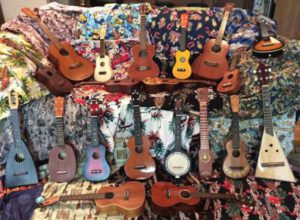
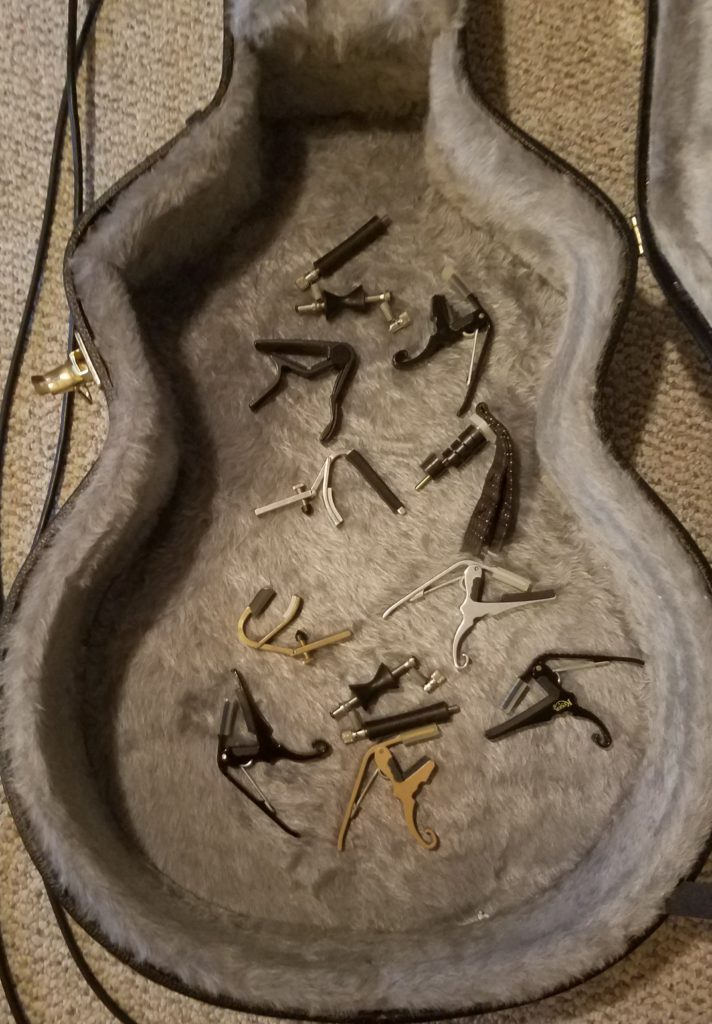
The photo to the right shows you all the capos I’ve had for the past few decades, minus the ones I’ve given away to students (THAT happens a lot!). Quite a few, right?!

click map

Sam Ash

What the Heck IS it?

Okay, so… I know not everybody is familiar with capos, so lemme take just a few seconds to help those just now seeing the bandwagon, let alone jumping on it…

A capo is clamped onto any fret of any guitar that you like, enabling you to play the same fingerings in different keys. It’s often used to help a singer who can’t quite hit the high notes, or a singer who feels like a song is too low for them to sing. Clamp on the capo, and they’re singing higher or lower, depending on where you clamp it.

The capo is also awesome for songwriting. It provides ample opportunities to buck the trends of normalcy and really go into creative musical places that most other players never even consider. They change up your melodies, expand your song keys, enable you to sing in different (and often better-sounding!) registers, and even throw such a wrench into normal fingerings, if you use partial capos, that you’re bound to create something new and fresh when using them.

For all those reasons and more, I have used those capos often. At least half my songs on acoustic guitar use a capo. Sometimes even more than one capo.

Yes, I’m that nuts.

Anyway, for those who appreciate how a capo can unleash the creative dragons within, it’s always an excitement when a new capo rises to the top of the guitar necks. Recently, the Thalia capo indeed has, and it’s even improved my songwriting and live playing options…

And that’s why you’re here! So let’s clamp down and get pickin’ & grinnin’… !

The Unboxing!!

Here’s a quick vid’ of all that I got for GOING FOR IT with regards to the cool Thalia capo. It was even better than I expected….

And Therein Hangs A Tale – ia, ia, ia…

The Thalia capo! These capos are pretty new on the music scene. They first started appearing in the music market just a few years ago in 2014.

Did you know that without Taylor Swift, there would be no Thalia capos??!

Taylor Swift in 2006
Taylor Swift in 2006. Notice the, uh… NOT ornate capo! (Photo: Dwight McCann www.DwightMcCann.com

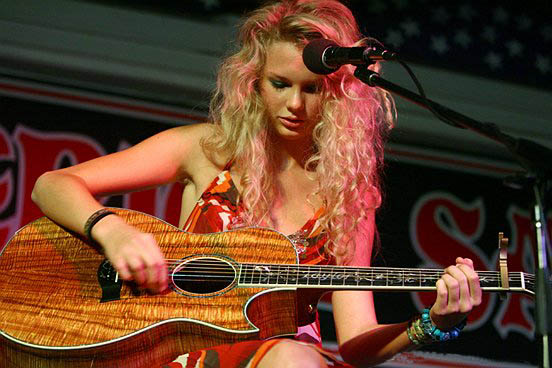
True story: Thalia Bradley was just 8 years old when she was staring at her wall poster of Taylor with a beautiful guitar and she decided that Taylor needed a prettier capo to go along with her guitar, instead of the plain, plastic one shown in the poster which she thought “…wasn’t really cool.” Her words, not mine!

She told her dad Chris, an inventor and guitar player, about her idea, and they both set out to provide a solution to her dream.

Thalia logo

Fast forward four years later: the dream became a reality when, after about 70 prototypes and a very successful Kickstarter campaign, they launched the Thalia Capo company and line of products. If you’d like to see a video by the company about their history and more details of their story, WATCH IT HERE.

One thing is for sure – their capos took the acoustic guitar world by storm! People loved ’em. Including me! The reasons why are numerous, but today we’ll look at the biggest reasons why Thalia is now THE go-to choice for those serious about using a capo!

Gotta Love Those Little Extras…

Thalia open ox
Fresh outta the oven!

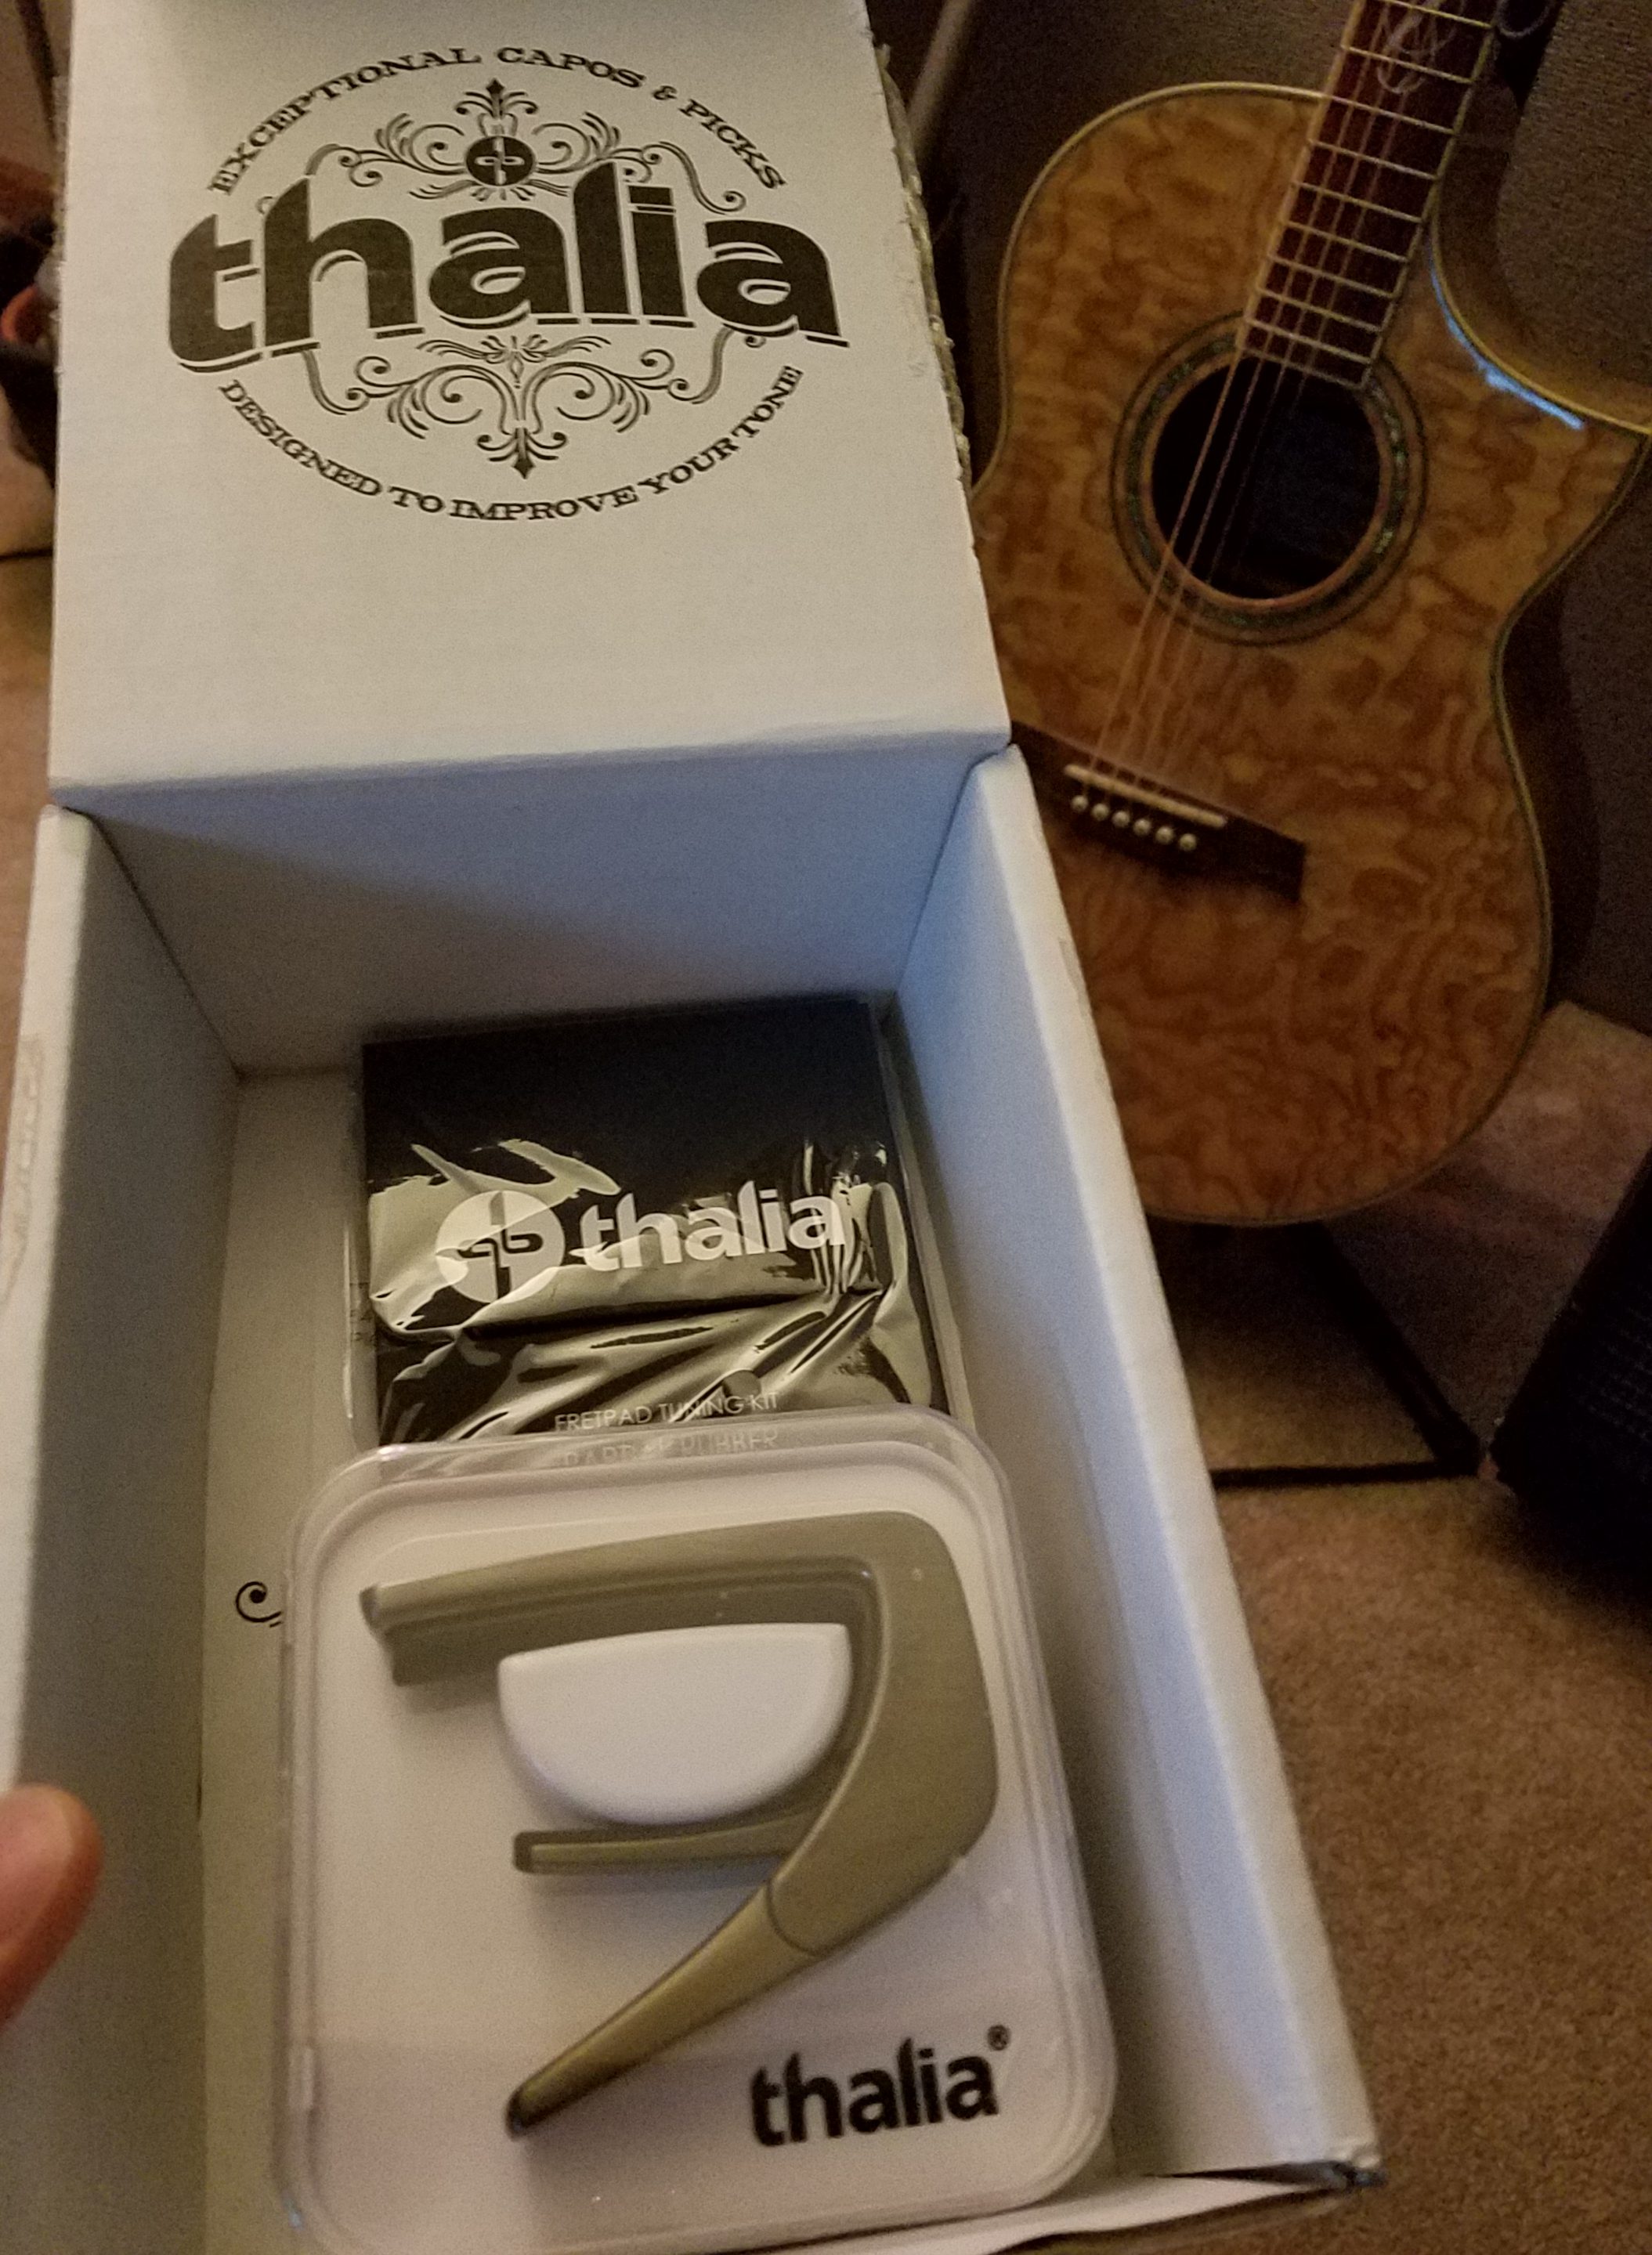
When you order a Thalia capo, you don’t just get a capo. There’s lots more in store, and a lot more options should you in the future like the product. Here’s what comes in each capo order:

  • A Thalia Capo of your choosing
  • A microfiber cleaning/gig pouch
  • The Thalia “Standard Tension” & “High Tension” Rubber Fretpad Tuning kits
  • A Capo jewel case
  • A quick-start guide
  • A Santos rosewood pick
  • A Thalia sticker

The gig bag is great for keeping the capo in, since you never want it rubbing against anything. When something looks this amazing, you really don’t want to mar it in any way, so, yea… the gig bag is a definite “Yea, baby!”

I keep the rosewood pick for special occasions, when I need a really different transient sound for my playing. Any wooden pick is gonna get really beat up with chinks and dents the way I play, so I only pull it out if I want something different.

Or if we’re shooting another video to look cool. lol

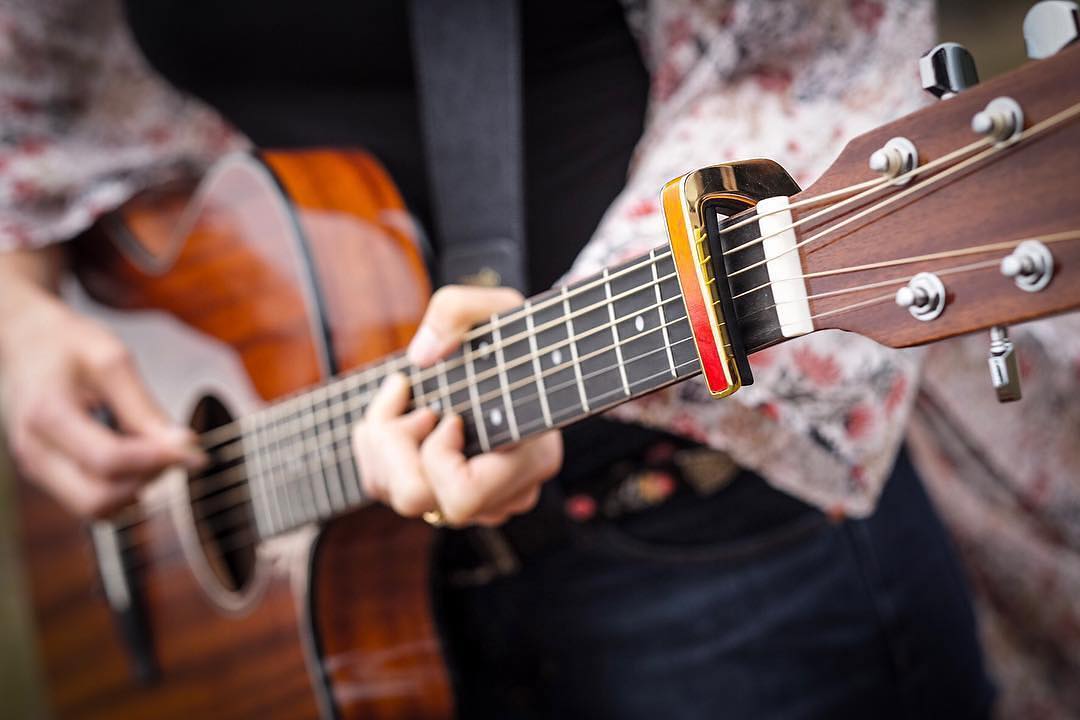
Clench, Clench, Like Judi Dench!!

I just saw yesterday that Judi Dench is making a full documentary on how she’s a tree-hugger; all her life she’s absolutely loved trees.

Thalia capo clenching

Well, Thalia capos hug trees too! Or… at least parts of them – the parts that have been shaped into a guitar neck!!

But what sets Thalia apart from other tree-huggers is the WAY they clench the neck. It sounds counter-intuitive, but to put on a Thalia capo, or to take it off, you actually squeeze in from the top and bottom, like you’re doing a barre chord. When you clench, the internal mechanics release pressure on the neck and allow you to slide it on or off.

The opposite is true when you want it to grab on – you release tension on the outside, and its inside grabs tight.

Weird, right? But it works!

Now I know why he had to go through 70 prototypes to get one that works great… lol

The Thalia Tune-up!

CAPO SHARP!!
CAPO SHARP!!

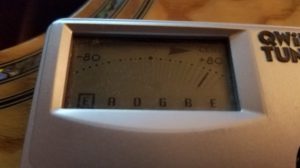
As someone who has used the capo literally thousands of times for recording sessions, writing sessions and live concert performances, I can tell you, with no small amount of chagrin, that most capos put your strings out of tune when you put them on.

This is why, when using a capo in concert, I would always put on the capo, THEN tune my guitar. If I tuned the open strings on my guitar correctly, THEN put on the capo… my audience and I would always hear what I can only call “grimace tones” and I’d have to tune on the fly, which always sucks. Being “capo sharp” was just something you had to live with.

Until now! Thalia set out to solve this problem. They had to first, of coure, figure out what the real problem WAS. Chris researched and experimented with capo types until he discovered that capos put us out of tune because most capos only have ONE ARCH shape that does not change. That one shape is then applied to many guitars which all have DIFFERENT arch shapes (called the neck “radius”) that don’t really fit the shape of the capo!

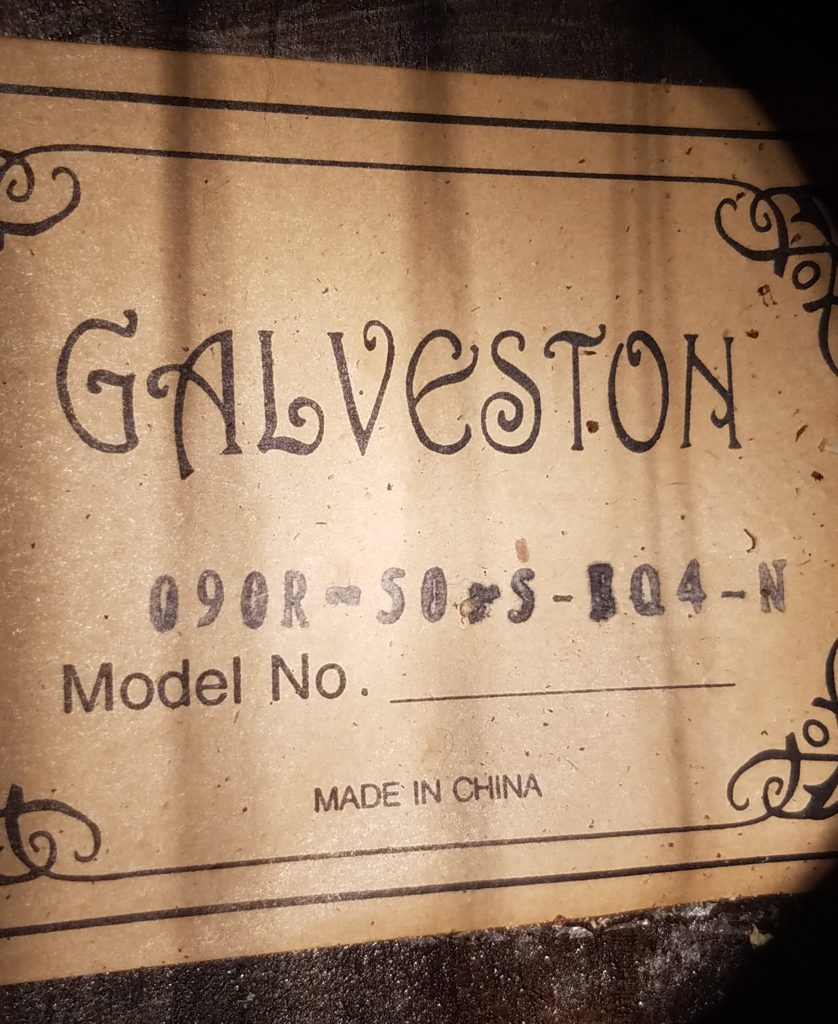
Today, Thalia capos amazingly dismiss this off-putting tuning issue by including, with every capo they make, an assortment of different “tuning pads”. You choose which tuning pad to place into your Thalia capo by consulting their included brand list. The list tells you which pad to put in based on what brand of guitar you have.

fretboard Radius

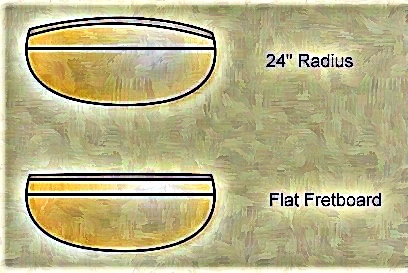
Each guitar is made with a specific fretboard “radius”, which is the amount of convex curve the fretboard has. Chris discovered that when you apply a capo with a radius that matches the guitar you’re putting it on, tuning issues never appear.

YESSSSSS!! Finally, someone has banished the dreaded dissonant beast from our midst. For the first time, no matter what fret I put this capo on, I’m still in tune.

That, my friends, has never happened ’til now. Thanks, Chris and Thalia!!


Don’t Fret – There’re Pads Galore!

So what about those “TUNING PADS”?? As mentioned above, every Thalia capo package comes with a slew of pad options, which allows those of us with multiple guitars to have the right radius represented and ready at the drop of a drum fill.

Thalia Capo with Interchangeable Fretpads

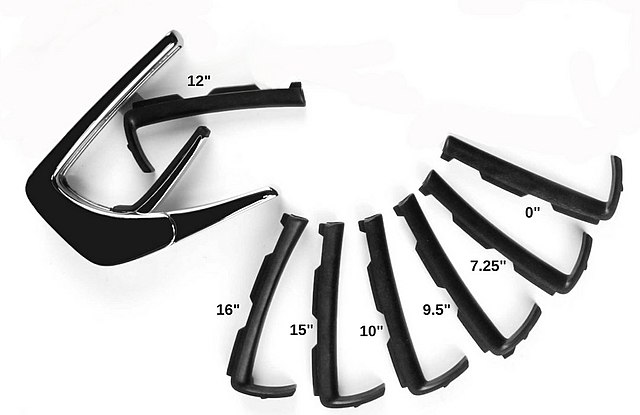
TWO packets of fretpads are sent with every Thalia capo: the “Standard Tension” packet, and the “High Tension” packet. EACH packet contains the following radii adapter fretpads:

  1. 0″ for Classical
  2. 7.25″
  3. 9.5″
  4. 10″
  5. 12″
  6. 15″
  7. 16″

That’s FOURTEEN different tuning pads in all! It’s pretty much given that this will cover you for most everything you’ll come across in acoustics. One purchase, done. I like that.

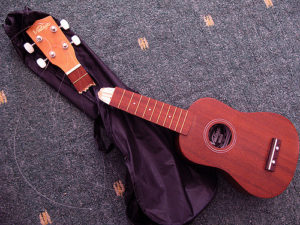
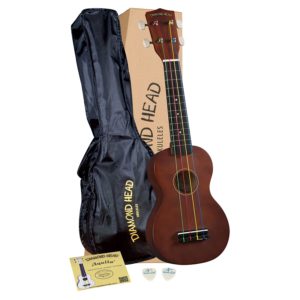
The “High Tension” fretpads are what you’ll use on 12-string guitars, Ukuleles, Banjos and certain guitars with low profile necks. These pads are 2mm taller than the “standard tension” fretpads.

The Quickstart Guide that comes with each capo directs you to exactly which one you should be using for whichever guitar you own.

If by chance you own a guitar that’s not on their list, if you simply know the radius of your guitar neck you can then just pick the appropriate fretpad.

If you don’t know the radius, and you can’t find the info from the manufacturer, there’s a simple way to measure the radius and find out. The instructions are on the Thalia website.

Oh, and I just have to mention this… I really like that these fretpads extend OVER the fretboard to the side as well. What that means is there’s no metal or other material that might slam into the beautiful neck of the instrument you spent hundreds, if not thousands, of dollars on. No neck scratches will ever occur because of your Thalia capo. Another great feature!

All the Right Moves!

The Thalia company also wanted to improve another common capo complaint: how difficult it is to re-position the capo on different frets.

thalia capo on neck

In the past, when using capos made by other companies, I would often have to use both hands to take my capo on and off. There’s even one that rolls up and down the neck to change frets, but you’d usually have to use both hands to roll it since it was clamped so tight.

This got very old, so when some companies came out with the simple clamp capos that only needed one hand, I jumped on their boat right away.

But the same issue of bad intonation came up again and again. I’d just have to tune with the capo on, retune with it off, etc. It was the only way around it.

No there’s no need for any of that. With the Thalia, you compress it slightly and swiftly move it anywhere on the neck you want. When you get there, you simply let go and “Boom!”, you’re as free as bird now.

And this bird you cannot change.

Sorry – couldn’t resist! lol
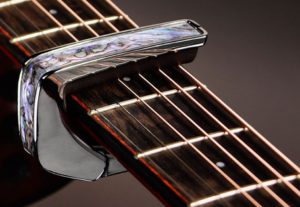
She’s a Beauty… !

If you’re here because of a sudden interest in getting a Thalia capo, I BET you I know why.

Because they look freakin’ AMAZING!!

Thalia capo lineup

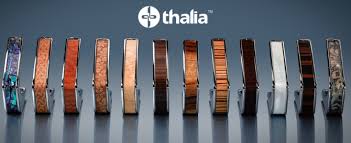
Chris told us in the video above that the artistic element was always at the top of his list of “must have’-s when developing these capos. That’s no surprise; just a cursory glance at the beautiful woods, shells, metals and crystals that are available to you for your capo is instantly mouth-watering. My G.A.S. attack started the first time I saw one, and though it took a few months before I pulled the trigger… its beauty… its beauty was so… sooo… intoxicating!

The way you can match or combine the tone woods with different impressive inlays allows you to really come up with a unique capo that’s all your own. And when you play with one, as I do, every time you go to move it to a different fret, you just KNOW that the people seeing it are thinking YOU are something special, because your guitar (hopefully) and your capo obviously are.

Your capo as a work of art? Whodduh thunk?? But using sustainably harvested woods and shell inlays, laser cutting the inlays and applying them by hand to each capo, the Thalia company gives you just that.  Artistry, beauty, and cutting-edge functionality. Now that’s a killer combination.

Really, buying a Thalia capo is way beyond a utilitarian business purchase. It’s creating a showpiece that will coincide with your brand – showing how discerning and exclusive your gear is, and thus accentuating how special your music is.

And that, we all know, is what it’s really all about.
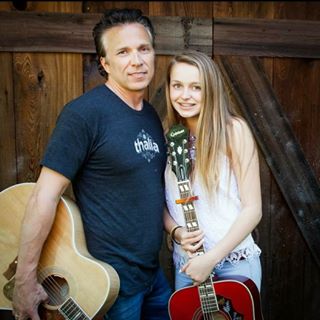
Thalia & Teaj

The Thalia capo has made a big difference in how I approach using the capo, both in performance and, especially, during songwriting. Its quality is second to none, its options seem limitless, and its versatility is a rare treat indeed.

The biggest change it’s brought about in my playing is that now I put the capo on from the FRONT, from the high “E” side of the neck. I never did that before; I always approached the neck with a capo from the LOW “E” side.

thalia capo on neck

Because this capo is designed to be slid up and down the neck quickly and easily with your LEFT hand (if you’re a right-hand player), I took the risk and started using it as they suggest. Outcome? I love it. It indeed is easier that way, but only because of how it’s designed.

I do have to angle the capo somewhat to allow room for my fingers on some chords, like standard “A”, but other than that using it is no worse than any other capo I’ve slipped on through the years, and in many ways better!

I also took the road less traveled and bought the “Partial” tuning kit to go along with my normal tuning pads. These cover only Some strings and leave others open at the nut, so I can write songs in bizarre, undecipherable tunings.

I even use the partial capos with my guitar in alternate tunings! Talk about whacked!!! lol

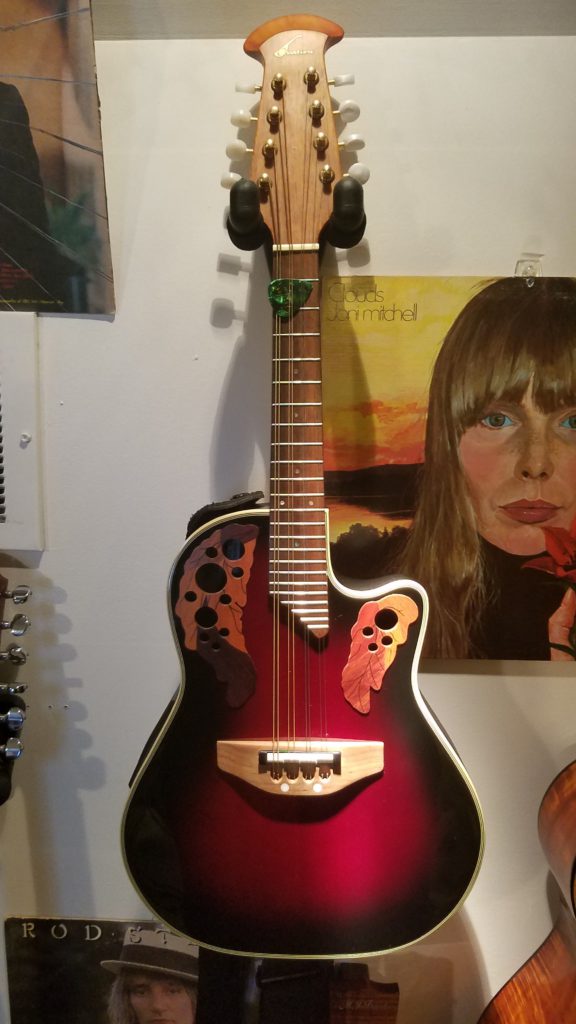
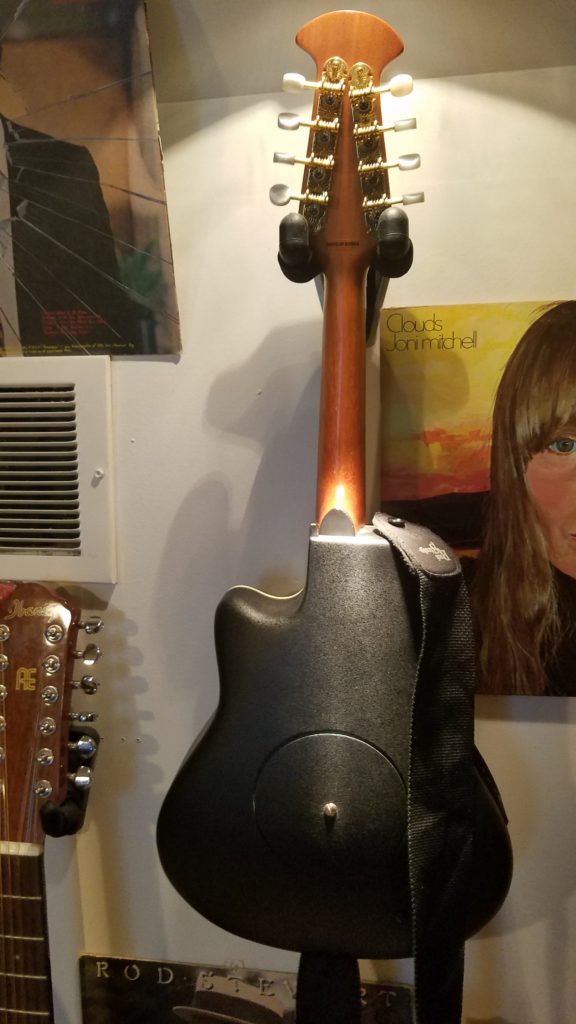
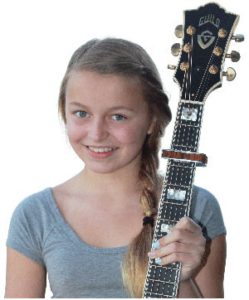
Lastly, this capo has started me keeping the capo on the guitar nut when not in use. Before, I would either keep the capo on the top of the headstock (if it clamped), or have it lying on some of my equipment, or in my pocket for a gig. This is a much more elegant and impressive method, and serves to show off even more the beautiful capo wood and how it complements the wood on my guitar.

It’s not often that a piece of music gear changes HOW you play by such a large degree. For something so small too, to have such an effect… pretty unbelievable.

But wicked cool!!

Strumming Up Support

In the retail product world, it’s either put up, or shut up. And there’s one sure way to put up that every customer will recognize as the real deal:

lifetime warranty

The LIFETIME WARRANTY!

Thalia puts it on all their capos. They understand you’re paying more to get a lot more, so they pony up and have got yer back. In short, I get the feeling that the Thalia company is a very grateful and helpful group of people.

If you ever run into any issues that aren’t already addressed on their very comprehensive and insightful Troubleshooting Page, a simple call to them will get things cleared up. Just keep in mind, though, that they open at 10 a.m. PACIFIC time, so call accordingly.

Since I’m in Michigan I can’t reach ’em ’til after 1 my time, but they’ve always been very accommodating and so very nice.

In the final fret, the warranty says it all. These people are serious about making, for you and me, the very best capo on the planet!

Strike the Pose!

Chris & his daughter Thalia

I think Chris, the owner of the company, really said it best when describing what his goal was in creating the Thalia capo:

“Design, when you have this gorgeous form that meets just an amazing function… that marriage is what really, to me, makes a product exceptional.”

That combination is exactly why I ordered my own Thalia capo and continue to use it to this day. I have the Indian Rosewood capo with the Brushed Black finish. It matches well with the fretboards on most of my acoustics.

One day I’m sure I’ll even spring for the inlaid name and other fancy-schmancy accessories, but for right now I have what matters most…

… the capo that works better than all my other ones combined. The Thalia.  🙂

If you use the links near the top of this post and get your own, please share with us your own testimonial. Is it your best capo too? Has it revolutionized your playing options? And most important to your family… does it make you LOOK COOL??! LOL

Let us know by leaving a comment. We here at Seriousgas always appreciate a good gear lust story.

Now, move up a couple frets and go… make… sounds!!

Teaj

Teaj in the storm fields

The Rocktron R50C – Wish You Were… Hair!!

So, why do I have a Rocktron R50C in my amp arsenal?? Well, to understand that, you must know this: I lived in L.A. in the mid to late 80s. I had a band, and yes…

… our hair was sometimes larger than life.

The R50C is a Big Hair amp!

It was a glorious heyday for Pop-Metal mania. There were more shred-filled, hard-rock machismo songs on the radio then than any other time.

To be successful in this aggressive, snarling genre, you needed four crucial things:

  1. A sweet, bitchin’ axe to shred on
  2. An outrageous and colorful assortment of clothes, netting, bandanas & boots to put on
  3. Hair so large it got its own album credit, and
  4. A hard-rockin’, street-brawlin’, timber-fallin’ amp!
Big Hair Teaj

At the time, I had all four. Since then, my clothes and hair have tamed down a bit, and my wife is very glad of this fact.

But have my guitars and amps??? HECK, no! Hence… my R50C – the amp that puts a little STORM in my studio!

It’s no mistake that rockers like the Stones, Van Halen, AC/DC… heck, even Night Ranger, are still out touring on the road decades later. There’s just something about playing a guitar through an amp REEEEEEEALLY LOOOOOOOOUD that keeps ya young somehow. I can’t explain it.

But, oh… do I know it’s true!!

Its Ballsy Breakdown

The R50C came out in the early 2000s, and it retailed for around $299 in its day. It was an entry-level, modern-sounding solid-state amp that made a lot of headbangers smile, and still does. The moniker “Rampage” I would heartily agree with – this amp is not subtle. Plug your axe into this chainsaw tone grinder and let the audience beware!

Rocktron R50C amp stack

Here are the manufacturer specs:

  • Solid State construction
  • 50W (25W per side)
  • Two 8″ speakers
  • 2-channel operation (Clean & Overdrive)
  • Stereo Chorus (footswitchable)
  • Spring Reverb (footswitchable)
  • EQ: High (shelf), Mid (Bandpass), Low (shelf)
  • AGX technology for low noise floor
  • Headphone Output
  • Line Output
  • Speaker Output
  • Dimensions: 15″ H x 20.9″W x 9.8″D (381 x530 x 250mm)
  • Weight: 26.16lbs. (11.87Kg)

The R50C Manual you can DOWNLOAD HERE, for those wanting deeper insight into this brawny buzz-grinder.

Rampaging Through Rehearsal

I keep the R50C in my main rehearsal room, plugged into, and sitting high atop, my EVH 4×12 cabinet. I like it standing at the ready there so that, at any moment, either for personal or band rehearsal, I can just throw on one of my guitars nearby, throw the switch, and GO.

It makes for a great rehearsal amp since it’s easy to use, without a lot of extraneous bells & whistles. The tone is a bit modern-sounding though, so if you prefer a more “70s rock” tone, you might want to go instead with a classic Fender or Vox option.

Also, remember that this IS a Solid State amp. There’s no tubes in this baby, so you’re not going to get a tube amp sound out of it. As is usual for these types of amps, it has a tendency to compress what you play and lessen the overall dynamic effect that some styles of playing demand. Some say they think this amp doesn’t translate fast notes very well. I think they’re just hearing the Solid State sound, frankly. There’s definitely a difference.

The R50C back panel

I’m still more of a tube amp guy myself, but every once in a while, this amp’s sound is just the ticket. Not to mention that the Rampage provides a really good CLEAN tone. If you like to use delays or chorus on a clean channel, you’ll get great, clean results with this amp. The stereo Chorus gives an almost “surround sound” kind of feel when engaged, and, though it only has two controls, spits out great results that you’ll wanna play with for hours.

Go ahead – throw all your favorite “Edge” licks at it – the Rampage can handle ’em!

If you prefer your sensory pleasures in the form of high-gain, hot lick, distortion overload you’ll be a fan of the R50C for sure. It was built with hard rockers like you in mind. To get the most dB out of your performance, make sure you’re plugged into the “High” input gain port. It adds about 3 dB more gain to your signal (I measured it) and your burning need for edge and speed shall be appeased!

Vetting the Settings
My fav amp settings

The picture on right shows how I like to have the EQ set. Tone is always subjective, but I find these settings to give me a tone that I could record with.

Keep in mind that these settings give me what I consider a good tone coming out of not only the amp, but also the cabinet. The two sound very different, and, since there’s no way to defeat the onboard speakers, you’ll get BOTH emitting signal when the R50C is linked to an external speaker cab.

Though I’d much prefer to be able to shut off the onboard speakers when I want to, in the studio I very much prefer to have both the amp AND the external cab shouting at me. They sound so different that, if I mic up both, I get two contrasting timbres to record onto two seperate tracks while only playing once.

Very cool.

Yet another reason why linking an external cab with this unit is the best way to bring out its best.

I tend to have the Presence knob dialed quite high, at about 2 o’clock, as it gives the notes I play more definition and clarity.

Give Me a Cabinet, Dab’n it!

Rocktron R50C speakers

If there’s a weak spot on this amp, most agree that it’s the speakers. The two onboard 8″ speakers Rocktron provided do the job, but “adequate” is about the most you can say about ’em for live performance. They’re a little too small and frail compared to the impressive high-gain turbulence that this amp can generate via its electronics.

I guess we couldn’t expect Rocktron to be able to make everything awesome at the low, low price point that this amp fit into. Something had to give. Most agree it’s the speaker. What the shortcoming is in the speaker design, who knows? What is clear is that it sounds a little thin and brittle for live work.

In the studio, however, I actually like the sound that the onboard speakers dish out. Since so often I’m having to put high-pass filters on electric guitars for the final mix, with the Rampage I don’t have to. IF I only use the amp.

But I tend to use an even better option – connect an additional cabinet to the amp!!

The Rampage sounds immensely better for live concert work when played through an external cabinet. Hook this baby up to pretty much any other speaker set and you can chop heads with the ferocity, cut and broadened BEEF of the tone, all the while muttering, “Wow! Why didn’t I do THAT before?!!”

As usual too, the better the cabinet, the better the tone. If you have a really amazing cabinet, like the EVH 4×12, or 2×12, both of which I use, you’ll want to just sit in front of it playing the whole day long, mesmerized by the intimidating tone, and swallowed up in the mind-bending metal magic stampeding out of this device.

In fact, you may just become a metal-head studio recluse, never using your door again. We’ll understand. We’ll take turns popping some TV dinners through your window every once in a while, and curiously listen to your Yngwie licks as they try to burrow their way out into the sun… !

Stu – Stu – Studio. Whoa – oh.

Amp Settings for telecaster shootout

In my control room I have, like most of you, a whole slew of amps at my disposal that reside on my hard drive. Amazing, isn’t it, how these days we can have really convincing amp simulations with just the click of the mouse? I use the UAD options, as well as AmpliTube.

But I also have a few hardware options, kept plugged in and ready. I keep these to the left of my console, so if I want “the real deal” I can just roll my chair over to whatever head I need, plug in and tell Pro Tools what input it’s using. Boom – I’m enveloped in the power!

This Rocktron amp is one of my options, though honestly I have yet to use it on any of my recordings up to this point. The reason really has nothing to do with the amp, but rather with my song selections – I typically am not writing or recording metal or hard-rock tunes.

If I ever DO, however, or if I have a client come in where I’m producing their album and it’s spilling over the edge of heavy, then I would without hesitation mic up the R50C through my 4×12, knowing that said client would be drooling over the ponderous, stomping tonal beast that I just unleashed upon their unwitting ears.

As always, it’s horses for courses. TheR50C is not a super-versatile amp, but if you like to kick the can down Headbang Avenue, you might not find a better companion at this price point!

Shred Up Your Necks With AGX!

Rocktron Rampage R50C

This Rocktron amp, like many others in their line, includes their patented AGX technology. The acronym stands for “Automatic Gain Expander“, and it’s there to solve the long-standing problem of noise that guitar players experience when turning up that high-gain distortion.

How does it do it?? Well, here’s what the manual says:

“The AGX circuit expands the gain of the amplification circuit only when required, based on the input level. If you’re not playing though, and there’s no signal present, the AGX circuit expands down the amplification level to a point where hum and noise are dramatically reduced. “

So essentially, it’s an automatic gate placed into the signal flow, making you sound a lot cleaner and quieter when you’re NOT throwing virtuoso hemidemisemiquavers out onto your screaming fans. After all, nobody needs hiss and screeching getting loud when you’re trying to touch the uplifted hand of that cutie in the front row…  lol

It’s not perfect though. To me, I don’t really hear that much of a difference from any of my other amps, and since there’s no controls for this AGX circuit… I guess we’ll just have to take their word for it that it’s actually doing something beyond what other amps provide.

If I turn the volume on my guitar all the down, I still get noise. Don’t know the electronics reason for that, but it definitely is there. It’s no worse than any other amp I have, but I’m not hearing considerably better either.

So, I don’t know… If I were playing live with this amp  I would probably still use the dead-stop Gate on my effects unit, since it allows me to adjust the threshold and get rid of 100 percent of noise based on the signal level I choose. Ymmv.

Recordings, Fresh Outta the Pro Tools Oven!

To give you a real sense of what this amp can deliver, I’ve recorded two different sound snippets for you.

The Wolfie with the R50C

For both of ’em, I played my EVH Wolfgang guitar, which, if you like, you can read about in THIS ARTICLE.

Also, I used for both an SM57 mic on the EVH 4×12 cabinet AND the R50C 8″ speakers. The cables then went into my Apollo Twin interface and straight into Pro Tools. To keep things clear and honest, I used no effects and no compression software whatsoever.

I used the same amp settings which I mentioned above, since that sound to me is balanced perfectly and sits in the live mix really well when playing with bass and drums.

The first clip you’ll hear is the CLEAN CHANNEL. I used the Middle pickup setting on the Wolfie, and played the intro to one of my favorite Van Halen songs: “In A Simple Rhyme“:

For the second snippet, I switched to the OVERDRIVE CHANNEL, and put my Wolfie fully on the Bridge pickup. I didn’t change any of the amp settings at all, so you could hear what simply switching from one channel to the other will give you.

Finally, as you listen, the EVH CABINET is panned to the RIGHT side. The R50C signal is panned to the LEFT side. You can listen to them both for a stereo effect, or cancel one side to hear better what each one sounds like alone.

Enjoy!!:

So whaddya think?? Did you like the sound? Think the Rampage has got the tone you’re looking for?? Wanna dial in your favorite setting and start buzzing?! I don’t blame you!

My EQ settings obviously put out just one of many different frequency spectrum setups that you could draw out of this amp. Regardless of how you set the knobs though, expect your amplified notes to fly like machetes at your adoring audience, especially when kickin’ in the Overdrive. But don’t worry… they’ll LOVE the attack!   😉

Turn Up Ye Amp, Ye Scurvy Dawwwg… !

This amp is fun. In prepping for this article I spent some hours just riffing and coming up with new songs and resurrecting old ones that call for a more beefy, in-your-face kind of tone. The Rampage didn’t let me down, and once I got going, I didn’t want to stop.

If you can’t go a day without listening to or playing Grindcore, Heavy Metal, Nu Metal, Thrash Metal, Death Metal, Groove Metal, Black Metal, Glam Metal or even Pirate Metal (“Arrrrh, Matie!!”) then you need to plug your guitar into the Rocktron R50C and inject some palm-muting, fast-licktion fun into your day.

Make sure you’re hooked up to a good cabinet to get the best sound, and you’ll probably find yourself hours later, shaking your head in wonder at where the time went. After all, time flies when you’re shredding fun.

Now go… make… (loud) sounds!!

Teaj

Teaj in the storm fields

My Ovation Mandolin – Gettin’ Jiggy With It!

The lights dimmed. It was time to play.

I clicked the tuner button off – I was live & ready. I could hear the crowd noise die down in anticipation…

I looked at the drummer. He counted off fast, “Uh ONE, two, three…” and with the flurry of an intro fill we were off…

The music lit the place up like dynamite! We were stringing together some energetic IRISH JIGS, and my EVH amp, on the Crunch channel, was giving my speeding notes frolicking flight.

Celebrity Mandolin headstock

But I wasn’t playing a guitar. Nope. I was playing my Ovation Mandolin!!

No, it’s not a Baby Guitar

Some walk up after concerts and ask me about “that little guitar” I played. If I’m not incorporating my ACTUAL little guitar (see THIS ARTICLE for that beauty), then they’re talking about my mandolin.

If you’re unfamiliar with mandolins, let me first tell you how much FUN they are. It’s like mixing the smiling sound of a ukulele with the steel bite and technique of a Telecaster. Most of the time you’re doing upbeat runs, melodies and hyper-energized strummings on a mandolin, so there’s no lack of fast-paced inspiration when you pick one up!

The mandolin is tuned, bottom note to top note, to G, D, A, E. It’s the exact same tuning as a violin, so if you play fiddle, you already know where all the notes are!

wooden mandolin
A typical wooden, NON-Ovation mandolin.

For guitarists, mandolin isn’t that hard to play either. The open strings are the four bottom strings on a guitar, but set in reverse, and going UP in pitch instead of down. Because of that, you already know the guitar chord shapes – they’re just backward and using only four strings out of six.

But wait! Doesn’t mandolin have EIGHT strings?? Yes, but four of ’em are just doubling strings, the same approach the 12-string guitar takes. So, really, when you’re playing, you’re only thinking about 4 strings to chord, solo, etc.

Okay, enough of a primer. Time to introduce you to my own ‘happy place’ instrument…

Ovation Weapons of Choice
Ovation logo

There have been, in the past, three distinct price echelons in the Ovation mandolin product line-up, and they’re as follows:

  • the ‘Applause‘ models (under $250)
  • the ‘Celebrity‘ models, (under $800)
  • the MM68 models (under $1,000)

The ‘Applause‘ instruments I don’t typically recommend, except for absolute beginners. They come across a bit cheap to me… which, of course… they ARE. That’s the point; Ovation wants to give people with little cash an option, so if it’s a new musical step and you don’t want to spend a bundle then, sure… go ahead.

The ‘Celebrity‘ instruments are good, well-made instruments. They’re constructed to the same fundamental specs & design characteristics as the more costly MCS68 mandolins. They’re just built overseas instead of here in America.

Now, getting an “Imported instrument” used to mean a huge dive in quality decades ago, but that’s really not very true these days. Thank China’s booming economy and openness to finally learn from Capitalism in recent years. I’ve played many a fine Chinese instrument in the last 7 years especially. So you get a good instrument with a price that reflects a foreign point of origin.

The ‘MM68‘ instruments are as forgiving as tanks, and just keep dishing out great sound stage after stage, all while looking fairly fancy since they have all the upper-crust accouterments that you’re paying extra for. They got the bling, dawg!

Ruby, Ruby, Ruby, Baby!
The Ovation Celebrity Mandolin

So, how does my Celebrity fit in the mix??

Well, I have owned the Ovation MCS148-RRB ‘Celebrity’ Mandolin for about 5 years now. The ‘RRB‘ stands for “Ruby Red Burst“, which is the color and finish that first drew me to the instrument.

Compared to the U.S.-made MM68 models, the ‘Celebrity‘ instruments are just as capable, but are slightly “dressed-down” in their component parts. Specifically, the only things that the MM68 add, that the Celebrity does NOT have, are these extras:

  • Ivory with Abalone binding
  • Ebony fretboard
  • Ebony bridge
  • Abalone inlays
  • Gold-colored tuners
  • Graphite neck
  • Case included

Other than those things, the Celebrity is made of all the same stuff, and put together according to the same assembly parameters. Pretty cool, considering the big difference in price. And speaking of those parameters, here they are:

The Ovation ‘Celebrity’ Mandolin:

the Celebrity Mandolin Label

Manufacturer Part Number (MPN): MCS148RRB

Instrument type: 8-String Acoustic/Electric mandolin

Body Type: Cutaway

Top: Solid Spruce

Bracing: Mando-Quintad

Scale Length: 13 7/8

Fretboard: Rosewood

Fret Inlay: Dots

Bridge: Walnut

Rosette: Multi Soundhole 5-Piece Raised Epaulet

Celebrity Mandolin truss rod
The truss rod is visible inside!

Pickup: Thinline

Nutwidth: 1 3/16

Tuners: Pearl

Optional Case: MC403

Preamp: OP24+

EQ : 3-band with switchable mid frequency

Switches: Pre-Shape and EQ bypass

Custom-taper volume slider

Shipping Weight: 4 lbs

Same specs, and same beautiful craftsmanship as the top models?? I think I want a SECOND one!!

But… but… it’s not WOOD??!!

I am not unaware of many people’s derogatory opinion of Ovation instruments. They are the wood purists; the handmade carpenters champions; the ‘proud-to-be-a-Luddite’ picketers.

“An instrument not made of wood??!! Unacceptable!!”

Hey, not everybody embraces change. I get it.

Ovation Mandolin back cover
The back cover gives access for battery changes.

Ovation instruments, however, have many, many good reasons to put them in your musical arsenal.

But, for me, there IS one reasonable reason why I would NOT choose my Ovation mandolin, or my Ovation guitar, to play. Know what it is?

It’s probably obvious. Like a producer once taught me about how to choose what instrument to record with: “It’s the sound, stupid!”

I also have a mandolin that was made in the late 1800s. It has, uh, NO plastic parts. It’s all wood, baby. Wood, wood, WOOD! With a few ivory tuner pegs thrown in just to make P.E.T.A. mad.

Musician girls and cow

But it has a certain sound. Its tonality is, as we’d expect, very WOOD-sounding. When I play it, I think of the hills of Tennessee; the meandering creeks and hollers of Kentucky. I think of that “Man of Constant Sorrow”, and having a picnic on “Good Ol’ Rocky Top”. Almost like… performing with a cow onstage, ya know?

So if I’m recording in the studio, and I want to put microphones on a mandolin for that more Bluegrass timbre, I won’t pick up my Ovation. It’s too modern-sounding. As one guy online put it: “There is no high lonesome quality to the Ovation.” I would agree. I’d pick up my all-wood mandolin.

Is that a bad thing?? No, not at all. It’s horses for courses.

Live, for example, I have never used my wooded mandolin yet. It would be too prone to feedback, for one thing, but it also doesn’t cut through the mix of a loud, full, electrified band anywhere CLOSE to my Ovation.

Ovation Celebrity from the back

I still use my Celebrity in the studio. If I want a more modern voice, say; or if I want to send it through my amps, or effect loops… the Ovation is killer for that. I have no complaints at all against it acoustically, But sometimes, yea… I might want to go woody.

Um, yea. Well… you know what I mean. lol

So if you’re ever hired to produce a soundtrack for “Deliverance, the Sequel”, then, by all means, go wood! You won’t get hate mail then by Bluegrass traditionalists who love to criticize the Ovations, or be tazed by the Bluegrass Police after playing an Ovation live at your local country Folk Festival!!

But otherwise, yea… mic up that Celebrity. It’ll give you a really pleasing sound.

And, of course, if you’re playing amplified live in loud places, well… I don’t know that you’ll find a better fit than an Ovation. It was designed to shine in acoustically-hostile environments.

Ever tried to tune a standard mandolin in a loud venue??

‘Nuff said.

The Freak

In prepping for this article, I scoured the boards online to see what others thought of the Ovation mandolins. Two things kept coming up again, and again, and again…

  1. How freakishly stable these instruments are with regard to staying in tune, and
  2. Their nearly indestructible, rugged design.
Ovation mandolin
Anathea Utley playing her Ovation mandolin… which is probably STILL in TUNE!!

First, Ovation’s tuning stability: it’s legendary. If you want an instrument that’s not going to go south on you because of changes (usually as you tour) in temperature, humidity, handling and the like, the Ovations are tremendously generous with their ability to withstand these rigors of the road. As one avid Ovation user said on a forum: “It’s so freakish it’s almost supernatural!” lol

Once properly set up (as any instrument should be), the bridge doesn’t move out of place, the neck is entirely immobile, the tuning rarely goes out, and if it does it’s just a smidge… the Celebrity and MM68 models are really rock solid and an excellent choice for demanding tour & performance instruments.

I can vouch for that personally, as I’ve never broken a string on this axe, and I’ve played shows months apart and when hitting the stage, most of the strings on it need little to no adjusting whatsoever.

How many instruments can you say THAT about??!


Celebrity Mandolin bridge
Gettin’ Loopy, or Havin’ a Ball?

I have to also mention this, for those who ARE familiar with mandolins and their constituent parts: they use BALL-END strings, not loop-end.

Is this a downside to the instrument?? I’ve never thought so. Ovation has three different sets available for us, and at least one other manufacturer makes ball-end mandolin strings too, so availability is never an issue.

You can also make ball end strings out of your favorite loop ends, if you find it’s an issue somehow. It’s not too hard. But for me, the ball end strings are so much more fast and easy when I need to change strings. I MUCH prefer it to the loop end approach.

Mandolin with bar behind the bridge

If you have a favorite mandolin string sound that IS a loop end string, there IS an easy way to still use ’em. Online mando picker Bic Parker, out of Dallas, says:

“I put a small brass bar on the bottom of mine so it will accommodate loop end strings. Works great and the strings settle in pretty easily.”

An excellent recommendation, Bic. Thanks for the tip! 😉

Electrify Me!
Celebrity Mandolin electronics

The OP24+ preamp and controls loaded into the Celebrity work very well, both on stage and in the studio. I’ve never heard any crackling or pot noise in all the 5+ years that I’ve owned it. Considering I bought it used and it’s probably over EIGHT years old, that says a lot.

The VOLUME & EQ sliders do what I expect it to, and delivers, and the affords me more than enough versatility to get the “Line In” tone I need for any session or live mix. It’s got three EQ bands to manipulate: Bass, Mid & Treble. For each frequency band you get 23 dB of cut or boost to shape your tone.

The “Status” button places the EQ in, or out, of the signal completely.

The Celebrity electronics from the inside.

The “Mid-Shift” button allows you TWO center frequency points (400Hz or 1KHz), of two different frequency bands, that you will cut, or boosted, with the “Mid” EQ slider.

The Pre-Shape button engages a circuit that attenuates the Mid frequencies, which thus boosts the bass and treble frequencies. This is a great choice if you want to reduce “rumble” frequencies below 40Hz, for example.

At the same time, it doesn’t come across unnatural or machine-like while amplifying my playing; it’s warm-sounding and a real asset to the instrument.

Good to the Last Strum!

I guess to sum it up, I’ll just put it simply: the Ovation Celebrity Mandolin is rugged, dependable, has great action, an excellent reputation and, above all, a superlative amplified sound.

Ovation Mandolin CARTOONED

If you want to initiate a strong, long-lasting case of G.A.S. (and how doesn’t?!), hop over and take a look at the incredibly mesmerizing woods, detailing and colors of Ovation’s latest instruments on their MANDOLIN PAGE HERE.

Those of you wanting to join me in strumming a Celebrity model, which is NOT currently in production, fear not! There’s still plenty of ’em out there, at crazy-good prices, in the used gear forums. Here’s two pages of options for ya HERE and HERE!

In the meantime, put on your favorite down-home tunes and get pickin’ and grinnin’. And don’t let those Traditionalists get to ya – there’s more than one way to strum a jig!

Now, go… make… sounds!!

Teaj

Teaj in the storm fields

My Telecaster Comparison – A Tale Of Two Tele-s!

As Donna Summer put it, we “work hard for the money”.

That’s why, when that extreme tidal wave of G.A.S. hits us square in the midcavern, we’ll go looking for the best value in the gear we have a hankerin’ for.

In my Telecaster comparison today, we dispel the woodshed whispers and pull back the quality curtain on price point differences between the spotlight stars of retail and their lesser known, unassuming illegitimate cousins. Just like with Jack Bauer in the classic “24” series, hold on… ‘cuz this SHOOTOUT could get ugly!!

Knock It Off!

So, we all want to make sure that the bucks we’re laying down for gear are worth the bang we end up plugging in, right?

This is especially true when buying a big name brand instrument or piece of gear. We all know there’s a substantial mark-up in price for items that brandish that high-end brand logo on their headstock, front plate or audience-facing sides. This is true, no matter what kind of product it is: clothes, food, music gear… cars.

But the same components, same design and many times the same sound, with a lesser-known name on the headstock, can sometimes drop THOUSANDS of dollars in price.

That much of a discount seems a little hard to justify, doesn’t it??

Well, maybe it is, maybe it’s not. If a brand name is well-known, you can also bet that there’ll be dozens, if not hundreds, of knock-offs (clone copies made by other companies) trying to produce the same tone, the same look, the same vibe for a lot less money.

Most unlicensed knock-offs come from overseas, where the cost to produce the same instrument is much, much lower than here in America. Whether the reason is currency exchange rates, underpaid labor force, low black market component pricing, government financial underwriting, or a combination of all of these is anyone’s guess.

Which all leads us to the answer to this burning question: is a name brand pro audio product substantially better than an imported knock-off product??

Time to answer that question, comrades. It’s shootout time!

Why the Tele Tell-All??
Fender Elite Telecaster

I thought I would get to the heart of the matter by testing two guitars that I purchased just this year. The first is:

  • The Fender American Elite Telecaster electric guitar
  • Price: $1,999.99 Retail. Over $2,000 out the door
  • Solid Alder Body (Ash on Butterscotch Blonde and Tobacco Sunburst)
  • Maple Neck
  • Maple Fingerboard
  • 22 Frets
  • 25.5 Scale Length
  • 6-Saddle American Tele with chromed brass saddles
  • Deluxe cast/sealed locking Tuners
  • Neck Pickup: 4th Generation Noiseless Single-coil
  • Bridge Pickup: 4th Generation Noiseless Single-coil
  • Three-position Pickup Selector Switch
  • Volume knob with S-1 switch, Tone knob
  • Neck Radius: Compound, 9.5″ at nut, 14″ at 22nd fret
  • Neck Shape: Modern C to D

And in the opposite corner, hitting its gloves together and ready to knock out the ‘champion’, it’s:

  • The Austin AU962 “Era-’62 Professional Deluxe” Telecaster copy electric guitar
  • Original MSRP: $449.
  • Solid Alder Body
  • Quilt Maple Veneer with “Amber Burst” finish
  • Maple Neck
  • Rosewood Fingerboard
  • 21 Frets
  • 25.5 Scale Length
  • Neck Pickup: Wilkinson Mini-humbucking
  • Bridge Pickup: Wilkinson Alnico-V Vintage Single-coil
  • Single-ply Creme Binding
  • 3-saddle Wilkinson “Classic” T-style ashtray bridge
  • Three-position Pickup Selector Switch
  • Volume knob, Tone knob, with “push/pull pot” for coil-tapping the pickup
  • Die-cast Wilkinson Tuners
  • Bright Chrome Hardware
  • 3×3 headstock with matching finish
  • Neck Radius: Compound, 12″ at nut, 16″ at 21st fret
  • Neck Shape: C
The Austin AU962 Tele-style guitar

The Fender company I’m sure you all know. They’ve been at this for decades and have long passed their first rodeo. The Telecaster they CREATED in 1951, and it is one of their flagship, breakthrough successes. They are still made and sought after today, though many of the telecasters currently being sold go all the way up to $9,000. And custom builds?? They can be even more expensive.

This “Elite” Tele from them is marketed as a modern Tele that can also cover some vintage sounds, so it’s not your average Tele by any means.

Austin guitars are distributed by St Louis Music Company as a “catalog brand” for them. I did a review of my Austin Tele and how much I like it in THIS ARTICLE. Check it out if you want to know its history, intricacies and why I like it so much.

I’ve used this guitar well and am very pleased with how it sounds and how it looks. But can it compare with my latest Fender Tele purchase??

A very good question…

Can’t Hear the Forest for the Trees?

First let’s talk wood. The Elite Telecaster is made of Swamp Ash. The Austin Tele, out of Alder.

These two woods are used by Fender all the time. In fact, Red Alder is used by Fender waaaaaaay more than Ash, and many of their past Telecasters, including those around the time the Austin was made, were made of Alder instead of Ash.

Alder guitar body with no staining
Alder guitar body without & with staining

Specifically, since the Austin guitar is based off of a 1962 Telecaster, they chose Alder because that’s what Fender used that year for its Teles. Even in Fender’s reissues of the ’62 they use Alder, as seen HERE.

Fender does a great job helping us understand WHY and WHEN they use these two woods in THIS ARTICLE. I highly suggest you read it before listening to the recordings below. When it comes to guitars, wood is crucial in understanding tone.

Ash wood for Telecasters
Ash Wood cross-section

If you read that, then you’ll know that right away we should expect to hear a difference in the treble side of tone between these two instruments. The Swamp Ash in the Fender should sound more “chimey”, with more treble and less warmth than the Alder wood.

We’ll see if it played out that way soon…

The other wood-y fact we need to recognize is that the fingerboard on the new Fender is just the top of the Maple neck, as opposed to the Austin which has a Rosewood fingerboard.

Fender Rosewood Telecaster
Fender Telecaster made completely out of Rosewood !

I much prefer Rosewood, personally. It’s not as slick and slippery as Maple, so when I shoot fast for notes and licks up and down the neck I don’t tend to over- or under-shoot with Rosewood. Plus it just feels better to me.

The problem is, Rosewood is now banned world-wide. In 2017 a TON of new rules were dumped onto those wanting to use Rosewood to make things, because it’s been so over-used that it’s becoming scarce. The world over, Rosewood is used for many diverse artistic and utilitarian endeavors; the constructing of instruments is only one reason it’s been diminishing.

For instrument-making companies these days, they just use something else. The market is simply too competitive currently to do otherwise, and with the HUGE rise in online shopping, and customers being immediately aware of what a fair and/or best price is at any second, the cost can’t be justified.

This is why you’ll rarely see what was once so common – a Rosewood fingerboard on a guitar.

Does it make a difference in tone? Probably not noticeably, but the feel is sure different.

Amazing, isn’t it, how various woods can be so different from one another?!

No Agenda, please

Lennon said it best: “Just gimme some truth.”

My purpose in today’s testing is the same: to simply find out how each guitar sounds, compare them, and see if there’s any truth to the notion that you don’t have to spend a lot of money to have a guitar that sounds really good.

That’s all. Nothing else. I’ve got no axe to grind against either company. I’m not here to knock down “the big guy” to prop up “the little guy”.

Nor am I setting out to somehow show that Asian imports are ridiculously pathetic or incomprehensibly subordinate (tho’ I don’t believe they are anymore).

Rather, I simply want to compare two similarly-made, but much differently-priced guitars, and see how their tones sit next to each other.

Now, obviously “tone” is a highly subjective subject. I’m not here to try to convince you of anything. Instead, I want to provide a window through which you can see, without having to spend ANY money, the true natures of these two guitars.

Red Telecaster

Why the Telecaster?? Because I have both an expensive and an inexpensive version of this iconic beauty, but I’m iffy as to whether I should keep the new Fender or not. It’s pretty pricey.

Also, I figure the Telecaster is a very familiar guitar sound to industry players like us, well-known in the industry, respected and its sound can generally be picked out amidst many guitar tones.

A secondary goal, for me, will be to see which guitar is the most versatile. I find, especially playing live, that I want a guitar that isn’t a one-trick pony, but rather has a wide assortment of tonal approaches. Even when played by one-eyed aliens.

This allows us to nail the specific guitar sounds needed for doing diverse rock/pop styles and songs. The better we can do this, the better (in the long run) we can land, and keep, that professional tour, or that open door to pro studio sessions.

Telecasters typically don’t provide a lot of different sounds, so I’m not expecting much diversity, but we’ll see…

Prepping the Parameters
Amp Settings for telecaster shootout

For the recordings, I’m keeping things as simple as possible so that we can concentrate instead on what’s coming out naked from the two Teles.

I simply ran a Fender “Vintage Voltage” 1/4″ cable from the Telecaster into my UA Apollo Twin Interface. Then, I fed the signal through only one plug-in: the UA 610B just to raise the gain a little bit, the settings for that you can see on the right.

Finally, you can also see that I ran the signal through the “Softube Vintage Amp Room” plug-in so that I could use their cutting-edge modeling techniques to get the amp sound that I thought would grace the Tele sound well.

Telecaster shootout rack overview

I used the same amp setting, called “Default“, for all songs, except the first recording, on which I used the “Clean” amp setting so you really only hear the guitars.

There are only three “classic” amp sounds in this plug-in, and although they don’t say the names, it’s whispered ’round the industry that the three models they offer are a Marshall, a Fender, and a Vox AC30 amp simulation. I believe it, ’cause the controls and features look very much like those original amps.

The one you’ll hear on these recordings is the Marshall simulation. I thought it brought the Tele sound to life the best.

I then booted up Pro Tools Ultimate, set up my session, and after recording exported the files. There’s no effects, no compression… nada. Just the guitar sounds through the same amp and settings.

Alright, well… it looks like our two Telecaster Challengers have their mouthguards in, their fight robes off, and…

There’s the Bell! Let the fight begin!!

The Naked Truth!!

In this first recording you will hear ALL PICKUPS. First will be the Fender, followed by the Austin. For the Fender you will hear, in this order:

  • the NECK pickup setting
  • the MID pickup setting
  • the BRIDGE pickup setting
  • the BRIDGE pickup setting, with S-1 engaged

Next, you will hear the Austin, in this order:

  • the NECK pickup setting
  • the MID pickup setting
  • the BRIDGE pickup setting
  • the NECK pickup setting, with Coil-Tapping engaged

Now that you’ve heard all the options, let’s focus on each one.

NECK PICKUP SETTING:

In this next recording, you’ll first hear the Fender Elite NECK pickup on Springsteen’s “Glory Days“. Following that, you’ll hear the Austin MINI-HUMBUCKER pickup transducing “Life in the Fast Lane” by the Eagles:

MID PICKUP SETTINGS:

Now we’ll move on to just the Mid setting sound. I’ll play Joe Walsh’s “Funk 49” for both. Again, you will first hear the Fender Elite, followed by the Austin:

BRIDGE PICKUP SETTINGS:

Next we move on to “Roxanne” by the Police. Using just the bridge pickup in all its spanky glory. As usual, the Fender first, then my Austin Tele:

The ‘ALTERNATE’ SETTINGS:

Both guitars have a little something special up their sleeve, though each one is completely different than the other. This pass will showcase, first, the Fender S-1 Boost enabled on the BRIDGE pickup, bringing to life Fleetwood Mac’s “Oh Well“. Right after that, you’ll hear the Austin’s COIL TAP option engaged on the NECK pickup, singing out the Beatles’ “Here Comes The Sun“:

Aftershocks & Afterthoughts
Tale of Two Teles

Well, did that shootout rumble your world like it did me? Were the results what you expected? Were you surprised at any of the results??

Sometimes little earthquakes of information like this can really rock our world, and for me… this comparison is an example. I didn’t expect many of the insights I gained. Here’s what each guitar spoke to me:

The Fender Elite

The very first thing that shouted out to me in this comparison session concerns the SIGNAL LEVEL.

Interestingly, I had to turn UP the Fender Tele in order for it to match the dB level of my Austin at every pickup selection – even the S-1 engaged bridge pickup. In fact, on the first song, I had to boost the 610B preamp level all the way up to 10 just to get the Fender to match my orange beast!

And, yes, I DID check, multiple times, to make sure the volume knob was up ALL the way.

This was very surprising to me. I never would have expected that my Austin pickups would have so much more dB beef than a real, actual Tele. Whodduh thunk?

I’m surmising that it’s because of the “4th generation noiseless pickups” that are now in the Fender. Perhaps the price of clean was a few dB of volume.

the Tele thick neck

The second thing I noticed was the NECK THICKNESS of the Fender. It felt a lot bigger to me than the Austin. The phrase that sprung to mind was “baseball bat”. Now, my hands aren’t small, but they’re not huge either, so, again, I was surprised.

I got the measuring tape out, wrapped it around the neck, strings on, and measured a 4 and 6/16ths neck thickness on the Austin. The Fender, on the other hand, came in at 4 and a half even. That equates to a neck thickness difference of 2/16s thicker. A difference that is substantial and easily felt upon first playing it.

For me, the Austin neck feels “normal” and just right for my playing style. The Tele feels too thick. Your hand mileage may vary, but if you like big, beefy necks, then you’ll probably looooove this Fender neck.

For me though… not so much. 😉

The Fender does taper though, from a C shape neck down to a D shape up at the 12th fret. For that reason is was more comfortable while soloing than when doing standard chords in open positions.

The third thing I noticed was that the STRAP PEGS on the Fender kept allowing my strap to fall off. I then compared the pegs and saw that my Austin had a more substantial peg, with a bigger spread at the top which kept straps from suddenly surrendering and leaving the party. Not a huge thing, but when I went to play the real Tele and the strap fell off the bottom, I definitely noticed! If I were to keep the Fender, I’d definitely have to get Strap Locks installed.

Tele pickup configurations

The fourth thing I noticed was actually a positive: that S-1 SWITCH is the bomb. It really kicks some more life and beef into the pickup tone, such that if I were soloing on the Fender, I’d pop that switch down faster than you can say, “My amp goes to ELEVEN!”

My only problem was finding the switch!! I made the mistake of thinking that you pulled up the knob to engage the S-1, just like you would a normal pull/push pot for coil tapping. Nope! It’s only the very TOP of the Volume knob that you push down. Took me a while to find that one.  lol

When pickups are wired in series you get higher output & a much fuller tone. That is definitely the case here with the Fender Tele when you engage the S-1 switch. It does make a difference, folks. It ends up sounding more like a Humbucker tonality, and if I were playing this guitar and wanted to cut to a solo… you better believe I’d be pushing that S-1 switch PRONTO, baby! It’s, by far, my favorite sound this Fender Tele makes!!

Tele neck edge blister

The fifth thing I ran into was not pleasant. I hadn’t been playing the Tele more than a few hours, when I noticed that I was starting to develop a BLISTER from the edge of the guitar neck! A red, rubbed-raw point in the joint where my first finger meets my palm started to scream for my attention because the edge of the maple fretboard was cutting into my hand there. See the pic to the left.

Usually that wouldn’t happen, but because this neck is so thick, my fingers don’t get quite so high up as they do on all my other guitars. Just one more sign that this whoppin’, bulky neck is definitely not for me. I don’t think I need a new guitar callous in yet another spot!

The Austin Tele

This guitar has been extremely useful to me here in the recording studio and live, and this test only proved why. The options choices made in its construction make it a little more versatile than your average Telecaster, and that’s still why I think I like it so much.

Teaj in the Telecaster Humbucker
The Austin really gives me “my” sound.

In running it through this test I learned some new things about it that will expand my options even further. First, I never realized just how ACOUSTIC sounding the neck pickup is when the coil tapping is engaged. It’s a sound that the Fender Tele doesn’t have at all, and which I don’t have on any other electric of mine either.

Austin Tele headstock

Definitely a fresh approach I can now take to some recordings and live numbers – instead of getting my acoustic out, I’ll just use this, for a bit of an unexpected twist!

The neck pickup on the Austin is a humbucker, and it stood out as the biggest difference maker between the two instruments. Yes, it indeed does sound more “Les Paul”-like, as you could probably guess. Fender did have this same approach back in ’62, which this Austin is modeled after, but not everybody is going to want that much of a change of tone on their Tele. If you DO like a wider tonal spectrum though, the Austin answers those G.A.S.-y prayers without a downbeat hesitation!

This test also helped me see that the Austin does not have as much of the high, treble cut as the Fender does in the neck and mid positions. The bridge pickup, however, sounds cut from the same cloth, so when I need the Tele twang I have it in one setting.

Lastly, I was glad to hear that the Austin did not produce a lot more noise than the Fender. Since the Fender pickups are heavily marketed as “4th generation noiseless pickups”, I figured that would be where I’d hear a big difference.

But nope, not so much. Only in the bridge pickup setting did I hear noise, and that only occurred if was (as expected) not touching the strings. Because I engage a noise gate when I play electric typically, it’s a non-issue.

The Last Strum

In the final analysis, the Austin has a more diverse, versatile pickup sound set, while the Fender concentrates on that spanky treble twang, no matter which pickup configuration you choose.

If I were playing a ton of Nashville country, there’s no doubt the Fender would be a great asset. I would, however, have to have a totally different neck than what this Elite provides, because it’s just too much of a baseball bat for what I’m used to.

They’re both good instruments, though each fills a different niche gives you different options, depending on your stylistic and tonal needs.

Telecaster Receipt

And money? How ’bout that price thang? Is the Fender worth the $1,700 more I spent to buy it, over my Austin??

Um… sorry. No.

I was going to keep the Tele too, if it really brought sounds to the mixing table that I couldn’t get elsewhere, but, at its extreme price point, and with the Austin already giving me the Tele smack I want at times… I think I’ll be heading back to the store today with some bad news.

Besides, the Austin neck feels nothing like a weapon from “The Godfather”, and that’s a good, good thing. lol

Wanna Be Startin’ Somethin’

This comparison is only looking at one type of guitar and sound, and thus really only scratches the surface of our brand vs. knock-off topic.

To gain even more understanding, we must all start to do research about the audio equipment we want and need, and then share what we find with others.

As you do, share your findings with us here at Seriousgas. It’s part of what makes this community fun, interesting, but also informative. These tests, as you can see above, really shed practical light onto what gear can really do… and not do.

Here’s a list of questions about potential gear I like to ask:

  • Who makes the best type?
  • What does “best” even mean with regard to this instrument/piece of gear?
  • How do warranties compare??
  • What company has the best/ the longest return policy?
  • Is there any reason not to simply and easily buy it online??
  • Which do I simply like best?? Why??
  • Is this a very specified tool, amazing for one thing? Or is it a tool for versatility, able to perform many tasks??
  • How does it sound?
  • How does it look?
  • How does it feel to use??
  • What’s a fair price?

If we ask these questions, research and get the answers, we can all help each other maximize the potential of, not only our gear, but our income!

Friendly Fire

So I hope today’s shootout uncovered some coveted kernels of truth about expensive and inexpensive guitars for you. My biggest takeaway is that… they’re not always all that different.

This was obviously no drive-by shooting either; it tooks quite a few days of prep, organizing, writing, recording and re-writing to get here, but I’m so glad to do it. The results speak for themselves.

Whichever Tele sound you like best, just know that there’s usually a good option at most price points to keep your tone-chasing heart happy. And that’s always a quest worth pursuing.

Even Kiefer Sutherland will tell you that.   😉

Jack & the Telecasters
His new band – “Jack & the Telecasters”!

Now, go… make… sounds!!

Teaj

My Galveston Bass Guitar – Full-Bodied Pleasure As The Rumbles Roll!

Special bass DEAL
Ever found one o’ THESE??

Everyone who’s ever suffered from Gear Acquisition Syndrome usually has a story or two about a “miraculous find” or “total steal of a deal” that they managed to snag somewhere, and how it raised their music to a new level.

Today I get to tell you about such a moment for me, and how a serendipitous glance at Craigslist on a holiday got me my Galveston Bass Guitar.

See, it went like this…

For HOW MUCH…??!!

I was looking for a Telecaster guitar. That’s how it all began. I’d never had one, and I’d wanted one for decades.

I mean, you know… that sound. That twang. That snap. That bite. I can only coax so much of that out of my many Strats before they give up, whining and moaning about “… right tool for the job… blah, blah, blah…”

So one Labor Day (when everyone else seemed to be on vacation but me!) I thought I’d drop onto Craigslist, as I do every week or so, and see if any good Teles were being offered.

The Austin AU962 Tele-style guitar

Lo and behold, I found one. And it looked in great shape. It wasn’t a true Fender Tele, but I didn’t care as long as it sounded like one.

Interestingly, the owner had also listed in the same ad a bunch of other gear, and basically said “$200 OBO gets it all”.

Now, we all know that spending a lot on a quality instrument has its benefits. I’ve done it quite a few times and have some very expensive instruments and outboard gear in my studio.

But I also know that to get…

  • A guitar
  • A bass
  • A guitar amp
  • A bass amp
  • Hard cases for each &
  • Cables for all

… all for $200??!

Dude. That’s insane!!!

free stuff

So, long story short, by the end of the day I was the proud owner of all of that. It was like I had bought a Tele guitar for peanuts, and got a bunch of other gear thrown in for FREE! Now that’s what I call every G.A.S.-ers dream!!

I figured I’d sell most of the package off, but… I ended up keeping all of it.

Know why? ‘Cause they all were in perfect condition and sounded good! Why wouldn’t you keep that?!!

The Tele (which I reviewed HERE if you’re interested) is VERY high quality sound. I love playin’ that thing. But my other fond favorite among the bunch? You guessed it – this Galveston acoustic-electric bass guitar. What once was considered “a throw-in”, I now wouldn’t part with except for maybe $500 or higher.

Was it sold for that much? No. Is it worth at least that to me??

Yup.   🙂

Time 4 an In-SPEC-tion…

Galveston bass front

Let’s take a look at the basics before we dive into my experiences with it:

  • 2003 4-string bass guitar
  • Acoustic hollow body
  • Basswood body
  • Rosewood Fingerboard
  • Piezo  Bridge Pickup
  • Scale length: 31″ (almost a short-scale length)
  • 20 Frets
  • 2+2 Headstock
  • Single Cutaway
  • Made in China

I’ve read online that in the 2000s the Galvestons were made in China, but these days are now a brand assembled in Korea. Other than that, I can find no corroboration, except for the inside label which shows it did originate somewhere in China.

Galveston bass Label

One thing I’ve noticed in this recent decade is the much higher level of quality and acceptance of Chinese products here in the U.S. Yes, we all know that “Chinese knock-offs” used to be a joke to stay away from.

That is definitely not the case anymore, and plenty of corporations in the world’s largest-populated country are out to prove it.

If anyone reading this ever finds the company who actually makes these… tell me, please. I’d like to call and thank ’em, ‘cuz this bass… is great.

I have to hand it to the previous owner too: everything that I picked up that holiday was in perfect condition. The owner said it all belonged to her dad when he still lived in Michigan and liked to play out occasionally.

Now he’s in Florida and said to just get rid of ’em ‘cuz he’s never coming back. Not everybody is cut out for winter, I guess.   lol

I cannot find a scuff, scrape, cut, ding… or any evidence of any kind that this isn’t new. Wow. How often does that happen when you buy something used?!


Try This on for Size

I really like the size of this bass. It’s not quite short-scale, which is 30″ or below, but it is just shy of that, ducking under the standard bass scale (34″) by quite a bit.

For that reason this is a good choice for those of you who prefer a smaller-sized bass. The shorter neck and more compact dimensions will have you smiling and not reaching so far as a standard-sized bass will demand of you.

Also, if you’re a player who needs a few years to “grow into your instrument”, this would be a good halfway point between a normal bass and a “kids version”.

Galveston bass inlays

In a nutshell, if the Fender P-bass size has always been too challenging to play for you, you’ll notice a big and delightful difference in how this one feels.

Also, if you’ve played some other acoustic-electric basses and found the BODY was too big for you, I think you’ll find that not a problem with this product. The body does NOT seem overly big to me. In fact, one of my GUITAR bodies is bigger!

The neck is not wide, but it’s a bit thicker than my other basses by, say, 3 millimeters or so. If you have small hands that might be a detrimental issue. For me it’s easy to adjust after a minute or so and I don’t think about it anymore, so it can’t be that thick.

Oh, and yes… the lightning bolts are actually pretty sweet, instead of the usual boring dots!

Sending You a Strong Signal

Galveston bass electronics

The electronics on this Galveston are quite, quite usable! There’s no buzz or crackle in them at all, which is pretty rare for something this old.

I found the settings to provide a lot of tonal variation. For recording I found the perfect setting to be the following:

  • Volume: At 75%
  • Presence: Cut by half, or all the way off
  • Highs: Cut by half
  • Mids: Cut by 1/4
  • Lows: Boosted by half, or full

The Presence slider is a very interesting beast on this instrument. To my ears, what it does MOST… is makes the transients of every note very pronounced. I’m thinking that might be a really cool sound in the context of an acoustic band, like those in Bluegrass, Folk or Americana styles.

For Pop/Rock or Ballads though, I just dial out the Presence completely most of the time. That gets rid of the beginning pick of the note, my fingernail noise, the sound of sliding along the strings, etc. What I end up with is a nice, full, beefy and less metallic sound than I get with my other electric basses.

This electronics unit is versatile, usable and provides a wide palette of tonal color for you to choose from for your timbre approach. No one-trick pony here – if you’re plugged in with this bass, you’ve got a lot of sounds to choose from!

Nobody’s Perfect

I did manage to find two minor weak spots on this instrument:

  • If you have the volume knob all the way up when you are playing pretty hard, certain notes on the bass come out distorted. There’s an easy fix, however: just keep the volume knob at about 75%. If you do this, all the notes are clear and clean no matter how much you hammer ’em. Doing this does not, however, noticeably add any noise to the signal, so fear not the clear-tone Reaper.
  • The only other really small issue is that when I plug my cable into the jack at the end of the body, I can feel it catch, but it doesn’t feel like it’s clicking into place as solidly as plugs do in other jacks. It hasn’t fallen out or anything, but when I play it live I always loop the cable through my strap, just in case. It just feels like it’s not clicking in as well as usual. Again, it hasn’t ever fallen out, and if you hold the instrument straight up with a cable in, it doesn’t fall out, but… I dunno. It’s just a feel thing to me.
Galveston-inlays CARTOONED & Vertical

Hard to believe that’s all I could find, but it’s true. Everything else works like a charm.

I will say that this acoustic instrument, as with any acoustic instrument,  is much more unforgiving of bad technique. I’ve played for enough decades to have a good handle on muting the strings I’m not playing.

If you haven’t worked on that yet, with this instrument you really should. The resonance of the guitar body grabs onto any ringing string and amplifies it, so… time to woodshed and get that muting technique down, my friends!!    😉

Oh, and that reminds me too… another benefit of spending time on this bass is learning to not be so dependent on placing your thumb on the edge of a pickup for anchoring. There’s not one there!   lol

Let’s Put Her to Work!

Galveston bass bridge

I have three favorite ways of using my Galveston bass:

  1. Practicing bass
  2. Playing with a stripped-down acoustic group
  3. Recording with it for a more “human” bass track

First off, it’s wonderful to just be able to pick up and play something without having to plug anything in. Love it, love it, love it. It’s action is a little higher than my other basses, so it is actually giving my fingers a better workout too, which counts for something.

Galveston bass back

If I’m going to play live at all without drums, say, with one or two other acoustic instruments like violin, or cello, or acoustic guitar, or acoustic piano, then I almost always go for the Galveston. It’s perfect for that scenario.

If we’re playing to more than around 30 people, I’ll plug it in and put it through some type of mild amplification. If I’m playing with ONLY one other guitarist though, I’ll just stay open-air and it holds its own very well. Especially if you put new strings on it. Wow, does that puppy carry well then!

Finally, I like using it in the studio for songs that just need a more down-home approach. It’s much more woody and resonant, full-bodied… more like a human bass singer creating the notes. That’s the interaction with the hollow body coming through.

Because of that though, you do have to watch that you don’t play facing your cabinet to close or you WILL get feedback at higher volumes. You can, as always, just put a feedback eliminator puck in the sound hole. I’ve yet to do that ‘cuz the need isn’t that great for my uses, but if I were going to play live, through a P.A., with a full band most of the time, I’d definitely invest in one.

My other basses can’t begin to give me the more earthy voice that this Galveston gives me. That’s probably its biggest asset. And in the final analysis, just like a painter, the more colors we have to choose from, the more interesting and fascinatingly fresh our music will be.

The Big Bottom Line

Galveston bass headstock

I am SOOOOO glad to have this bass. It gives me a totally different sound than any of my other only electric basses; I can practice quietly and acoustically; the whole instrument is in like-new condition… What’s not to like??

For the money, this gets 4.5 STARS! It would be 5, except for that one niggling issue of intermittent distortion of certain notes at full volume which, as I mentioned, is easily fixed by moving the knob down a skosh.

If you happen to come across one of these used (I don’t find ’em new anywhere), take my advice and grab it. At the very least, it’ll be an inexpensive way to get people noticing you, ‘cuz with this bass… I always get the “what is that?” train of comments. And at the most?? You’ll have a quality instrument that really sounds good in a live OR studio session mix.

I know… ‘cuz it does just that in my mixes too.  😉

Now, go… make… (low) sounds!!

Teaj

The 7 Best Ukuleles of 2019 – Your 4-String Tickets to Paradise!

Can you picture it?

Your hammock gently swaying, under tall, green waving palms…

… your toe kicking warm little showers of gleaming white sand with every other swing…

… the sussurus of a beautiful turquoise sea lulling you into ‘surf’s up’ daydreams…

… and the smiling sound of a UKULELE sweeping down the beach from somewhere in the distance.

What is it about this tiny, unassuming instrument that can so take us to the peaceful, embracing beauty of the islands in just an instant?!

Who knows? But you’re here, so that means… you’ve decided to find out! You’ve drunk the sunny KoolAid and are decisively UKE-bound and strum ready.

Leleland ukulele shop in Berlin
JOHANNES ISELE/AFP/Getty Images

But which ukulele should you get? I mean, one cursory look online and you can see… there’s a TON!

Good question! If you missed my first post about how to buy a ukulele, you’ll want to go check that out first HERE. There you’ll find lots of info and get a good understanding of how to proceed in your ‘great island quest’ for a uke.

If you did read it tho’, let’s now move on to the 7 best ukuleles that you can get RIGHT NOW to fan that Hawaiian beach party flame into a roarin’ BONFIRE!!

Under $100

Ukulele ladies!

The ukulele is no new instrument. It’s been around since the 1880s in Hawaii. For some reason, this little “jumping flea” (what ukulele translates as!) really caught on in America. Just check out those classy early 1900s gals playing for your listening pleasure. They got uke fever BAD!

But clearly today there are more manufactured ukuleles worldwide than EVER before. But there’s no need to get mired in uke overload. Every year we do a thorough scanning of the industry to see what the best values are at different price points… so you don’t have to!

broken uke

So off we go!! We’ll start with the cheapest. Now, sure, you could the least amount possible to get a ukulele (like THIS PAPERWEIGHT), but you’ll be disappointed when, not only will it probably fall apart within a few times playing it, it might not even make it to your DOOR in one piece!

Not to mention they’ll be hard to play, are often missing crucial pieces (plenty of reviews saying that!) and sound pretty pathetic.

For some of you though, you simply want to buy your child, who’s, say, under 10 years old, a uke to play on. I gotcha. In that case, since you’re probably not too concerned about tone or intonation, I would personally go with…

1) The Diamond Head DU-151 Soprano Ukulele Starter Kit!

Diamond Head Ukulele package

This not only has a decent uke that has garnered 4 out of 5 stars in over 700 reviews, but it also comes with a gig bag, a pocket instruction guide, an online lesson, and even picks.

Definitely a great 1st instrument for any child and sure to bring a lot of tropical smiles to your living room! To pick it up, quick and easy, go here!:

click map

Amazon

Now, if you’re over 10 years old and want to buy an inexpensive ukulele for yourself – one that is getting consistently good reviews, sounds good, isn’t missing pieces and won’t fall apart, then break open your ‘piggy at a luau bank’ and strum on over to…

2) The Lohanu “LU-S”  Soprano Ukulele

This ukulele is a rare product. Why? It’s one of the very few products I’ve ever seen that has over two thousand reviews all giving it a FIVE-STAR RATING! Pretty outstanding.

I think it’s not only that the quality is above average; you also get a ton of accessories with the package. Here’s what your purchase will include:

  • Sapele/Mahogany Top, Back & Sides & Neck
  • A Rosewood Fingerboard
  • Aquila Strings Installed
  • Handmade ABS Bindings
  • Chrome die cast tuning gears
  • A Strap
  • Two Strap Buttons, installed
  • A Tuner
  • A Case
  • 2 Picks
  • A Pick Holder
  • An Extra Set of Aquila Strings
  • FREE Bonus Ukulele Video Lessons!
  • UNCONDITIONAL LIFETIME WARRANTY for Ukulele & All Accessories!!

To get all that for under $80 is quite the accomplishment. Plus it looks really, really nice. That Mahogany wood grain looks killer, and rivals the look of my own mahogany uke that cost over $200!!

if you’re serious about gettin’ your hula on, why wait… BUY IT HERE!

click map

Amazon

Both of the ukes above are Soprano ukuleles. They are almost the smallest available. But what if you have larger hands??

No problem! Lucky for you, the Lohanu Ukulele package ALSO comes in a Concert and a Tenor size!

3) The Lohanu “LU-S”  Concert Ukulele

Lohanu Concert Uke

The most common uke played today is a “Concert Ukulele”. It’ll provide you with a little more real estate under those fingertips and won’t make you feel quite so much like your hands are having to play “Twister”.

All the specs of this uke are the same as the Soprano above. You’re basically just getting a BIGGER instrument made of all the same materials… at the same insanely low price.

Ready to get that fingertip upgrade and bring the island breezes to your porch by getting this Lohanu Concert Uke?  BUY IT HERE!! 

click map

Amazon


4) The Lohanu “LU-S”  Tenor Ukulele

Lohanu Tenor Uke

Got REAL “monster mitts”??! Then I’d instead increase the size even further and go with the Tenor size.

As you increase the size of the instrument, the space between frets increases, thus giving you more room to maneuver.

The Soprano, Concert and Tenor ukuleles all have the same fingerings. It’s only when you move down to the Baritone uke that the fingerings change. So feel free, as many of my uke-y friends have, to get one of each. I did have one of each… until I traded away my Tenor for… a Telecaster guitar.

Yea, I know. I get G.A.S. once in a while myself!   lol

If you’ve got cocktail wieners for fingers, Lohanu has you covered – celebrate that size matters and get your larger-sized Tenor ukulele today. To nab it, CLICK HERE!!

click map

Amazon

Under $200

If you’re wiling to spend more than a hundred bucks on a uke, then this probably isn’t your first uke rodeo! Whatever the case, you can bet there’s lots of options for your more “discriminating taste”, without question. Let’s look at a couple…

First off, I have to put in this list one of my favorite ukes to play, and that’s the BARITONE ukulele. If you’re coming from guitar to uke, guess what? You already know the fingerings! Playing a baritone uke is just like playing the upper four strings of a regular guitar in standard tuning.

Since it’s significantly bigger, it also gives you quite a different tonality than the “normal”, concert uke sound. Think “my uke and my git-fiddle had a baby” and you’ll be near the mark.  😉

The best deal I find on one currently is this:

Oscar Schmidt Uke
5) The Oscar Schmidt OU53S Baritone Ukulele!

The reviews are rockin’ with scores of satisfied customers, and the price is definitely exceptional for all you get:

  • Select Spruce top
  • Rosewood back and sides.
  • Rosewood fingerboard and bridge
  • Abalone top inlays
  • Dimensions: 14″ (35 cm) long, 10″ (25 cm) wide at the lower bout, 7.5″ (18 cm) wide at the upper bout, and 3″ (7.5 cm) deep.

I really like two things especially about this uke: the wider, more manly bridge, and the impressive detailing and purfoiling that is done on the edges. Beautiful stuff!

GET IT HERE and start Bari-toning your way to the beach tonight!!


6) The Lohanu Cutaway Electric Concert Ukulele!

Lohanu Electric Uke

When you get into the one hundred dollar PLUS range, you probably (like me) are also thinking about electrification. The best uke under $200 I could find that comes ready for amplification is this awesome deal.

I need to say here, I am in NO WAY affiliated with Lohanu. I get no kickbacks from them, no percentage. I have never talked with them in my life.

But I cannot ignore all the reviews people leave – not just dozens… HUNDREDS of reviews, almost all giving 5 stars to these products. Capitalism doesn’t lie, in this respect. These ukes are getting thumbs up all across the nation! Whenever I thought I found a good deal and good quality from another company, I find Lohanu blowing them away in the reviews section… and in their pricing.

That speaks volumes.

So, get this: this package deal is, like the other one above I mentioned, a steal, it’s so packed full of quality and accessories. Here’s what you get with this investment:

Lohanu Electric Uke electronics frame
  • A cutaway body
  • Sapele/Mahogany Top, Back & Sides & Neck
  • A Rosewood Fingerboard
  • Aquila Strings Installed
  • Handmade ABS Bindings
  • Chrome die cast tuning gears
  • A 3-band EQ
  • A Strap
  • Two Strap Buttons, installed
  • A Tuner
  • A Case
  • 2 Picks
  • A Pick Holder
  • An Extra Set of Aquila Strings
  • FREE Bonus Ukulele Video Lessons!
  • An UNCONDITIONAL LIFETIME WARRANTY!!

This is such an amazing deal, and proven to be such a quality instrument based on the reviews, I’ve decided that I’M buying one. Yep; I LOVE the fact that it’s a cutaway, which you rarely find in a uke under $200.

Wanna join me in snatching up this stupendous value in a ukulele package? Easy – BUY IT HERE!!

Under $500

Okay, if you’re willing to spend upwards of $300 for a ukulele, you are definitely in the big leagues now! You obviously want an instrument that is going to sound good all the time, have excellent intonation, stay in tune, look phenomenal, and last for years. Am I right??

Alright then… let’s get you what you want. Here is the best overall value I found anywhere on this kind of top-notch uke:

7) The Kala KA-SKCGE-C Spruce/Koa Concert Ukulele!

Kala Spruce Ukulele
Look at that Spruce, goose!

There’s one large reason I am recommending this particular ukulele – the specific combination of woods used in its construction.

See, I had a guitar made from scratch by a luthier who knows his picks from his pickups, and we were very deliberate about choosing the woods. I “listened” to quite a few different types of wood faceplates. By simply tapping on the thin wood top you could hear already, even before construction, how the wood disseminates sound.

Adirondack Spruce was, by far, the best-sounding top plate I heard. The rest of the guitar I made of Hawaiian Koa. Today, it is my NUMBER ONE, go-to acoustic when I’m recording in the studio. Nothing beats it. I rarely have to EQ it at all. It’s just that good.

This Kala ukulele is made of almost the same stuff. Similar woods mean similar tones, so this baby should give you a lot of sweet, sweet music for years to come. Kala is a very respected brand too. Someone very into ukes swears by ’em (you’ll meet Mark farther down!).

The picture alone should tell you all you need to know, but here’s the construction in a nutshell:

  • TOP: Solid Spruce
  • BACK & SIDES: Hawaiian Koa
  • FINGERBOARD: Pau Ferro
  • STRINGS: D’Addario Titanium
  • ELECTRONICS: Kula by Fishman

This is obviously more of an Intermediate to Professional-type instrument. The Fishman electronics unit I have used myself. It’s also dependable, clean and effective towards getting a great sound through a P.A. system.

For more info, check it out on THIS PAGE, and start imagining what it would be like to speak through this kind of a higher-end uke. I can tell you… it’s GREAT!

click map

Amazon Sam Ash

When the Hawaiian Sky’s the Limit!

Alright, so… we’ve given some super options for beginners, exceptional values for the Intermediate player, and even a couple high-end ukes for those of you more serious about the craft of UKE-ing. I hear even newly-wed brides like to celebrate on their honeymoons with ukuleles. Weird?? Naaaaaaah.   lol

What’s left? Well, I don’t want to leave out those of you to whom a ukulele is more, so much MORE, than an instrument; it has become… for you, a way of life.

I have a friend for whom this is definitely true: Mr. Mark Swarthout. His website says it all – theukuleledude.com! I mean, come on… just take a look, in the picture below, at all those ukuleles the man plays!! Talk about serious G.A.S.!!

Ukulele Collection of Ukulele dude!
the ukulele dude

I interviewed Mark recently and asked him his opinions about the subject of this article. He said he’s pretty much played every manufactured uke out there, so his insights are valuable for the end goal of a wise uke purchase. So, to close out today’s overview, I offer you here Mark’s testimonial tips on where you can go for the utmost, tip-top, no-holds-barred, best-of-the-best ukuleles possible! Here’s what he had to say:

Talsma Ukuleles logo

“The uke I use the most personally was handmade by Dave Talsma. You can find him at Dave Talsma.com. His shop is in Swartz Creek, Michigan, so I can drive to him if necessary. Warren Buffett owns one of his ukes! I figured if he got one, I should too, since he’s got enough money to buy ANYTHING!”

Franks Uke & Guitar
My Franks babies hangin’ in the studio (right & lower left)!

Lastly, I have to also tell you about the luthier who hand-built my own soprano ukulele, Mr. Mike Franks. He’s become quite the renown builder of ukes and guitars; his instruments are now sold worldwide and he has a solid, loyal following that often buys multiple guitars from him frequently.

To the right you can see the acoustic guitar and soprano ukulele that he constructed from scratch (as I got to watch!) and are without question two of the top instruments in my whole studio.

Franks logo

THIS PAGE, on Mike’s website, shows you everything you need to know about why his renown has grown exponentially over the last few years.

If you’re truly serious about a well-intoned, professional’s ukulele, by all means give his carefully handcrafted instruments a look.

Time to Hula Down the Beach!

You’re going to have BIG SMALL FUN with the friendly, smile-inducing ukulele, that’s a given. I know these insights and recommendations, based on my own experience and that of other professionals, will help you reach volcanic heights of musical exploration and creation.

I’d like to give a BIG shout-out to my friend and adroit uke aficionado Mark Swarthout for giving us his insights that helped direct this post into the best pics for you at this point in time. Products change every year, but the options outlined above are excellent choices for you right now!

Finally, if there wasn’t already enough incentive to go ahead and get that uke and start strumming, take it from no other than one of our greatest music legends, from the Beatles himself, Mr. George Harrison! Here’s his advice:

Harrison Uke Note

I think we’d be wise to take his “sound advice”! I know I already have… for years now!!

Now, go order that dream uke, get your nimble wrist ready for strummin’, and go… make… sounds!!!

Teaj

The Crate BT50 Bass Amp – Solid WHOMP For The Hard-Edged Player!

Close up on BT50 amp

Sometimes fate has a way of smiling on you when you least expect it.

And sometimes… it smiles with GEAR.

My example is the Crate BT50 bass amp. It came to me kind of on accident, from checking out an ad for something else in Craigslist. Now, my Live Room will never be the same.

Lemme tell ya why…

My Big Bottom Destiny

I’d been searching for a good deal on a Telecaster-type guitar for a couple years, when one weekend I saw one, in good shape, listed by an owner in my area.

But they not only wanted to get rid of the guitar; they had a few other pieces they wanted gone too. The whole kit and caboodle of equipment they put it up at one exceptional price, and even put “Or best offer” to top it all off.

Well, if you’ve hung around here long enough, you know I’m a gear nut, so the chance to investigate some really fine equipment at a low cost sparked my wires immediately. I was soon handing over my hard-earned cash to the owner and driving home with the new, groovy booty!

Full disclosure here: I’m a tube amp guy. Always have been, since I was a teenager. I think that’s mostly because when solid state amps first came out, I thought they sounded SO fake, and SO plastic that I wouldn’t go anywhere near them. I always thought the same about Crate. And since they went out of business in 1997, I figured it was because we all thought they sounded like the south end of a northbound Alpaca. I’ve also heard from a repair guy who calls their amps “Cold Solder Joint Crates”, as they’re frequently brought in with that electronics problem.

That’s probably still true to a large extent, but my mind has changed on one thing: there IS a place for solid-state amps in the studio.

My non-deliberate acquiring of this amp (my first solid-state EVER) has opened my eyes a bit about their capabilities, and, depending on what it is you’re trying to sound like and deliver, it just might be an asset to your axe-enhancing arsenal.

So, am I no longer a tube amp guy?? Hardly. I still think tube amps are the sizzle in my scha-mizzle. But at least now I know… there’s more than one way to groove a big bottom!

Inspect those Specs

As usual, let’s get the specs list out of the way. The BT50 comes standard equipped with:

  • Crate 12″ bass driver, 8 Ohms
  • Output Power Rating: 50W RMS 2% THD, 4, 120 VAC
  • Gain: Distortion 104dB;  Clean 63dB;  CD Input 37dB
  • Topside Chromatic tuner
  • Octave Control
  • A Distortion channel with gain, shape, & level
  • A Clean channel with level, 4-band EQ, & footswitchable octave with level
  • Signal Limiter
  • Internal Noise Gate
  • Headphone jack
  • CD input (RCA)
  • CFS2 Footswitch Included
  • 21″W x 18″H x 14″D
  • 46 lbs.

Not bad at all for an amp that retailed for under $300!!

I also find that it is getting a consistent 4.5 customer satisfaction rating no matter which pro audio store I check into. That also speaks volumes about this amps longevity.

This amp is now discontinued, but I thought I’d do this article since I still see a LOT of them out there used. I know I like to read actual user’s reviews before I pull the trigger on used gear, so… here we go!

Tone from the Deep!

I played through my tube amp first, just to wrap my ears around what the usual sound is that I use when recording in the studio. I used my Hohner Active B2-A headless bass, into my Bugera Veyron amp, going into my Ampeg 1×12 cabinet. For both amps I used the same cable, a Fender “Vintage Voltage”.

Here are the settings that I normally use when recording on my Bugera:

Bugera bass amp settings

Then I plugged into the Crate amp, turned it on and played my first notes.

WHOA!! Two big immediate things I noticed:

  1. The Midrange on this amp is extremely pronounced, with all the knobs set midway. Definitely need some adjusting to take out that wonky nasality!
  2. This amp has obviously spent many a night in smoke-filled bars. Either that, or there’s an eighty-seven years old chain-smoker living underneath all that fuzzy tilex!!!
Crate BT50 Clean settings

I started with all the setting in the middle, at high noon. In that setting, this amp was WAAAAAY to midrangey for my tastes. I immediately turned the mids down, and adjusted the other EQ knobs too. Finally, I carved out a usable sound that I could play and record with. The settings I landed on are in the pic to the left.

First up, we’ll examine…

The CLEAN Channel

This amp gives a lot of definition to every note you play on this Clean channel. My tube amp gives notes a kind of luxury halo of angora warmth around all the notes, which of course I LIKE. But if you want really, really defined notes, with no fuzzy anything of any kind, this solid state amp will give it to you.

I tried various turns of the Master, versus the Level knob, but found that they didn’t give me any considerable change in tone by doing so, as other amps sometimes do. They’re just going to adjust your volumes, end of story.

The Manual says there’s an internal Noise Gate, but it must not be on this channel, because I don’t hear it kicking in, no matter how soft I play and let the note fade.

I think I’ll use this channel for bass on an upcoming Pop/Rock track I’ll be recording soon. I think it would work well for it, and it’ll be good to try some new bass hardware in a mix for a change.

After all, pretty much everything can sound good in a mix, if it’s treated right and placed with an experienced ear.

Next, let’s look at…

The DISTORTION Channel

BT50 Distortion Section

Wow. When they say Distortion… they really mean Distortion! This is NOT a subtle effect, folks. Even turned just one degree up, the notes are instantly painted with obvious, gritty growl. And when you get to nine o’clock, only a quarter turn up? It is total in-your-face SMACK DOWN!

I honestly doubt I will ever use this channel, because it’s SOOO over-the-top, but I’ll say this… if you’re a Metal musician and are into that kind of tone within the constructs of your songs, this effect is MONSTER. You should definitely give it a listen.

Oh, and there’s the Noise Gate! Guess they felt like they needed it on this dirty channel but not so much on the Clean. Not a bug deal though, as most of us who play out know how to keep our bass beasts tame between songs or before or after the gig.

Let’s talk about this “Shape” button. It’s a weird entity. Unique, to be sure; I’ve never encountered anything like it before.

To my ears it has three distinct “zones”, and in each one it affects the sound differently. Here’s how I’d break it down:

  1. Knob all the way left: This has the most bass frequencies, and also has a noticeable compression circuit on it.
  2. Knob at high noon middle: This setting is the least compressed. You can play quiet, and loud, and clearly hear the difference between them.
  3. Knob all the way right: This setting gets rid of pretty much all the bass frequencies, and you’re left with a setting that could work very well if you wanted to do a rippin’ bass solo, complete with distortion. If the psyche of Eddie Van Halen suddenly took over your bass player mind, you’d want this setting.

The Extra Bits

BT50 on-top Tuner!

Ok, I love, love, LOVE the fact that not only is there a built-in TUNER, but that they put it ON TOP of the amp so it’s clearly there to see when you’re standing up playing. Way to go, Crate – you win the Mod of the Day Award!!

It works well too. By using the tuner, my bass sounded very well-tempered and right on pitch.

It’s also great that it’s a CHROMATIC tuner, not just a 4-note jobbie. For bassists that play in alternate or drop-down tunings, this is a real asset.

Next, I have to say that I’m also now a fan of the OCTAVE Control now, because of this amp. How cool! The dial allows you to seep in tones one octave DOWN from whatever you’re playing. I’ve seen this effect done with pedals before, but I’ve not seen it built into an amp. And it works really well too. Pretty sweet!

You can have the effect brash and obvious, but I found I liked it at about eight o’clock – barely on. This gives you enough that you can hear it when you play very high up the neck, but down in normal positions where we have to riff most of the time it’s too subtle to hear.

But you felt it! YESSSSS!!

I found the CHORUS to be quite good-sounding, actually. A real compliment to the sound, no matter what setting you put it on.

The Reverb, on the other hand, sounded a bit “meh”. Not very convincing or flattering. More of a fake effect than giving it a true “room presence”. Still, if you want some depth to your tone, you can dial it in so you can just barely hear it and the quality (or lack thereof) won’t be as obvious.

Jacks on the BT50

The Headphone Jack and the CD/iPod Input you pretty much expect on a lot of these combo amps, so nothing special there. Plugging into the headphone jack DOES defeat the speaker, FYI, which is generally how you want these wired. I mean, why bother Grandma with Pantera if you don’t have to, right??   😉

The Big Bottom Line

The sound of this amp is soooooo completely different from my higher-end bass tube amp, but I’m actually glad – now I have a fresh variation of bass timbres to throw into whatever song calls for it. Having more options is always a good thing, right?!

BT50 with basses

Clean channel? Very good, IF you EQ it right and don’t mind a very defined, solid-state sound.

Distortion channel? So in-your-face, you’ve got to really like that kind of delivery to choose it for anything.

Effects? Chorus: great. Reverb: adequate. Octave Control: easy to use and cool for some parts

Pros:

  • Another very different amp tone for the arsenal
  • Snarling distortion if that’s your thing
  • Chromatic tuner on top is the bomb
  • Octave Control is really pretty sweet
  • Loud enough to warrant it being a great practice/rehearsal amp
  • CHEAP!

Cons:

  • Very midrangey. I only found one EQ setting that I liked
  • Distortion is one-dimensional & VERY heavy, akin to a rusty chainsaw
  • No warmth to the tone. Somewhat artificial-sounding

I’m using this amp in my Live Room now, where I and other musicians practice or rehearse for a show, and it’s a good fit. It has enough volume (if the settings are right, avoiding compression) and you can dial in a good workable tone. Sure, it will never lose that solid-state-construction sound, but that’s okay. Horses for courses.

Got other questions? Already own a Crate amp and want to chime in?? Think this amp would be better if it were covered with leather leopard-skin pants??!! Let us know in the Comments. All personalized animal pants are welcome here, without judgement.     lol

Now, go… make… sounds!!

Teaj