The Pearl Rhythm Traveler Drum Set – Showing The Big Boys How It’s done!

It is great to have a huge 20 piece drum kit wrapped around you entirely as you channel your inner  Neil Peart  (RIP).

However, most of us do not have roadies and big trailers to haul that kind of behemoth set!

In my long career as a musician, (don’t ask how long… never too old to ROCK!), tearing down and setting up drum kits has been one of the most frustrating things. It takes a lot of time… AND space. Not to mention the wear and tear on your actual kit.

So when I was really fed up with trying to fit my kit and guitars in my car, I heard about the Pearl Rhythm Traveler drum set. I was curious, so I went to check it out at a local music shop.

At first, I must admit, I thought, “This kit is so DINKY. It can’t possibly sound that good”; I snubbed my nose at it and walked away.

But then, soon after, I heard some pretty sick beats bein’ laid down, so I turned around and saw, to my surprise, that the salesman was playing the Pearl Rhythm Traveler! And… who woulda thought… it had some really killer tones!!

But even tho’ the sound impressed me, I still couldn’t help but think, “How could a little kit like this one ever compete, really, with my BIG kits??”

And that is the question, isn’t it? Can it??! Well, before I answer THAT… a little back story!

Stairway To (NOT!) Heaven

It was the day of the gig. Another opportunity to head out to yet another smoked-filled bar, and convince yet another roused-up crowd that OUR band… is the stuff of legend!

After hours of loading, we are finally on the road. The smell of old French fries, spilled beer and week-old smoke (that somehow has now become PART of our saturated equipment) fills the air of our now very cramped band van.

Despite the “odour de la ROCK”, the excitement & adrenaline of the imminent gig has us all laughing, and debating just how much we are going to “rock their faces off”.

We pull up to our destination at last.  Oh, great! A “No Parking” sign by the slightly crooked load-in door. Not the first time for THAT red-carpet welcome! Guess its time to circle the block and hope there is a spot somewhat close. 

We manage finally to snag a spot just around the corner, so we walk to the venue to get the lay of the land. Making our way inside the dim-lit bar, we meet an older guy. He looks pretty weathered, like maybe he’s fully lived the rock & roll life… perhaps a bit too much.

“Hi. I’m the sound guy.” Oh. That’s why.

He instructs us that “load in is through those doors and up the stairs”.   

Wait… what? What was that last word??

Did he just say… STAIRS??!!!

I ask you: is there anything worse for loading in when you’re in a gigging band than… stairs??? HATE THAT!!!!

I mean, come one – we have 4x12s, amps, guitars, a keyboard, my incredible HEAVY full drum kit complete with a wrap around rack…

Anybody know how to use “the Force”??!

Well, we couldn’t find a Jedi to “air haul” our stuff, but we were able to at least move our van closer and park on the street with our hazard lights on. That meant we could load in without a long slog TO the venue at least.

Later, after way too many trips lugging our heavy equipment up and down those stairs, I feel like I never need to work out again. I just want to sit and catch my breath.

But I don’t, of course. I can’t. This is rock & roll, people!! What do we do?? We put on our best rock star faces and start greeting people, that’s what. Connecting with the audience starts even BEFORE the first beat of the first song. We gotta see who our audience is!

When the feeling of having run a marathon wears off, we’re ready to start the actual show. So what if the stage is so tiny that the drums barely fit… even WITHOUT the rest of my band!

My former BIG gig kit!!

The vocalist/guitarist has to stand on one side, and the keyboard player is forced to actually stand on the floor! Is this really happening?? Good thing it was a low stage. 

Of course, in this kind of venue, with a stage this small, you at least know the sound system is gonna be amazing, right?!

Wait? Is that the sound of laughter I hear coming from your mouth??

Yea, yea, okay. The sound sucks too! All we hear is a muddle of different fighting frequencies. We each smile and hope we’re keeping the rhythm tight and the pitch centered and… soldier on…

But hey – at least the drunken crowd seems to love us! I even get a couple free drinks from some new fans before the gig is done. Overall, we rock some faces, raise the roof, and almost forget that…

Uh, yea. We still gotta load OUT down those @#$%!% stairs again!! If you have ever played an all-out, balls-to-the-wall rock show, then you KNOW how spent you are afterwards. Especially after a couple “grateful audience member” drinks!

But we do it. We take it in stride. But being the drummer, I can’t help but notice… I kinda have MORE and BIGGER stuff to slog than anyone.

And it’s getting old.

At the next band rehearsal, I notice that some drum lugs seem to be loose, and one is even missing entirely from my bass drum. Seems like I’m repairing my kit after every gig now.

There’s got to be a better way. This latest concert, on top of years of shows just like it, starts me seriously considering… “Should I buy an electronic kit? Find a smaller touring kit?? Suck it up and stick with what I have? Switch to CAJON??!!”

A Traveler Beckons from Afar!

After much debate I decided to try an electronic kit. I chose the Simmons electronic kit (yeah, the one like everyone has) since it seemed to maintain a good reputation. At least… that’s what I’d heard.

The Simmons electronic kit

I started practicing in my home with it, and at first… it was great! I must admit that I loved making crazy fun sounds and beats with all the effects it had.

But soon enough my latest drum bubble had to burst. The more I played, the more I realized: I just don’t like the feel of an electronic kit. To my touch at least, the Simmons kit had little give, or bounce, and I… I… I just couldn’t get used to it.

Add to that that the pedals would slide all over the place so I actually had to DUCT TAPE them down while I was playing. Like THAT looks real professional.

Oh, but wait… they also had trigger problems. The samples would sometimes cut in and out, or abruptly cut off too fast… as if there was some kind of brick-wall noise gate on them. What’s up with that?!!

Ah, infatuation. It’s fun while it lasts, but… those relationships don’t usually last long, and neither did mine. Yes, I DID try the Simmons kit LIVE a few times. They worked “OK” for lighter, basic beat-type music. But for hard rock?? Oh, man… they didn’t bring the sound, the look… or the feel.

No. Just… no. NEXT!!!

Frustrated, I headed back to the drawing board. I stopped by my local Guitar Center and readied myself for a good, long browse. There’s something almost spiritual about hours in a music store anyway. Good for the soul (if not the bank account).

As mentioned earlier, soon enough the salesman reeled me in by bringin’ the skins of the Pearl Rhythm Traveler kit to life. I, of course, sat down and jammed out some gnarly beats to see if I COULD conjure up such an impressive sound and, lo & behold, I could!

And that was that. As fast as a flam in a Speed Metal band – I was hooked and purchasing those wine-red little drums.

Stairs? SCHMERZ! BRING ‘EM ON!!!

Unboxing and set up

When I got my new kit home, I have to tell you – I was a bit confused with the set up. See, both the snare AND the floor tom connect to the bass drum. Hadn’t really noticed that in the store. 

Once I got it figured out though, I found setting it up to be super easy.  I tuned them to my liking and added dampening to each drum to give ’em a smoother tone.

The kit comes with a hi-hat stand and stool, but I opted to use my own, as the one I’m used to playing is of higher quality. No biggie.

And, yes, the set also comes with hi-hats and a crash/ ride cymbal. But, ya know what? They’re not so great. They’re “basic sounding” beginner cymbals – totally cool if you’re a beginner! But since I, uh, play real shows, I just ditched ’em for my own Zildjan ZBT set. No comparison there!

I added some more cymbal stands also, for another crash and a china cymbal (still thinkin’ about you, Neil Peart!).

My verdict after some months with this new kit?? It’s a KEEPER! Totally love ’em, and yes, they DO get the job done in most cases.

One thing’s for sure: my feet and back are undying fans!!!

The Snare that dares!

Let’s break the set down, piece by piece, so I can be specific about its pros & cons. Think of this section as testing for Sound Check. 😉

First, the snare. This 13×5 fully-assembled outta the box drum is like a groove slave that dares to take on the world.

It’s connected to the bass drum via an hardware arm that’s mounted on the pedal side of the bass drum.  

Do I like it? OH, yea! I found it to be similar to my previous Pearl snare drum, both in tone, responsiveness and size. 

It has a bright, tight sound that cuts through the mud of a live set, not to mention a great “pop” when doing some tricky stick work.

Its all about that bass

When starting my journey, I was looking at 18” and 20” bass drums. I am happy this came with a 20×8.

The bass drum features a 20×8 shell, heads on both sides (including a sound hole), a pedal bracket connector,  and two separate mounts  for all toms and the snare.  

The foot pedal is connected to a bracket that raises the drum a couple of inches. I’m glad it does, because it gives it the usual, comfortable height that I am accustomed to on my full-size drum set. 

This kick drum has some good thump for being smaller. I tuned it pretty tight as that is the tone that I prefer and I believe it really makes it shine. Regardless of how you tune it though, it’s a solid piece that can bring the beef to most shows, no problemo.

The heads are very responsive, with a great kick back. I’ve performed many an acoustic show where I only played this kick, along with some cymbal work. It shone through beautifully every time!

Tom tom makes you nom nom

Ok, its true: when I hear a drummer doing a sick beat only on the tom tom’s?? I start to drool. MORE LOVE to TOMS!!

This kit features first, second and floor toms.  Both the first (10×5) and second tom (12×5) are connected to the bass drum via the front mount, using a double tom mount.  

The floor tom (14×5) is actually mounted to the bass drum as well, via an arm hardware piece mounted on the rear side of the drum.

Unlike the kick & snare, all the toms have only a top head, leaving the bottom open for volume and tone. 

It took me a while to get the toms where they felt comfortable, particularly the floor tom. Like most drummers, I’m used to having my floor tom actually… well… on the floor! Not being able to move it out and in as I pleased was irksome at first.  Because it’s mounted, you are more limited in placement than a free-standing standard floor tom.

After some play, however, I was able to find its “sweet spot” for my technique and reach, so now it maintains a very comfortable position for me.

The tone of these three toms are all a bit brighter then I was familiar with. Makes sense, right? They’re smaller.

Can you get ’em down to standard tom size tones?? Well… not really. If you try to tune them down, the heads just make a “blat” type sound that’s more like playing a thick hanging shower curtain than a drum!

So I just keep ’em tuned up where they resonate best. After a little dampening for hushing ringing overtones and focusing the sound… I think I’ve got ’em dialed in and am very pleased with the result when I play live.

Count me in as a co-vagabond with The Pearl Rhythm Traveler’s tone and feel!

The cymbals and hardware game

Yea, this little baby comes with all the hardware needed to start you off. It features a two-piece cymbal package: 13” Hi Hats and a 13” Crash.

A full hardware package including:

  • Chrome cymbal stand
  • Chrome Hi-Hat stand with black base
  • 4 black L-arms
  • Aluminum clamp for mounting the low tom to the cymbal stand
  • Aluminum/black bass drum pedal
  • Two sided beater (Felt/plastic)

Some kits also have a separate snare stand, as well as aluminum hardware verses black.

As I mentioned already, I was not a fan of the cymbals that came with it. To me they sounded similar to the cymbals that come with ones of those kid drums. They were too thin and bright sounding and (in my opinion) sounded cheap. 

Replacing them with my own Zildjan ZBT cymbals makes the whole kit sound so much more professional.

All the hardware and brackets are good quality though, and, hey, I haven’t broken any yet so… that’s a good sign.

I opted to use my old hi-hat stand as well. It’s a little more solidly-built. Don’t get me wrong though, the stand it comes with works just fine and doesn’t present any problems.

Oh, one more change: I swapped out the stock drum pedal for my Mapex bass drum pedal. You know how it is: you get your foot used to a particular pedal, it’s hard to deviate. I’m just more accustomed to the feel and control of the Mapex.

But there’s nothing bad about the kick drum pedal that comes with this kit. In fact, I DO use it occasionally with my “suitcase drum” and it works wonderfully (wait for the article on THAT one later!).

Additionally, I added a couple of other cymbals and stands to the kit to make it more of a full sound. I play harder rock music sets often, so… what can I say – a girl’s gotta ROCK!!

Size Matters

Once I had the set up I liked, including the things I added, I never looked back. I love this little kit.

Yea, it’s a little smaller and tighter than what I was used to, and yeah, that was the whole point of buying ’em! I know!

Once I got this kit set up and personalized to my liking,ever since I’ve adored it. It’s light, compact, but yet super punchy, with a big boy kick drum sound that’s sure to give you that metaphoric punch in the face!

Then there are the size benefits. I can lug this thing around everywhere without any issues. It fits easily in my car and in a small room.

I was even able to fit the drumset and a small amp in a wagon to carry through downtown San Diego, California. 

Also, I of course faced the dreaded stairs for load-in once again and, thankfully, this little kit made it a much more enjoyable, and tolerable, experience.

The Rhythm Traveler has become my primary drum set for touring and practice. Got no choice now, ‘cuz I sold my full-size Pearl kit! Yup. I just wasn’t using it any longer.  And since I’m a music teacher as well, the small size works for any little tykes I might be showing how to rock! 

So now, whenever I want, I can switch from the full 5-piece, to a paired-down set (bass, snare, hi hat and crash/ride), OR to only playing the kick drum and hi-hat. Recently it’s been more of the paired-down version, seeing just how far I can go with that set up. Pretty versatile for such a good-sounding kit!

My Ending Fill!

So, yea – this little drum set is amazing! I highly recommend it to anyone who’s struggling with load-in and space issues – you’re never gonna wanna go back! I’ve used it for rock, punk, folk, Americana… it always sound complementary

If you NEED behemoth kits that you can hear from miles away, then, more drum power to ya. This kit’s not for you.

But if you’re looking for a lightweight, brave, quality kit that never wimps out or sounds weak…. you just found it!

Watch out for the little guys (or gals). They pack one mean punch!!!

Specs

Caveat Emptor: Little details may differ between these kits, but here’s what mine came with:

Drums: 

20X8 Bass drum shell

10X5, 12X5 and 14X5 Tom shells

Fully assembled 13X5 snare

Black lugs, mounts and brackets

Cymbals: 

13″ Brass Hi Hats

16″ Brass Crash/ Ride

13″ Black plastic single hat

13″ black plastic cymbal

Heads: 

Black 20″ rez head with white pearl logo,

Clear 20″ batter head with integrated “o-ring”, 10″,

12″ and 14″ “Pearl Protone” dual ply hydraulic (oil filled) tom batter heads

coated 13″ batter head and clear 13″ rez head already assembled on the snare.

Hardware: 

Chrome cymbal stand,

Chrome Hi-Hat stand with black base,

Three black L-arms,

Two black bass drum spurs,

Aluminum clamp for mounting the low tom to the cymbal stand,

Aluminum/black bass drum pedal,

Chrome snare stand,

Two sided beater (Felt/plastic),

Two 20″ Black anodized aluminum hoops with black wrap inlay,

10″, 12″, 14″ black rims

two 13″ black rims already assembled on the snare,

12 black claws for the bass drum

bag of chrome T-rods.

Features

  • Mahogany shell construction
  • Black drum hardware
  • Full hardware and cymbal pack
  • Three color options: Matte Black, Wine Red and Pearl White

Where to buy

Honestly… these little bad-@$$&s are hard to come by. Once players have ’em they don’t tend to get rid of ’em! But keep an eye at GC or Reverb.com or the local store of your choice. You never know when one might pop up and make your day.

It sure did MINE! 😉

Jen, Beat-Maker Extraordinaire!

The EVH Phase 90 – Stripey, Swooshy Goodness That PUNCHES Your Tone!!

MXR EVH Phase 90 guitar pedal

There are times when you buy a piece of music gear to sound BETTER.

Other times, you buy a piece of gear to sound DIFFERENT.

And then… there are those other glorious times when you buy a piece of music gear… simply because you want to sound like one of your heroes!

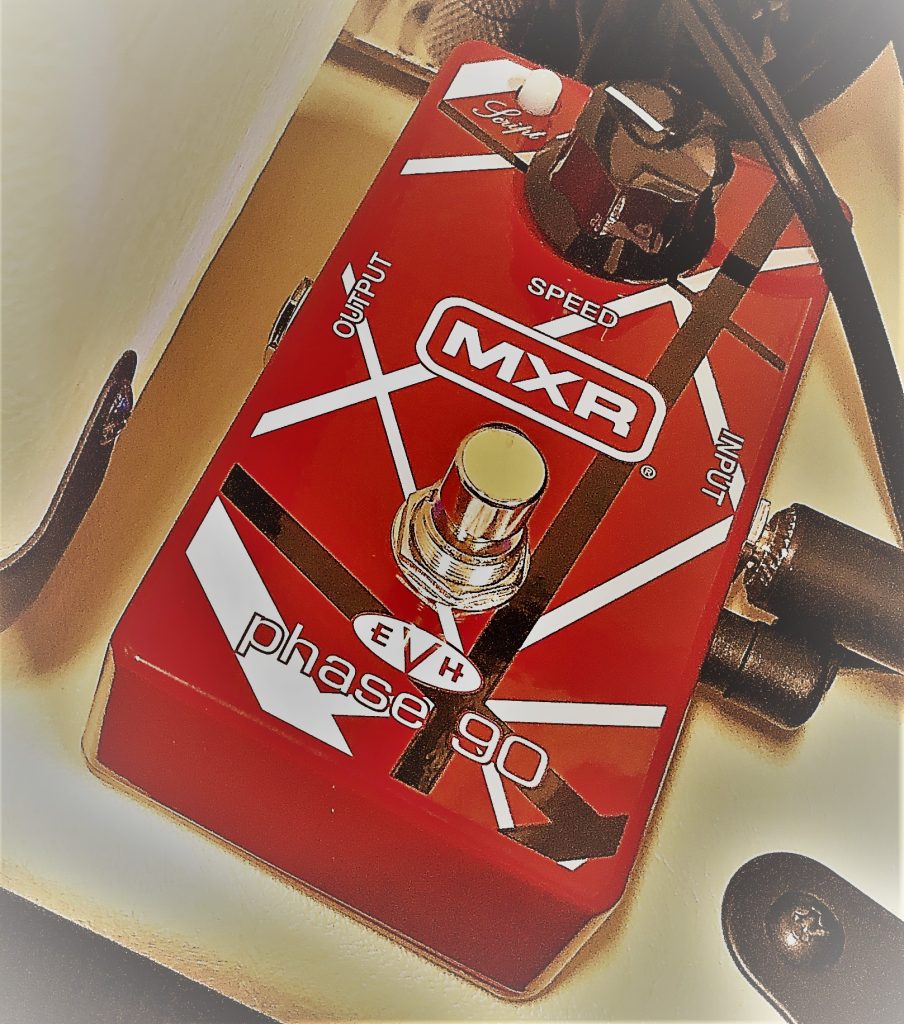
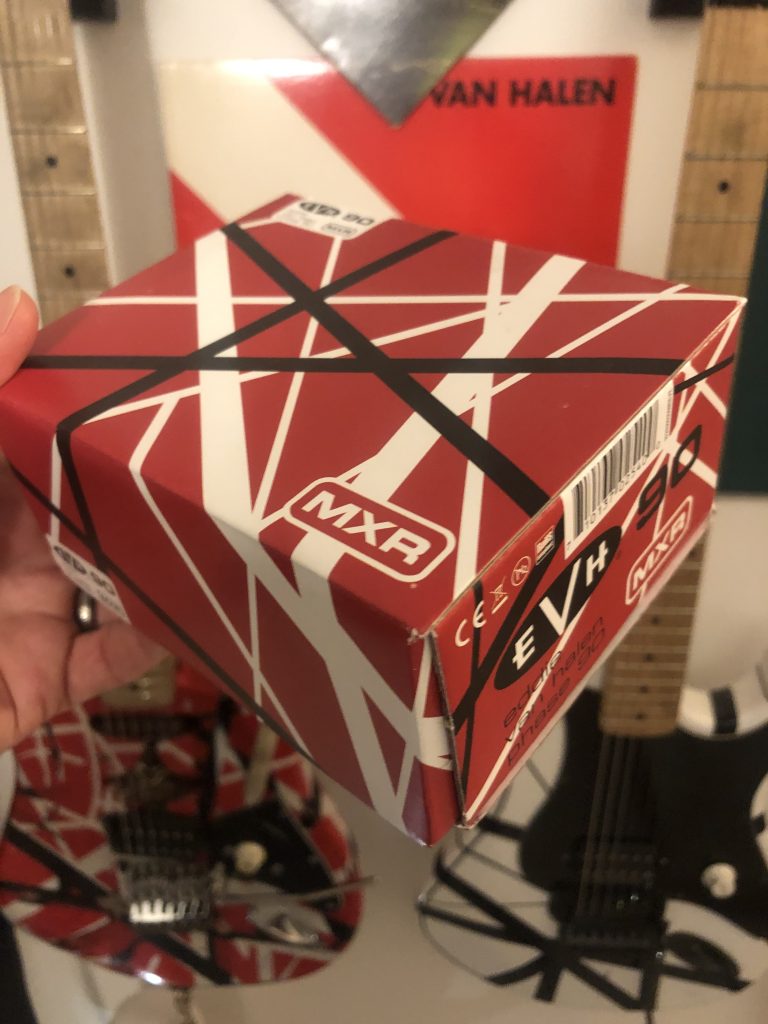
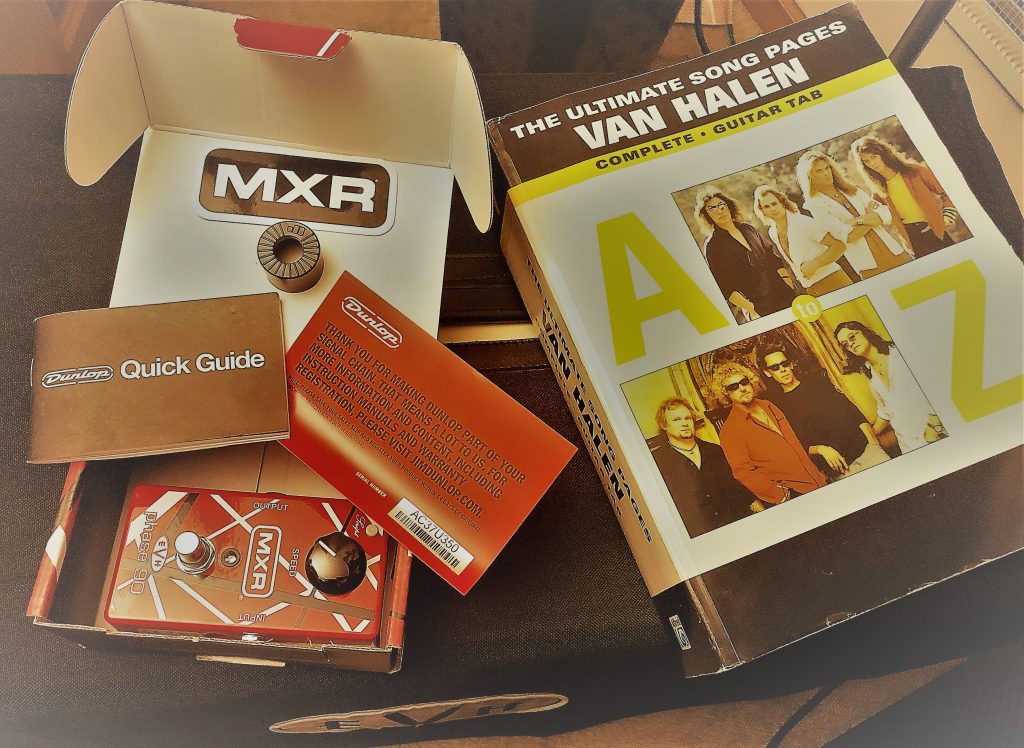
The EVH Phase 90 guitar pedal by MXR came into my life because of that latter desire. I had told my family this past Christmas that, really, the only thing I wanted was this sweet pedal.

Guess who musta been nice not naughty for Santa??! LoL

My beaming smile and more calloused fingers show my gratitude for their generosity!

I pretty much used this pedal for every gig I play now if I’m on the electric… even the one I did TONIGHT! I don’t engage it all the time, mind you, but for those “special moments” when I need that little boost, or a little flash of Eddie flair… it’s there!!

What’s in a Name?!

Ed grinnin' on my studio wall

I’m sure there are probably some people out there in the world who have bought this pedal and didn’t know who Eddie Van Halen was.

I am definitely NOT one of those people.

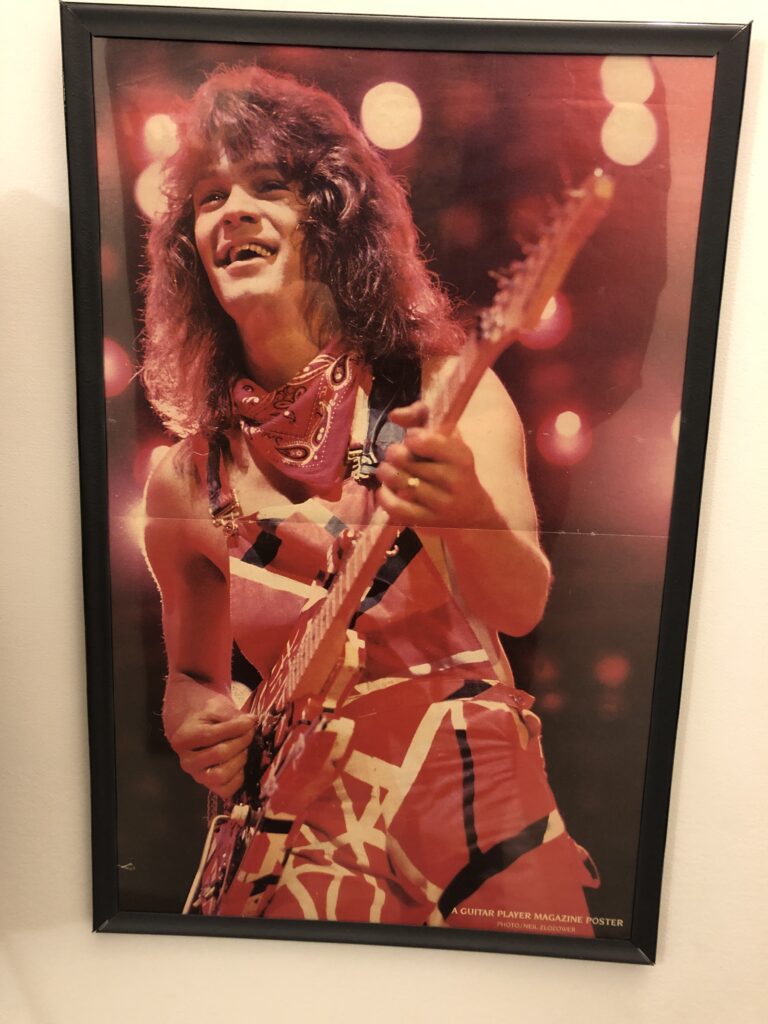
Mr. Edward Van Halen has been a hero of mine since middle school , and the red, black and white striping on this pedal inspire more in me than simple artistic appreciation – a deep emotional connection will always be conjured up in me by anything related to that wizard of the strings maestro Mr. Van Halen.

Eddie’s passing this past year, in what is surely the most challenging year most of us have ever lived through, made the whole train wreck of 2020 even worse. You can read my subsequent tribute to his all-too-soon passing in THIS POST.


If you want to get a good sense of what this pedal can do for your sound, listen to Van Halen’s first and second albums. You’ll hear the Phase 90 peppered throughout those albums, on many songs. It won’t always be on though; Eddie rarely engaged it for more than a few seconds, usually popping it in and out as a way to strengthen certain licks, lines or solos.

Ain’t Talkin ‘Bout Love“, “Atomic Punk” , the melt-your-face guitar solo that bowled us all over in disbelief called “Eruption“… they all feature the scrape-y, swirly, boost-y cloak that the Phase 90 wraps around your tonal delivery.

Van Halen II (between the ‘Little Guitar’ & the Wolfgang) featured the Phase 90!

He also used it on later songs too, like “Everybody Wants Some“, “Drop Dead Legs“, and even the last song on Van Halen’s very last album, for the tune “Outta Space“.

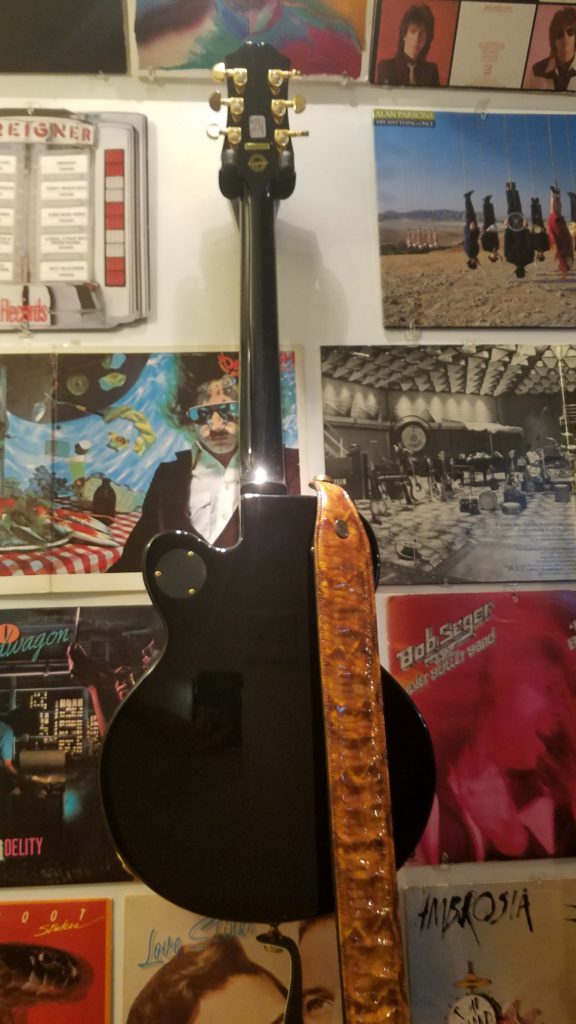
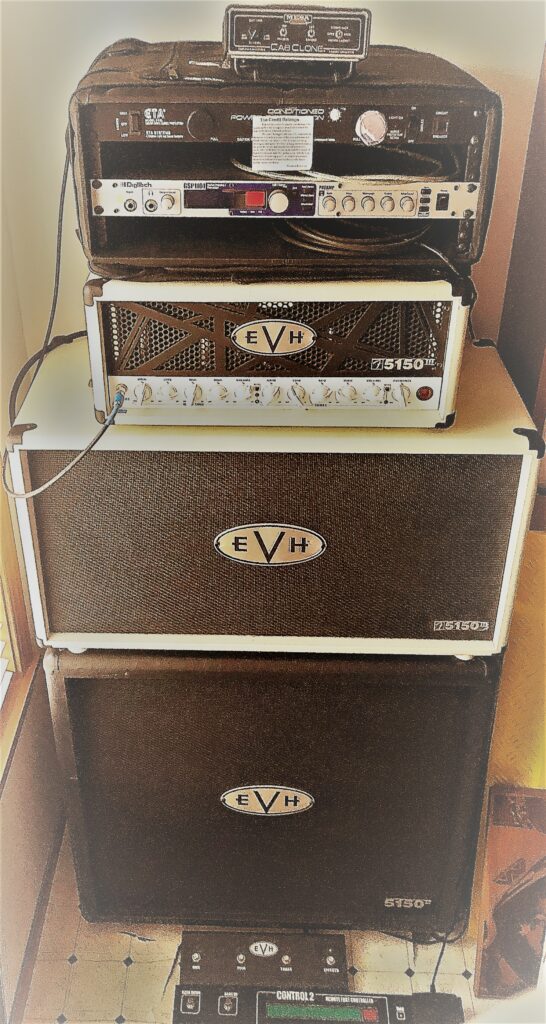
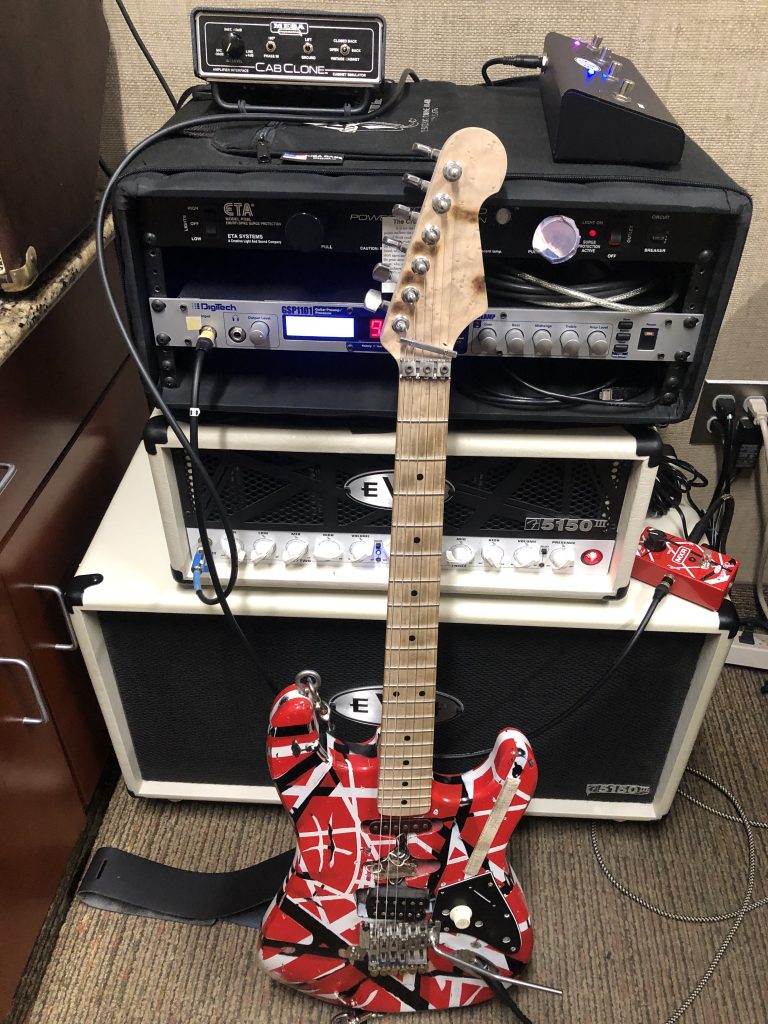
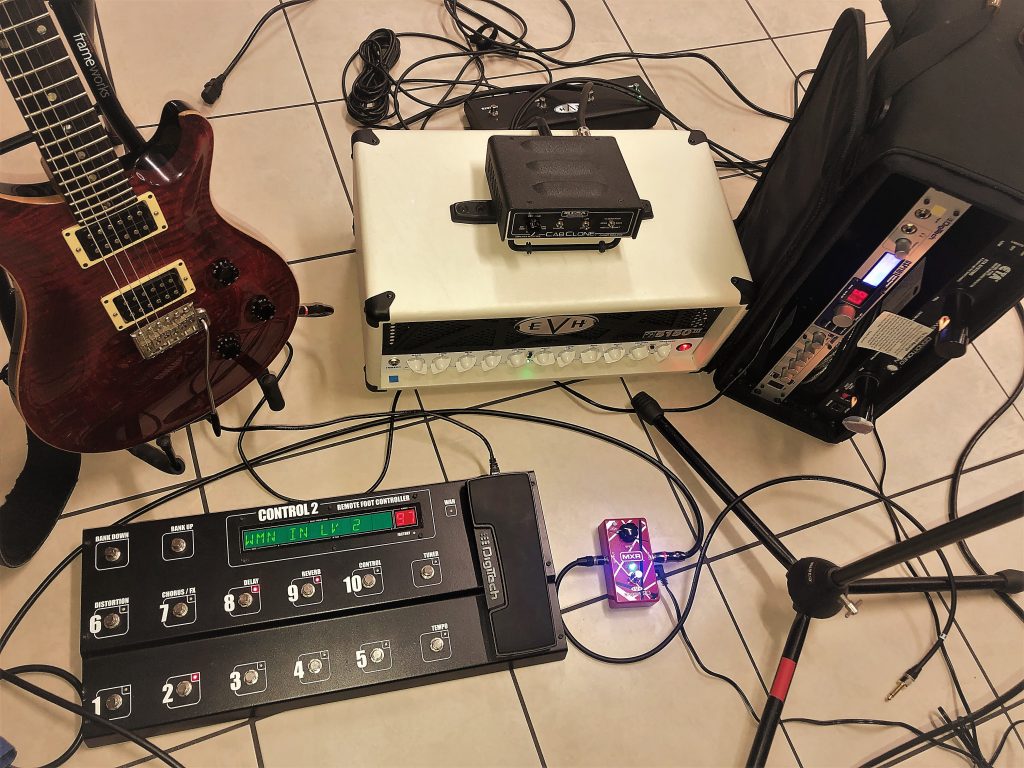
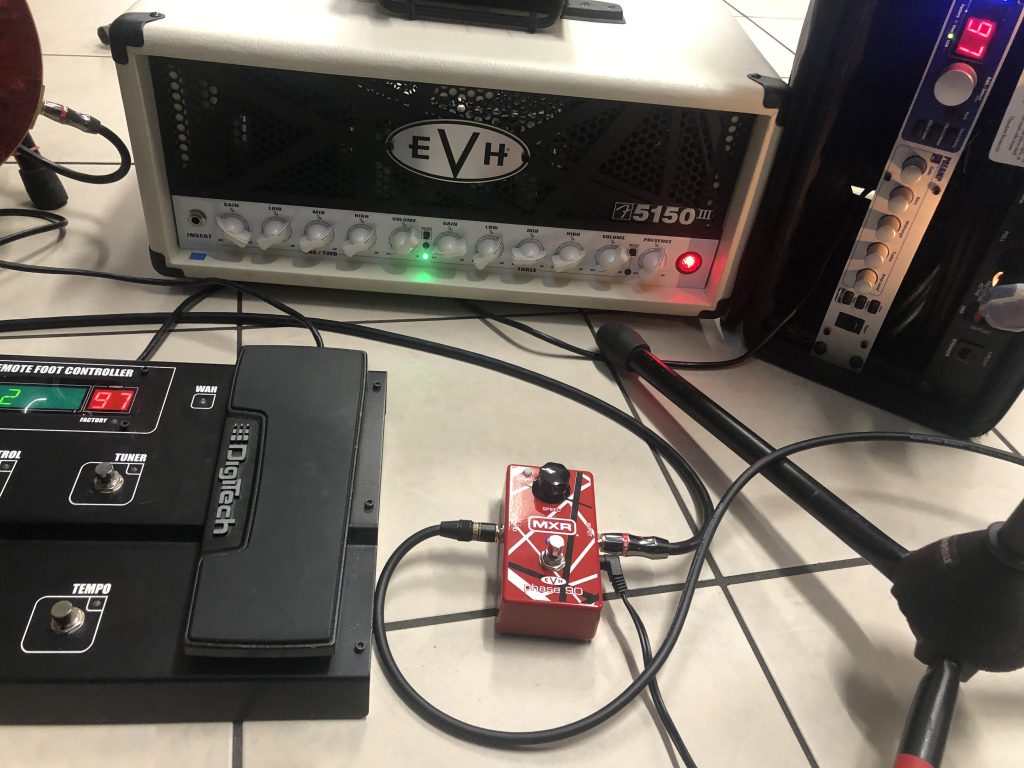
Since I’ve studied Eddie’s songs my whole lifelong (or so it feels like!), I wanted the Phase 90 so I could totally nail Ed’s tone & effects when I play certain material of his. This pedal, put in my signal path after my EVH Wolfgang guitar, but before my 5150III amp and GSP1101 processor, brings that Pasadena party that was Van Halen right into my control room every… single… time!!

My EVH gig rig
My EVH gig rig!

For those of you guitar angels (see the front cover of 1984) who like to ascend into “Spec Heaven” whenever you check out a new piece of gear…

Lay back on your cloud I’m take in these numbers that I’m layin’ down:

Phase 90 Box

SPECIFICATIONS:
Weight: 11.2 ounces

Release date: January 16, 2004

Model #: EVH90

Dimensions: 5.8 x 4.5 x 2.8

Input Impedance: 1 MΩ


Output Impedance: 10 kΩ

Signal to Noise*: >96 dB


Bypass: Hardwire


Current Draw: 8.2 mA


Power Supply: 9 volts DC (battery) OR a 9 volt AC adapter (not included)

*A-weighted, Vref = 1 Vrms

Phase 90 Bottom

In case anyone is wondering, no, the Phase 90 is not “true bypass“. However…

If you really need it to be, you can always call upon the fine skills of Robert Keeley, in Edmond, Oklahoma, to do a mod on it for you. He’s done this plenty of times, and has worked on Steve Vai and Peter Frampton’s gear. Contact him at www.robertkeeley.com.

If you’re like me, you already have a standard 9v 200-300ma adapter with multiple plugs for all your pedals. That kind of adapter will power this pedal juuuuuust fine, thank you very much. I’ve had no issues using mine in all my gigs.

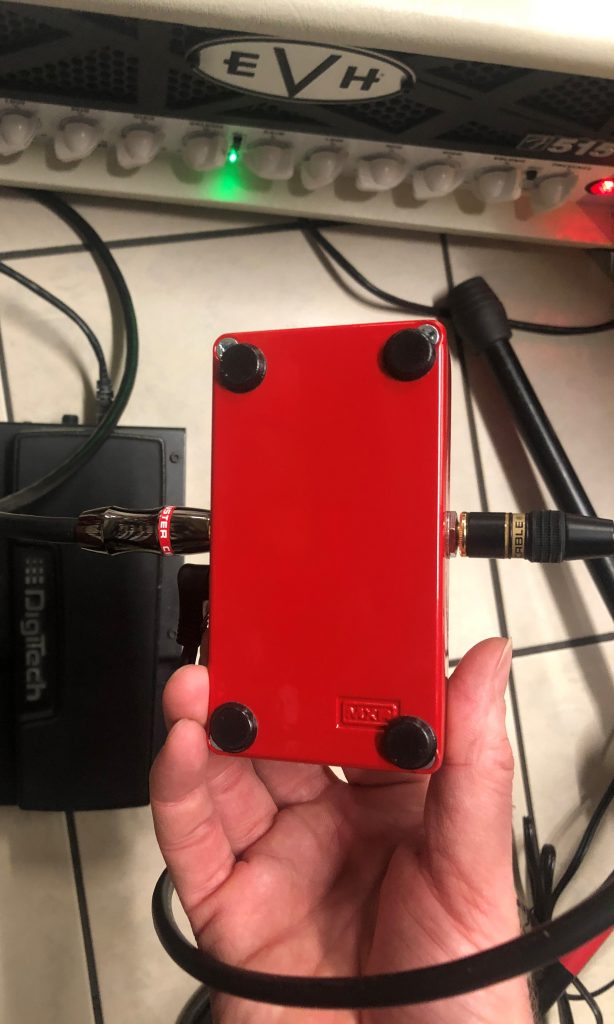
Also, it comes with little rubber feet that adhere to the bottom of the unit to keep it from sliding around all over. They work too; I haven’t had any issues with it moving after I’ve put my foot down about my solo demands!  LoL
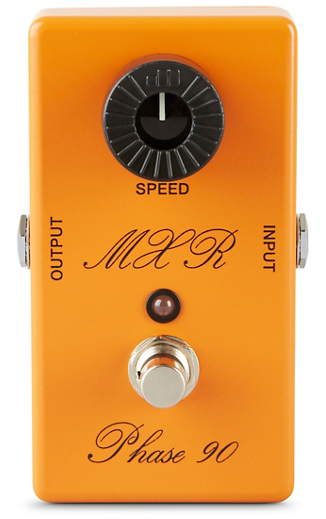
It’s Got the LOOK

Phase 90 with Frankenstein
My gig rig with my “Frankenstein” replica!

As I mentioned earlier, this pedal sports the same red, black and white striped artistry that Eddie Van Halen wrapped all over his famous “Frankenstein” guitar early in his career.

The pedal is pretty small, thin and lightweight; you definitely won’t see it taking up much room on your pedal board.

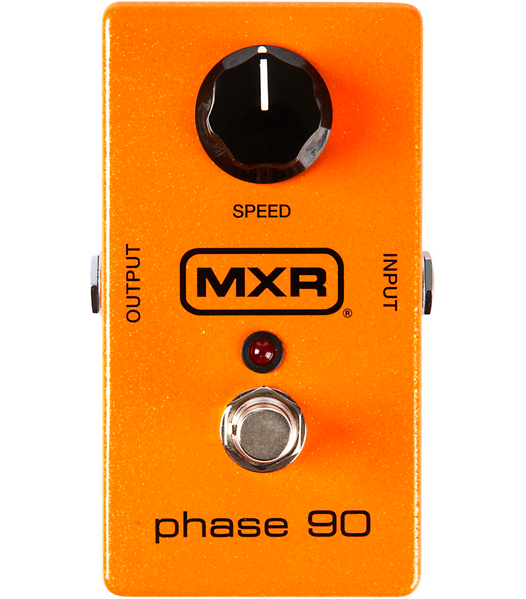
It’s also very simple in use: just one silver button to engage the pedal, and one black dial to hone in the exact amount of the effect that you want. That’s it.

Or is it???

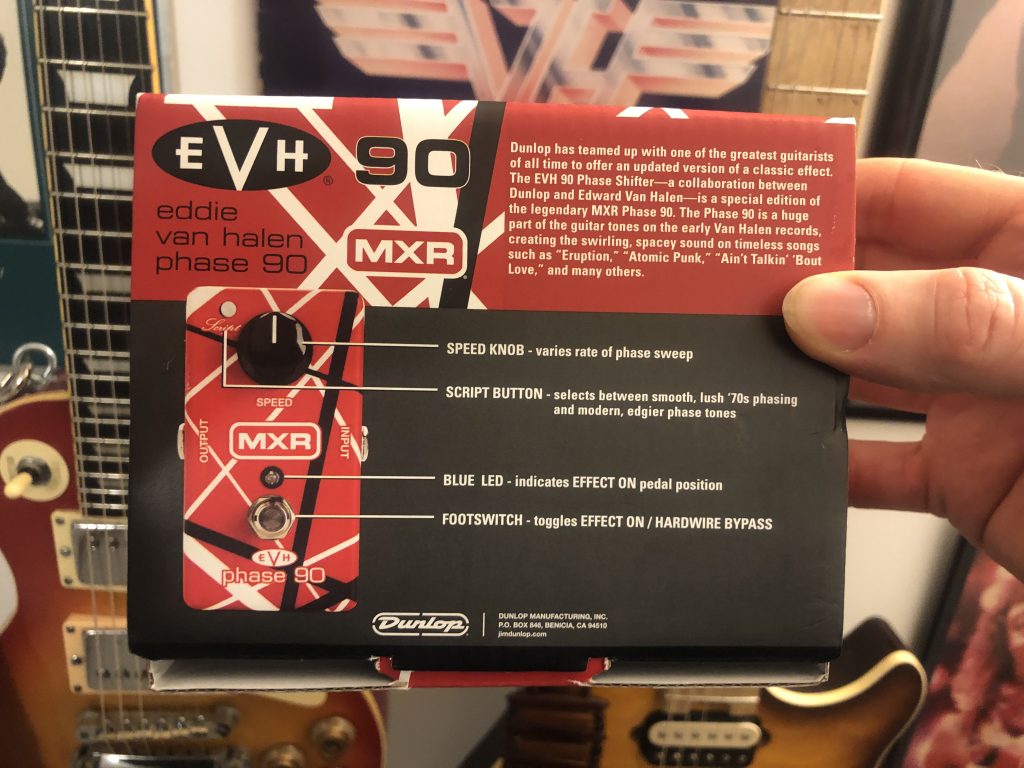
At about 10:30 from the big black dial there’s a tiny, white button that, when engaged, instantly gives you the exact setting that Eddie used for most of his songs.

Here’s how MXR engineered it: if you leave the “Script” button alone, then you’ll be calling up the more “modern” sound of their Phase 90 pedal. The effect sounded more pronounced in this version, and it had the “Block Logo”, as in the picture below:

Phase 90 block version

If you depress the white button though, you get the more vintage “Script Logo” phase tone, which first came out in 1974 and looked like this:

MXR phase 90 Script version

Fire that button up and BOOM… you’re instantly transported back, back… back to the days of the late 70s, striped bandanas and simple amp setups… the days of Eddie taking over the world!

This is especially cool for those of us that really want to just play Van Halen songs, cuz we don’t have to mess with anything; one little press of the white button, and BEHOLD… that Eddie aura is resurrected instantly!

This double-whammy duality of the pedal is why it’s more expensive than the older single version – basically, you’re getting TWO pedals in one, extending the range and strength of the effect and giving you a bit more sweep for your buck.

No Frills Gives ya Chills!

Just as the looks of this pedal are simple and straight forward, so the adjustability and versatility of the Phase 90 is deliberately limited. You’re not going to get a ton of effects out of this puppy. It’s a one-trick pony; it doesn’t try to spin sound plates one frequency sticks like your favorite all-encompassing guitar processor.

Phase 90 Box specs

But what it does do, it does well: if you want your signal gently boosted or, say, a solo brought forth in the mix without transforming the basic tone much… the Phase 90 does that with a sandy panache you’ll love, with a slight tilt in the mid and upper frequencies that shines a spotlight on your shred-mania right when you need it.

You can also get quite a warble or tremolo effect out of it the further to the right you turn the black dial.

I don’t usually go too far to the right myself though. Eddie didn’t either. He usually kept it clocked at about 10 a. m. so there wasn’t any fast movement in the effect that would lure your ear away from his magnificent playing.

Instead, at the “dialed-left” settings, there’s rather a slow, sweeping kind of morph that sprinkles all your notes with a Milky Way kind of star quality that’s subtle until you take it out. Then you miss it!

Phase 90 at my gig
Can you spot the hidden phaser??? Ok, ok… so it’s NOT so hidden!

If you know how this effect sounds, and what it does, then you know it does it better than any other option out there. That’s why I don’t see it going out of style anytime soon… or ever, for that matter.

One word about signal chain too: if you reeeeally wanna nail that Eddie vibe, do this: place this pedal in front of your preamp, not in the effects loop, and before your distortion in the chain. That’s exactly how Ed had it and, well… is anyone gonna say his recordings didn’t sound amazing??!  😉

Keep in Good Company

The MXR company is actually owned by Dunlop (the brand Eddie used for his Wah-Wah pedal). Even before Dunlop bought ’em, MXR had a good reputation for making gear that stands the test of time.

dunlop-mxr-logo

The all-metal construction of this EVH-branded pedal is solid and dependable. I can’t see it breaking. I’ve also never heard any of my friends that have these MXR pedals complain that one went dead during a concert, broke off any pieces, or had any issues with them at all.

Eddie not only used MXR pedals at the beginning of Van Halen’s rise to legendary status, but also continued to use them throughout his career… right up to the end of his life. That says a lot.

So far, in gigging with it, I can vouch for their ruggedness and dependability.

Since Eddie agreed, I like to think that… great fingers think alike. 😉

Ain’t No Sin t’ Grin!

I always like to talk about this side of a piece of gear whenever I do a review, because, let’s face it… music and all the technology that goes along with it is, if nothing else, a lot of FUN.

This pedal can indeed be a lot of fun too. The first and foremost reason? Well, because you can instantaneously call up an effect that made one of the best guitar players of all time (maybe the best?!) sound just that much better because of this li’l box.

Phase 90 close up at gig

If you are recording guitarist , you can also push the dial to some extremes, & get it to wash your tone with some freaky movement.

This is especially effective if you match it to the temple song you’re doing. That way the effect doesn’t come across too extreme, but rather is a subtle pulse shrouded behind the bass and drums – like a gentle tap-tap-tap on your back by the sword wielded by the Angel of Rock!!!

And, come on, just having a pedal that looks like that in your arsenal has to make the playing more fun, doesn’t it?!

It reminds me of another thing I always loved about Ed – his smile. When he played his grin was usually a mile wide. Anybody could see, from planets away, that he just absolutely loved playing music and never wanted to do anything else.

Gee… maybe that’s why he was so amazing. Ya think??! 😉

I’ll Take My Kicks Striped, Please

Pedals for guitarists can be like shoes for women -you can have a closet full of them, buy more and more of them every year, and still always have that little voice in the back of your head that says , “Oh, but… what about those?”

(Not that I can talk. Who just haaaaaad to get those rockin’ kicks pictured below? Who?? One guess.)

Van-Halen-shoes

I’ve bought a lot of pedals and gear in my time. Some hold my perpetual interest. Others? They’re here and gone like spring sonic dandelions – interesting for the moment, but not something I continue to reach for when it’s time to jam.

The EVH Phase 90 is a box you can always count on to add that little bit of brash bravado to your tone, whether in the overdrive or clean channel. Need a simple swoosh? Keep the knob left. “Unchained” undulations?! Turn right, string bender!!

Although it’s pretty ubiquitous now in my live rig, I don’t find that I use the Phase 90 much in the studio. But that’s entirely because my songwriting and production is a bit more on the eclectic side.

I don’t rely on the same effects much; I’m more a Peter Gabriel-kind of producer, with lots of diversity album-to-album, and I’m always looking for elements of surprise that paint those bouncing frequencies with aural ambushes in your ear!!

When I do need this effect though, I use it deliberately, and it’s much better than any software plug-in I have. Plus, it doesn’t add a lot of noise to my signal chain. That, in and of itself, makes it worth its weight in amps!

That’s a (striped) Wrap!

For those of you that want that “Eddie” sound, or for those who just want a good, solid dependable pedal that can only make you sound better

Get this pedal!!

When that little blue “engaged” light shines up onto your spotlight-sweaty brow, and you hear how it helps you punch through the mix into the bosoms of your adoring fans (or whatever body parts you prefer… I know what I like!) you will be very glad you spent your hard-earned cash on a product worth the money.

Just don’t blame me if you can’t stop learning Van Halen tunes and nobody sees you for 8 months.

It’ll be like your own private COVID vacation… only MUCH, MUCH BETTER!!!!

Here’s to many a marathon jam, my friends!  😉

Now, go… make… SOUNDS!!

Teaj

How to Score Black Friday Musical Instruments – the ‘Sleepless in Seattle’ Way!

Black Friday Musical Instruments
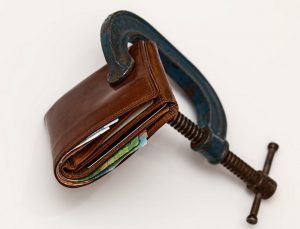
Is there ever a day more akin to Christmas to G.A.S. sufferers than Black Friday??

What opportunities!!

What inspirations!!

What a sudden glut of zeros on our bank account statement!!

So let your love affair begin, and let these tips get you ready to…put a ring on it!!

“Who Do Ya Love? Now Who Do Ya Love…?”

It goes without saying (and yet, here I am….saying it!) that, to quote the inimitable Joe Jackson, “You can’t get what you waaaaant, ’til you know what you waaaaant.” You’ll make things a whole lot easier on yourself and her on Black Friday if you’ve done your research, picked your bride, and are simply ready to walk him/her down the aisle….to the “Checkout” page!

Three options will prepare you:

  • Research online
  • Research in your local stores
  • Research both

Totally your call, but I recommend the third option. There’s just something that really ties the knot when you’ve held your beloved after choosing him/her from amidst the other options that are alluring, yet somehow lack that…certain something.

Online research is good for checking out the features and benefits of a given instrument or product, and then comparing it against what you have ascertained is the perfect fit for your style, studio setup or production needs.

In-store shopping is excellent for what really matters in audio – how does it SOUND?? Go in there, pick up instruments and PLAY them. There’s no substitute for experiencing the sound-producing qualities (or sub-par traits) of a given instrument. When it comes to musical instruments, until you hear it, you just don’t know.

One quick caveat though: know what your budget is going in to this. A four or five-thousand-dollar instrument is obviously going to make most of us salivate and quote love poems, but if you know that the best you can muster is under $700, then by all means don’t tease yourself into misery – try ones that fit your budget so you can have a successful end to this courting tale.

No More Dumb-bow – This Elephant’s FLYIN’!

Case in point: three years ago I went to a store called Shar in Ann Arbor, Michigan to check out their “Pre-Christmas Sale”. It is the premiere shop for any orchestral stringed instrument. They are indeed, in a word….awesome.

I had started learning violin two years previous was in the market for a new violin bow. The one I had was a beginner model and I was wondering if a new bow would improve my fiddle tone at all.

Upon arriving, I asked the Shar representative if I could try any violin bows under $500 (see? I knew my budget). I had brought my violin with me so I could hear the end sound product. She soon had graciously brought me a large drawer upon which was sitting about 14 violin bows. She explained to me the basic divisions of each kind and then ushered me to a practice room where I could try each one to my heart’s content.

If you would have told me before that day that violin bows can influence your tone dramatically, I would have listened, but been pretty skeptical. Not anymore. I couldn’t believe the different frequencies that each bow brought out of my fiddle! Two in particular stood out as the clear winners as I played, so I then put those two to the ultimate test: I recorded myself playing with both on my smart phone and then listened objectively (a method of decision-making I highly suggest). The recording made it clear which made me sound like Heifetz on a mountaintop, so I marched right out to the register singing “Got to Get You Into My Life” (the EWF version, my personal favorite)!

So if you can, get in a store and decide upon the specific make, model and variation of the instrument you want. That way, if you do buy online, you have the assurance that you’ll like the exotic damsel that shows up at your door swaying and singing your name.

Crave, but Save!

Once your heart is set on him/her, the most important thing you’re gonna need to woo her to your world is….MONEY, of course. Kinda hard to get around that one. Since you’ve already chosen a specific instrument, look online and find the lowest possible price on it right now. You know on Black Friday it’ll be less than that probably, but for now let that be your maximum price.

Next question: do you currently have that total, set aside, in your bank, or available on your credit card? If not, you must start RIGHT NOW putting aside some cash every payday that will get you to your goal. If you’re really smart you will have a bank savings account (or a drawer in your studio!) all year long, that you stash cash in just for this day. Even call it “BLACK FRIDAY BOOTY”. It sounds pirate-y and makes the bankers wonder, especially if you’re wearing an eye-patch!

Follow this advice and you will have a rich, wondrous rendezvous every year with a website of your choosing. It might not be on top of the Empire State building like our mentioned movie, but, with today’s smart phones….it could be.

Request and be Blessed!

The other idea to make the most of this day takes a little more patience, but still ends up in celebration – even more so because it’s shared with other people. This is a great tactic for those who know that they just won’t have enough cash to get what they need/want on the big day.

The method? Ask your loved ones to buy it for you or chip in on it with you for Christmas! This suddenly increases the funds such that the instrument you desire might be in reach. It’s a win/win – your family gets you something they KNOW you’ll love and you….well, you get to feel the love, both from them and, come the yuletide, your new beloved that’ll be waiting under the tree!

My personal experience with this? I found a guitar on EBay some years back that looked SO COOL – it was A Les Paul-type electric, covered with dragon motif Purfling on the pickguard and up the entirety of the neck. The Seller had forgotten to, um….put the word “guitar” in the heading, so, I kid you not, I ended up being the only one to bid on it. And the starting bid? $230 – with a hard-shell case.

BU-YAH!!!

Waking up that Christmas morning, I almost felt like I was 5 again; it was that exciting and fulfilling. Try it. I guarantee you’ll like it!

The Early Riffing Bird…

If you or a loved one is gonna buy for you on Black Friday, score your purchase in the morning. Don’t wait. Many products end up being sold out and you don’t want that disappointment. Remember, there are millions of people online all trying to get the best deal. Girls, don’t let your hot stud of an instrument be stolen by some other hussy! Guys, don’t let your lovely lady be swept away ‘cuz your pillow felt good. Tine to make the doughnuts! Be like David Lee Roth: get up, and don’t let nothin’ get you down!

When you’ve grabbed your coffee, sit down and start surfing. Check any and all websites that list your instrument, and if you’ve risen early…no need to rush. Be thorough and you’re bound to find your beauty able to be freed for less money than you’ve seen yet. It doesn’t happen every time; some websites are obviously still living in the 80s and keeping their marketing heads in the sand by not offering Black Friday specials. Let’s give our hard-earned cash to those who cut us deal after deal. That’ll teach ’em!

On a Clear Day You Can See….Your Tracking Number!

Finally, in true romantic comedy fashion, if you’ve done the work to find your love; if you’re ready for the moment you propose; if you’re there with cash in hand and a winning smile to melt circuit–laden heart…then, don’t be shy – put a ring on it! Make the commitment! It’ll be worth it, and you’ll always have Paris…uh, well, I mean you’ll always have a great Black Friday story to share with your friends, family, children, grand-children, great-grand-children, great-great-grand-children, great-great-great-grand….

Now – go…make…sounds.

Teaj

“Hey, Mr. Colaiuta – what’s the best beginner snare drum, ya think??”

best beginner snare drum

If only we all could ask the greatest players of every instrument, like Vinnie, such questions.

Something tells me there’d be a lot fewer Chinese knock-offs in our kits!

If you’re new to the snare world, or even drums in general, welcome!! It’s a world of laughter! A world of tears! It’s a….oh, no, wait that’s…something else entirely….

Actually, It’s a world of cool, crackin’ sounds that move yo’ booty and sing like Hootie! And, as I tell my students, playing drums has an aggressive, barbaric, ‘Incredible Hulk’ kind of vibe that I don’t get from any other instrument. When drums play it’s not just a sound…it’s an INVASION!!

If you’re trying to find out what the best beginner snare drum is, then I’m guessing you’re coming from one of two potential places:

  1. You’re a young rocker who wants to learn some radio songs and get noticed by the opposite sex, or
  2. You’re in school, starting to play in the marching band, you’re looking for a concert snare and you haven’t yet been noticed by the opposite sex.

KIDDING!! Well….kind of. I’ve been in both places so…there’s a nugget of truth in each. Hah!

In any case, let’s take a look at each scenario to find the best beat for your buck…

“The Snares Go Marching Two by Two, Hoorah! Hoorah!”

Most of the time schools will have their own marching snares

best beginner snare drum

to hand out to those wishing to hit things, but not always.

If you do want to buy your own there are perks: having your own instrument carries with it a bit of clout and sets you apart as one who is more “serious, dude’ about your percussive mission.

Also, it will probably be in much better shape than the snares the schools has, since they’ve been dropped, rolled, hit, thrown….who knows what, for God knows how long!

Not that you have to have the greatest snare in the world starting out anyway. As long as the snare wires (the jangly metal or plastic screen-looking thing on the bottom head) and the strainer (the blocky lever on the side of the drum that engages or disengages the snares, changing the sound dramatically) are working, and you have a good head on the drum (the skin or polymer that you actually hit) you’ll probably be just fine.

If you’re buying a snare for school, however, it’s imperative that you ask your teacher what parameters you need to stay within if you want to use it with the marching band. What size? What color?

The biggest issue is snare depth. Most marching bands will want you to have a marching snare – one that’s 12 inches deep and 14 inches wide. This is much deeper than a snare you’d find on a drum kit. So if you’re wanting a snare that can serve for marching AND for a home kit, you’re probably out of luck.

Again though, you must ask your band director. He or she will probably give you excellent advice and know some local options for you to shop as well.

Also, what many students who like drumming do is use the school’s deep snare for marching and invest in their own drum kit snare for home use. Sammy says it’s the best of both worlds.

Anybody…little VH love? Anyone??

 Time to Sit, Behind the kit

On the other hand, maybe you’re the guy or girl who is NOT in marching band, but rather just really likes the thought of layin’ down a smooove grooooove and bein’ the foundation of a modern-day pop, rock or jazz band.

Well, your options are practically limitless. There are SOOOOOooooo many snare styles, brands, looks and sizes, it’ll turn your head around like a cold wind blowin’. Right, James?

The most typical snare in a kit is probably the 14″ x 5″, and that’s a great place to start so you get in your mind what a “normal” snare sound is and how to work it. Then, when future G.A.S. attacks occur, you can stomp and wail and cry out for the need, the absolute need for…

…a smaller snare:

tiny snare drum

Or a spiky snare:

best beginner snare drum

Or your favorite band’s snare!

best beginner snare drum

Or even your favorite TV show’s snare!!!

best beginner snare drum

Whatever floats Baywatch Bob’s boat, it’s best to start on a classic snare, and that’s a 14×5 or 14×5.5. From there the options are limitless.

But if you don’t go with the classic size up front, just know that there’s more than one way to skin a snare…

Size Matters

It’s going to make you a much more flexible, desirable drummer if you remember this: no matter what size of snare you get, the tightness of the head will be a big determining factor in the sound. If it’s stretched a lot, you’ll get a high cracking, tight sound. If loosened, it’ll be more subtle, appropriate for ballads and such.

But, as with every instrument, it’s so subjective. Just know that part of the fun of drums is tuning them. They don’t just have one sound. Get in there and play with those lugs (the tension rods that allow you to tighten or loosen the head) – twist ’em up, twist ’em down; listen to the difference in how the drum sounds when you hit through the changes.

Any given drum has quite a few voices if you give it a chance to sing in different registers.

My aluminum snare has been known to growl like Freddy Mercury sometimes. :-p

 Bang the Best. Leave the Rest.

It’s been said many times in the music world, but I’ll repeat it here because it’s always a good slogan to live by: buy the best instrument you can afford. Is it true that playing on a quality piece of gear is a more pleasant experience than playing on a cheap one? In almost every instance, yes.

Sometimes when you’re just starting an instrument you actually don’t know what a good one sounds and feels like. Because of that you could play on your $10 Fisher Price plastic djembe and think you’re summoning up the spirits of ancient Kenya, it’s so compelling! But in actuality…it probably leaves a little to be desired. That’s more obvious at times than others.

Case in point: my first guitar. A relative gave it to me. Probably was in their attic behind floor tiles and great-grandma Rebekah’s 1800s church clothes.

It had terrible action on the strings; they were so high off the neck I thought I was the worst weakling wannabe ever.

Then one day… I went over to my bud’ Brian’s house. He had a nice Martin. I picked it up. I played an E.

It felt and sounded like a totally different instrument.

best beginner snare drum

Definitely play on as many drums as you can. Yours. Your friend’s. The music store’s. The more you investigate, the wider your aural world will become.

At the beginning tho’…just get the highest quality you can for the money, even if you’re only spending $50.

Stockpiling Your Snare Arsenal

I also want to warn you: this site is called Serious G.A.S. for a reason. Once you start down this road of really being able to hear and recognize the differences in drums, I guarantee you – you’re going to want at LEAST one more.

And then another.

And then a smaller one.

And then a bigger one!

And then one made of maple, ‘cuz, come on, every pro kit has a good maple!!

And then, “Hey, wait – is that a DRUM SALE I see advertised??!!!!”

This is why I have a Ludwig 14×5 Supraphonic (circa early 80s) snare:

best beginner snare drum

A Pacific 14×6 birch snare:

best beginner snare drum

A 1980 Ludwig 14×6 Supraphonic (circa mid 80s) snare:

best beginner snare drum

AND a PDP Limited Edition Maple/Walnut 14”x7.5” snare:

best beginner snare drum

Each one is very cool, but very different. I choose the right snare for whatever current song I’m recording, and it melts into your hot, steamy ears like BUTTER!!

I’m telling ya. Gear Acquisition Syndrome never ends. It just gets more picky, because your ears get more picky.

The Day the Cilia Died

And speaking of ears, every drum student I teach gets this admonishment, for very good reason: WEAR HEADPHONES!!

I never, ever, ever, EVER practice my drums without ear protection. In fact, I don’t even go to concerts without taking earplugs. Once you’ve fried the sensory cells that look like little hairs in your ear (they translate vibration into sound) they are gone. Gone!

And they don’t grow back.

Drums can be loud. VERY loud. And if you’re on a drum kit, the cymbals too are so loud and piercing it can actually hurt if you’re getting the full brunt of their power.

I auditioned for a Journey cover band once, playing bass, and the drummer didn’t like it that I wouldn’t play without in-ear protection. I lost the gig, but saved my hearing.

I easily came out ahead on that one. So should you.

best beginner snare drum
One of Teaj’s rockin’ drum students!

If the biological facts don’t convince you, consider this: great musicians through the decades have lost their hearing because of the electrification of instruments that rock music ushered in loudly. Legends like Phil Collins, Pete Townsend, Ozzy, Eric Clapton, Brian Wilson, Chris Martin….they all have varying levels of hearing loss.

And, trust me, they wish they didn’t. Don’t be that guy, or girl. Protect your hearing so you can have a lifetime of performing and enjoying your music. It really sucks when that ability is taken away.

“I Just Wanna Bang on the Drum All Day….!”

Once you’ve bought your first snare drum, you’ll want to…practice! At least, we hope so. That’s where the FUN is!

If there’s anything that irks my smirk it’s seeing an instrument alone and unwanted in some corner that never gets to sing or shine ‘cuz it’s being TOTALLY IGNORED. Don’t cause your instrument to run away to Sgt. Pepper – get on it and bang away. Just 10 minutes a day can really advance your skills and let you see the possibilities that lie innate inside you.

Not so into it today? One sure way of eliminating the drudgery is to always start by putting on your favorite music and playing along to it. Even if you haven’t learned the song, play it anyway. Play it for the sheer enjoyment of it.

Then you can move on to studying something specific. But if you start with a smile, you’ll probably end with one.  😉

It’s a Hit!

So, in a nutshell, the best beginning snare drum is what you have money for, either with a classical school band or a modern-radio-songs band in mind.

Practice for the fun of it, wear ear protection and prepare for a lifetime of audio awesomeness as you pursue an extremely versatile instrument that is so crucial to music today and into the future – the SNARE DRUM!

You’re gonna LOVE IT!!

Now….go….make…sounds!

Teaj

Teaj in the storm fields

Discount Music Gear – A ‘One Man’s Trash’ Story

Discount Music Gear

 Every once in a while, when G.A.S. hits ya hard, you find that, well, there’s just not as much bread in the bread box as you need to scratch that screaming itch.

I teach students music out of my studio, and since many of them are still in school they often have little (mostly… NO!) cash to put towards a certain piece of gear that suits their fancy.

That’s when I suggest to them what I often do myself: GO DISCOUNT! Sometimes a used, reduced, or B-stock piece of music gear might just be the ticket!

The Upsides. The Downsides. The ‘Get-off-your-backside’-s….

If you can afford to buy whatever music tool you want full price, then the world is certainly your oyster.

Heck, it’s an oyster with a kickin’ stereo system, free drinks and stack of new guitar strings! Who we kiddin’?!!

But if not….then you need to consider the other options. The biggest upside? They’re cheaper, of course! And most of the time in just fine condition, believe it or not.

Here’s what to look for:

  • “Demo” units
  • “No-box” units
  • “B-stock” goods (Any unit not new, in unopened box)
  • Last year’s model, now reduced in price

There’re all kinds of reasons why you may find a cheaper price on the product in question. You just have to look in the right places.

I’ve bought a couple pro audio gear pieces, for example, that have “road rash”, or slight blemishes on the outside case because of being used on the road. The units WORK fine though.

Do I care about a couple scratches?! HECK, no! If it does the job and still has the same warranty, you can paint it purple, I don’t care. 😉

Also, since you won’t have to wait to save more cash, you get what you want sooner, which is always good.

Is there a trade-off? Sometimes. Nine times out of ten, I have bought demo units and out-of-box units that looked brand-spankin’ new; couldn’t find a scratch on ’em!

Then there were other times when there were issues. They were small, and none of them affected the sound, the navigation or the dependability of the unit. Usually just scratches, dents, dings.

Motif art

Or, in the case of the Yamaha Motif keyboard I got used, some Chinese writing on the top that I really hope isn’t cursing out everyone who actually can read it (See picture at right).

Most stores won’t sell a unit that doesn’t work, but they’ll be happy to reduce the price for you on one that works fine, but might look a little used.

Finding these types of gear can take some doing tho’; they’re not often put right up on the front page. They’re “marred”, after all, so stores will usually keep ’em in a corner somewhere.

It’s like when you go to supermarket: you won’t find the ‘reduced goods’ placed on an end cap where you first walk in the door!

No strain, no gain. But if you put the work time in…. I betcha you’ll find somewhere across this fine Inter-land of ours the exact piece you want for some dollars off…..sometimes MANY dollars off.

“Awwwwww, Where Do We Go – ooo Now??!”

There are several places I find that consistently have provided me with high quality, working options for a lot less money. Sometimes insanely less.

First up is EBay. It’s amazing when you want a piece SOOOOO badly but it’s hundreds of dollars more than you have, but you type the make and model into the EBay search and find that some blessed saint of a human being is listing that exact unit for hundreds less than the going price, it’s in great shape, and many times it’s listed as “No Reserve”, which means the seller has not set a minimum price to sell on the unit! Yippee!! Whoo-hooo!! Unbelievable!

Now all you have to do….is win the auction. Ah, yes, here’s where it gets a little tricky. I have been successful more times than not by using this method to do just that: sniping.  It’s waiting ’til the last seconds of an auction to make your bid.

First, determine the most that you are willing (or able!) to spend for a product. Then, wait until the last 10 seconds of the auction is up and THEN submit your bid. You’ll have to be quick on the draw, but this DOES work.

It has worked for me maaaaaany times. This means, tho’, that you must know exactly when the auction for this unit is going to end, and you must be there, right in front of your computer, ready to pluck the ripe fruit from the thrumming music tree.

Now, if others have bid higher than you’re willing to spend, then you’re out of luck. Unless, of course, you decide, “Ya know… I think I can scrounge up another twenty bucks…..” and increase your bid. Besides, what are the rest of your family for, if not to be there for you when you’re sick…with G.A.S.!

Next place that I recommend to my local music students all the time is Music-Go-Round.

This is a real brick and mortar store that you can physically drive to visit OR check out their websites to see the latest gear they’ve bought and brought in. They specialize in buying used music gear and reselling it.

I have one about ten minutes from my house and the owner and I know each other veeeeery well, thanks to my visiting him often. Maybe too often.

Okay, definitely too often. But, lemme tell you, I have picked up some SWEET, SWEET DEALS there.

Discount Music Gear

See this Eddie Van Halen Frankenstrat? Got it there, less than $500. Down on the right you’ll see the Ovation I picked up when one weekend I had to play & sing some alternate tuning guitar songs and wanted a second acoustic all tuned wierd and ready to go. That listed for around $800 but I picked it up for under three! And, by the way, I couldn’t find anything wrong, scratch, ding, whatever, on either of them.

Discount Music Gear

Chris at Music-Go-Round in Troy, MI – he’s MAH MAN!!! In any case, if you see something you like, the price is usually fantastic right on the tag, but it you still don’t have enough, make them an offer. Them saying ‘no’ is the worst that can happen. The best? You could be playing a sweet new instrument and still pay your rent or mortgage tomorrow!

Also, try Craigslist. This is where people who live near you want to sell their stuff privately so they put it on this site, usually with a short explanation of what it is and a picture.

I have hanging on my wall no less than nine instruments that I’ve gotten off of this site, and they’re all in great shape and I use them in the studio or live all the time.

One caveat: you must be more diligent checking out the gear before you hand over your cash (cards aren’t usually accepted). People selling music gear out of their house might not be as 1) knowledgeable, 2) trustworthy or 3) deliberate about making sure that everything on the instrument or gear actually works. Once you hand over the cash, there’re no returns, so….give those units a thorough going-over before you decide.

If it’s electronic, by all means, plug it in, go through menus, test the outputs by bringing headphones with you in the car. Most people are fine with this kind of testing.

And ask questions about the unit: how was it used? For how long? Are you the owner? Was it for live use or only studio? Do you still have the box and accompanying manuals and papers?Trust me, you’ll be glad you did.

Finally, I would suggest going to any online music store and, in their search engine, type in “used“.

Guitar Center, for example, has a lot of used gear that goes for substantially reduced rates and is always in working condition, even tho’ it may look beat up a bit.

Personally, if something looks like it’s been gigged with, great. Isn’t that the point with music gear – to USE it for performance? Battle scars just make it, and by association, you look more experienced (and suddenly Hendrix melodies are everywhere….).

“Cello! Is it Meeeee You’re Looking Foooor….?”

About 6 years ago, I was producing a song that I really wanted to have strings on. Nothing major, just a cello and a couple violins maybe.

Now, I play a lot of instruments, and I thought to myself, “The lines I want aren’t hard. I just don’t have the instruments. Maybe I can find some…..”.

With that, I opened up Craigslist, did a search under “cello” and scrolled down the list.

In case you don’t know, buying a cello is no small feat financially; they are priceeeeeyyyyyy! Almost always over a thousand. Unless you want a plastic one. Which, um…..no. Not for me.

Down the Craigslist list soon enough I saw an interesting post that not only showed a cello but dozens of other instruments: violins, violas, guitars, basses, trumpets….a virtual cornucopia of musical exploration. The text was short and didn’t explain much; it basically just said “Instruments for Sale”.

Well, not being one to pass up a rare, awesome thing, I jumped in my car and drove about a half hour to a small, unassuming, little house and met an older lady, Mary, and her daughter who took me downstairs to where the whole basement was taken up by instruments of all kinds – more than I’d ever seen in one house.

When I asked Mary what the deal was with all these, she confided somberly that her husband, Billy, who had wanted to open a music store one day, had recently passed away. She would be moving in two weeks to California to live with her other daughter there and get away from her pain a bit, so all these instruments had to go.

Discount Music Gear

I had brought with me $530, thinking if I was lucky I just might bring a cello home. Mary & her daughter, tho’, were in such a need to get rid of her late husband’s inventory that she was pricing them at levels…..well, at levels that you just don’t usually find. She just wanted that stuff outta there!

So, that day, I drove home with a cello, a violin, a banjo and a glockenspiel. All of those except the banjo I have used on recordings and whenever I do, I think of Billy and his dream and whisper a private “Thank you” to his memory.

After all, if there’s anyone who understands the hold musical instruments can have over you… it’s me!

Mommy! Look What I Found!

The moral of the story? Make music while you can, my friends, and if you need discount music gear, check out the places I’ve listed above. You just never know what serendipitous options you might find there.

For the History Buffs

One last thing: that cello I got from Tony’s wife? It looked a little beat up so I had it maintenanced by a skilled luthier. I take all my orchestral string instruments to a place in Michigan called Shar Music. Wouldn’t go anywhere else. They are the bomb ‘cuz they know strings like….like Elton John knows altered root chords!

They took their little flashlights and cameras and peered inside its cavernous chamber, then told me that there’s no sign of a company label and that, although it’s got a good sound, the inside is not as sandpapered and filed down as they usually see.

Thus, in their opinion, I am now the owner of a “pioneer-made cello” that probably was fashioned well out of pure love of the instrument by some individual somewhere….in the late 1800s. 

WHOA!! Wow. Now everytime I play the instrument I not only think of Tony, but of the impassioned private citizen who just had to make that cello that year. Probably because he or she didn’t have the money to buy one.

If only they’d had Craigslist. Lol

So, until next time, investigate all those discount music gear pieces and save some money. Then go… make… sounds!

Teaj

Teaj in the storm fields!

Tascam 16×08 Interface

So why, when I could have purchased a new synth, mic, sax, guitar….any new instrument…would I instead be investing in a Tascam 16×08 interface, for heaven’s sake?!

Well, the answer is as complex, and simple, as this: PLATFORM! This year I went to a totally different recording setup and needed an appropriate gateway to get all my audio into “the box”.

May not sound sexy, but…ya know…  somehow it IS!

Tascam 16x08

A Change Will Do Me Good

Since 2002 I recorded all my original music on the Roland VS-2480 hardware configuration. I recorded many a fine album on that gear, but this was the year things grew to the point where I needed more, so…

Now I sit here taking in the grand vista of a full-blown Pro Tools 12.8 system.  And I’m loving it. Yea, there’s a HUGE learning curve, but I mean, come on: “Teaj, you’re gonna have to spend more time in the studio surrounded by all this great gear, making new music.” Cry me a river!!

Because I’m working ‘in the box’ now, however, I needed to invest in an audio and MIDI interface. If you don’t know, that’s the piece of gear that gets your sounds and MIDI information from your synth/keyboard into the computer.

In other words, if you’re going to stick a microphone in front of an instrument, the other end of the cable will need to plug into something!

That thing is called an “interface”. This gets it into the land where digital friends and gremlins fight and frolic and allows your sounds to show up on your computer monitor screen where you can mutate and cannibalize….uh, I mean, caress and edit them to your ear’s content.

For me there were two issues regarding interfaces that I had to answer before I bought one:

1) Quality and

2) inputs.

I knew, since I’m recording albums, that the interface I buy has to have good A/D conversion, come from a reputable company and basically have positive reviews from the online legions that have used it.

I also needed at least 8 inputs, because I like to track real, live drums (yes, those still ARE used in the studio!) instead of using loops or drum machines.

With those caveats in mind I did a 3 day search and kept coming back to this unit. It’s got great reviews, comes from a company with a long, rich, impressive history in pro audio and also has TEN inputs on its front, which is, of course, even better than eight. Why? Well, why does my amp go to eleven? The answer is obvious.  😉

My Preamp Primer

Tascam has always been a maker of high-end, dependable audio machinery. This 16×08 is another strong link in their chain of unendingly supplying us with stable, durable and ergonomic pro audio gear that helps us quickly and easily “get ‘er dun” in the studio.

Here’s the Spec list:

  • Support for Windows & Macs
  • USB 2.0 computer connection
  • 8 Ultra-HDDA mic pres with XLR connectors, and 8 TRS inputs
  • +48V phantom power onboard for all mic inputs
  • Included software allows for assigning Outputs via the Digital Patch Bay
  • Software features a DSP mixer with 4-band EQ & usable compression on each input channel
  • Scenes can store DSP mixer settings (up to 10 scenes can be stored and named)
  • Low-latency monitoring via on-board DSP mixer
  • Confirmed & ongoing compatibility with major DAW software (SONAR, ProTools, Cubase, Live, Studio One, Garage Band)
  • Up to 96kHz/24-bit recording
  • Ultra-HDDA (High Definition Discrete Architecture) mic pres, with −125dBu EIN
  • Enable “Standalone Mode” to use the 16×08 as an independent mic pre
  • High-impedance inputs also available
  • 56 dB of preamp gain available
  • Eight TRS outputs
  • Separate controls for Line Out, Headphones volumes
  • Standard TRS headphones output jack with 70mW/ch output power
  • Tough metal casing for durability
  • MIDI input and output
  • RoHS certified
  • USB class compliant 2.0 support
  • Angled design provides excellent usability on a desktop
  • Connect with iPads and other iOS devices via Class Compliant drivers
  • Dedicated AC adapter included

Signal’s Maiden Voyage!

Getting it up and running was easy. The manual was clear on how to hook up cables and everything worked as it was supposed to from the moment I turned it on.

Tascam 16x08

I did have to learn how to finesse the BUFFER SIZE on it, depending on how I’m using Pro Tools, in order to get audio that didn’t click, pop and stutter. Once I understood how to set those parameters based on recording versus playback tho’ everything was gold.

In a nutshell, it gives good sound, is extremely versatile if you need to make channel/output/input changes, and the extremely useful and well-designed software program that comes with it is very handy. I keep it right next to my open Pro Tools window so I can make any changes on the fly, since all the parameters you could ever wish to change are displayed right there for you.

The basic EQ and Dynamics processing section, by the way, is intuitive and a great way to get a little mild compression on incoming signals, like toms or snare, right there on the front end before your sounds go into your computer.

I found both sections work well if you don’t tax them too much. The learning curve was mild, so you can get up and running with this unit in minutes.

The high amount of mic pre dB headroom in this unit makes it ideal for dynamic or ribbon mics, without introducing a bunch of terrorizing noise. I’ve never had a problem yet, especially with live drums, having enough rich, clean signal.

As soon as I narrowed down my interface search, my G.A.S. for this unit was BURNIN’! Thankfully, I found it for a great price on EBay new and somehow survived the four days it took for it to arrive.  Now…it’s part of my recording family of electronic gadgetry, and I couldn’t be happier.

If a simple 2-in, 2-out interface just doesn’t cut it for you, as it didn’t for me, and if you want to be able, say, to track a whole band live in your studio, you’re going to to need a good number of inputs. The Tascam 16×08 gives you that, and so much more. And with the legacy dependability of the Tascam name, you know you’re going to be stay in good hands… session after session.

Got questions? You know where to find me. In the meantime, if you wanna join me in Tascam-land, here’s your link!:

See ya for our next post. In the meantime, plug in some ports, and go…make…sounds!

Teaj

My Epiphone WildKat Review – Love at First Purr…

Epiphone WildKat
Teaj’s Custom Tiger WildKat. G.A.S.!!!

Every once in a while, you come across an instrument that just makes you STOP what you’re doing…and look.

An instrument that is so unique, so wondrous in it’s singularity…that time seems to be in flux somehow.

An instrument…that gives you G.A.S.!

And, voila, next thing you know…you’re writing an Ephiphone WildKat review like me.

Here.

Now!

The beauty you see above is what prompts today’s entry. It’s called the “Tiger Stripe” WildKat. Epiphone manufactured this beauty sometime around 2007. It’s just one of the finish options in the “Wildkat” series that continues to be sold quite successfully up to today.

But THIS particular wood grain and finish is rare in the Wildkats. When I saw this baby pop up on ebay, I just couldn’t stop researching it and scouring the pictures.

Just look at that wild wood. That ferocious finish. That savage saviour-faire!! Even in pictures, it’s beautiful. In person… even better.   😉

Epiphone WildKat

Inspecting the Specs!

So, what’s the layout of this beast?? For those with inquiring minds, here’s what you need to know:

The back of the WildKat!

Alnico-V P-90 dogear pickups


Mahogany body


Laminated tiger striped maple top


Set Hard Maple neck


Rosewood Fretboard with dot inlays


Limited edition logo on back of headstock


White body & neck binding


Grover tuners


Tune-o-matic bridge with Bigsby Tremolo Tailpiece


Metal “Bikini” logo plate


Black reflector knobs


Gold hardware


2 pickup volume & 1 Master Vol. 1 Tone controls


3-way selector switch


24.75″ Scale


1.68″ nut


Black finish with natural top

On Safari for a Wall of Sound Trophy…

My first glimpse of this guitar was one with a solid-red finish and no wood grain. I’d seen a musician friend play it live on stage in some concerts in the past couple years, so I knew the play-ability and tone were great. I spoke with him backstage about it after one concert and learned that they held up well over time and didn’t create any problems live.

I’d kept this particular axe on the back burner until one day, checking through Ebay for great deals, I decided to type in “Epiphone Wildkat”. Ya know, just to see what’s out there.

Man! I caught a glimpse of this savannah-stripin’ creature and heard the snarl of potential tone satisfaction as I read about it. When I saw the price was pretty low, I knew I would make a bid.

But not yet! Anyone savvy with Ebay knows you don’t bid until the last 8 seconds. I’ve snagged SOOOOO many auctions this way and highly recommend it if you really want to succeed at winning auctions.

Five days later (with very few other people bidding, surprisingly) I sniped my bid in at the 5 second mark and… WON! Soon it would be winging its way to me – the guitar, the hard Epiphone case and all. I couldn’t wait!!

After purchasing, I thought I’d read up on this particular model. I found many a staunch fan, with websites tauting it’s glories left and right. There was really only one complaint I saw a couple times: the unyielding nature of the stock Bigsby bridge and subsequent intonation problems.

The pickups  are Alnico P90s. They tend towards a darker sound if anything but to my ears they sound great, though somewhat genre-specific.

Raise your Cups! To the Wildkat Pups!

Kat pups

I wouldn’t use them for funky chicken picking – that’s what I got my Paul Reed Smith for!

But lush chords, ambient washes, country or folk rhythm backing – it’s got all that color in spades.

Some people swap ’em out for different pups, but, ya know…it’s all personal preference. I prefer to let my different guitars speak for themselves and use them where their tonal range and response are appropriate.

This Kat gives me a unique sound that none of my other axes come close to… mostly due to these pickups. So at the end of the day it’s… “Cheers!” Another successful concert.

Taking Paws…for Potential Problems
Bigsby tremolo

The stock WildKat/Bigsby bridge is engineered such that the strings can rub across the bridge edges when the tremolo bar is engaged, often causing unwanted tuning maladies.  I also heard a couple people say the strings got stuck in the nut when using the tremelo.

Personally, if I really wanted to go to town with the whammy I’d switch to an instrument which has a bridge set up made for that, like my EVH Wolfie, you can read about HERE.

The Bigsby trem really should only be used for slight tremolo effects, and I found that if you put new strings on with a good ‘locked tight’ method of adhering/wrapping them ’round the peg posts, you shouldn’t have an issue.

There are, however, some online colleagues that found enhanced intonational success by swapping out the regular bridge for a roller bridge – one that lets the strings sit in a rolling groove that moves along with the string when the whammy goes bammy! That usually takes care of any issue easily, tho’ to go the full Monty you could swap out for more expensive nut as well.

On the other hand, some believe that roller bridges suck up some of your tone and sustain. I can see their point, tho’ I’d have to hear both to make an informed decision.

And Thereby Hangs A Tail…

Epiphone WildKat

I’ll never get rid of this beauty!!  I am uber-satisfied with my Tiger-Stripe Epiphone WildKat, and I’m sure you can see why.

You won’t catch me making any mods to it either, since I think they’re unnecessary if this beauty is handled well, if the strings are replaced with solid pro methods and if the trem isn’t used to play “Eruption” to Wildebeests.

“The right tool for the right job” is the germane motto here.

Back of the WildKat Headstock

Many examples of it’s sound can be found on YouTube, so if the G.A.S. is starting to bubble up in you, check out the ferocious feline tones on this beast there.

If you want to join in on some purrrrfectly wild jungle tone (“You in the JUNGLE, baby!!”), cage your own right here, right now… and start pickin’!

Wildkat BUY NOW

If you decide to put on your Kat’s pajamas by clicking there like I did, let us know how you’re likin’ YOUR WildKat. We look forward every day to new G.A.S.-y tales!

‘Til then, see ya in the woodshed … and don’t forget to go…make… (Kat!) sounds!

Teaj

Teaj in the storm fields