Easy Guitar Songs For Beginners – Rock Star Shortcuts 101!!

Audiences love easy guitar songs!

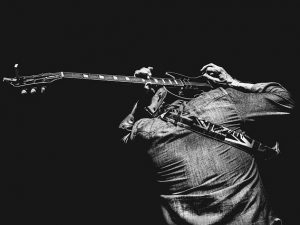
I’ve been playing gigs with just me and a couple guitars for decades now.

A lot of time and energy goes into carefully choosing and charting songs from various decades in our past. It’s all for the goal of bringing smiles and good memories to people’s faces and minds.

Because of that, I’ve come to know pretty well what songs kick up an audience’s energy. And which ones don’t!

Many of these tunes I’ve been playing for 30+ years! I can still remember learning a lot of ’em, and how for some, it wasn’t easy. Just trying to get my fingers to play some of those chords and licks took WEEKS!!

It’s true – great songs can be wickedly complex and a real b#$% to learn!

Easy guitar songs make the crowds go crazy!

But not all are that way. I wish back then I’d had someone to tell me:

“Hey! Kid! There ARE easy guitar songs for beginners. Try these – people will love you!!”

Well, just because I didn’t get that doesn’t mean YOU have to go without. My gig-minded friends, welcome to Rock Star Shortcut School!!

Ascend Acoustic Mountain!

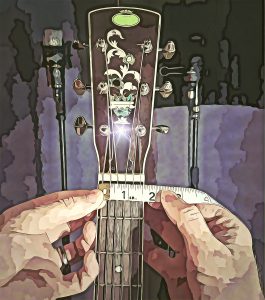
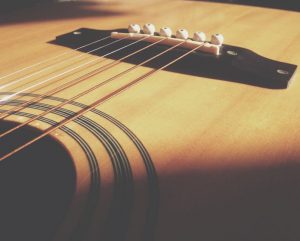
The first list I want to give you is concentrating on songs I only perform on acoustic guitar. This approach is where I’ve spent the majority of my time, since it’s easy (once you’re practiced and ready) to pull off a few sets without much gear, set-up time or hassle.

Street guitarists like Acoustic easy guitar songs

Acoustic guitar songs can be among the most enduring of all time. Want proof? What’s the most recorded song of all time, the world over? Any idea??

It’s “Yesterday“, by the Beatles. Just Paul McCartney and an acoustic guitar, with some strings behind him to lush it up a bit. Wanna please a crowd of all ages? Throw this song in. You’re sure to get not only smiles, but respect. It’s not the easiest song, sporting 10 different chords, but it’s not among the hardest either. “Blackbird” is much more demanding.

Acoustic easy guitar songs rock

The list below teaches you how to play these songs fairly easily. If there are complex intros and such, I’ve linked you in most cases to ways of playing it that are easier. In the majority of cases that means simple chords instead of intricate riffs.

Whenever I learn a song, I learn all of it, just like the recording. When you’re first learning though, it’s totally fine to learn easy versions of any tune. As we heard earlier, it’s the vocal that’s important anyway.

So what acoustic guitar songs get a great audience reaction but aren’t that difficult to play?? Here’s my top fifteen that always get an audience singin’ along, and that I play regularly on an acoustic guitar:

Surfer guitarists like Street guitarists like Acoustic easy guitar songs too

If a “7” is added quickly after a major chord of the same name, I didn’t include that as a separate chord. You can leave the 7 out to simplify.

Also, with some of these songs, there are passing chords that are technically in the song, but you can get away with not playing. This simplifies the song so you don’t have to worry about quick, sudden chord changes as a beginner.

In “Soak Up the Sun“, for example, one of the chord progressions is [ Em D/F# G A ]. You can, however, totally get away with simply playing [ Em G A ], skipping the fast passing chord and making it a lot easier. No one will mind if you do this, especially if your VOCALS are really good.

Except that guitar player in the front row who wants to think he’s better than you. He’ll notice. 😉

Elevate to Electric Heaven!

Easy guitar songs behind the back!!

Electric guitars tend to be in bands. Yes, you can do gigs alone and play some songs on electric (I’ve done it hundreds of times), but the electric guitar really sings out best when accompanied by a kickin’ rhythm section. For that reason, the following easy guitar songs are meant to be played in the context of a band.

If there are instrument solos in any of the songs in the list, you can just skip those, or vocally riff through them, if you’re not good at soloing. Why? Because the most important thing is… yea, I think you know. 😉

The list of my favorite electric guitar songs to play is… well, it’s very long, I’ll just put it that way. But which ones are easy?? I guess I’d narrow it down to the following fifteen tunes:

Easy guitar songs work great on electric.

The last one there, “Time For Me To Fly”, is an example of a song that originally was in an extreme alternate tuning on the 12-string guitar. That makes things difficult in a live setting, unless you have dozens of guitars and a guitar tech to hand them to you live!

So here I’ve linked you to ways of playing all these tunes that are quick and easy but still sound very much like the original.

Another great thing about these songs is you can play them with only the basics. Sure, you could turn a ton of effects on, but these songs can still be effective if all you have is an axe and an amp.

Tested and Trusted

So now you have links that are either accurate, or convincing reconfigurations, of all these songs. The video lessons you can jump to anytime and, within minutes, be ready to gig!

LIttle girl guitarists like easy guitar songs

The instructors in these videos are all qualified fellow musicians whom I trust. I’ve watched each video and can vouch for their expertise.

Do I personally play the songs like they do in every case? Nope. I tend to play songs just like the original recordings, and these versions often do not, but they definitely work, and are simple for beginners, which is the whole point of this article.

Once you have a large group of songs like these down and you can perform them well, you can always expand your technical proficiency by learning the tricky bits, the fills, the solos, the alternate tunings and extra overdubbed guitar parts that made the song great in the first place.

What I did NOT do (you’ll be happy to know) is link you to lessons where the instruction is incredibly wrong, and believe me… there are plenty of those!! I have found hundreds (yes, HUNDREDS) of TABs and instructional videos that are way off the mark.

These days there’s really no excuse for teaching something wrong. All a person has to do is call up a video of the original band or artist playing a certain song and look where their hands are. Are they using a capo? Are they using open or barre chords?? Electric, 6-string or 12-string??? It’s all right there.

If you learn tunes in a technically proficient way, even if it’s simple, it’ll be advantageous to you in the long run. Everything in these lessons will help you in the future play even more great tunes, with no bad habits!

No Arthritis, Please!

If you ever do happen to learn a song dramatically wrong… it can force upon you a learning curve that’s WAAAAAY larger than it needs to be.

Before I sign off for the day, lemme share with you two cases in point, and you’ll understand why learning from a trusted source is so important…

Guitar Player mags
Some of Teaj’s old guitar mags!

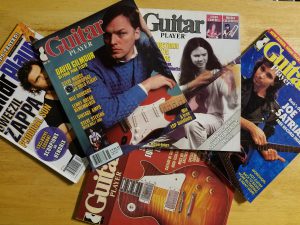
Before the Internet appeared, and simplified our lives considerably, gig tunes were either learned by ear or gleaned from music magazines that would TAB out a few songs each issue.

I spent days and days hammering out two songs from two different music magazines this way. In each case, the magazine TAB was wrong. Really wrong. I’m not just talkin’ a couple measures off here; I’m saying well over half of the song in one case, and ONE HUNDRED PERCENT of the song in the other, was completely, totally wrong.

For “Blackbird“, by the Beatles, I still to this day play it the way I learned it, tho’ I’ve since seen Paul McCartney play it and he does it in a much simpler way that I wish I’d learned in the first place. Oh well, no worries… it just made me a more flexible player, right?!

The second song was “Little Guitars“, by Van Halen, and that TAB was so off the mark, it was like trying to paint the Mona Lisa with a car tire! I worked at that stupid piece for months. I remember thinking, “Eddie! Dude! How in the world did you come up with contorting your fingers this way??! Do you have arthritis or WHAT??!!!”

The problem was that the magazine and TAB creator (who shall remain nameless, grumble, grumble, grumble…!!!) thought that Eddie played the song on a normal guitar in normal tuning.

TABs are a good way to learn easy guitar songs

He could not have been further from the truth. Eddie used a small scale guitar, which maintained a normal tuning like that of a full-sized guitar capoed at the third fret. He also dropped the low E string a full whole step down.

When you use this approach (the RIGHT ONE!!!!) for the song, the chord shapes are mostly ones you already know and have played for years.

(Heavy sigh, grimace)

Okay, no problem. Again, just made me a better player, right?! All that to say, learning the right way for each song is the way to go. Not only do you get inside the head of the writer, you save yourself a ton of time and aggravation and more efficiently carve out your niche of success in this crazy career field.

Do it right to do it better!!

They'll love your easy guitar songs

Strum it! Pick it! Love it!!

Who doesn’t love this kind of work?! Playing music is incredibly life-giving and exciting. The more you do it, the more examples you find of intoxicating joy in the moment, and when an audience sees that in you… they’ll be screaming for more!!

Easy guitar songs are great for little girl rockers

Learn as many of the songs above as you can, beginning to end. Practice until you don’t even have to look at the guitar neck anymore. You GOT THIS!

Then you can be free to interact with the crowd, take in the venue, and revel in the freedom of being a master of your repertoire. Doesn’t matter if the songs are simple. It’s all about how you perform them.

Showing the crowd competence and confidence and fun will make them want what you’ve got. Whether you’re a rocker in boots, a pop diva in sequined sneakers, or a little girl busking in Crocs on the street…

… they’ll find it, and you, simply irresistible!

So get practicing, and make you mark on the ever-expanding universe of guitar artists shredding their hearts out online. I’ll be watching for ya.

Now, go… make… sounds!!

Teaj

What Is A Bodhran? – Heartbeat Of The Emerald Isle!

Bodhran & spirits

In 2015, I made an exciting discovery! Have you ever taken up a new musical instrument? Then you’ll know what I mean.

That first discovery expanded my musical world, and eventually led me to another discovery, and the very question I pose to you today: “What is a Bodhran??”

Now that I’ve been playing a bodhran for a few years I can answer that question for ya! It’s exciting for me to introduce to you today its sound, its story, and its potential for making your music even more interesting than ever.

But first, lemme show you how I found it in the first place!

String-y Serendipity…

Teaj's fiddle
Teaj’s fiddle

My first exciting discovery in 2014 was… the violin!

It wasn’t my plan to take it up as another instrument, but… life is strange sometimes. What was it Lennon said? “Life is what happens to you while you’re busy making other plans.” Great insight. But then he was a Beatle!

I had actually planned to take up cello. I saw a fine-looking, dark brown cello for sale on CraigsList and just had to have it. When I arrived, the seller actually had dozens of instruments for sale, including a violin in good shape.

She said a hundred and thirty bucks for it. I figured, “Wow, that’s all?! I might as well at that price!” So I went home with more than I planned for. FOUR MORE instruments actually. Talk about Serious G.A.S.!

Back home, I was surprised to find that it was not the cello that consumed me, but rather the violin. And soon enough, the bodhran was in the mix too, because of a new appreciation for music… from across the ocean!

The Pipes Are Calling, Danny…

It was through one of my violin study books that I first heard and came to really appreciate the bodhran. The book included, amidst the mostly classical pieces, an Irish folk tune. As soon as I played it, I immediately appreciated its beautiful melody, as well as the unusual choice of chords sitting underneath.

I kept being drawn back to play this tune from the “Emerald Isle”, as Ireland is called. Again and again. “Hmmm… “, I thought, “… this Irish music rocks! Wonder if I can find more??”

Fiddle books led me to bodhran playing

A couple hours and online receipts later, I did! Eventually I was playing through more awesome melodies, and I just couldn’t get enough. Even “Danny Boy”, a song most people have heard at least once, seemed to really come alive and become so much more emotionally impactful playing it on a violin.

But there was also, almost always, a different-sounding DRUM playing along on these Irish songs. It sounded really different, but really cool. Researching, I found it was the BODHRAN!!

As I continued playing, and began listening to more and more Irish music, and watching videos of Irish groups, my interest in this north island beat-maker grew until I knew… I had to have one!

Playing the Bodhran
Getting Comfortable with my OWN Skin

Just around the time I was seriously G.A.S.-ing for a bodhran, wouldn’t you know it… one showed up on CraigsList!!

I ended up snagging this Roosebeck Tunable Bodhran, seen in the picture to the left, from a local girl who no longer played it and wanted it to go to someone who would appreciate it and play it into the future. I assured her I would.

There were others listed on CraigsList, but hers was the largest… exactly what I was looking for. No mamby-pamby play toy bodhrans for me – only the most powerful will do!!

She only asked $80. These sell new for $108 plus tax, and since it was in perfect condition I thought that a steal.

The head is genuine goat (apologies to any P.E.T.A adherents), tho’ you can buy the same model with a synthetic skin instead.

If you’re interested in my specific model, feel free to take a look at the MidEast company’s website by CLICKING HERE. They are more pricey than your typical beginner models, but as always, you get what you pay for.

Leprechaun Speech

Flag of Ireland, where bodhrans come from
Flag of Ireland

Since I know you’re wondering, let’s cover the first thing most people ask when they’re looking into the bodhran is, “How do you SAY that??!”

This is especially the case when they see the drum spelled in the right Irish way: bodhrán”. Most people outside of Ireland leave off the diacritical mark above the ‘a’. Heck, I don’t even know, as an American, how I’d type one in in the first place!

The easiest way to remember its pronunciation is to say, “It’s a bodhran, MORON!!” Keep those two in rhymed complicity and you’ll have no problems. Oh, and it’s probably best to say that in your HEAD, not out loud. For obvious reason. 😉

Titanic Irish group with bodhran

Dig That Gaelic Beat!

So you’re here because of genuine interest in this exceptional instrument. Maybe you noticed it in the movie “Titanic“, during the below-deck dancing and playing. Maybe you came across an Irish group recently, in a restaurant, pub or bar. Or maybe you stumbled upon Irish music on Spotify, Pandora or ITunes.

Whatever your reason, welcome! The BODHRAN awaits for you to breathe the pulse of life into it and make it come alive in some energized gig near you!

The bodhran is a simple, single-skin frame drum. It’s played mostly in Irish music groups, tho’ occasionally artists like myself will use it in songs that are not Irish, but still benefit from its sound.

Bodhrán played live

Bodhrans come in different sizes, which make them louder or softer, higher in pitch or lower in pitch. The smallest is 10 inches in diameter. The largest? 26 inches.

A goatskin is usually used in Ireland for the beating material. In America, it might be synthetic, or even other animal hides that make the striking surface.

On the back of the bodhran, you will usually find one or two crossbars. These allow you to hold the drum securely, but even more, it gives the back of your hand something to brace against so that you can push the drum skin outward, raising the pitch when desired.

Sometimes you’ll see a tunable bodhran. Many are not tunable. You’ll know the tunable one by either lugs, bolts or hex key riggings, either on the outside of the side of the drum, or underneath on the inner side.

Did you know that bodhrans are a descendant of the tambourine?! There are even pictures of some Irish musicians playing from the 1950s that show jingles still attached, just like a tambourine.

Not Your Everyday Beat Box

The Bodhran strike
The Bodhran strike

There are a few things that set the bodhran apart from other drums and percussive approaches. They are:

  1. It’s played on its SIDE.
  2. It’s played with a “beater“.
  3. It’s played with your palm touching the underside of the skin

So, first, the bodhran is played on its SIDE, not with the skin facing up. It’s usually resting on your leg (usually the left thigh, if you’re right-handed). The skin top faces your chest as you play.

Secondly, you play it, not with drumsticks, and only occasionally (if ever) with your hands or knuckles. Most of the time, you’ll use a unique, artistically-crafted wooden stick called a “beater“.

Centuries back, it was more common to use an actual animal bone. The ends, where knuckles or joints would be, served as excellent striking mediums to pummel out the loudest sounds. That’s why you’ll hear some still refer to the beater as a “bone“.

You’ll also find this playing stick referred to by the name “tipper“, or “cipin” in certain territories, especially in Ireland. But the term I’ve heard the most here in American is “beater”.

Regardless of the name though, it takes a while to get used to the novel way of holding and sounding the drum with one of these. It’s different from any other percussion instrument I’ve come across.

Bodhran player using brushes jpg
Bodhran player using brushes

Oh, and sometimes I’ve seen bodhran players use brushes on the skin for a softer effect. I just use the brushes from my drum kit and they work great. Adds another color to your tonal arsenal, but you probably won’t use them much, as Irish bands tend to be anything BUT soft and gentle!

Lastly, to coax, or explode, different sounds from the bodhran, you place your left hand (if you’re right-handed), open-palmed, on the back side of the drum skin. Lifting it from the skin, touching it palm open, or pushing the skin outward will provide different responses, pitches, and timbres, since that dampens or releases the vibration of the skin.

I find this technique to be very much like playing the hi-hat on a traditional drum kit. Your left hand will “open and close” the drum, by merely lifting or dropping your palm to the skin. Thinking this way, you can pound out rhythms as complex as you’d like with this instrument, just like you can get all Stewart Copeland on the hi-hat with drum sticks.

Opening and closing the drum skin sound is also great for musical accents. It’s easily done once you get the hang of it, and easily heard too. In fact, I don’t think there’s a more expressive drum with as much variance in skin resonance, except for the African talking drum.

Getting JIG-gy With It!
Druid playing bodhran

When playing the bodhran, you’ll find that most Irish music comes down to two varieties of songs:

  1. The Jig
  2. The Reel

A jig is in 3/4 time, and has a rhythm similar to saying “PINE-ap-ple”.

The reel, on the other hand, is in 4/4 time, and has a rhythm similar to saying “WAT – er – me – lon”.

If you’re playing the bodhran, it’s mostly your job to keep everyone centered on one of those particular grooves.

There’s not a lot of soloing typically; you’re mostly serving the song and the other solo instruments that keep the tunes on fire with their breakneck speed and rousing energy.

Irish music can be very fast at times, and I’ve found it a challenge to keep up on bodhran, but like anything, practice makes progress.

And besides… I’ve found violin is MUCH HARDER. 😉

Bodhran tipper grip

The tipper you will hold in your beating hand similar to how you’d hold a pencil. Then, swinging the wrist up and down, you thump out your most ‘leapin’ leprechaun’ grooves for your fellow musicians to play along with.

There are, however, differing styles of beater technique, mostly based on geographic preferences and the origins in Ireland. The style that I play, and that is by far the most common, is “Kerry” style. This is the method that uses a tipper with TWO heads. The other less popular technique is called the “West Limerick” style, and it uses only ONE end of a longer, thinner tipper.

But wait! There are even some who play the bodhran with thumb and knuckles instead of with a wooden beater. If you try this, you’ll see that you do not get nearly as much volume out of the drum. Since some Irish music gigs are done with no amplification, it’s much harder to be heard over all the other instruments if you opt for this method. I personally am gonna stick with “tipper-ing”, thank you very much.

You can strike the rim of the bodhran too if you want, to get that “wood on wood” sound that’s more like South American claves. Just be careful you don’t do it too hard – nobody likes dented or chipped tippers!

Bodhran back hand

The aural textures you can produce with the bodhran can go from deep and booming, to subtle and mid-rangey, to bright and staccato, if you want. The combination of controlling it with the tipper AND the palm muting gives you a LOT of controlled variety.

For those of you wanting GREAT online instruction, I suggest what I use myself: the Online Academy of Irish Music! They are actual Irish musicians who live over there and play this music week in and week out, and know how to teach it well.

I know there’s lots on YouTube but honestly I don’t think any of that compares to what OAIM offers us. Check out their FREE beginners instruction videos by CLICKING HERE! Then just navigate to your instrument of choice and start jammin’ with the experts.

Meet ya in the virtual practice rooms!

You Never Forget Your First

10 inch bodhran

For those just starting out, I recommend you do what I tell all my beginner students to do: don’t spend a lot! Unless, of course, you’re really, really sure you love the instrument and will stick with it and develop into an expressive musician using it.

Guinness bodhran

For those who are unsure, I recommend THIS 10″ INEXPENSIVE BODHRAN. It will do the job nicely and give you everything you need to start learning the Irish repertoire beats and grooves and improvisation techniques. The best part is, it’s under fifty bucks!

Or, if you don’t mind advertising an esteemed BEER while you play, THIS 16″ ONE is good for starters and a little bigger so the sound will have more beef. If you drink a coke while playing it however, don’t be surprised if you get your tipper stolen.   lol

Mid-priced bodhran

For those of you more certain of your decision, you’ll feed good about investing in THIS 14″ MID-PRICED BODHRAN. All three of these options come with tipper included, so you’re good to go out of the box!

Recognize that bodhrans, like most instruments, can be priced quite expensively. If you want to spend a lot on one, you certainly can! But the options I’ve given you here are great BAM for the buck, but aren’t cheaply made so that your playing suffers.

One of the more expensive ones I’ve ever seen it THIS ONE. Tho’ I’m a Lord of the Rings fan, I can assure you… I will not be picking up that bodhran any time soon. lol

Laughing at bodhran players
Grins & Skins!

Because the bodhran is so unassuming and humble, it tends to get the short end of the beater when it comes to jokes. There are SOOOOO many, you could enjoy a whole day looking them up online, but I’ll give you just a couple to suffice here:

“When someone tells a guitarist joke, people laugh.

When someone tells a bodhránist joke, people nod in solemn agreement.”

See what I mean?! Here’s another:

“What’s the difference between a bodhran and an onion?

Different kinds of bodhran beater sticks

Most people cry when they cut up an onion.”

And finally… :

What is the difference between a dead bodhran player lying in the road and a dead rabbit lying in the road?

The rabbit might have been on it’s way to a gig.”

There are many more, but you get the picture. But it’s all in good fun. I can tell you, for all the jocular put-downs, I’ve never seen an Irish group perform yet that did NOT have darn good bodhran players… and they helped make the concert exciting in big, toe-tappin’ ways!

Boost That Beat!

There will be times when you’re just gonna have to mic your drum. In the studio, on large stages, or at concerts where you have a lot of other loud, amplified instruments, will call for some type of help getting your sound up and over the other spotlight-stealers.

The Pro 35 is great for bodhran!
The Pro 35 is great for live bodhran!

For studio use, the mic I use for picking up the bodhran (not to mention pretty much everything else), is the Audio Technica 4050. You can read all about that impressive mic in the article I wrote HERE. I also usually record with TWO mics on the bodhran, one in front and one in back. The sound is quite different for each side and it helps to have both in a mix to choose between.

For live performance, a dynamic mic like the Audix i5 works well, or even the common Shure sm57. I prefer the Audix tho’.

You can also get a mic that clips to your drum so you don’t have to worry about clunky mic stands and the like. I’ve come across numerous recommendations for THIS AT PRO35 CLIP MIC and plan to get one for myself for just this use.

Nicola Joyce (Gráda) playing bodhrán
Nicola Joyce playing bodhrán

Skin-rappin’ Gets Toes Tappin’!

So, what is a bodhran?? That’s easy – it’s fun in a drum! And now you know why everyone should have one… including you!

A little practice… a few upbeat, jiggy gigs… and who knows – maybe we’ll meet at the World Bodhrán Championships in Milltown, County Kerry, Ireland where it’s held each year.

If we find you’re spankin’ a mean bodhran… I’ll be sure to tip my tipper to ya. 😉

For now, get yourself one… start practicing… and go see some real bodhran bashers in action. Watch the ads for Irish groups near you. Irish PUBS are a good place to check for Irish music too.

Bodhran is fun!!
Bodhran is fun!!

Maybe you can even find what we have here in Michigan that’s put on by the put on by the “Detroit Irish Music Association” – an Irish music “open chair night“, where anyone can show up with their instrument and sit in on song after song after song from the Irish repertoire. It’s daunting when you first try, but worth the bravery!

Whatever route you take, may the luck o’ the Irish dance and jam wi’ ye! I know I’m so glad I stumbled upon this well of rhythmic riches. It was an interesting, surprising road but I’m glad my musical curiosity led me to it. Many lively hours of smiles, expressiveness and skill-building later, I’m still happily ON the beaten path.

Now, go… make… sounds!!

Teaj

What Is A Cajon Drum? – Welcome To The LITERAL Beat Box!

Cajon dude on the street

For all you gangstas of the groove out there, today’s post is an insightful reminder – there’s more than one way to skin a drum!

Sometimes all it takes… is a couple PLANKS.

Of all the wooden contraptions assembled throughout the centuries, the Cajon drum has to be one of the simplest, yet most efficiently pleasing creations ever.

Musical instruments are typically not as simple and approachable as the Cajon, which is probably why its popularity doesn’t diminish with time.

What is a Cajon drum?? In a nutshell, it’s simply a box that you hit with your hands like a drum! The sounds you produce when you whack it can sound either low, like a bass drum, high like a snare, or somewhere in the middle like the tom-toms on a trap kit.

These days, plastic has usurped wood as the material of choice (at least in the low-price options), but regardless of the construction choices, the end result is a convincing set of tones that are making more music today than ever.

A History of “Hit”
Peru, where cajons were born

The South American country of Peru and its concomitant indigenous cultures have bequeathed to us many revolutionary developments: agricultural technology; weaving; pottery; gold and silver work… all these can be traced back to Peruvian people groups in those dramatic mountains and valleys near the mighty Pacific Ocean.

For musicians, they passed to us a singular instrument that has stood the test of time: the cajon!

Interestingly though, it turns out it was foreigners in Peru that brought the cajon into existence, not the natives. The following story is an example of how mixing human cultures can produce interesting results, even in music…

The Inca war against Spain begat the cajon

The 1500s were a terrible time for Peruvian people groups. It was the century that Spain decided to invade Peru, their eyes wide and their mouths salivating for what they knew was an area replete with gold and silver.

Francisco Pizarro, a Spaniard with thirst for riches and fame, had sussed out that the Incan Empire was quite a rich one while he was stationed in Panama, in the newly conquered territories there. In 1524 and in 1526, he tried to conquer the Incan Empire in Peru, then led by Incan emperor Atahualpa, but was sent packing by the Incan resistance with his greedy tail between his legs.

Didn’t stop him though. He came back a third time with even more military strength and finally captured Atahualpa, which essentially established Spanish rule.

Those whom the long genocidal war didn’t kill mostly succumbed to the disease epidemics that the Spaniards brought with them. Within a few decades, the Incan culture and peoples of the 16th century had pretty much been decimated. The Peruvian native cultures just couldn’t protect themselves from the vast numbers Spain sent against them.

Yet, from out of that rapacious slave and slaughter-fest, something beautiful emerged. An unexpected instrument. A way to find a little joy amidst the suffering. The cajon.

Zimbabwe Rock painting of Africans drumming

See, the Spanish conquistadors in the New World often brought with them African slaves, both to serve them in their newly “acquired” territories, and to serve as spear fodder in their invasion armies as they tried to take over mile after mile of sprawling land masses that legitimately belonged to other people.

Africans have a long, fascinating history of extremely rhythmic, energizing music, performed on improvised instruments that often brought communities together for song, dance, and vibrant celebrations. Music in Africa has for centuries been a successful means of cultural cohesion and local pride, and hand-made African DRUMS were often the focal point for most tribal performances. Even ancient rock paintings depict it!

So it was only natural that the slaves, stolen from their native African homes and music, would try to emulate their memories and create something that they could play to feel like a little part of home was still with them. The torment they suffered was hideous, but the moments that they could play songs together somehow lifted them above their situation, if only for a moment. Such is the power of music.

Precursor to the cajon!
Spanish slaves had to make music with whatever they could find

They didn’t have much. But what they DID have a lot of was… boxes, barrels and crates. In fact, that’s what the word “cajon” means in Spanish – “crate”!

Wooden hauling crates, barrels or chests were used to store everything an invading army needed, especially food and dried tea. There was no lack of them lying around and they had a pretty solid bass kick when struck in the middle. Sound familiar??

Who was the first stolen musician to pick one up and start thumping on it like a drum? We’ll never know, but I’m standing up to salute his memory right now. You will always be remembered now, our brother in groove!!

Alex Acuña playing the cajon that bears his name

In the centuries that followed the instrument grew slowly in popularity from the slaves on tea plantations, to Spaniards who adopted the instrument into Flamenco music, to other European musicians who took notice.

A couple modern players really brought the instrument into focus through their consistent use of the instrument: Alex Acuña, an L.A. session drummer & percussionist from Peru, has had the cajon as part of his arsenal since the 70s.

I witnessed this firsthand when he was booked for a session with “The Yellowjackets” at the studio I worked at in North Hollywood. The man had an EPIC amount of percussive toys!

Paco de Lucia, a renowned Flamenco guitar virtuoso, also brought the cajon into the spotlight by incorporating it into his regular repertoire and writing with it in mind.

Now, centuries after its humble beginnings, the cajon is well-established in today’s Western music scene. Now, any set of hands eager to rhythmically assail a solid surface, for beat’s sake, can pick up one of these unpretentious yet pragmatic boxes of beat, and play excitement to the open skies!

Cajons love stripped down gigs!
Cajons love acoustic gigs! (c. AndréKäpper)

The “SLAP”-pin’ Sounds of Today’s Cajons!

Cajons today are used mainly for acoustic, stripped down music and live performances. I have seen many live shows that featured cajon in the percussion section. Some shows even had only cajon for rhythmic backup.

If you’ve never heard a cajon, or if you’d like to hear what many cajons by diverse manufacturers sound like by comparison, WATCH THIS VIDEO.

One of its main benefits, of course, is that instead of dragging multiple cases, drums, hardware, cymbals, and percussion toys to a gig, you can simply pick up ONE BOX and walk smiling out the door. Setup and tear down?? What’s that?! All you do is set your box down and sit on it – you’re ready, baby!!

For me personally, I’ve played many solo gigs, just me and a guitar and/or me and a keyboard. At quite a few of those I’ve hired any one of dozens of drummers I know to sit in with me on cajon, djembe and percussion. It always turns out really well and even produces a lot of interest from the audience, the most popular question being, “What IS that thing??!”

Heidi Joubert on cajon
Heidi Joubert (c. Dave Catchpole)

But there’s many other ways to use what the cajon offers. Here’s a list of its popular uses in the music business today that I’ve played, hired, seen or discovered from my fellow musicians:

  • Acoustic music live shows
  • Radio tours
  • Open air gigs with no amplification
  • Songwriter rounds
  • Small venue gigs
  • Bands with no bass guitar or instrumental soloist
  • Low-paying gigs where bringing a full band isn’t worth it
  • Private parties where space is limited
  • In-home concerts
  • Camp music
  • Educational school tours
Mike Ashworth on his cajon kit

Cajons are, more and more, starting to be incorporated into live performances by well-known, renowned artists. Just yesterday, for example, I clicked on Netflix as I ate my dinner and watched Steve Martin & Martin Short’s live show. The show was funny and full of anecdotes and personal reflections from the two men. Definitely worth watching if you haven’t caught it yet.

Near the end of the show, though, Steve brought out his backing band to join him for some bluegrass music that he’d written and played it on his banjo. The drummer, Mike Ashworth, was playing a kit that included a cajon, and it went perfect with their “Appalachian sound”: acoustic guitar, acoustic bass, acoustic banjos… all instruments that prefer a softer rhythmic approach than the drums. The cajon worked perfect!

The cajon is starting to catch on a bit in the recording studio, but it’s still not very popular for that particular use. I tried and tried to find actual studio recordings by well-known artists that have cajon in the mix, but came up with squat.

Cajon with foot pedal
Playing the cajon with a foot pedal

Do you know of any studio recordings that feature the cajon?? If so, let me know, ‘cuz even after Googling probably 30+ pages I came up with nothing…

You’ll also find in today’s drum marketplace plenty of accessories for the cajon – so many it can practically be turned into a pretty convincing simulation of a regular trap kit (watch that Steve Martin special for a great example!). Castanets, jingles, clave blocks, foot pedals… there’s a plethora of options to stick on or around your cajon these days.

Give ’em a try. They’re all still small enough that you’ll probably still be able to put everything in one bag, over your shoulder, and get to your gig with ease. Now that’s efficiency!

Types For “TAP”-in’!

My, my… what a long way the Cajon has come! What once was just a simple wooden crate now has a whole marketplace of options, sizes, shapes and accessories… it wallops the mind!!

In today’s modern world, there are basically six types of cajon to choose from:

  1. Standard box models
  2. Standard box models, with pickups
  3. Slap top models
  4. Slap top models, with pickups
  5. “Tablet” cajons
  6. Fully electronic
The cajon as a kick drum

Tho’ they’re all basically a box or slab that you hit, the sixth is a much different hybrid version that we’ll explain soon enough.

If you look hard enough you’ll also find some one-offs – cajons that are built in weird, different configurations, but are only put out by one company to see if there’s any interest in their off-the-BEATen-path design. HERE’S ONE by Schlagwerk, for example.

Other countries have some designs that we don’t promote much here in America too. I discovered recently that in Cuba, for example, they make several cajon variations, including a much larger “bass cajon” for their energized music. Cigar caddy not included though. :-p

Configurations and uses will be as varied as there are people’s preferences, but really the six above are what you’ll find 99% of the time.

Let’s explore each with some detail…

The Standard “Box”
Lotsa Cajons!

These are your basic cajons. Nothin’ fancy, just the box and a few sounds for you to draw out by pounding away.

With the standard version, you SIT upon it and play the instrument by slightly leaning forward (NOT bending) and pounding out your passions with the palms of your hands down just below your kneecaps.

It’s important that you don’t get in the habit of slouching forward to play, as that will, over time, turn you into kind of a Qausimodo-looking player, and tho’ that might be a hit with the ladies (it was in Disney’s movie!), you might regret it when you try to reach your dusty mallets on that upper shelf.

These big box “chairs” have excellent bass response, since they have a large chamber inside to bounce big bass waves around. Sometimes these models have a bass port (a HOLE, basically), and sometimes not. If you get one with a bass port, you can stick a mic in front of it and get quite a convincing “kick drum punch” when you need it.

Some of these cajons will come with pickups already installed inside. Most will not. If you ever DO want to put your cajon signal through a P.A. or amp, however, there are pickups available, like THIS ONE, for you to install easily and solve that problem with minimum effort and learning curve involved.

Micing the bass port
“Slap top” models

This type of cajon is what I first bought and have stuck with. I personally don’t LIKE the posture you have to use with a standard cajon. Even when you try not to slump, it still feels like I can’t keep my spine straight.

It’s probably because I’m 6’2″, so it’s more of a reach for me than shorter groove-meisters to get down there where the bass really booms.

In any case, I really like these “Slap top” models. Currently only Meinl makes them, but I bet eventually we’ll see them from all the major manufacturers when the patents allow.

I bought the “Makah Burl wood” cajon of this type years ago. The pic to the left shows me havin’ a bangin’ good time walloping out the rhythms with it while recording it all via the mics into Pro Tools.

Check out the review I did of it by CLICKING HERE.

The Meinl TOPCAJ1MB Cajon

The clear advantage with these is you can sit up straight and interact with the audience without straining your neck upwards. Also, in the studio I can sit as normal, in my control room chair, and play it while operating my studio gear without changing my posture or position at all. I like that.

The slap top models will not, however, produce as much bass response, since inside they do not have as big a reverberatory chamber. I find if you are mic’ing the cajon, this does not matter, but if you plan on using the cajon mostly for open air concerts with no P.A. system or amplification, then the bigger cajons that you sit on will give you a deeper bass response.

As with the standard cajons, some come with pickups, most do not. Adding a pickup is simple to do however, as I mentioned above. It all depends on what kind of gigs you’ll be playing and what, if any, amplification you’ll need.

This week I’m finishing up a review of a newer Meinl slap top that came with electronics built in. Stay tuned here at Serious G.A.S. for that in-depth comparison and hear how the pickups fare, compared to the sound through microphones.

Which way do YOU think will win?? 😉

“Tab” Cajons
Travel cajon

Now, these are not a box. At least, not much of one. They are basically just a slightly hollow slab of wood or plastic about the size of a computer tablet, so their bass response is, uh… pretty non-existent.

Still, if you don’t mind low volumes (most people mic these) and a different approach, this stripped-down approach to the cajon and bongo sound might be just the ticket for your musical explorations.

You could also, as with the others, stick a piezo pickup on the wooden surface and send that signal through the P.A. or amp, instead of mic’ing it.

If you don’t amplify it, then you’re sure to be drowned out if you have several other louder instruments jamming with you.

To watch a video of a tablet player, click THIS LINK.

Electronic Cajons

Like the portability and ease of the cajon, but want a wider array of sounds to choose from? No problem! Enter the electronic cajons!

roland ec10

These products give you a box, or a slab, of wood to pummel, but they also provide an electronic system that will trigger dozens of other desirable percussive sounds. Any of you familiar with MIDI triggering will know exactly what I mean.

By far the most popular of these models is the Roland EC10, which you can hear in all of its glory by GOING HERE.

This kind of approach certainly will brand you as a cajon player who has, at any needed moment, a diverse and well-rounded sound set that can complement any song genre. You can even sound just like you’re playing a real trap kit if ya want. The Roland unit, for example, provides SIXTEEN different drum kit sound samples, giving you just the right kit sound for just about any genre of music.

And expanded sound boundaries makes for more and better gigs, right? Riiiiight.    😉

“BASH”-able Brands!

Using brushes on cajon for a different sound
Brushes on cajon make for a different sound

There are certain companies in the percussion industry that stand out for good reasons. These are the manufacturers that:

  • put in a good amount of research for their designs
  • have excellent return policies
  • have excellent quality control in place
  • use consistent manufacturing techniques
  • have a good track record of dependability in their products.

The companies that readily fulfill these expectations, in my experience, are:

  • Tama
  • Meinl
  • Pearl
  • Latin Percussion (LP)
  • Roland
County One Cajon
A boutique cajon by County One

Are there other small companies, and even individuals, making cajons of all styles, colors and sound qualities across the globe today? You bet! One quick search for a cajon on “Etsy” will show you what I mean.

If you wanna support the little guy, go for it. Feel free to explore the vast Internet frontier of home-grown rhythm boxes. You’ll find hundreds of weird and (sometimes) wonderful options all over the Internet, Make sure you ask about warranties, shipping costs, repairs and the like before you buy. The “little guys” don’t often have the support in place after the sale that we’d like to trust is there.

With the large corporations that I listed above though, you’ll tend to get a lot more color and style options, as well as a solid warranty to protect your investment.

So, if dependability and “BAM” for your buck is important to you, stick with the companies I listed. They have a long, respected history and, as I’ve experienced, won’t let you down.

“PUNCH”-ey Price Particulars!
Fancy cajon

In case you’re wondering what separates an expensive cajon from a cheaper one, here are the typical places you’ll find major differences:

  • the type and quality of the snares
  • the ability to change the snare tensions
  • the type and quality of the box wood
  • the type, quality and/or adjustability of the frontplate of the cajon
  • the presence (or not) of electronics
  • the thickness of the wood used
  • the sound port size and location
  • the artistic detail of the choices and assembly of woods

Here’s a bit of insight, by the way, if you ever run into the following designations: if the cajon you get does NOT have snares inside, it’s designated a “Peruvian style” cajon. Basically it sounds like you’re only playing a crate or a box (remember the African slaves in Peru?).

Those cajons with snares installed (which is by far the majority) are called “Flamenco style” cajons. This is what allows modern day cajons to sit in for full drum kits for acoustic bands, the fact that you can get a low kick and a high snare sound out of one small instrument.

There. Now you’re knockin’ in the know!

“FLOG”-able Favorites!

Two cajons

So, if cajon is in your future, either because you’re going to begin pummeling wood with a beat, or because you’ve been doing that for a while already, here are two rave recommendations for ya…

For Beginners:

You’ll want a good instrument to start on, but you probably also want great value and a lower price, since you’re just beginning to check this Peruvian “crate” thing out. No worries – the Meinl Compact Jam Cajon is your best bet.

This cajon is slightly smaller than most of the higher-priced models, but that just means it’s lightweight and easy to carry to gigs!

Meinl SL1500 Jam Cajon

Because of its smaller size though, it’s not going to pump out as much low end as the bigger, more expensive models. You can mitigate that, however, by putting a mic on its sound port and cutting the high end through the EQ on whatever mixer you’re running through.

If you’re going to play without any amplification, this cajon will be fine as long as there’s not too many other musicians, and as long as everyone else is playing non-amplified instruments like you are.

It’s got a 2-year warranty so you’re covered if anything goes wrong. A definite benefit to have when you’re first starting out.

To get a quality cajon made by a respected manufacturer, that’s this portable, for under $70… in a word: sweet.

To see it and HEAR it in action, GO HERE!

To pull the trigger and start makin’ some crowd-gathering street concerts in towns near you, use either of these links and go BEAT CRAZY:

Musician's Friend Amazon Image Map

Musician's Friend Amazon Image Map

For Intermediate to Pro:

You’ve been in this game; you know your stuff. But maybe you haven’t peeked into the market recently to see some of the new offerings.

My favorite cajon sound this year comes from a newer company… out of Sweden, believe it or not! Valter Percussion is producing, in Europe, a series of cajons that sound GREAT. I’ve watched several videos on their products and am really impressed by the pro sound they get out of their designs.

My favorite they’ve made is the “Big Box“. To my ears, it’s a cajon that could really fool people’s ears into thinking that they’re listening to a real drum set. The bass hits sound so much like a real kick drum hit it’s freaky! It’s mostly because of an internal baffle they put on the front plate. An excellent innovation that makes all the difference!

LP Kevin Ricard Signature Cajon

Unfortunately, no one here in the States sells them. If you want to though, you can personally special order one for yourself via their WEBSITE HERE.

If you want a no hassle, get it here, now, kind of product, then I’m really stoked by the Kevin Ricard Signature String Cajon by Latin Percussion. This cajon has great tone, a superb look, the latest ergonomic form, and tuning flexibility unparalleled by most other cajons. Let Kevin walk you through what sets it apart by watching THIS VIDEO.

Kevin Ricard has played for Sting, Kenny Loggins, American Idol, and had a long stint bein’ the groove meister for the Tonight Show as well. The dude is the epitome of what a professional is all about. The fact that he helped design this cajon and is proud to put his name on it… is all the “POW!” we need to know. This instrument is going to serve you well.

So check the specs and get your own bit of “BOOM!” Kevin’s pro beat sound is one click away…:

Time for Woodshed WHACK-ing!
cajons with palm tree

One of the best parts of getting an instrument is… playing it! Ahhh, the joy of woodshedding for days, and days, studying songs, patterns and approaches… and soon finding that YOU can really make the instrument speak! As you accumulate skills through tapping, beating, punching, slapping or battering your own cajon, it will become easier and easier to slip into any song and be a great rhythmic accompanist with the cajon.

At that point, you’ll probably find yourself getting called on to play with others frequently. With practice will come renown. You’ll then probably get serious G.A.S., like the rest of us, and just have to have a couple more (or five… or ten??) expressive cajons for your collection.

But here’s where ya start. Get that beat box in your tremoring hands and strike away… who knows what spotlit stages await you?!!

Let us know here at Serious G.A.S. how your cajon journey goes. Are you taking the plunge and starting to play? Are you an old cajon pro? Have you tried the latest, greatest electronic approach?? Let us know in the Comments section. We’re all gear heads, anyway, so all your stories intrigue us!

Until we all sit in a drum circle and jam… go… make… sounds!!

Teaj

The Best Hearing Protection For Musicians – Guard It Or Scar It!

Last week I had a visit from my good friend Chester. He’s a very gifted writer of country songs, and we’ve been recording some of them and slowly working towards his first solo release.

During our conversation he surprised me by saying that, guess what – he’s been deaf in his left ear since childhood!

Light bulb moment. So that’s why he always struggles with intonation sometimes when we’re recording his material.

I’m sure to be giving him a decidedly different headphone mix from now on!

I decided to talk about the best hearing protection for musicians not only because Chester reminded me of how it can greatly affect us in the studio, but also because the topic isn’t covered that often, yet it greatly affects how (and even IF) we use every bit of music gear at our disposal.

In fact, we could say there is no more crucial tool. Many of us take our daily hearing for granted, but staying cognizant of its fragility, and our responsibility to protect it, is important. If we don’t, we might not be able to maintain musicianship long into our future, and that would just plain… suck!

Let’s uncover what’s really going on beneath that awesomely coiffed hair on the side of our heads, shall we?!

Jus’ d’ Facts, Jack!

If the question “Do you use aural protection?” only conjures up for you romantic interludes with preferred backstage groupies, let us draw back the curtain for you now about why aural protection is no laughing matter:

According to the Hearing Loss Association of America, 1 out of 5 Americans suffer from hearing loss. Once you get to the 65-year-old mark, that figure increases to 1 in 3!

What’s interesting (and should really set us to changing our ways if we tend to sound extremes) is that 60 percent of the people with hearing loss get that hearing loss from where they work, or  go to school.

Now, if that’s true based on your average job around the nation, how susceptible do you think we musicians are, knowing that, where we work, most of the time it’s… well, pretty loud!

It’s not just the decibel level we should concern ourselves with, however. EXPOSURE TIME is the other biggest factor. For each level of noise pollution, there is an accompanying limit to how long you can subject yourself to noise before harm kicks your ear cilia outta commission.

In other words, on-going, long-term exposure to noise can result in permanent, incurable damage to our hearing.

As of right now, there is no method of regenerating damaged Cochlear hair cells. There is promising research towards that end, but it’s at least a couple decades away from becoming a reality.

That leaves us with the cold reality that blasting our ear drums will result in debilitating damage that we’ll never recover from.

Check out these many ways we play with aural fire…

Outdoor noise

So, outside. We all like a nice, quiet, idyllic country scene, right? Birds gently singing, a nice breeze, the sussurus of a small passing stream…

Trouble is… that’s not outdoor life for most of us!

At least for those of us that live in cities, there is rarely a lack of noise pollution a stone’s throw away.

One of the biggest offenders, by far, to our ears, are the multiplicity of those ol’ trusty LAWN MOWERS. Did you know that the noise of gas lawn mowers clocks in from around 87 decibels up to 107 decibels or so?? That’s LOUD, man!

Do you mow your lawn? If so, do you wear noise-cancelling headphones when you do it?? If not, you are tearing down, a little more each time, your long-term hearing potential.

If you’re also a musician who just happens to work a lawn mowing and gardening gig as your day job, you could be at SERIOUS, IMMENENT risk of hearing damage if you’re not donning protective headphones while you work. Those consistent, high decible levels you’re near will attack your inner ear hairs BIG TIME, burn ’em to a crisp, and leave you asking “Huh?” way too often!

Our garages and sheds are usually chock full of other things that are not only loud, but damaging to our hearing after just a couple hours of exposure. Here is “the naughty list” you should protect your ears against:

  • Leaf Blowers
  • Saws
  • Weed Wackers
  • Air Compressors
  • Snow Blowers

And how ’bout transportation? If you’re in a big city and they have one, you might occasionally ride the SUBWAY. Get this: the average noise level at a subway stop is 88 decibels. Between the train noise and the people noise (including those of us busking on our instruments by the walls or pillars!), it’s no wonder it reaches those heights of ear assault.

Here are other TRANSPORTATION MODES that tend to be pretty noisy:

  • Trains
  • Tractors
  • Construction Vehicles
  • Planes
  • Motorcycles

Did you know that a plane taking off produces 140 decibels of noise?!! Wow. Glad they have that noise-cancelling material in those walls – when we’re taking off we need it!

But think of those who live near an airport. Especially a busy one, like J.F.K. or L.A.X. Think noise pollution is an issue if huge jet airliners are passing right over your roof every few minutes?!! You bet it is.

If any of these auditory terrors show up around you, do yourself a favor: put your earplugs in.

For those of you that live in Houston, Texas, congratulations… you’re surrounded by the most noise in America, according to THIS ARTICLE.

Durham, North Carolina?? Not so much.   😉

Lastly, I’d be remiss if I didn’t mention an environment that can sometimes actually exceed 140 decibels of noise and yet hardly anyone thinks to wear ear protection around it… I’m talking about… SPORTS GAMES.

Joining the fans in the stands has always been a noisy affair. Few realize, however, the extent to which their hearing is compromised while rooting for their favorite team.

Crowd noise has been measured many times, so we know with accuracy ear plugs are beneficial. For example, in 2014, at a Kansas City Chiefs game, the roar of the crowd was measured at 142.2 dBA!

A Vuvuzela can damage your hearing

Indoor stadiums tend to be worse because of the architecture which, in some cases, traps and reverberates sound to a higher degree. Husky Stadium in Washington, for example, is known as one of the loudest stadiums in the U.S. It has a cantilevered metal roof which traps sound easily. A sound level of 133.6 dBA was measured there!

And, as if things couldn’t get worse, the South African soccer fans decided to add their own brand of musical instrument to the mix! Ever heard of the Vuvuzela?? It’s the plastic horn that has found its way into soccer games now. It only produces one note, but MAN… what a note – try 120 decibels worth of musical cheering.

Indoor noise

But wait – it’s not only outdoor noise pollution that can put our ears in jeopardy. Do you ever have too-high decibels sounding forth from these sources in your home??:

  • Vacuum sweeper
  • Music devices
  • television
  • Computer speakers
  • generators
  • air conditioners
  • Food blender
  • Loud family members!
Blenders can damage hearing
Teajs blender and phones

Almost every morning I start my day by making a fresh fruit smoothie for my wife and I in our Vitamix blender . In fact, I’m sipping on this morning’s right now as I write this to you. The Vitamix is great, and it has lasted us for almost a decade now.

Problem is… it’s LOUD!

But, as usual, there’s an easy fix… I just wear headphones while I’m blending! I grabbed a pair of drum headphones from one of my kits and keep them right next to the blender. Problem solved.

Same goes for our vacuum. It can get up to 77 decibels, and tho’ science says that will only cause damage when subjected to around 8 hours of it, I’d rather play it safe and keep my most important pro audio devices protected from even moderately-loud emanations.

If you make your living with your ears, isn’t that the least you can do?

Studio Session Assaults!

There have been sessions, especially with certain drummers I know, where I have been absolutely floored by the amount of mix they want in their headsets. I can see where my level is set at (let’s say 10 o’clock), so when a musician says it’s okay a LOT higher (say, 3 o’clock!) I know there’s some extreme hearing damage that’s already taken place.

And I certainly don’t want to make it worse! But, at the end of the session, they will have only delivered the goods if they were able to hear the mix, and themselves, well. Sometimes that means cranking it for the already hearing-impaired, unfortunately.

By far the main culprits are drummers, and the reasons are obvious. But having played drums myself for years, I know that there are ways to keep the decibels from overruning into unsafe territories. We just have to know what the safe parameters are, and keep monitoring  levels to maintain a best defense. By doing this, we can avoid the sound land mines that can blow up our long-term hearing faculties.

Bands in the studio should protect their hearing too

Electric guitarists are probably the next guilty of wanting it LOUD. I’m one too, so I know the temptation. One of my favorite ways to express myself through the electric is through strategic feedback. That only happens when the amp levels are somewhat loud, so ear damage is definitely a danger there if your headphones are not noise-cancelling, or if they’re (worse!) not on your head!!

There’s another adverse condition that puts our ears in potential peril: tracking a full band live, simultaneously. It’s always a good idea to talk about levels before tracking and mention to all the players decibel level dangers. Then they can make their own best decisions.

If the band wants to track in the same room together – that’s the worst for volume control, not to mention bleed-through. Still, if that’s what the client wants, we must ultimately oblige them. Be up front, though, about the risks and hazards of boosting things too hot. It might just keep your clients from walking out with hearing damage along with their finished mix.

Live Music noise

Okay, so… we all know that concerts can be loud. In our line of work, in fact, these awesome expressions of our art CAN BE the most detrimental series of assaults on our ability to hear.

As proof of that, let’s look at some scientifically gathered numbers. These noise assessments were gathered specifically at and around live concert events. Here is a table showing what they found concerning the amount of sound musicians at outdoor gigs are being barraged with:

Decibel stats show hearing loss danger

And lest we only think of ourselves, let’s take a moment to see what the music we are performing is doing to others all around us. Here is a data roster showing the typical decibel exposure taken in by outdoor concert peripheral workers, those who make the experience of coming to see us a pleasant one:

Decibel exposure levels for peripheral workers

Surprised?? It’s facts like this that we need to arm ourselves with as we go forth to our gigs. Good science doesn’t lie, folks.

Remember, decibel level + duration = the level of danger.

So, based on the numbers above, if you think your rehearsal, recording or concert set-up is making you susceptible to hearing loss, do something about it! Use some aural barriers… before it’s too late.

Ears Slapped? Get an App!

Okay, so now we know all the ways our hearing is attacked wherever we go. Should you then throw in the towel on our music goals and pursuits?? Of course not. Rather, just use simple, cost-effective methods to reduce your exposure to harmful volumes.

Hearing saved by a cell phone decibel meter
My cell phone decibel meter

Here’s one – your cell phone!

The Internet and the cell phone really haven’t been around for that long, but they’ve revolutionized our lives to HUGE extents. I, for one (obviously) spend a lot of time using the Web and learning endlessly about so many things.

One way I use my cell phone, besides consulting the Internet, is specifically for hearing protection: I have a DECIBEL METER APP on my phone. I got it free, and it works great.

Whenever I sense that the audio volume around me is getting pretty high, out comes my trusty phone and meter, and BOOM… I am immediately shown whether I, and the company I’m in, are in danger of hearing loss or not. It’s reassuring to be able to scientifically deduce my aural environment at a moment’s notice, no matter where I’m at, rather than guess at it.

If you don’t have a decibel meter on your cell, download one RIGHT NOW. Are there options? Well, I just searched in my app store for ‘decibel meter”, and guess how many apps came up??

OVER ONE HUNDRED!!

So, you’ll have no problem finding one. Trust me, you will not be sorry having this at your disposal, and, once you use it, I bet you’ll be surprised at just how noisy normal, daily life can be.

No Smacks While You Relax!

Private music listening through headphones is at an all time high. Whether it’s the ubiquitous little ear buds that Apple made famous, or the cover-your-ear type that gamers wear to stay “in the zone”, headphones are everywhere.

So too is their ability to smack our hearing as hard as Muhammed Ali in the ring! THIS VIDEO shows you what I mean.

Did you catch that part in the video that said if you have your headphones turned all the way up, you’re probably listening at about 120 decibels?? At that extreme loudness, you only have seconds before your ear starts to fry!

One good way of testing whether your phones are too loud is this: have someone stand three feet from you and try to have a normal conversation. If you find yourself straining to hear them, then your volume is probably at a dangerous level.

Your best bet? Don’t allow yourself to turn the volume up through headphones more than HALFWAY. If you keep with that safety precaution, you’ll eliminate the chance of long-term damage to your ears.

Sick & Tired of… Ear Fatigue!

Audio studio professionals have bandied the term “Ear Fatigue” around for decades. It’s actually not a clinically accepted term in the medical community, yet the reality of it has been proven time and again to be true.

Even Roger Nichols took breaks!

Is it the same as hearing loss??

Not necesarily, though they’re both talking about the same thing: a prolonged assault on our sensitive hearing mechanisms.

Ear fatigue, simply put, is when you have temporary hearing loss at certain frequencies, as opposed to permanent hearing loss, which is when it’s “game over, man; game over!”.

Ear Fatigue usually occurs after hours of mixing at moderately high to high SPLs. The typical frequencies that are most impacted are 4–6 kHz., since that’s where our inner ear cochlea is most sensitive to noise damage.

You know when you’ve had Ear Fatigue this way: you come back to a mix and say, “What the #$$% ??!! That sounds horrible!!” Too long under the barrage of high SPLs will cause you to not make good audio decisions, and you’ll definitely hear it the next time you push play.

Solution?? Easy – every two hours get up, walk about, take a break, then come back to it. Fresh ears will build a fresh mix. And don’t mix at high volumes all the time. You’re just asking for trouble if you do that.

Teaj’s son CJ in his first drum session!

Stop the Ear-gression! Use These!!

As you can see from the picture on the right, I have taught my son to play drums always wearing ear protection. He’s done this since he started, at three, so by now I suspect if he ever did try to play without any he’d just FREAK and put ’em back on!

I’m the same way. Not only with drums, but also with electric guitars. Both can explode extremely high decibels into our senses, so attenuating those levels down to something safe is, at least in my studio, mandatory.

We have many pairs of good, noise cancelling headphones in my studio. Here are the types I use and suggest for ongoing studio work

  • Noise cancelling headphones, no cable, for simple practicing. I prefer cans that reduce levels by at least 15 dB when I’m playing drums, but you can find many different pairs with varying dB attenuations. My favorite pair are the Walker EXT headphones. They’re really comfortable, and with a NRR of 34, there is no danger of hearing loss at all with these puppies!
  • Noise cancelling headphones, with cable, for practicing to recorded music. I’ve got so many of these type strewn across the studio. They come in really handy when a band is tracking in the same room. I’ve got 2 or 3 pair of the Vic Firth Isolation headphones, since they deliver excellent audio, but lately I’ve come to be a fan of the Koss QZ-99 phones. They’re a lot cheaper than the Firth’s, have a cord two feet longer, and have the added benefit of having a volume knob on the headphones themselves. Always good when the talent can do something for themselves instead of asking ME!    lol
  • Closed-back mixing headphones, for eliminating all surrounding noise. During a mix, I always check things with headphones, so a good pair that’s comfortable can make the process a lot more pleasant. I also use these type for laying down vocals. I can hear the mix fine but there’s no bleed into the mic to worry about later. Although I used Sony MDR7506s for decades, my new favorites are the Samson SR950s. They bleed less, are more comfortable and let me hear what I need to with faithful fidelity. A sound choice, indeed!

For more headphone options, check out my article on the best for this year by CLICKING HERE.

Even Animal protects his hearing!

On the other hand, if you find yourself playing LIVE concert stages more than in the studio, then you’ll want one of these two devices:

  • A decent, dependable pair of in-ear monitors. Best solution by far.
  • Or sound-reducing ear plugs made for musicians, if you’re using floor monitors.

I played bass in a band once that had a drummer who played SO FREAKIN’ LOUD all the time, I could hardly hear my floor monitor. He hit his cymbals like Thor hits enemies with his hammer, and my ears were feelin’ about that kind of attack!!

Earasers are great hearing protection
No in-ear monitors? Use these.

I very soon purchased some good protection in the form of “Earasers“, which are flat frequency response earplugs designed for musicians. They reduce sound by 19 dB, so when I stood next to aforementioned drummer with them in my ears, I no longer felt like the cilia hairs in my inner ear were being disintegrated by a mosquito zapper!

The other BIG plus to these which I really appreciate is that when I went to SING while wearing them, I didn’t have any intonation issues. This is a huge asset, because so many times when I’ve attempted headphones, headsets, ear plugs or ear buds… it messes with my ability to hear myself clearly and thus affects my intonation.

In any situation where you’re not wearing in-ear monitors and music is being played around you, coming from either amps or monitors, these will do a GREAT job of cutting the volume but not sounding muffled or changing the EQ of the sound. They made my rehearsals with one of my bands muuuuuch more enjoyable!

Now Go Forth and… Attenuate!!

If you’d like even more insight into why protecting our most valuable pro audio asset can be accomplished, visit our friends over at “Sound Advice” at THEIR WEBSITE HERE. This group of caring scientists specializes in teaching the entertainment world how to specifically keep our ‘sound gates’ protected. They have amassed tons of data and use all their measurements to further equip us to keep our aural senses safe.

In short, they ROCK! Thanks, guys!

If you remember nothing else from this post, take this with you: the magic number is 83 dB. If you keep audio levels at, or below, this mark, you’re pretty much guaranteed to safeguard your hearing, and keep your career intact. How do you do that? Check your decibel levels, everywhere and often.

If you MUST make yourself vulnerable to higher decibels, then make sure the DURATION is short enough to avoid damage. To gauge that, copy this chart and keep it with you, in your gear case, or on your phone:

decibel exposure chart

How about you? Do you protect your ears? Do you think about it only in concerts, or in everyday life as well? Or perhaps you’ve never used aural protection and think “I’m fine!”?

Whatever your position, share it with us. This post is an especially good prompt for discussion about this important, career-affecting topic.

Look forward to hearing your thoughts. ‘Til then, go… make… (quieter) sounds!!

Teaj

The Rode NT1 – Ssshhh! The Mic… Is Listening!!

In Hand NT1

Interested in the Rode NT1, eh?

I’m not surprised! It has a really excellent reputation for being an incredibly useful mic in the studio and is touted in the ads by Rode as “one of the world’s quietest studio microphones”.

Is that just hype? Or is it history?? Only a mic shootout will tell, so that’s just what we decided to do here today on Serious G.A.S.

I was turned on to it numerous times simply by asking this question: “What microphone, under $1,000, is your favorite in the studio??

The answer to that question was the NT1 too many times for me to ignore, so here I am again, putting my money where my computer keys are!

But Will It… ??!

A favorite show around our house after dinner is “Forged In Fire”. Blacksmiths from all over the country come to compete for ten grand by forging an awesome blade.

One of the judges, Doug Marcaida, always makes us laugh. After he attempts to disembowel a fake human torso with a fresh blade, if it cuts deeply enough to make the fake blood spill, he will smile a huge smile and say, “It will kill!!”

Every time I buy products to review, for my studio and for you, my friends here, I have to eventually make one of two statements:

  1. “It will stay!”
  2. “It will go!”

I end up returning quite a bit of what I review here. That’s not usually because it’s bad somehow; it’s just that I already have products in the studio that can do the job as good or better, so there’s no use throwing away my money.

The NT1 new in Box

Those things that I keep, though, I keep because it is a genuine step up from what I have, OR because it is delivering a certain characteristic that I am lacking in the studio and thus it will provide me with another color for my sound palette that I’ve not had until now.

Either way, if I keep it… there’s a very good chance you will too.

So did I keep the NT1???

Well, … we’ll just have to see, won’t we? 😉

A Sound History

Before I let that audio cat out of the mic bag, let’s look at what we’re testing today.

The NT1 was first released by this Australian company in 1991, and in just a few years found roaring success. The home studio market was just kicking in, those anxious to record their first album without spending hundreds of dollars an hour at a pro studio were quickly buying the latest home recording gear in droves.

rode mic logo

I know I SURE did. My first album was done on a Roland VS-880! Talk about THROWBACK Thursday!! lol

Rode NT1 Warranty
THAT’S a good warranty!

Rode then redesigned and upgraded the NT1 in 2003, and decided to call the upgrade the NT1-A. It sent their sales skyrocketing once again.

Finally, in 2013, the latest version was released, the mic that is available to us today. Rode dropped the “a” and once again labeled the mic the “NT1”, as a way of saying they were “going back” to a more vintage sound.

Today’s NT1 is more popular than ever. It is consistently one of the most sold mics in pro audio retail stores every year. I verified this by asking several pro audio retail outlets that I frequent and buy from often.

That kind of success doesn’t come accidentally. So how did Rode earn these accolades and sales??

Sound On Spec

Let’s get the details out of the way first. Here’s the performance specifications that you get when you buy an NT1:

  • Polar Pattern – Cardioid only
  • Frequency Range – 20Hz – 20kHz
  • Maximum SPL – 132 dBSPL
  • Equivalent Noise Level (A-weighted) – 4 dBA!!
  • Weight – 15.5 ounces
  • Warranty – 10 years, if registered

If you want to know even more tweaky specs, feel free to visit the RODE WEBSITE. Otherwise, let’s get down to real studio business and talk about what we really want to know…

… how good IS it?!

Rave on, Reviews!

It says a lot about a pro audio product when, no matter what audio website you visit, all the reviews average above 4.5 out of 5.

That does not happen very often, so kudos to Rode for making a product that, across the board, is widely praised for its workmanship and sound.

All the reviews I read simply said the product met or exceeded recommendations. I didn’t find any putting the mic through paces with so many things, as I did in my studio, however.

So let’s check my results. How did the NT1 fare against other mics when put to the test on various instruments around a typical studio??

Acoustic Guitar

The ditty I wrote for this shootout features my Ibanez AE acoustic guitar, with freshly installed bone bridge pins (for more on how those can really change your sound, see THIS ARTICLE).

IMPORTANT!: ALL of the following recordings contain NO preamps, NO effects, NO dynamic processing, and NO post manipulation in any way, not even fader riding for volume.

I want us all to hear what the mic, alone, can do, not my plugins in Pro Tools. For best fidelity, listen to the following recordings with quality headphones. You’ll get a much better grasp on the intricacies of each mic’s frequency response.

Okay, let’s do this! First up: you will hear my acoustic guitar tracks. You’ll hear it four times, with a different mic for each. Here is the order of the microphones you’ll be listening through, in order of appearance:

  1. Audix i5
  2. Audio Technica 4050
  3. Oktava MKL2500 tube mic
  4. RØDE NT1

Give a listen and ask… “Which mic represents the guitar for this song best?”

For me, 1st place went to my favorite studio mic, the AT4050, which was the second recording. It always brings out the sparkle on an acoustic SO well, I wasn’t surprised. But the NT1, to me, came in second place!

One thing I noticed right away is that the RØDE mic brings a homogenizing quality to everything it picks up. What I mean by that is a kind of aural sweet syrup that makes anything it hears more legato, more “mixed together”, more… cohesive-sounding. It’s almost like it has its own small bit of compression built in or something.

Very interesting, and for certain types of instruments and songs, it would be a great asset.

Third place for me was my Audix i5. Again, no surprise; it is my go-to mic for amp cabs and acoustic, tho’ I also have other mics in the mix too.

Vocals
Vocal mic shootout, with the NT1

This was a fun bit of vocalizing. When you hear the lyrics, you’ll understand why!

The vocal, as before, comes up four times. Here is the order of the microphones you’ll be listening through, in order of appearance:

  1. Shure SM58
  2. Audio Technica 4050
  3. Oktava MKL2500 tube mic
  4. RØDE NT1

Give a listen and ask the same question as before. It’s my “most important question” when choosing a mic.

This was a tough one, because my tube Oktava mic and the NT1 both delivered a really good transfer for this song. I had to listen back and forth, six or seven times, before I made my final decision. The clincher came from walking out of the control room and listening from outside the door.

Because of that final listen, 1st place went to the NT1! There were two reasons:

  1. the EQ of NT1 kept my voice forward in the mix a bit better than the MKL2500
  2. that compression thing in the NT1 was evident again, keeping my loud and soft sections a little more even than the Oktava.

Third place for me was my AT4050. I’d definitely have to dial out a bit of high frequency bite for this tune, but it was so much more dynamically interesting than the SM58 there was just no contest.

Drums

For this test I decided to do something I don’t normally do – I took the “one mic on the drums” approach!

I would rarely do this, as the music I write calls for more control over the disparate elements of the drum kit, but for this comparison it worked great.

Mic'ing the drums with the NT1

The full drum set was mic’ed by placing four mics FIVE feet out from the kick drum, and FOUR feet high off the ground. All were pointing in the exact same spot: the gap between two of my high toms, where the snare peeks through.

You’ll hear the kit four times, just like the vocal and guitar. Here is the order of the microphones you’ll be listening through, in order of appearance:

  1. Oktava MK319
  2. Audio Technica 4050
  3. RØDE NT1
  4. CAD CM217

The CM217 is a pencil, small-condensor mic that I use in pairs above my kit for overheads. They work really well for that application and they’re not that expensive. Sure, you CAN buy Nuemann KM184s for a LOT more, but if you’d rather… these work well.

Give a listen and choose your favorite rhythmic mojo!

What’d ya think?!

I was really pleasantly surprised by the NT1 on this test! It won my 1st place vote because it clearly brought the most presence out of the whole kit, bringing its faux compression sound right where we needed it most. I mean, did you hear how it made the toms sound like they were right next to it?? How does it DO that??!

My Oktava 319 came in second for me. I thought the AT4050 did great on the cymbal work, but it didn’t do nearly as well, at the distance of 4 feet where I placed it, at picking up the toms and snare with any beef. For that reason I put it third.

The CM217s came in last, but I knew they would. I use them for cymbal pickup, not drum sounds. Horses for courses… of courses. lol

Bass

My Ampeg PF-210HE cabinet had four mics on it for this part of the shootout.

  1. Oktava MK319
  2. Audio Technica 4050
  3. RØDE NT1
  4. AKG D112

The AKG mic is, as you probably know, a good choice for any bass frequency application, so I threw that in.

I don’t tend to record my amp and cabinet that hot. I find about 10 o’clock on my amp head, the Bugera Veyron Tube, is just fine for good tone and thumpiness.

Place your bets, slide on in to this recording and let’s see where the cards fall!

Your choice??

Here in low-low Land the tables were certainly turned for me. My 1st choice was the D112. No surprise since bass frequencies are what it’s made for!

Second place for me was also a surprise: my AT4050! It brought definition and clarity to the envelopes of each note far better than the final two, so it shows me it’s versatility yet again.

There’s a reason it’s my favorite mic!

The NT1 in this comparison actually came in LAST place this time. I thought it added a muddiness down there that the other mics did not. In many instances, its smeary, buttery legato manner would really benefit a recording, but not here.

So, 3st place then went to my Oktava 319. These Russian mics I got years ago and I they are good workhorses around the studio. I wouldn’t say they make things sound great, but they don’t make anything sound bad, so they’re definitely worth the investment. I usually use the pair that I have as second or third mics on some instrument.

CARTOONED NT1
My Final Answer

Without question, I was impressed by this mic. It is quieter than any other mic I currently own, yet you don’t have to have a preamp to get it sounding great in a mix.

Its tendency to have its own “compressed” character really can work wonders for some things. Same for its tendency to “blend” a sound into a very legato tone, almost like there’s a hint of room reverb behind it, tho’ obviously there’s not.

I wouldn’t use it on everything (pass on bass, thanks) but if the question is asked is this a mic that’s worth its price and useful in the studio, I would have to answer a solid “Yes!”

For that reason, I am now a proud owner of an NT1. To paraphrase Doug Marcaida: “It will stay!”

I recommend it to anyone wanting a versatile, usable mic for in-studio use. Just know that it has its own “flavor”, as all mics do, and use it when an appropriate instrument needs some audio love.

Join Club RØDE!

If you’re ready to join me, playing in the RØDE band, you can currently buy the NT1 in THREE ways:

  1. Just the mic itself, with a simple ring-mount: “Rode NT1”

2) The mic, a shock mount and a pop filter (what I bought): “Rode NT1KIT”

3) The NT1Kit plus a 1-channel audio interface: “NT1 Portable Studio Recorder Kit”

The one you’ll need depends on what gear you have now, and how good you want the final product to sound.

One thing’s certain: even if you get just the mic, you will quickly have a world of aural exploration at your fingertips. Go for it!!

Bias?? What Bias?!

Just so you know, as usual, I have NO endorsements from any one company. I do these comparison tests first and foremost so I can get the best sound in my own personal studio, for my own songs and my own recordings.

When I recommend a mic, it has nothing to do with company kick-backs, a free mic on the side, tour endorsements, or any other kind of slick, undercover deal.

Like you, I just want awesome recordings, and I pay for all this stuff myself. Which is why I won’t be doing a Neumann U67 review anytime soon… unless you and twenty or so other G.A.S.-a-holics want to go in with me on the SEVEN GRAND!! LOL

Does Slash Know About This??

Btw… one of the first things I asked when I looked into this mic is… what’s with the slash???

In their company ads, you’ll see that the company is called “RØDE“. Why is there a slash in the O? Is that just to get us to notice it more? Does their company speak another language? Did the printing machine malfunction and nobody caught it in time??!

Here’s the dealio: ø is a letter in Scandinavian languages. It’s pronounced like the German umlaut “O”.

The word “røde” means “red”. Henry and Astrid Freedman, who founded the company, are originally from Sweden, so I guess they wanted to throw a bit of their heritage into the company moniker.

Why “red”? Your guess is as good as mine. lol

All To-ge-ther Now… All Together Now!

For those of you into SONGS as well as gear (that is why we do this, right??), here’s all the recordings you heard above put together into the finished composition!

The tracks I used were the ones I chose as first place winners. I added just a skosh of reverb and processing.

Enjoy!!

Giving You the Signal

Hope you enjoyed listening first-ear to the recordings I made using the NT1.

The NT1 mic shootout session

I hope those audio signals provides you, as they did myself, real insights into, not only whether this mic stands above the hype (it does), but how the NT1 stacks up on certain frequency spectrums against other mics on the market.

Let us know your thoughts. Do you already use one? Will you now? Have you found anything better for the price?? Leave us a comment and fill us in on your wealth of studio knowledge.

It’s a jungle of mics out there… thanks for stopping by and letting Serious G.A.S. help you machete through it!!

Now, go… make… sounds!!

Teaj

Acoustic Guitar Parts – Swap ‘Em Out To Step It Up!

For my birthday this past Memorial Day weekend, I got a rockin’, G.A.S.-y gift!

I had specifically asked for certain acoustic guitar parts, and my family, being the awesome examples of humans that they are, had some nicely wrapped and ready for my open hands as soon as I got up.

My New Bone guitar parts
My New Bone Bridge Pins!

The present was deceptively small for the considerable impact it will make. I removed the paper, opened the box lid, and lifted out the packet that lay inside. I looked through the clear plastic baggie, and viewed what I had been anticipating… six cream-colored guitar bridge pins….

… made of BONE!!

Yep; actual bone. From what creature? Couldn’t tell ya. The pins didn’t come with a death certificate or autopsy report. :-0

What I CAN tell you is that swapping my old pins out for these new bone ones made an immediate difference in the sound produced by my Ibanez AE acoustic guitar.

So does replacing parts, like pins, saddles, nuts and such, really make that much of a difference?

Funny you should ask… !

No Petrochemical Synthetic Polymer Malleables!

Plastic guitar parts are like plastic beach waste - the worst!
Hawaiian plastic beach waste

We all know that we get what we pay for. For guitars under, say, $800, it’s pretty common to find lots of parts made of (wait for it… ) PLASTIC. That soft, shape-shifting polymer is everywhere; there’s probably not a single room in your whole house that doesn’t have something plastic. In fact, it’s so ubiquitous, our oceans are full of it and damaging wildlife and the environment.

But… is it a good choice for the tone-transferring parts of instruments?? Not really. The reason mostly has to do with its mass: it’s just too soft. Soft materials will never pass along vibration as well as harder, more dense materials.

Add to that, that because of its softness, many find their strings cutting into the plastic nuts or saddles over time, deep enough that the notes become cut short and “muffled” sounding.

Definitely not a boost towards optimal tone!

If you record acoustic guitar with microphones frequently, as I do, you know how important it is to eke out every bit of impressiveness that you can. If we optimize critical components by getting rid of plastic, we’ll find we’ve taken a beneficial step in the right direction.

Here’s what I’ve noticed: when you swap out the plastic nut, saddle and pins on an acoustic guitar for another material, you eliminate a kind of “banjo sound” that plastic produces. The mid-high frequencies seem to be more pronounced by plastic, as well as a muddy low-end.

I also find that plastic emphasizes and DE-emphasizes certain frequency RANGES. This (to my ears) makes the sound more… well, I guess the best word is “separated”. It sounds less like a cohesive team of tones, and more like disjointed ranges of notes, throwing dodge balls at each other… in a gymnasium… with green fluorescent lights!

To see what I mean first-hand, just LISTEN TO THIS.

In a nutshell, use plastic parts and you’ll sacrifice clarity of fundamental notes, sustain, low bass & overtone frequencies and even, full-bodied tone.

Blinding You With Science!

The video above shows us that the difference in materials can produce staggeringly apparent sound differences! But how can the material used to make pieces that are so small make such a difference??

Science can provide insight. Every single part of your guitar does three things:

  • CUTS certain frequencies that the strings produce
  • BOOSTS certain frequencies that the strings produce
  • TRANSFERS UNALTERED certain frequencies that the strings produce

The combination of these cuts, boosts and transfers is what produces the specific “sound” of your guitar.

So, when you strum or pick an acoustic, the vibration of the strings passes through the saddle, the bridge, the bridge pins, and into the top wooden sound board. All of those cut, boost and transfer frequencies.

If one (or more!) of those is made of a substance that stifles vibrations (e.g. plastic), then instead of resonating them, a significant part of your sound, my friend, will just be stolen. And the police can’t help ya!!

It mostly comes down to density. The denser the material is, the more it will pass on these four characteristics:

  1. Volume
    Pins and saddle on an acoustic
  2. Clarity
  3. Sustain
  4. Tonal Center

With that in mind, replacing the wood of our guitar BODY should make a massive difference, right?? Yup, but since that’s so cost-prohibitive to a ridiculous degree, just buying another guitar is a better way to fix a bad-body problem. Remember, G.A.S. is good! 😉

The biggest reason to upgrade from plastic? For me, it’s because parts made of bone produce a more EVENLY-REPRESENTED frequency spectrum. No matter what I play, it sounds like the frequencies are all a cohesive unit, instead of islands of tone that just happen to be in the same room.

The materials you make a musical instrument with matter a lot. If you just want something with 6 strings to play around a campfire every few times a year, then… whatever, put strings on a rake. But if quality of sound is your goal, you MUST consider what raw materials make up your melody-making tool.

So, given that plastic is such a poor medium for vibrational transfer, what other options do we have??

Bad to the Bone!

My birthday gift was BONE bridge pins. Bone is definitely a denser material than plastic, so right away we know that we are going to get better sound transference.

I personally found more volume, more sustain, more clarity in tonal center and more evident harmonic content in my Ibanez AE, just from switching from plastic to bone pins! How cool, that we can gain a real boost to our tone for under $20!

Bone is used a lot for acoustic guitar
Too much bone??

If you’re wondering what KIND of bone you’ll get, well, sadly there’s no way of knowing unless you ask the company you purchase through, and even then the person you get on the phone might not know.

Most of the time you’re probably getting COW. They use many of the more dense bones of our moo-ing ex-friends, and probably will continue to, as long as humans eat meat, which (tho’ I’m a vegetarian) probably will not end anytime soon.

Sometimes other bones are used though. In my research I’ve come across the following:

  • Cow
  • Horse
  • Asian buffalo
  • American bison
  • Camel
  • Mammoth
  • Elephant
  • Unidentifiable bones!

The only downside I’ve read about using bone is that, because it’s an organic substance, its density isn’t consistent throughout. In other words, there could be some “dead spots” under certain strings as opposed to others. This makes sense from a scientific standpoint, and the sonic transfer could be affected.

Anything that’s alive, or even was alive, will have an unpredictable, organic differences. I get that. Still, the upgrade to bone from plastic was such a clear winner to my ears… even if that IS true, it doesn’t matter to me.

So, did you notice the wildly anachronistic animal on the list above?? How in the name of Gibson did that get on there??! Let’s see, shall we… ?!

For That “Woolly” Tone

Mammoth makes good guitar parts
Guitar chicks prefer Mammoth

Did you know that, for over 300 years, there has been a legal ivory trade coming out of Siberia… of woolly mammoths?!

It’s quite common to dig up the remains of these great beasts in that region. They preferred it there for some reason. Maybe the tundra ice kept their flowing hair locks moisturized!

Regardless, even today it’s still legal to trade for the ivory in the tusks of these animals. Yes, MAMMOTH IVORY is rare, and costly, but come on… who wouldn’t want to make a connection with an impressive creature that’s been extinct for thousands of years? Imagine how its massive mojo could burnish up your tone! Mesmerizing!!

Some scientists estimate that there are probably still 10 million mammoths carcasses buried in Siberia, based on the rate and regions of discovery thus far.

So, if you aren’t scared away by price tags that are usually over a hundred bucks, go get for your most favored guitar a set of woolly mammoth bridge pins (like THE ONES HERE) and spread your impressive story to anyone who even MENTIONS your guitar.

Or even those who don’t. I mean, come on, everybody would have to know, right?! 😉

So? How would you describe the tone difference you heard in the video? I like it. In fact… I think I’m gonna look into swapping out my bridge now… !

A Trunk of a Tail

It’s important to differentiate, when shopping for guitar parts, between bone and ivory. There is a difference.

The tusks of an animal, what is designated “IVORY“, are of a much denser nature than the bones of that same animal. Tusks are basically teeth that have grown out of an animals mouth. They are not considered bone, and they are more prized as a sound transferring material because of their denser characteristics.

Elephant tusk is now illegal for parts

Alas, even tho’ they are better at sound transference, a political movement has all but eliminated it as a chose for musicians. In 2014 the U.S. Department of the Interior implemented a ban on IVORY, because way too many elephants were being killed for it. That ban is still in effect today.

This had sweeping ramifications for many industries, but the music instrument business was hit extremely hard. For decades, ivory had been used for tuners, saddles, nuts, bindings and purfling… Now suddenly that raw material was off-limits.

There is also legislation out there still protecting walrus, rhinos and even narwhals (“hope you find your dad, Buddy”)! They were, for hundreds of years, all secondary sources for international ivory trade.

It’s a good feeling to know the lives of rhinos, elephants and walruses the world over are being saved out of extinction. But the instrument companies still had to stay in business, and they needed alternatives FAST!

It’s similar to what happened in 1929, the year of the stock market crash that caused the Great Depression: From that point the makers of PIANOS started substituting plastic on top of their piano keys instead of ivory, to cut costs and try to survive through one of the worst financial debacles in history.

In both cases, though for different reasons and at different times, plastic started being used in droves. It saved the day, but it did not save the TONE. As a substitute for ivory, plastic is, in a word, inferior.

WOODn’t You Know it

We now move on to using material that, yes, was still “alive” once, but is much more accepted as a raw material, and causes less political rallies: WOOD.

If you have a guitar that you feel is too bright, and overly ringy, then you could benefit from swapping your parts out for wooden replacement.

Tall Trees make good acoustic parts

Two of the biggest wood options for acoustics are Rosewood and Ebony. Both of these will lessen the high frequency content a bit, and provide a more “warm” final sound product. If you want your axe to “mellow out” then, those two would be excellent choices. Other options I’ve seen are:

  • Maple
  • Ironwood
  • Osage Orange
  • Unknown woods – usually dyed black

One luthier online even said he had a guitar come in once that had a nut made of (are you ready?!)… matchsticks!

Not everybody can support a G.A.S. habit, obviously. ;-0

For an excellent example of EBONY versus PLASTIC, go watch THIS VIDEO. If your ears are like mine, it’s pretty obvious which are gonna win the “I Sound Better Than You” award!

One thing to remember about wood: it always grows or shrinks based on temperature. So adding more wooden parts to your already-mostly-wood guitar will cause it to be even more susceptible to environmental changes. Finicky about tuning? You have been warned!

As Fleetwood Mac said… “Tusq!!”

Tusq pins go well with acoustic guitar

Many say a close second to using bone components, or even better than bone, is switching out your plastic with “Tusq” parts. It’s basically man-made ivory made by a company called Graph Tech.

Those who are Tusq adherents say that you get a more consistent delivery of vibration from this material because it’s totally consistent in mass, thickness and density. They will tell you the shortcomings of bone, based on the ‘dead spots’ I mentioned, and share the many companies that now ship guitars with Tusq instead of plastic.

Without question, it’s a great step up from plastic. I myself am toying with buying some Tusq parts just to test ’em out.

Can’t hurt, might help!

Metal Mania!

Chrome over brass bridge pins for acoustic

Although I didn’t see it a lot, you can, if you dig deep enough online, find acoustic guitar parts made of metal.

The options I came across were:

  • Brass
  • Steel
  • Stainless steel
  • Aluminum
  • Titanium!

To hear a shootout between BONE and BRASS pins, watch THIS VIDEO.

Sounds like going this route really livens up your tone in the high frequencies. I could definitely hear the more “metallic tone” when he used the brass pins.

In fact, it reminded me of playing a Resonator guitar (check those unique creatures in THIS POST), only with the metallic quotient dialed back quite a bit.

Regardless, you will certainly get a different sound, no question, and often that’s just the ticket for livening up your mix or your live tones!

Artificial Intelligence?

There are plenty of man-made options, like plastic, only better, just waiting for you to try their tone. I’ve found these available:

1,000,000th Martin Guitar in 2004
The 1,000,000th Martin Guitar!
  • Corian (Martin guitars use this!)
  • Graphite
  • Granite
  • Polystyrene
  • Epoxy
  • Formica
  • Stone!
  • Unknown composites

But I thought we said that artificial polymers were bad??

Well, certainly any man-made material that is SOFT is going to work against you on a guitar. The ones listed above are all much denser, and thus better sounding than plastic.

Remember that, at the end of the day, whatever materials you use on your axe, it’s about how it SOUNDS TO YOU. The ear of the beholder reigns, and for both the player and listener, if it sounds right, it IS right.

Nothing Beats Cheap G.A.S.!
Guitar parts for coins!

What’s great is that a lot of these material upgrades to your axe don’t have to come at a premium. Many are CHEAP! And as anyone knows… cheap is good for G.A.S.!

Check out THESE BONE PINS that you can have caressing your tone-lusty ears in mere days.

Or THIS SADDLE & NUT COMBO pack that will not only enliven your sound, it’ll take your guitar’s style up a notch or two!

Or just get everything all in one package, LIKE THIS KIT, and really turn the tables on your tone!

It can’t hurt, doesn’t cost much and just might take your sound up to the next level for hardly any investment.

Sounds like my kind of Gear Acquisition!

You Got SKILLS?!

So now that we know all about our options for switching out the nut, pins and saddle… can we do it ourselves?

An acoustic guitar ready for new parts!

Yes! But only if you feel comfortable, knowledgeable and skillful enough to take on the task. I would also take my guitar to a luthier IF I found the saddle to be GLUED into the bridge. This is not standard procedure, so you probably won’t come across that problem, but if you do… don’t try to rip it out yourself. That could damage your bridge and soundboard badly.

Here are a couple breakdowns for swap-outs that I recommend:

  • To witness how to swap out your saddle, watch THIS VIDEO
  • To witness how to swap out your nut, watch THIS VIDEO

Since you take pins out every time you change the strings on your guitar, I think you can handle pin switching. 😉

How about electric guitars? I don’t find they need swapping as much, personally. That’s probably because there’s so many other factors at play in an electric: pickups, metal bridges, tremolo systems, cables, amps, effects… under that avalanche of tonal elements swapping out a nut would not be nearly as noticeable.

But in acoustics the difference screams.

Okay, so knowing that each kind of material will alter the tonal characteristics of your guitars in small to moderate ways, and with varying tonal outcomes… let’s take a look at our options…

The First Cut is the…
Measuring for new acoustic guitar parts

As a final caveat to all this talk of upping your game tonally, I must mention… none of this material-swapping will be a magic bullet to your sound unless you make sure that every piece you put on is CUT correctly, or shaped appropriately, for the guitar in question.

Measure your guitar parts before you buy. This will ensure that you get the same size nut, saddle and pins that will fit your guitar.

Then, when you get the right-sized piece, make sure the strings naturally sit where they should. If it looks like they don’t want to sit where the slots have been cut in the nut, for example, you may have to get the nut recut or buy another one that fits better.

Even pins can be different, tho’ they’re not so much of an issue. I have one guitar where the pins were a little larger than what the guitar came with. They stick up about 2 mm higher than they should, but they’ve never popped out once I put new strings on and still improved the sound.

I find that most guitars will take these add-ons just fine, with no needed trips to a local luthier. But keep your eyes open… some guitars are made… well, just a little differently!

See… and Believe!

The best way I can think of to finish this article is to give you a taste of the options I’ve discussed.

I planned on doing a video shoot-out, but guess what? Sotos already did a great one, so I figured why re-invent the wheel?

Sotos guitar parts comparison

Sotos Bakas is an excellent musician and gear geek from Athens, Greece. In researching guitar parts materials, I came across the parts comparison he has online. He did a bang-up job! He kept everything the same except the parts, watched his proximities, played the same music… the perfect way to really hone in on the parts in question.

And even more… he plays beautifully!

So to get instant insight into the tonal varieties of guitar part materials, watch Sotos in THIS VIDEO.

Thanks for that outstanding comparison, Sotos. You ROCKED it!!

The Saddle-bone Connected to the… PIN bone…

Saddle & nut parts

My suggestion to you, in light of all we’ve covered today, is that you do what I did: buy one or more of the parts that are currently plastic on your guitar, change them out and see if you like the difference.

Remember, most of these parts are under $20; many under $10!!

Switching from plastic will up your tonal game. You’ll hear the obvious benefits, and your music and your audiences will gain the benefits.

If you go for it, let us know the results here at Serious G.A.S. Throw us a comment and describe the difference in sound you experienced.

For now, I’m going to go investigate those mammoth parts… I think the caveman in me is COMIN’ OUT!!!

Now, go… make… sounds!

Teaj

Teaj in the storm fields!

How To Gain Stage, Pt. 1 – Launching Your Guitar Tone!

(Editor’s Note: Hey, gearheads! Teaj here. Please help me welcome a good friend of mine, fellow G.A.S. sufferer and new blog author to our site: Mr. Sean Barrett. He’ll be sharing his expertise in the pro audio field from time to time, and you’re sure to dig what he’s layin’ down. Take it away, Sean… !!)

Space. The final frontier.

These days are pretty exciting for anyone who ever wanted mankind to explore the cosmos. I’m certainly one of those.

According to our pioneer man, Elon Musk, just a few years from now we’ll have a colony on Mars. AWESOMMMMME!!

But how will we get there? And what does that have to do with today’s topic: How to Gain Stage???

Well, to make it Mars, or anywhere far out into space, very precise calculations MUST be made.

It’s not a matter of just “heading THAT way”, either. On any outward bound journey, a colonizing ship is going to have to make a series of course corrections in order to make it to the final landing point.

Each time they adjust their trajectory, these course corrections could cause them to overshoot or undershoot their goal. But IF they are careful… methodical… they will reach their optimal goal and plant the flag of success on new worlds untold!

Gain staging is the same concept; it’s basically a series of ‘course corrections’ that will lead us to the ultimate goal,which is… sounding amazing!

Ready to blast off?!

Launch Time: T Minus Five Paragraphs…!

This is Part One in a series of articles that will help to solidly define and give examples of “Gain Staging“. Today’s post specifically will look at the “launch” phase – where your sound starts and how to navigate from there forwards to your goal.

Some of you may have never heard of gain staging. That’s okay. It’s not talked about much. That’s probably because it’s not well well-understood.

Today, we’ll hopefully change that, so we can apply, with informed confidence, the changes to our guitars and rigs that will take out tone “to infinity and beyond” (to quote a space-daring pioneer)!

One caveat before we dig in: there is, admittedly, no right or wrong when it comes to your sound. Tone is a completely subjective matter, and opinions are like @#%holes – we all have one!

So instead of defining a “right sound or method”, we seek today to make sure that everyone understands the gain staging procedure well. That way your personal guitar sound is not an accident, but rather a product of strategic creation, an informed blueprint… a deliberate series of course corrections.

Commence Stage One Separation…

So, what is “Gain Staging”? Gain staging is best expressed by this simple explanation: “One volume source feeding another, while specifically seeking to minimize distortion and noise”.

Another way of looking at it is this: a Gain Stage is any point in an audio signal flow where you can make adjustments to the level of the signal.

Also, let’s define our terms. What is GAIN? It’s simply the amount of signal output, measured in decibels, that a device is sending forth.

We all want the best tone possible, right?! Well, a big part of that is making sure that our tone is clear, and unadulterated by hiss and fuzz, or as we say in pro audio, keeping a good “signal-to-noise ratio”.

We often forget that every step in our audio chains, from fingers to speakers, can affect our sound dramatically. Because of that, we need to know how to wisely manipulate EACH STEP towards a clean, strong, emotionally-impactful tone that will cause our adoring fans to go ga-ga!

The biggest offenders in “breaking the chain”, as Fleetwood Mac spoke about, are electric guitarists. For that reason, this article is directed mostly at those of us riding those electric sound rockets.

gain stage Cartoon 2

But wait! If you play any instrument that needs more than one cable to be heard, then you will still benefit from understanding gain staging. Just apply the principles to your own instrument, step by step, with the same goal in mind.

So, electric guitarists… you know your weakness – you collect so much gear! And these days (in case you haven’t noticed), it’s a trend to have a lot of stomp boxes.

That’s cool and all, but unfortunately stomp box chains often introduce quite a bit of whacked signal settings. To the unwitting shred-meisters, that just means it “sounds bad”.

Bottom line: if we’re gonna have all those magic little boxes, we’d better learn how to set them up so our tone doesn’t, in a word, SUCK!

Picking Up Where We Left Off

Gain staging is a balancing act of volumes. It’s like doing a tango, but with multiple partners. And in THIS scenario, having multiple partners will NOT cause your guitars to be smashed, your car keyed, or your personal life transformed into hell’s oblivion.   lol

STAGE ONE of your sound launch is the volume output and signal-to-noise ration of your guitar PICKUPS.

Can you make adjustments to the signal level and noise here?? Yes, but not easily! Pickups are sold in different output levels, so you could install different pickups in your guitar to change this first gain stage setting of your signal flow.

Obviously that’s a lot of work, and not something you can do on the fly, but it IS a gain staging choice you can make.

See, some pickups can be noisier than others. Anything labeled “High-output Pickup”, for example – these will introduce a bit more noise naturally, as they kick out a LOT more volume than your typical pickup.

Do you know what type of output you have, in all the pickups, on all your guitars? It pays to know, and to gain stage accordingly.

If your guitar has more than one pickup, try this test for gain staging insight: Plug your guitar straight into your amp. Choose a clean channel with low gain. Turn the amp on, and turn the volume up so it’s moderately loud. Now use your pickups switch and listen to each one sequentially.

Hear any differences? Since you want your SIGNAL TO NOISE RATIO (S/N) as low as possible, listen for any hiss in each pickup. You might find one is giving you a lot more noise compared to the others. Now that’s something to remember when you’re using that guitar for a gig or a recording session!

Here’s something else to consider: make sure that the pickups you have in your guitar are the ones best suited for your music genre, personal style and/or song choices. Be deliberate about what pickup is in what position.

You probably don’t want a high-output pickup if you’re backing Enya, for example. 😉

Pump Up the Volume!!

STAGE TWO in electric guitar gain staging is the VOLUME knob and TONE knob. Both of these can heavily influence the clarity of tone and amount of noise in your signal. The best sound? Have your volume all the way up and your tone knob all the way on high. This will launch you with maximum clean “fuel” for your signal’s long journey to the speaker cone.

A few things to remember: the TONE pot does only one thing – it cuts high frequencies. It is not adding, or boosting, anything. All it does is reduce the amount of high frequency content in your signal.

Also, with regard to VOLUME knobs: you may have one, or two, or even three of these! If you have humbucking pickups, then the corresponding potentiometer knob is typically a 500K type. The pot linked to a single coil pickup is usually a 250K type.

But regardless of which type of volume pot you have, they all have this in common: When the volume knob is set around 8 or 9, the impedance is maximum and the output circuit will pick up the most hum and the most noise.

This is because of basic electronics – high impedance circuits, like volume pots, are just more sensitive and pick up hum and noise easily.

To mitigate this fact, simply keep your volume at ZERO when not playing, and keep it at TEN when you are playing, unless, of course, a certain technique demands it. This will keep the impedance AND noise/hum at a minimum.

As an added bonus, you also won’t lose any brightness in your tone if you keep the volume setting all the way up. Reducing the volume knob, even to 9 or 8, immediately rolls off some of the high frequencies.

Using A.C. to Make it HOT??

STAGE THREE is optional and not found on the majority of guitars and basses, but there are many who swear by it and wouldn’t use anything else. It’s called ACTIVE CIRCUITRY, or A.C. for short.

Our friend Luke gives a good explanation of the differences, in case you’ve not heard of active pickups, in THIS VIDEO.

An active battery helps gain staging

How do you know if you have active pickups installed on your guitar?? Well, an active pickup requires a battery somewhere in the guitar to power the active pickup.

Turn your guitar around. Look for a battery port on the back of the guitar. It might be a little door that you can swing open with your fingers, or it might be a rectangular-shaped port that you’ll need a screwdriver to open. Either way, if it’s that shape, you probably have an active pickup.

Active pickups are great from the gain staging perspective for two reasons:

  1. They virtually eliminate any electrical noise, so you get a really clean signal right from the get-go.
  2. With their Volume knob you can adjust its volume to “play nicely” with the other pickups on your guitar, which are probably passive and don’t put out as much volume.

Watching Cable

Finally, STAGE FOUR is an oft-skipped crucial link in the chain: your GUITAR CABLES. I consider this a part of gain staging. Some don’t. To me it definitely should be because SO MANY have wrestled with noisy, “bleh” tone until they changed their cables and discovered their tone cleaned up and came alive!

To assure that your cables aren’t being part of your tonal and/or noise problem, make sure to:

  • always keep your cable LENGTH at a minimum
  • buy cables with braided or serve shielding, and avoid foil shielding

Cables made with only foil shielding tend to lose the war against noise; they pick up magnetic field interference from your other gear, as well as pesky radio frequencies. They’re okay if you’ll use them in short lengths, and for connections that will not be MOVED at all, since they break easier.

Yes, they’re cheaper, but NO… they are not one with the Force, young Padawan! 😉

We’ve Hit Quantum Distortions, Cap’n!

Anybody into rock ‘n’ roll distortion guitar sounds?! Raise your leather-gloved, metal-bracelet-wristed shred hands high!

Have you noticed that when you have your amp and/or effects set on a distorted tone, and you roll back your guitar volume knob, that not only does the volume go down, but the tone also gets less distorted??

Why is this? Because the volume knob (at whatever setting it is at) dictates the GAIN level to whatever signal comes next. It’s yet another example of how gain staging can really affect your sound.

You can see how this all adds up. Each unit in an audio chain will have its own gain settings: pickups; pedals; amplifier preamp… and each gain setting affects the volume and noise level in the next device in the chain. If we ignore gain staging, we can really make a noisy, tone-sick mess or our rig’s end product.

Remember this simple truth: the higher the output of a previous device, the higher the gain of the next unit in the audio path.

The Trajectory to Tonal Mastery!

Alright… so let’s recap the initial elements of guitar rig gain staging:

  1. First, know your pickups and what type of output they produce
  2. For the cleanest signal, have your Volume and Tone pots all the way up
  3. Use A.C. if it’s an option and if it complements your sound and musical approach
  4. Buy and use only quality cables

Keep your axe-slinger boots boogying down this yellow-brick road and you will always maximize your tonal potential.

The final word here is this: your ultimate guitar tone is only as good as the weakest link in your audio chain!!

So do your due diligence: gain stage your rig, and make EVERY link in the chain a strong one.

First Stage Separation Now Complete!

I trust we’ve demystified some of the concepts of gain staging today for you, such that you can approach your gear confidently.

Now you’ll know exactly what to do to achieve your best sound, end the quest for ultimate guitar tone, and pacify thousand rabid thousands of screaming fans that idolize and adore you for your intoxicating 4-, 5-, 6-, 7-, or even 8-STRING wizardry!!

One thing is sure: staying informed as a musician will always address problems more efficiently. Greater understanding = better and faster control over our instruments, gear, and choices. So let’s keep at it.

Next up: Gain Staging, Part 2, where we will look further down the audio chain into PEDALS and AMPS.

Stay tuned here on Serious G.A.S. ‘Til then, peace out, Tone-chasers!!

Sean

Sean Barrett, Guitar Virtuoso & Tech Geek